2014 HONDA ACCORD COUPE change time
[x] Cancel search: change timePage 141 of 593

140
uuOperating the Switches Around the Steering Wheel uWipers and Washers
Controls
Wipers and Washers
The windshield wipers and washers can be
used when the ignition switch is in ON
(w*1.
■MIST
The wipers run at high speed until you release
the lever.
■Wiper switch (OFF, INT, LO, HI)
Change the wiper switch setting according to
the amount of rain.
■Adjusting the delay
Turn the adjustment ring to adjust the wiper
delay.
■Washer
Sprays while you pull the lever toward you.
When you release the lever, the wipers make
two or three more sweeps before stopping.
*1: Models with the smart entry system have an ENGINE START/STOP button instead of an
ignition switch.
1 Wipers and Washers
NOTICE
Do not use the wipers when the windshield is dry.
The windshield will get sc ratched, or the rubber
blades will get damaged.
NOTICE
In cold weather, the blades may freeze to the
windshield, becoming stuck.
Operating the wipers in th is condition may damage
the wipers. Use the defroster to warm the
windshield, then turn the wipers on.
If the vehicle speeds up while the wipers are
operating intermittently, the length of the wipe
interval shortens. When the vehicle starts moving, the
wipers make a single sweep.
When the vehicle speeds up, the wiper operation’s shortest
delay setting ( ) and the
LO setting become the same.
Turn the washers off if no washer fluid comes out.
The pump may get damaged.
The wiper motor is equipped with a breaker that may
stop motor operation temporarily to prevent an
overload. Wiper operation will return to normal within a
few minutes, once the circ uit has returned to normal.
If the wipers stop operating due to any obstacle such as
the build-up of snow, park the vehicle in a safe place.
Rotate the wiper switch to
OFF, and turn the ignition
switch to ACCESSORY ( q or LOCK (0*1, then remove
the obstacle.
Intermittent Time
Adjustment Ring
MIST
INT: Low speed with
intermittent OFF
LO : Low speed wipe
HI: High speed wipe Pull to
use
washer.
Long delay
Short delay
Page 157 of 593

156
Controls
Interior Lights/Interior Convenience Items
Interior Lights
■ON
The interior lights come on regardless of
whether the doors are open or closed.
■Door activated
The interior lights come on in the following
situations:
• When any of the doors are opened.
• You unlock the driver's door.
• You remove the key from the ignition
switch.
• When the power mode is set to VEHICLE
OFF (LOCK).
■OFF
The interior lights remain off regardless of
whether the doors are open or closed.
■Interior Light Switches1 Interior Light Switches
In the door activated position, the interior lights fade out
and go off about 30 seconds after the doors are closed.
The lights go off after 30 seconds in the following
situations:
•When you unlock the driver's door but do not open it.
•When you remove the key from the ignition switch
but do not open a door.
•When you set the power mode to VEHICLE OFF
(LOCK) but do not open a door.
You can change the interi or lights dimming time.
2 Customized Features P. 97, 298
The interior lights go off i mmediately in the following
situations:
•When you lock the driver's door.•When you turn the ignition switch to ON ( w*1.
•When you close the driver's door with the key in
the ignition switch.
•When you close the driver's door in ACCESSORY
mode.
If you leave any of the doors open without the key in
the ignition switch
*1, the interior lights go off after
about 15 minutes.
*1: Models with the smar t entry system have an ENGINE
START/STOP button instead of an ignition switch.
Models without smart entry system
Models with smart entry system
Models without smart entry system
Models with smart entry system
Door Activated Position
Off
Door Activated
Position
On
OffModels without smart entry system
Models with smart entry system
Page 181 of 593

180
Features
Audio System Basic Operation
To use the audio system function, the ignition switch must be in ACCESSORY (q or
ON
(w*1.
Use the selector knob or MENU button to
access some audio functions.
Press to switch between the normal and
extended display fo r some functions.
Selector knob: Rotate left or right to scroll
through the available choices. Press to set
your selection.
MENU button: Press to select any mode.
The available mode includes Change Source ,
Station List , Save Preset , Radio Text ,
Music Search, and play modes. Play modes
can be also selected from Scan, Random/
Repeat , and so on.
BACK button: Press to go back to the
previous display. button: Press to change the audio/
information screen brightness.
Press once and make an adjustment.
u Each time you press , the mode
switches between the daytime mode,
nighttime mode and OFF mode.
*1: Models with the smart entry system have an ENGINE START/STOP button instead of an
ignition switch.
Models with one display1 Audio System Basic Operation
These indications are used to show how to operate
the selector knob.
Rotate to select.
Press to enter.
Audio Menu Items
2 Station List P. 188
2 Radio text P. 188
2 Music Search P. 190, 193, 198
2 Scan P. 191, 199
2 Random/Repeat P. 191, 194, 199
ButtonSelector Knob
MENU ButtonBACK Button
Page 184 of 593

Continued183
uuAudio System Basic Operation uAudio/Information Screen
Features
You can change, store, and delete the wallpaper on the audio/ information screen.
■Import wallpaper
You can import up to three images, one at a time, for wallpaper from a USB flash
drive.
1.Connect the USB flash drive to the USB
port.
2 USB Port P. 175
2.Press the SETTINGS button.
3. Rotate to select System Settings, then
press .
u Repeat the procedure to select Clock,
Clock/Wallpaper Type , then
Wallpaper .
4. Rotate to select Add New Wallpaper ,
then press .
u The preview of the imported data is
displayed.
5. Rotate to select a desired picture.
u The preview is displayed on the left side
on the screen.
6. Press to save the data.
u The confirmation message will appear.
Then the display will return to the
wallpaper list.
■Wallpaper Setup1Wallpaper Setup
•When importing wallpaper files, the image must be
in the USB flash driv e’s root directory.
Images in a folder cannot be imported.
•The file name must be fewer than 64 characters.•The file format of the im age that can be imported
is BMP (bmp) or JPEG (jpg).
•The individual file size limit is 2 MB.•The maximum image size is 1,680 x 936 pixels. If
the image size is less than 420 × 234 pixels, the
image is displayed in the middle of the screen with
the extra area appearing in black.
•Up to 255 files can be selected.
•If the USB flash drive doe s not have any pictures,
the No files detected message appears.
Page 189 of 593

uuAudio System Basic Operation uPlaying AM/FM Radio
188
Features
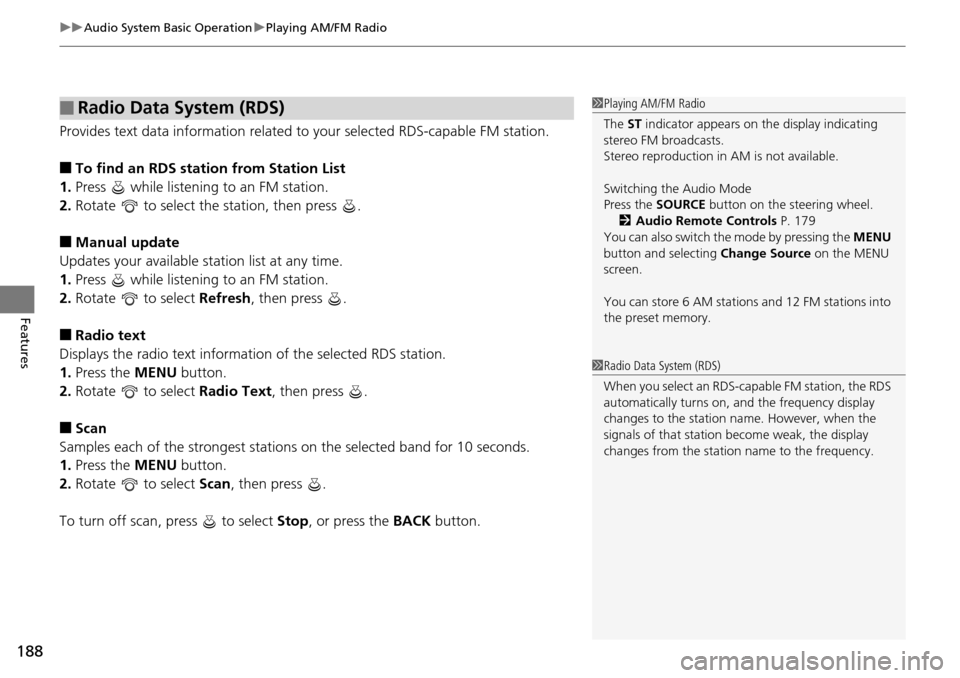
Provides text data information related to your selected RDS-capable FM station.
■To find an RDS station from Station List
1. Press while listening to an FM station.
2. Rotate to select the station, then press .
■Manual update
Updates your available station list at any time.
1. Press while listening to an FM station.
2. Rotate to select Refresh, then press .
■Radio text
Displays the radio text informat ion of the selected RDS station.
1. Press the MENU button.
2. Rotate to select Radio Text, then press .
■Scan
Samples each of the strongest stations on the selected band for 10 seconds.
1. Press the MENU button.
2. Rotate to select Scan, then press .
To turn off scan, press to select Stop, or press the BACK button.
■Radio Data System (RDS)1Playing AM/FM Radio
The ST indicator appears on the display indicating
stereo FM broadcasts.
Stereo reproduction in AM is not available.
Switching the Audio Mode
Press the SOURCE button on the steering wheel.
2 Audio Remote Controls P. 179
You can also switch the mode by pressing the MENU
button and selecting Change Source on the MENU
screen.
You can store 6 AM stations and 12 FM stations into
the preset memory.
1 Radio Data System (RDS)
When you select an RDS-capable FM station, the RDS
automatically turns on, and the frequency display
changes to the station name. However, when the
signals of that station become weak, the display
changes from the statio n name to the frequency.
Page 203 of 593

202
Features
Audio System Basic Operation
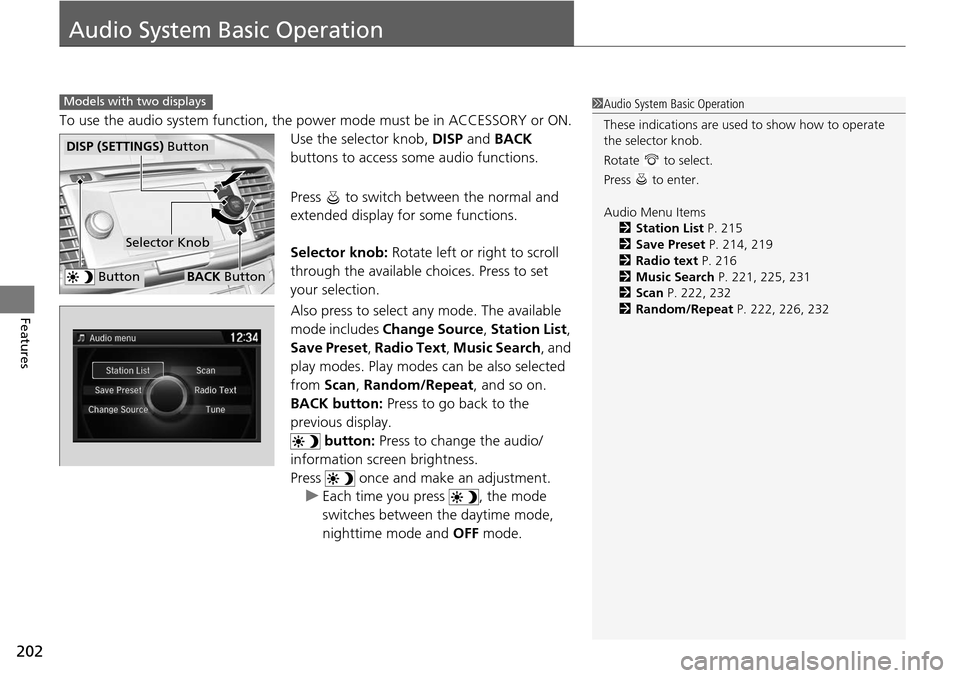
To use the audio system function, the power mode must be in ACCESSORY or ON.
Use the selector knob, DISP and BACK
buttons to access some audio functions.
Press to switch between the normal and
extended display fo r some functions.
Selector knob: Rotate left or right to scroll
through the available choices. Press to set
your selection.
Also press to select any mode. The available
mode includes Change Source , Station List ,
Save Preset , Radio Text , Music Search, and
play modes. Play modes can be also selected
from Scan, Random/Repeat , and so on.
BACK button: Press to go back to the
previous display. button: Press to change the audio/
information screen brightness.
Press once and make an adjustment. u Each time you press , the mode
switches between the daytime mode,
nighttime mode and OFF mode.
Models with two displays1Audio System Basic Operation
These indications are used to show how to operate
the selector knob.
Rotate to select.
Press to enter.
Audio Menu Items 2 Station List P. 215
2 Save Preset P. 214, 219
2 Radio text P. 216
2 Music Search P. 221, 225, 231
2 Scan P. 222, 232
2 Random/Repeat P. 222, 226, 232
Button
Selector Knob
DISP (SETTINGS) Button
BACK Button
Page 205 of 593

uuAudio System Basic Operation uAudio with Touch Screen
204
FeaturesSelect to adjust the clock and screen settings.
■Changing the Clock settings
2Clock P. 106
■Changing the Screen settings
1.Select Screen Settings .
2. Use
(+, (- or others to adjust the setting.
■Changing the Clock/Screen Settings1Changing the Clock/Screen Settings
The followings are adjustable screen settings:
•Brightness
•Contrast
•Black Level•Display
Changes between the da ytime or nighttime
modes.
•Beep
Mutes a beep that sounds every time you touch the
screen.
•Keyboard
Changes the on-screen keyboard from the
alphabetical order to the qwerty type.
•FadeTimer
Sets the screen black out timing.
Select .
Page 210 of 593

Continued209
uuAudio System Basic Operation uAudio/Information Screen
Features
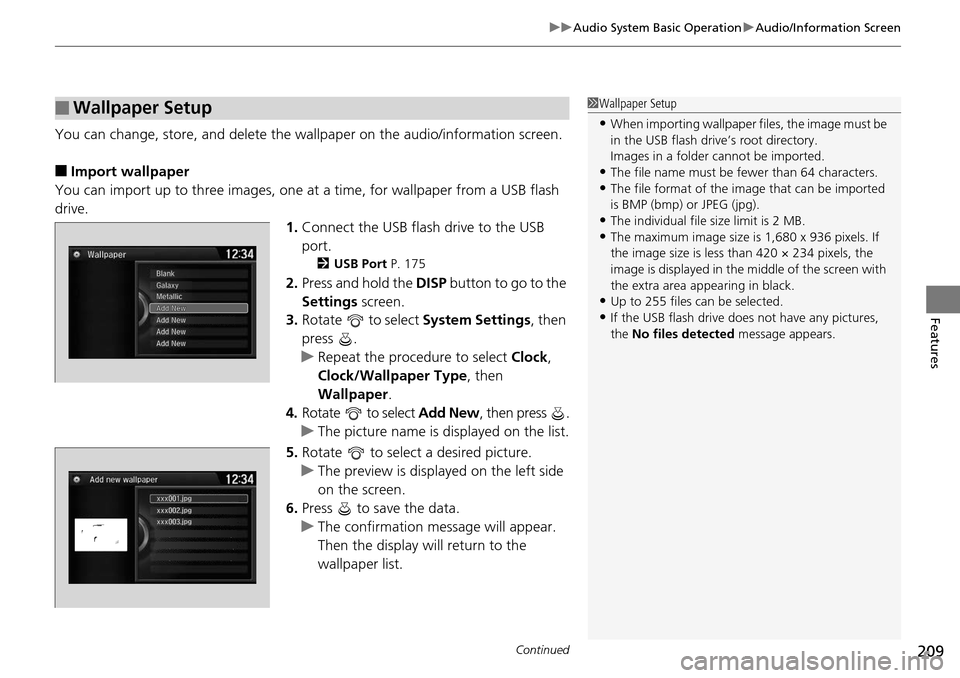
You can change, store, and delete the wallpaper on the audio/ information screen.
■Import wallpaper
You can import up to three images, one at a time, for wallpaper from a USB flash
drive.
1.Connect the USB flash drive to the USB
port.
2 USB Port P. 175
2.Press and hold the DISP button to go to the
Settings screen.
3. Rotate to select System Settings, then
press .
u Repeat the procedure to select Clock,
Clock/Wallpaper Type , then
Wallpaper .
4. Rotate to select Add New, then press .
u The picture name is displayed on the list.
5. Rotate to select a desired picture.
u The preview is displayed on the left side
on the screen.
6. Press to save the data.
u The confirmation message will appear.
Then the display will return to the
wallpaper list.
■Wallpaper Setup1Wallpaper Setup
•When importing wallpaper files, the image must be
in the USB flash driv e’s root directory.
Images in a folder cannot be imported.
•The file name must be fewer than 64 characters.•The file format of the im age that can be imported
is BMP (bmp) or JPEG (jpg).
•The individual file size limit is 2 MB.•The maximum image size is 1,680 x 936 pixels. If
the image size is less than 420 × 234 pixels, the
image is displayed in the middle of the screen with
the extra area appearing in black.
•Up to 255 files can be selected.
•If the USB flash drive doe s not have any pictures,
the No files detected message appears.