2014 FORD SUPER DUTY light
[x] Cancel search: lightPage 160 of 458
For 2WD vehicles and vehicles
equipped with a manual shift 4WD
system
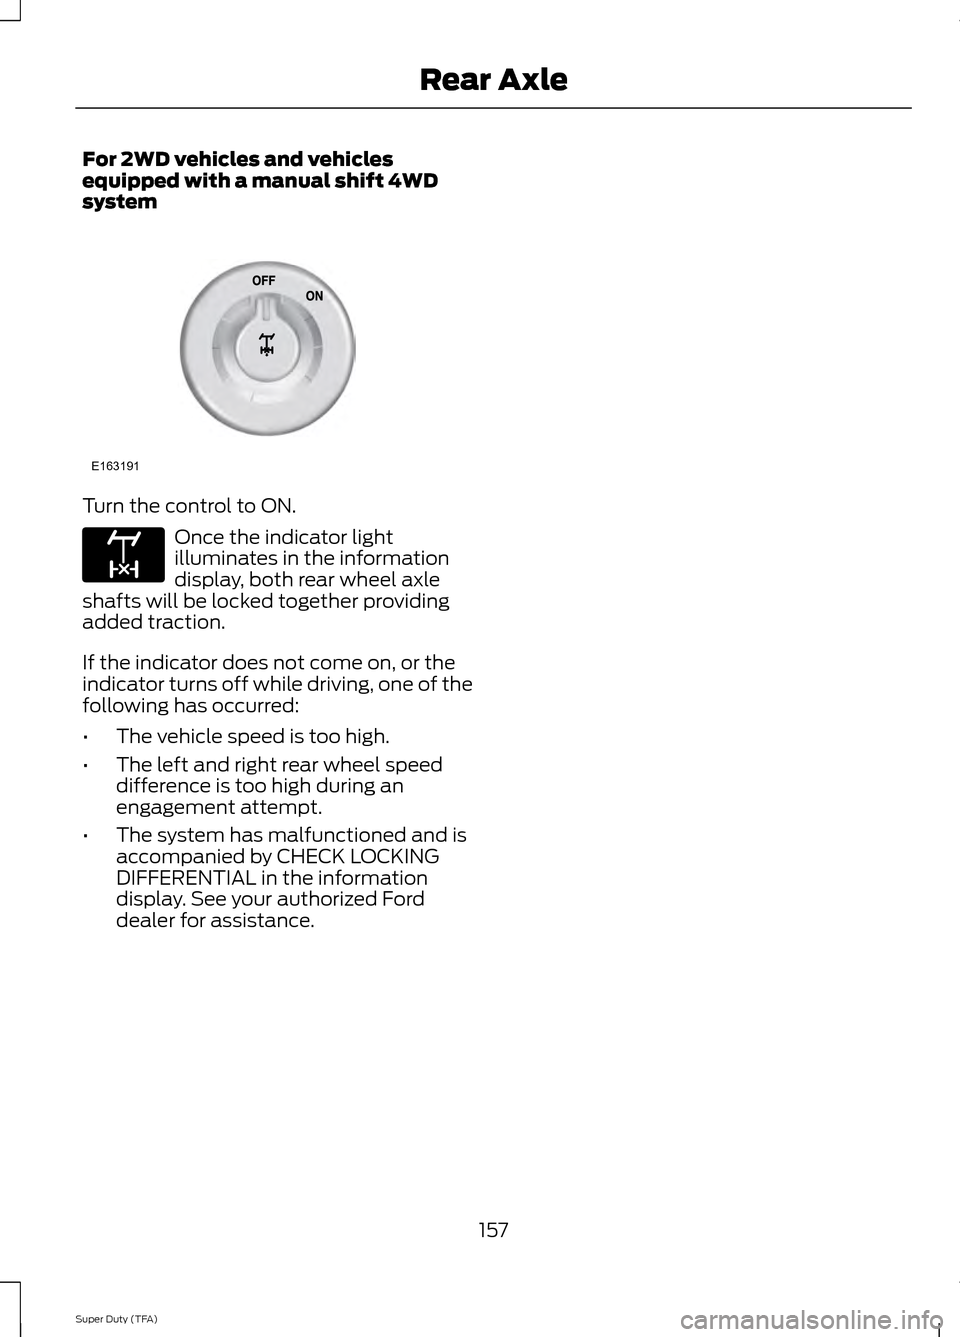
Turn the control to ON.
Once the indicator light
illuminates in the information
display, both rear wheel axle
shafts will be locked together providing
added traction.
If the indicator does not come on, or the
indicator turns off while driving, one of the
following has occurred:
• The vehicle speed is too high.
• The left and right rear wheel speed
difference is too high during an
engagement attempt.
• The system has malfunctioned and is
accompanied by CHECK LOCKING
DIFFERENTIAL in the information
display. See your authorized Ford
dealer for assistance.
157
Super Duty (TFA) Rear AxleE163191 E163170
Page 161 of 458
GENERAL INFORMATION
Note:
Occasional brake noise is normal. If
a metal-to-metal, continuous grinding or
continuous squeal sound is present, the
brake linings may be worn-out. Have the
system checked by an authorized dealer. If
your vehicle has continuous vibration or
shudder in the steering wheel while braking,
have it checked by an authorized dealer.
Note: Brake dust may accumulate on the
wheels, even under normal driving
conditions. Some dust is inevitable as the
brakes wear and does not contribute to
brake noise. See Cleaning the Alloy
Wheels (page 251). See
Warning Lamps and
Indicators (page 75).
Wet brakes result in reduced braking
efficiency. Gently press the brake pedal a
few times when driving from a car wash or
standing water to dry the brakes.
Brake Over Accelerator
In the event the accelerator pedal
becomes stuck or entrapped, apply steady
and firm pressure to the brake pedal to
slow the vehicle and reduce engine power.
If you experience this condition, apply the
brakes and bring your vehicle to a safe
stop. Move the transmission selector lever
to position
P, switch the engine off and
apply the parking brake. Inspect the
accelerator pedal for any interference. If
none are found and the condition persists,
have your vehicle towed to the nearest
authorized dealer. Brake Assist
Brake assist detects when you brake
rapidly by measuring the rate at which you
press the brake pedal. It provides
maximum braking efficiency as long as you
press the pedal, and can reduce stopping
distances in critical situations.
Anti-lock Brake System
This system helps you maintain steering
control during emergency stops by keeping
the brakes from locking.
This lamp momentarily
illuminates when you turn the
ignition on. If the light does not
illuminate during start up, remains on or
flashes, the system may be disabled. Have
the system checked by an authorized
dealer. If the system is disabled, normal
braking is still effective. If the
brake warning lamp illuminates
when you release the parking brake, have
the system checked by an authorized
dealer.
HINTS ON DRIVING WITH
ANTI-LOCK BRAKES
Note: When the system is operating, the
brake pedal will pulse and may travel
further. Maintain pressure on the brake
pedal. You may also hear a noise from the
system. This is normal.
The anti-lock braking system will not
eliminate the risks when:
• you drive too closely to the vehicle in
front of you
• your vehicle is hydroplaning
• you take corners too fast
• the road surface is poor.
158
Super Duty (TFA) BrakesE144522 E144522
Page 162 of 458

PARKING BRAKE
WARNING
Always set the parking brake fully
and make sure the transmission
selector lever is placed in position P.
Failure to set the parking brake and engage
park could result in vehicle roll-away,
property damage or bodily injury. Turn the
ignition to the lock position and remove
the key whenever you leave your vehicle. Apply the parking brake whenever your
vehicle is parked. Press the pedal
downward to set the parking brake. The
brake warning lamp in the instrument
cluster will illuminate and remains
illuminated until the parking brake is
released.
To release, pull the brake release lever
located at the lower left side of the
instrument panel.
If you are parking your vehicle on a grade
or with a trailer, press and hold the brake
pedal down, then set the parking brake.
There may be a little vehicle movement as
the parking brake sets to hold the vehicle's
weight. This is normal and should be no
reason for concern. If needed, press and
hold the service brake pedal down, then
try reapplying the parking brake. Chock the
wheels if required. If the parking brake
cannot hold the weight of the vehicle, the
parking brake may need to be serviced or
the vehicle may be overloaded.
HILL START ASSIST
WARNINGS
The system does not replace the
parking brake. When you leave your
vehicle, always apply the parking
brake and put the vehicle in position P. WARNINGS
You must remain in your vehicle once
you have activated the system.
During all times, you are responsible
for controlling your vehicle,
supervising the system and
intervening, if required. If the engine is revved excessively, or
if a malfunction is detected, the
system will be deactivated.
The system makes it easier to pull away
when your vehicle is on a slope without the
need to use the parking brake.
When the system is active, your vehicle will
remain stationary on the slope for two to
three seconds after you release the brake
pedal. This allows you time to move your
foot from the brake to the accelerator
pedal. The brakes are released
automatically once the engine has
developed sufficient drive to prevent your
vehicle from rolling down the slope. This
is an advantage when pulling away on a
slope, (for example from a car park ramp,
traffic lights or when reversing uphill into
a parking space).
The system will activate automatically on
any slope that will cause significant vehicle
rollback.
Using Hill Start Assist
1. Press the brake pedal to bring your
vehicle to a complete standstill. Keep
the brake pedal pressed.
2. If the sensors detect that your vehicle is on a slope, the system will activate
automatically.
159
Super Duty (TFA) Brakes
Page 165 of 458
System Indicator Lights and
Messages
WARNING
If a failure has been detected within
the AdvanceTrac system, the
stability control light will illuminate
steadily. Verify that the traction control
system was not manually disabled using
the stability control button. If the stability
control light still illuminates steadily, have
the system serviced by an authorized
dealer immediately. Operating your vehicle
with traction control disabled could lead
to an increased risk of loss of vehicle
control, vehicle rollover, personal injury and
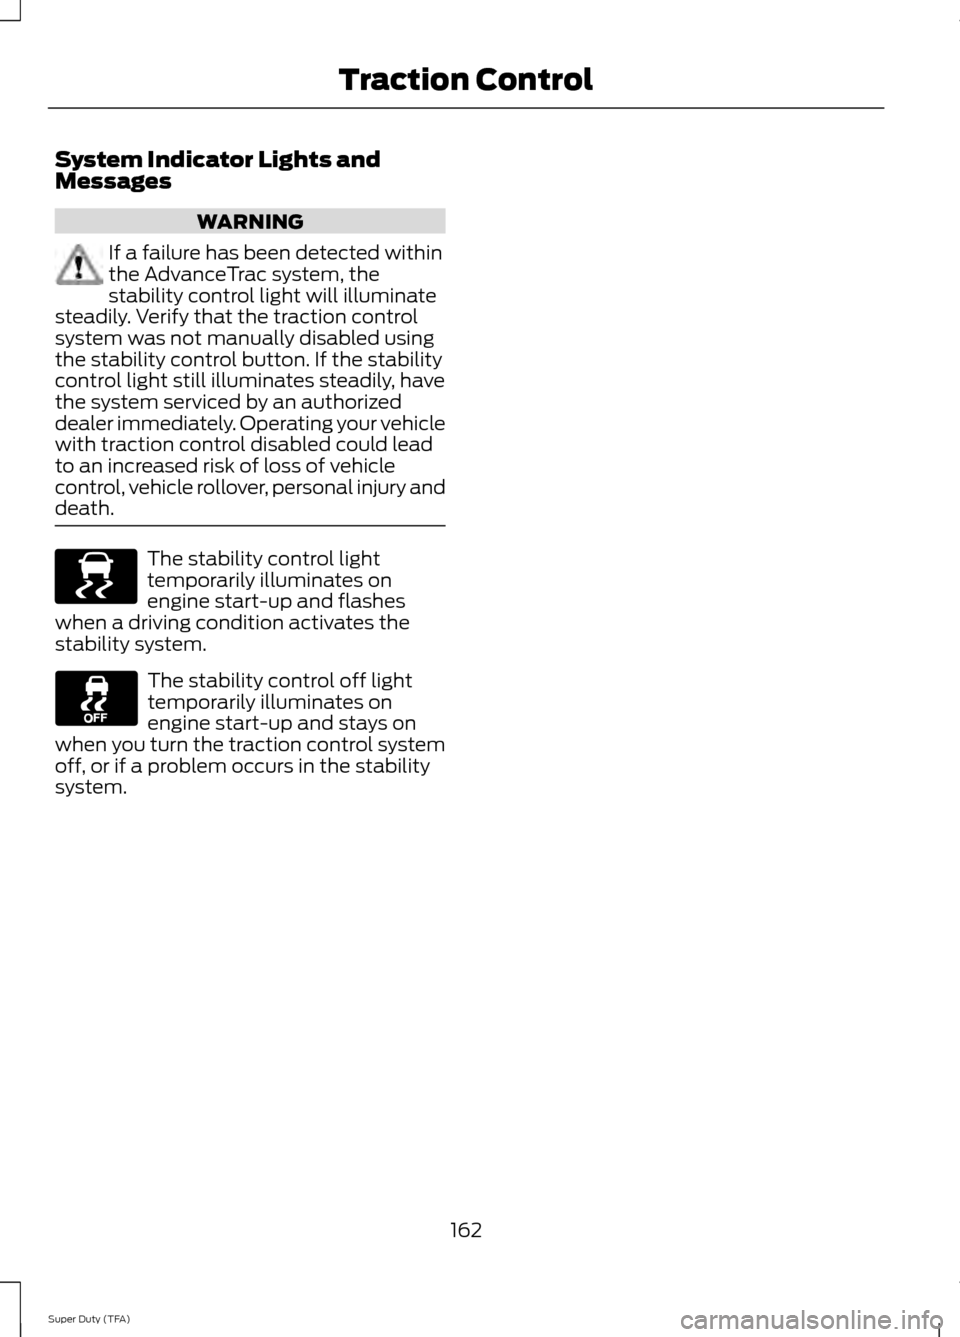
death. The stability control light
temporarily illuminates on
engine start-up and flashes
when a driving condition activates the
stability system. The stability control off light
temporarily illuminates on
engine start-up and stays on
when you turn the traction control system
off, or if a problem occurs in the stability
system.
162
Super Duty (TFA) Traction ControlE138639
Page 167 of 458
The system automatically activates when
you start your engine. The electronic
stability control and roll stability control
portions of the system can be turned off
below 35 mph (56 km/h) and are disabled
when the transmission is in position R.
See
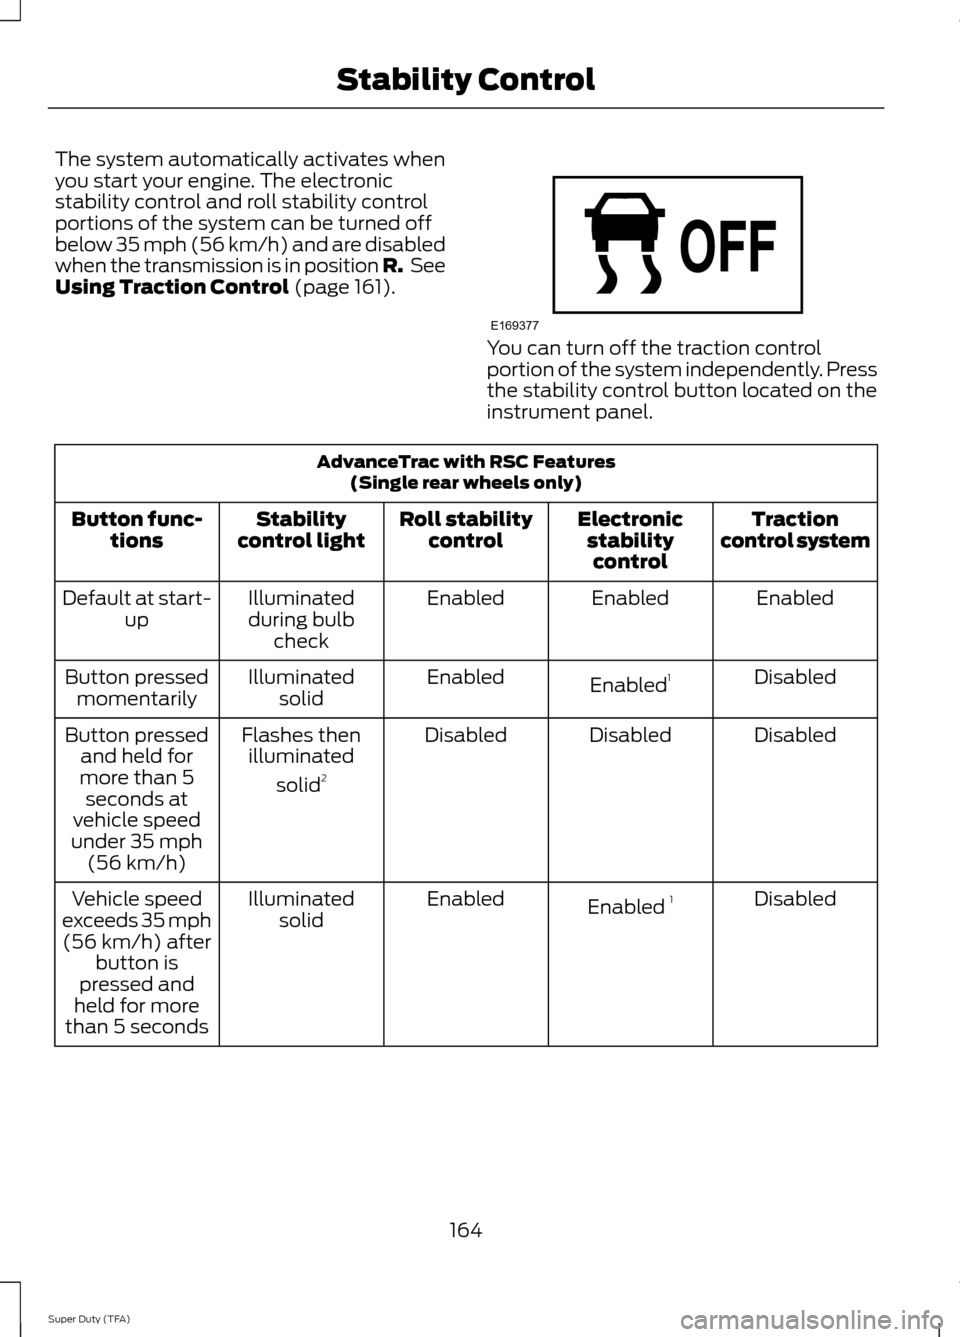
Using Traction Control (page 161). You can turn off the traction control
portion of the system independently. Press
the stability control button located on the
instrument panel.
AdvanceTrac with RSC Features
(Single rear wheels only)
Traction
control system
Electronic
stabilitycontrol
Roll stability
control
Stability
control light
Button func-
tions
Enabled
Enabled
Enabled
Illuminated
during bulb check
Default at start-
up
Disabled
Enabled 1
Enabled
Illuminated
solid
Button pressed
momentarily
Disabled
Disabled
Disabled
Flashes then
illuminated
solid 2
Button pressed
and held for
more than 5 seconds at
vehicle speed
under 35 mph (56 km/h)
Disabled
Enabled 1
Enabled
Illuminated
solid
Vehicle speed
exceeds 35 mph (56 km/h) after button is
pressed and
held for more
than 5 seconds
164
Super Duty (TFA) Stability ControlE169377
Page 168 of 458
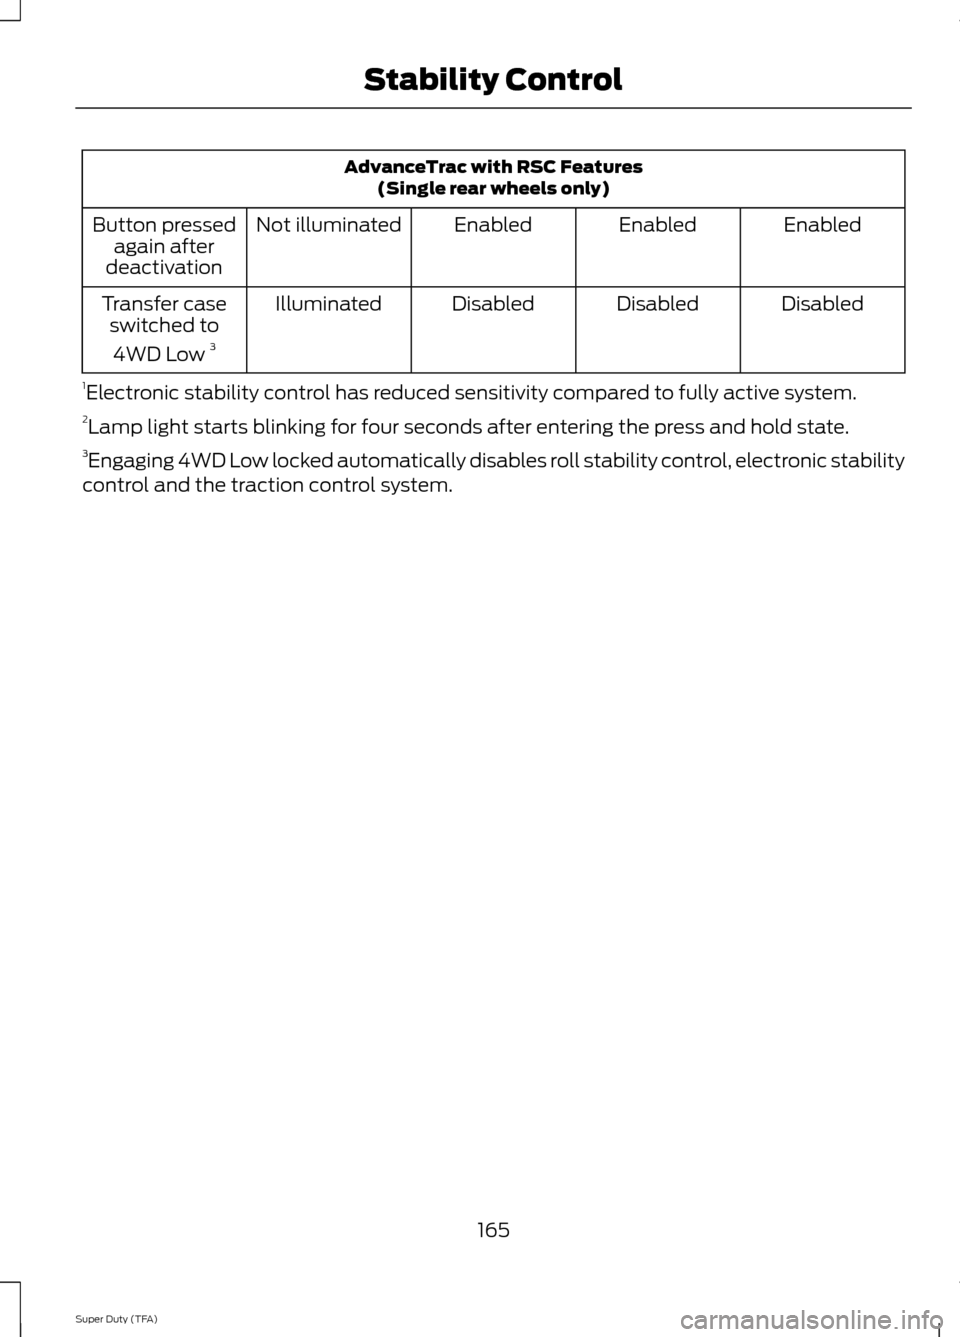
AdvanceTrac with RSC Features
(Single rear wheels only)
Enabled
Enabled
Enabled
Not illuminated
Button pressed
again after
deactivation
Disabled
Disabled
Disabled
Illuminated
Transfer case
switched to
4WD Low 3
1 Electronic stability control has reduced sensitivity compared to fully active system.
2 Lamp light starts blinking for four seconds after entering the press and hold state.
3 Engaging 4WD Low locked automatically disables roll stability control, electronic stability
control and the traction control system.
165
Super Duty (TFA) Stability Control
Page 169 of 458
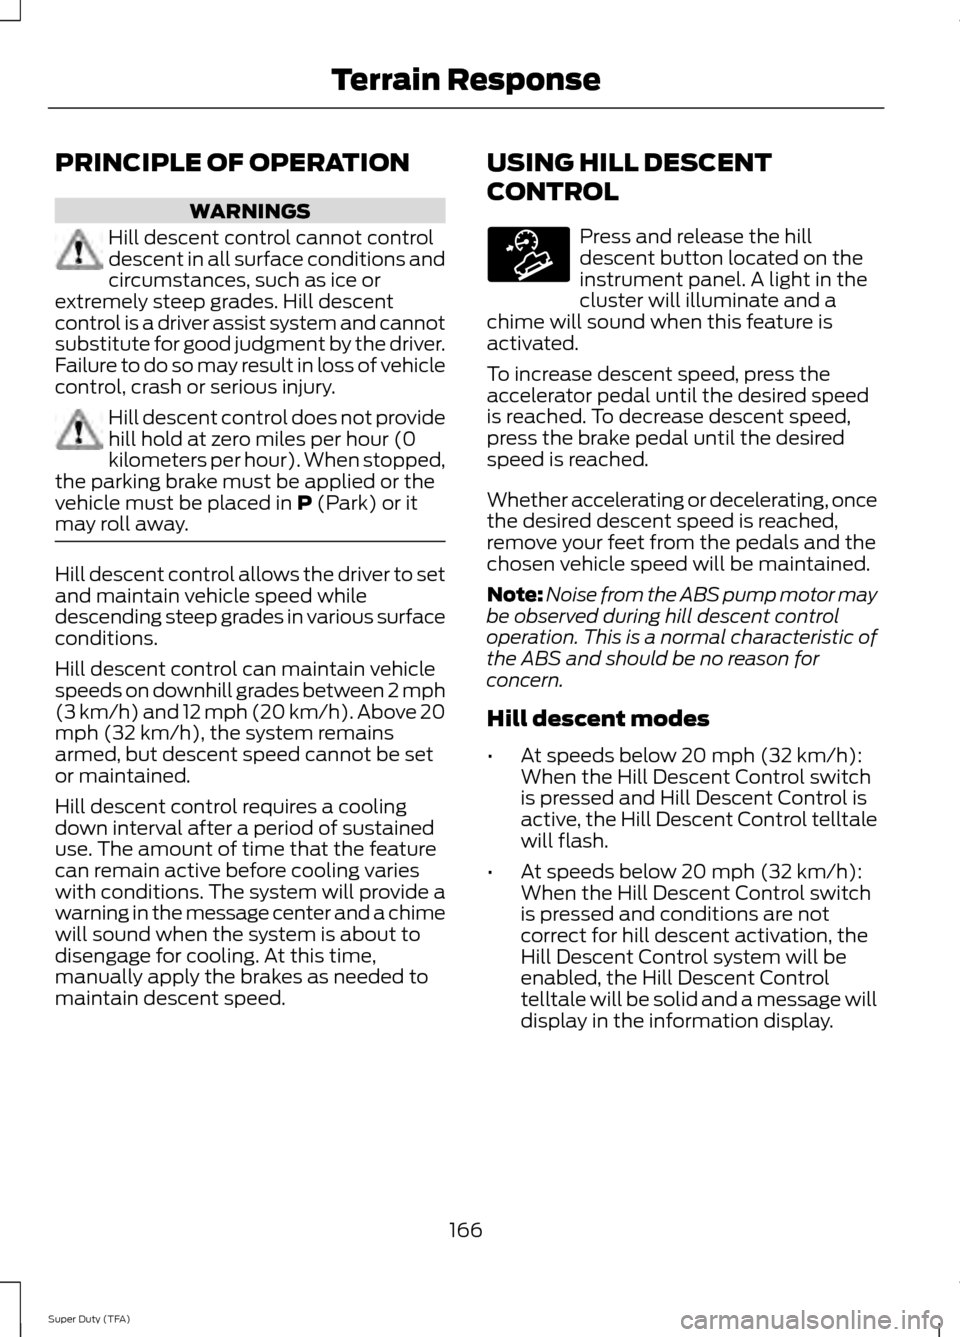
PRINCIPLE OF OPERATION
WARNINGS
Hill descent control cannot control
descent in all surface conditions and
circumstances, such as ice or
extremely steep grades. Hill descent
control is a driver assist system and cannot
substitute for good judgment by the driver.
Failure to do so may result in loss of vehicle
control, crash or serious injury. Hill descent control does not provide
hill hold at zero miles per hour (0
kilometers per hour). When stopped,
the parking brake must be applied or the
vehicle must be placed in P (Park) or it
may roll away. Hill descent control allows the driver to set
and maintain vehicle speed while
descending steep grades in various surface
conditions.
Hill descent control can maintain vehicle
speeds on downhill grades between 2 mph
(3 km/h) and 12 mph (20 km/h). Above 20
mph (32 km/h), the system remains
armed, but descent speed cannot be set
or maintained.
Hill descent control requires a cooling
down interval after a period of sustained
use. The amount of time that the feature
can remain active before cooling varies
with conditions. The system will provide a
warning in the message center and a chime
will sound when the system is about to
disengage for cooling. At this time,
manually apply the brakes as needed to
maintain descent speed. USING HILL DESCENT
CONTROL Press and release the hill
descent button located on the
instrument panel. A light in the
cluster will illuminate and a
chime will sound when this feature is
activated.
To increase descent speed, press the
accelerator pedal until the desired speed
is reached. To decrease descent speed,
press the brake pedal until the desired
speed is reached.
Whether accelerating or decelerating, once
the desired descent speed is reached,
remove your feet from the pedals and the
chosen vehicle speed will be maintained.
Note: Noise from the ABS pump motor may
be observed during hill descent control
operation. This is a normal characteristic of
the ABS and should be no reason for
concern.
Hill descent modes
• At speeds below 20 mph (32 km/h):
When the Hill Descent Control switch
is pressed and Hill Descent Control is
active, the Hill Descent Control telltale
will flash.
• At speeds below 20 mph (32 km/h):
When the Hill Descent Control switch
is pressed and conditions are not
correct for hill descent activation, the
Hill Descent Control system will be
enabled, the Hill Descent Control
telltale will be solid and a message will
display in the information display.
166
Super Duty (TFA) Terrain ResponseE163957
Page 174 of 458
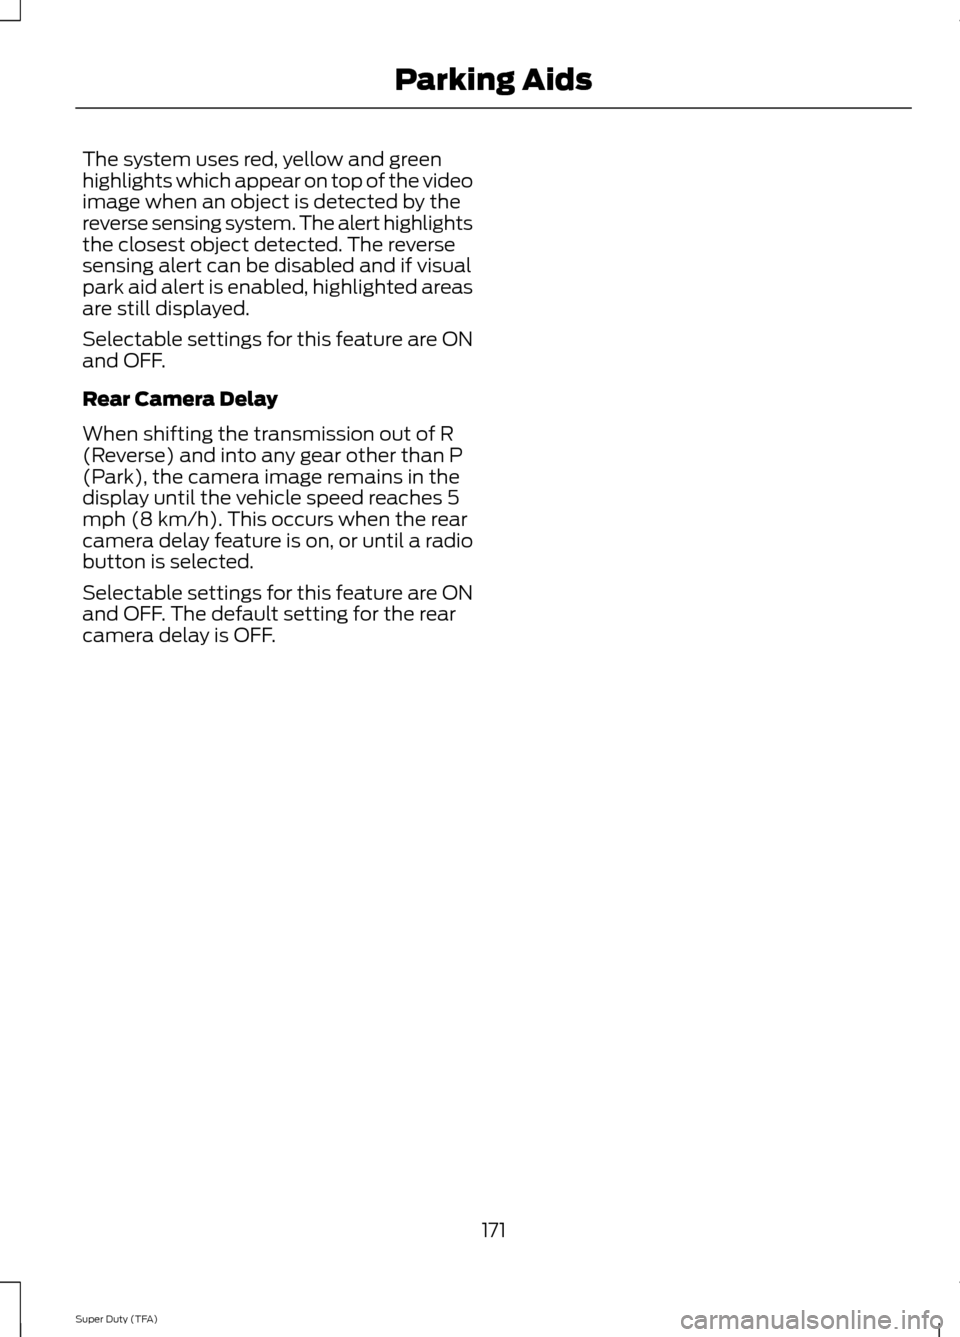
The system uses red, yellow and green
highlights which appear on top of the video
image when an object is detected by the
reverse sensing system. The alert highlights
the closest object detected. The reverse
sensing alert can be disabled and if visual
park aid alert is enabled, highlighted areas
are still displayed.
Selectable settings for this feature are ON
and OFF.
Rear Camera Delay
When shifting the transmission out of R
(Reverse) and into any gear other than P
(Park), the camera image remains in the
display until the vehicle speed reaches 5
mph (8 km/h). This occurs when the rear
camera delay feature is on, or until a radio
button is selected.
Selectable settings for this feature are ON
and OFF. The default setting for the rear
camera delay is OFF.
171
Super Duty (TFA) Parking Aids