2014 FORD SUPER DUTY key
[x] Cancel search: keyPage 133 of 458
STARTING A GASOLINE
ENGINE
When you start the engine, the idle speed
increases, this helps to warm up the
engine. If the engine idle speed does not
slow down automatically, have your
vehicle checked by an authorized dealer.
Before starting the engine check the
following:
•
Make sure all occupants have fastened
their safety belts.
• Make sure the headlamps and
electrical accessories are off.
• Make sure the parking brake is on.
• Move the transmission selector lever
to position P.
• Turn the ignition key to the on position.
Note: Do not touch the accelerator pedal.
1. Fully press the brake pedal.
2. Turn the key to the start position to start the engine. Release the key when
the engine starts.
Note: The engine may continue cranking
for up to 15 seconds or until it starts.
Note: If you cannot start the engine on the
first try, wait for a short period and try again.
Failure to Start
If you cannot start the engine after three
attempts, wait 10 seconds and follow this
procedure:
1. Fully press the brake pedal.
2. Fully press the accelerator pedal and hold it there.
3. Start the engine.
Stopping the Engine When Your
Vehicle is Stationary
1. Move the transmission selector lever to position
P. 2. Turn the key to the off position.
3. Apply the parking brake.
Stopping the Engine When Your
Vehicle is Moving
WARNING
Switching off the engine when the
vehicle is still moving will result in a
loss of brake and steering assistance.
The steering will not lock, but higher effort
will be required. When the ignition is
switched off, some electrical circuits,
warning lamps and indicators may also be
off. 1. Move the transmission selector lever
to position
N and use the brakes to
bring your vehicle to a safe stop.
2. When your vehicle has stopped, move the transmission selector lever to
position
P and turn the key to the off
position.
3. Apply the parking brake.
Cold Weather Starting (Flexible
Fuel Vehicles Only)
The starting characteristics of all grades
of E85 ethanol make it unsuitable for use
when ambient temperatures fall below
0°F (-18°C). Consult your fuel distributor
for the availability of winter grade ethanol.
As the outside temperature approaches
freezing, ethanol fuel distributors should
supply winter grade ethanol (same as with
unleaded gasoline). If summer grade
ethanol is used in cold weather conditions,
0°F to 32°F (-18°C to 0°C), you may
experience increased cranking times, rough
idle or hesitation until the engine has
warmed up.
You may experience a decrease in peak
performance when the engine is cold when
operating on E85 ethanol.
130
Super Duty (TFA) Starting and Stopping the Engine
Page 134 of 458

Do not crank the engine for more than 10
seconds at a time as starter damage may
occur. If the engine fails to start, turn the
key to off and wait 30 seconds before
trying again.
Do not use starting fluid such as ether in
the air intake system. Such fluid could
cause immediate explosive damage to the
engine and possible personal injury.
If you should experience cold weather
starting problems on E85 ethanol, and
neither an alternative brand of E85 ethanol
nor an engine block heater is available, the
addition of unleaded gasoline to your tank
improves cold starting performance. Your
vehicle is designed to operate on E85
ethanol alone, unleaded gasoline alone, or
any mixture of the two.
If the Engine Fails to Start Using the
Preceding Instructions (Flexible Fuel
Vehicles Only)
1. Press and hold down the accelerator
one-third to one-half the way to the
floor, then crank the engine.
2. When the engine starts, release the key, then gradually release the
accelerator pedal as the engine speeds
up. If the engine still fails to start,
repeat Step 1.
Guarding Against Exhaust Fumes WARNING
If you smell exhaust fumes inside
your vehicle, have your vehicle
checked by your authorized dealer
immediately. Do not drive your vehicle if
you smell exhaust fumes. Carbon
monoxide is present in exhaust fumes.
Take precautions to avoid its dangerous
effects. Important Ventilating Information
If you stop your vehicle and the leave the
engine idling for long periods of time, we
recommend that you do one of the
following:
•
Open the windows at least 1 inch (2.5
centimeters)
• Set your climate control to outside air.
ENGINE BLOCK HEATER (IF
EQUIPPED) WARNINGS
Failure to follow engine block heater
instructions could result in property
damage or serious personal injury.
Do not use your heater with
ungrounded electrical systems or
two-pronged adapters. There is a risk
of electrical shock. Note:
The heater is most effective when
outdoor temperatures are below 0°F
(-18°C).
The heater acts as a starting aid by
warming the engine coolant. This allows
the climate control system to respond
quickly. The equipment includes a heater
element (installed in the engine block) and
a wire harness. You can connect the
system to a grounded 120-volt AC
electrical source.
We recommend that you do the following
for a safe and correct operation:
• Use a 16-gauge outdoor extension cord
that is product certified by
Underwriter ’s Laboratory (UL) or
Canadian Standards Association
(CSA). This extension cord must be
suitable for use outdoors, in cold
131
Super Duty (TFA) Starting and Stopping the Engine
Page 138 of 458
•
You may need to cycle the ignition from
off to on several times after refueling
to allow the fuel system to pump the
fuel from the tank to the engine. On
restarting, cranking time will take a few
seconds longer than normal. With
keyless ignition, just start the engine.
Crank time will be longer than usual.
• Normally, adding 1 gallon (3.8 liters) of
fuel is enough to restart the engine. If
the vehicle is out of fuel and on a steep
grade, more than 1 gallon (3.8 liters)
may be required.
• The service engine soon indicator may
come on. For more information on the
service engine soon indicator, See
Warning Lamps and Indicators
(page 75).
Refilling With a Portable Fuel
Container WARNINGS
The fuel system may be under
pressure. If the fuel filler cap is
venting vapor or if you hear a hissing
sound, wait until it stops before completely
removing the fuel filler cap. Otherwise, fuel
may spray out and cause personal injury. Do not try to pry open or push open
the fuel system with foreign objects.
This could damage the fuel system
and its seal and cause personal injury to
you or others. Use the following directions when filling
from a portable fuel container:
1.
Remove the fuel cap from the fuel filler
pipe by rotating it counter clockwise.
2. Slowly insert the portable fuel container into the fuel filler opening. 3. Fill the vehicle with fuel from the
portable fuel container.
4. 4. When done, remove the portable fuel container nozzle and reinstall fuel
cap. Insert fuel cap into fuel filler
opening and turn clockwise until a click
is heard.
REFUELING WARNINGS
Fuel vapor burns violently and a fuel
fire can cause severe injuries.
Read and follow all the instructions
on the pump island.
Turn off your engine when you are
refueling.
Do not smoke if you are near fuel or
refueling your vehicle.
Keep sparks, flames and smoking
materials away from fuel.
Stay outside your vehicle and do not
leave the fuel pump unattended
when refueling your vehicle. This is
against the law in some places. Keep children away from the fuel
pump; never let children pump fuel.
Do not use personal electronic
devices while refueling.
Use the following guidelines to avoid
electrostatic charge build-up when filling
an ungrounded fuel container:
•
Place approved fuel container on the
ground.
• Do not fill a fuel container while it is in
the vehicle (including the cargo area).
135
Super Duty (TFA) Fuel and Refueling
Page 142 of 458

You can correct these temporary
malfunctions by filling the fuel tank with
good quality fuel, properly closing the fuel
fill inlet or letting the electrical system dry
out. After three driving cycles without these
or any other temporary malfunctions
present, the service engine soon indicator
should stay off the next time you start the
engine. A driving cycle consists of a cold
engine startup followed by mixed
city/highway driving. No additional vehicle
service is required.
If the service engine soon indicator remains
on, have your vehicle serviced at the first
available opportunity. Although some
malfunctions detected by the OBD-II may
not have symptoms that are apparent,
continued driving with the service engine
soon indicator on can result in increased
emissions, lower fuel economy, reduced
engine and transmission smoothness, and
lead to more costly repairs.
Readiness for
Inspection/Maintenance (I/M)
Testing
Some state/provincial and local
governments may have
Inspection/Maintenance (I/M) programs
to inspect the emission control equipment
on your vehicle. Failure to pass this
inspection could prevent you from getting
a vehicle registration.
If the service engine soon
indicator is on or the bulb does
not work, you may need to have
the vehicle serviced. See On-Board
Diagnostics (OBD-II).
Your vehicle may not pass the I/M test if
the service engine soon indicator is on or
not working properly (bulb is burned out),
or if the OBD-II system has determined
that some of the emission control systems
have not been properly checked. In this
case, your vehicle is not ready for I/M
testing. If the vehicle
’s engine or transmission has
just been serviced, or the battery has
recently run down or been replaced, the
OBD-II system may indicate that the
vehicle is not ready for I/M testing. To
determine if the vehicle is ready for I/M
testing, turn the ignition key to the on
position for 15 seconds without cranking
the engine. If the service engine soon
indicator blinks eight times, it means that
the vehicle is not ready for I/M testing; if
the service engine soon indicator stays on
solid, it means that the vehicle is ready for
I/M testing.
The OBD-II system monitors the emission
control system during normal driving. A
complete check may take several days. If
the vehicle is not ready for I/M testing, you
may need to perform the following driving
cycle consisting of mixed city and highway
driving:
Drive on an expressway or highway for a
steady 15 minutes, followed by 20 minutes
of stop-and-go driving with at least four
30-second idle periods.
Allow the vehicle to sit for at least eight
hours without starting the engine. Then,
start the engine and complete the above
driving cycle. The engine must warm up to
its normal operating temperature. Once
started, do not turn off the engine until the
above driving cycle is complete. If the
vehicle is still not ready for I/M testing, you
will have to repeat the above driving cycle.
139
Super Duty (TFA) Fuel and Refueling
Page 143 of 458
AUTOMATIC TRANSMISSION
WARNINGS
Always set the parking brake fully
and make sure the gearshift is
latched in P (Park). Turn the ignition
to the off position and remove the key
whenever you leave your vehicle. Do not use the tow/haul feature
when driving in icy or slippery
conditions as the increased engine
braking can cause the rear wheels to slide
and the vehicle to swing around with the
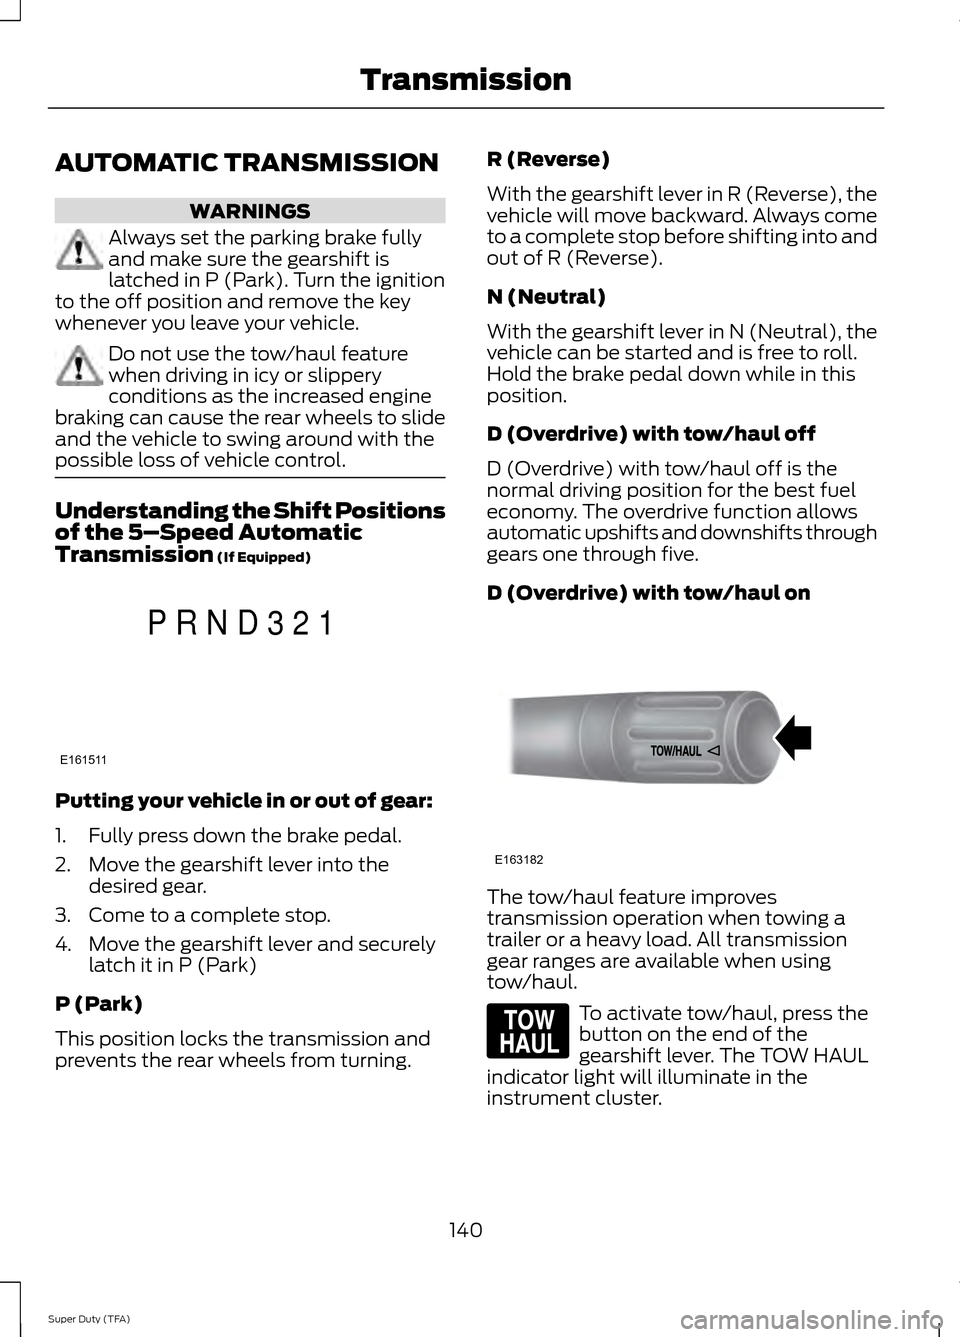
possible loss of vehicle control. Understanding the Shift Positions
of the 5–
Speed Automatic
Transmission (If Equipped) Putting your vehicle in or out of gear:
1. Fully press down the brake pedal.
2. Move the gearshift lever into the
desired gear.
3. Come to a complete stop.
4. Move the gearshift lever and securely latch it in P (Park)
P (Park)
This position locks the transmission and
prevents the rear wheels from turning. R (Reverse)
With the gearshift lever in R (Reverse), the
vehicle will move backward. Always come
to a complete stop before shifting into and
out of R (Reverse).
N (Neutral)
With the gearshift lever in N (Neutral), the
vehicle can be started and is free to roll.
Hold the brake pedal down while in this
position.
D (Overdrive) with tow/haul off
D (Overdrive) with tow/haul off is the
normal driving position for the best fuel
economy. The overdrive function allows
automatic upshifts and downshifts through
gears one through five.
D (Overdrive) with tow/haul on
The tow/haul feature improves
transmission operation when towing a
trailer or a heavy load. All transmission
gear ranges are available when using
tow/haul.
To activate tow/haul, press the
button on the end of the
gearshift lever. The TOW HAUL
indicator light will illuminate in the
instrument cluster.
140
Super Duty (TFA) TransmissionE161511
P R N D 3 2 1 E163182 E161509
Page 148 of 458
WARNINGS
When doing this procedure, you will
be taking the vehicle out of park
which means the vehicle can roll
freely. To avoid unwanted vehicle
movement, always fully set the parking
brake prior to doing this procedure. Use
wheel chocks if appropriate. If the parking brake is fully released,
but the brake warning lamp remains
illuminated, the brakes may not be
working properly. See your authorized
dealer. Your vehicle is equipped with a brake-shift
interlock feature that prevents the
gearshift lever from being moved from P
(Park) when the ignition is in the 3 (on)
position and the brake pedal is not pressed.
If you cannot move the gearshift lever out
of P (Park) position with the ignition in the
4 (on) position and the brake pedal
pressed, a malfunction may have occurred.
It is possible that a fuse has blown or the
vehicle
’s brake lamps are not operating
properly. See Fuse Specification Chart
(page 214).
If the fuse is not blown and the brake
lamps are working properly, the following
procedure will allow you to move the
gearshift lever from P (Park):
1. Apply the parking brake. Turn the ignition key to 1 (off), then remove the
key.
2. Move the steering column to the full down and full rearward position
(toward the driver ’s seat).
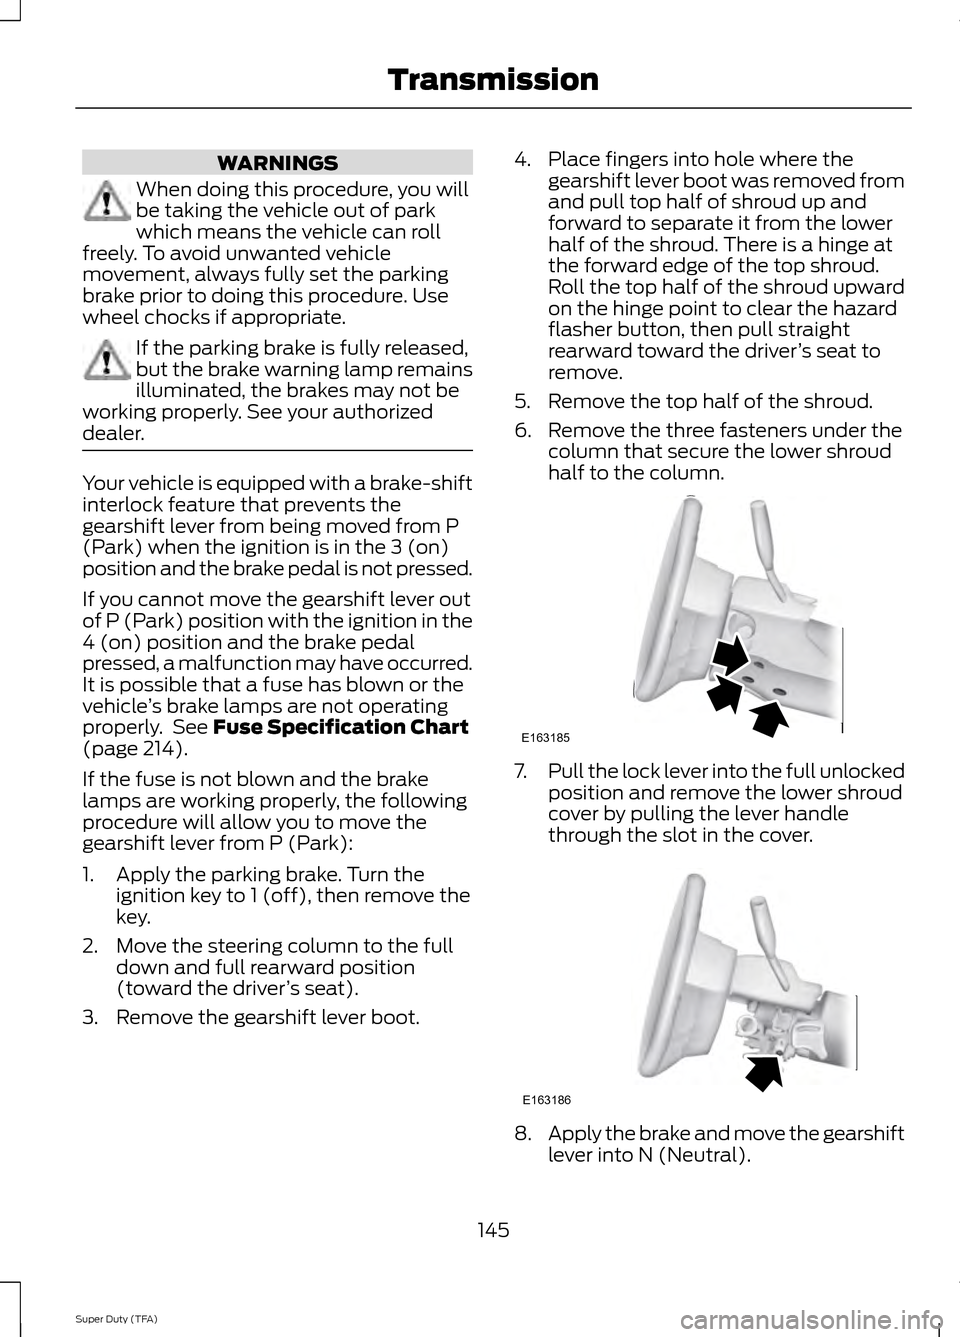
3. Remove the gearshift lever boot. 4. Place fingers into hole where the
gearshift lever boot was removed from
and pull top half of shroud up and
forward to separate it from the lower
half of the shroud. There is a hinge at
the forward edge of the top shroud.
Roll the top half of the shroud upward
on the hinge point to clear the hazard
flasher button, then pull straight
rearward toward the driver ’s seat to
remove.
5. Remove the top half of the shroud.
6. Remove the three fasteners under the column that secure the lower shroud
half to the column. 7.
Pull the lock lever into the full unlocked
position and remove the lower shroud
cover by pulling the lever handle
through the slot in the cover. 8.
Apply the brake and move the gearshift
lever into N (Neutral).
145
Super Duty (TFA) TransmissionE163185 E163186
Page 157 of 458
If your vehicle has anti-lock brakes, apply
the brakes steadily. Do not pump the
brakes.
Driving on Snow and Ice
WARNING
If you are driving in slippery
conditions that require tire chains or
cables, then it is critical that you drive
cautiously. Keep speeds down, allow for
longer stopping distances and avoid
aggressive steering to reduce the chances
of a loss of vehicle control which can lead
to serious injury or death. If the rear end of
your vehicle slides while cornering, steer in
the direction of the slide until you regain
control of your vehicle. Note:
Excessive tire slippage can cause
transmission damage.
Four-wheel drive vehicles have advantages
over two-wheel drive vehicles in snow and
ice but can skid like any other vehicle.
Should you start to slide while driving on
snowy or icy roads, turn the steering wheel
in the direction of the slide until you regain
control.
Avoid sudden applications of power and
quick changes of direction on snow and
ice. Apply the accelerator slowly and
steadily when starting from a full stop.
Avoid sudden braking. Although a
four-wheel drive vehicle may accelerate
better than a two-wheel drive vehicle in
snow and ice, it will not stop any faster as
braking occurs at all four wheels. Do not
become overconfident as to road
conditions. Make sure you allow sufficient distance
between you and other vehicles for
stopping. Drive slower than usual and
consider using one of the lower gears. In
emergency stopping situations, apply the
brake steadily. Do not pump the brake
pedal. See Hints on Driving With
Anti-Lock Brakes (page 158).
If Your Vehicle Gets Stuck In Mud or
Snow WARNING
Do not spin the wheels at over 35
mph (56 km/h). The tires may fail
and injure a passenger or bystander.
If your vehicle gets stuck in mud or snow,
it may be rocked out by shifting between
forward and reverse gears, stopping
between shifts in a steady pattern. Press
lightly on the accelerator in each gear.
Note:
Do not rock your vehicle if the engine
is not at normal operating temperature,
damage to the transmission may occur.
Note: Do not rock your vehicle for more
than a minute, damage to the transmission
and tires may occur or the engine may
overheat.
Parking WARNINGS
If the parking brake is fully released,
but the brake warning lamp remains
illuminated, the brakes may not be
working properly. See your authorized
dealer. Always set the parking brake fully
and make sure the gearshift is
latched in P (Park). Turn the ignition
to the off position and remove the key
whenever you leave your vehicle. 154
Super Duty (TFA) Four-Wheel Drive
(If Equipped)
Page 162 of 458

PARKING BRAKE
WARNING
Always set the parking brake fully
and make sure the transmission
selector lever is placed in position P.
Failure to set the parking brake and engage
park could result in vehicle roll-away,
property damage or bodily injury. Turn the
ignition to the lock position and remove
the key whenever you leave your vehicle. Apply the parking brake whenever your
vehicle is parked. Press the pedal
downward to set the parking brake. The
brake warning lamp in the instrument
cluster will illuminate and remains
illuminated until the parking brake is
released.
To release, pull the brake release lever
located at the lower left side of the
instrument panel.
If you are parking your vehicle on a grade
or with a trailer, press and hold the brake
pedal down, then set the parking brake.
There may be a little vehicle movement as
the parking brake sets to hold the vehicle's
weight. This is normal and should be no
reason for concern. If needed, press and
hold the service brake pedal down, then
try reapplying the parking brake. Chock the
wheels if required. If the parking brake
cannot hold the weight of the vehicle, the
parking brake may need to be serviced or
the vehicle may be overloaded.
HILL START ASSIST
WARNINGS
The system does not replace the
parking brake. When you leave your
vehicle, always apply the parking
brake and put the vehicle in position P. WARNINGS
You must remain in your vehicle once
you have activated the system.
During all times, you are responsible
for controlling your vehicle,
supervising the system and
intervening, if required. If the engine is revved excessively, or
if a malfunction is detected, the
system will be deactivated.
The system makes it easier to pull away
when your vehicle is on a slope without the
need to use the parking brake.
When the system is active, your vehicle will
remain stationary on the slope for two to
three seconds after you release the brake
pedal. This allows you time to move your
foot from the brake to the accelerator
pedal. The brakes are released
automatically once the engine has
developed sufficient drive to prevent your
vehicle from rolling down the slope. This
is an advantage when pulling away on a
slope, (for example from a car park ramp,
traffic lights or when reversing uphill into
a parking space).
The system will activate automatically on
any slope that will cause significant vehicle
rollback.
Using Hill Start Assist
1. Press the brake pedal to bring your
vehicle to a complete standstill. Keep
the brake pedal pressed.
2. If the sensors detect that your vehicle is on a slope, the system will activate
automatically.
159
Super Duty (TFA) Brakes