2014 FORD SUPER DUTY tow
[x] Cancel search: towPage 143 of 458
AUTOMATIC TRANSMISSION
WARNINGS
Always set the parking brake fully
and make sure the gearshift is
latched in P (Park). Turn the ignition
to the off position and remove the key
whenever you leave your vehicle. Do not use the tow/haul feature
when driving in icy or slippery
conditions as the increased engine
braking can cause the rear wheels to slide
and the vehicle to swing around with the
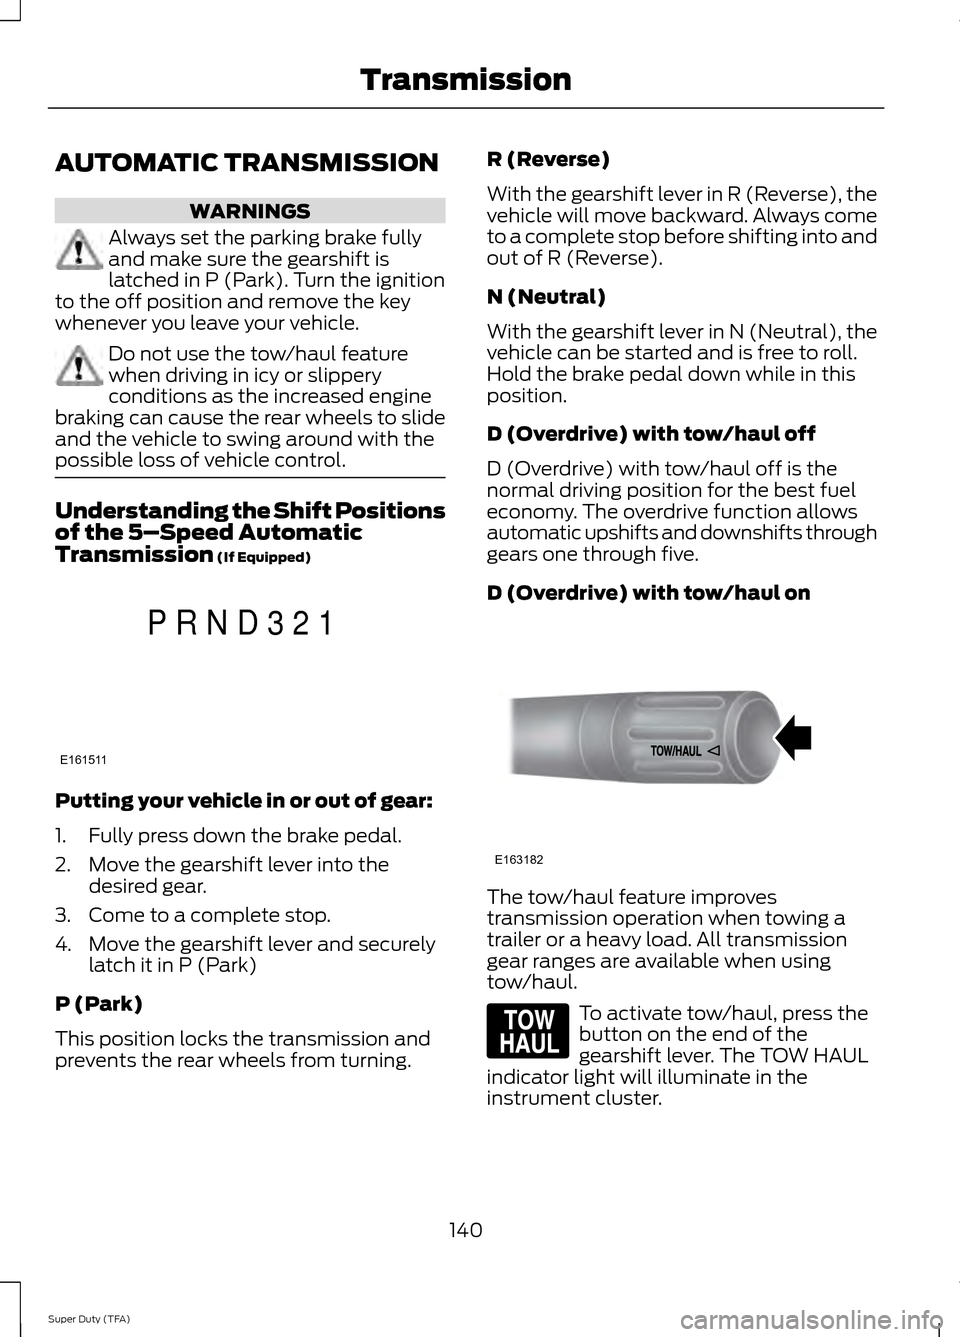
possible loss of vehicle control. Understanding the Shift Positions
of the 5–
Speed Automatic
Transmission (If Equipped) Putting your vehicle in or out of gear:
1. Fully press down the brake pedal.
2. Move the gearshift lever into the
desired gear.
3. Come to a complete stop.
4. Move the gearshift lever and securely latch it in P (Park)
P (Park)
This position locks the transmission and
prevents the rear wheels from turning. R (Reverse)
With the gearshift lever in R (Reverse), the
vehicle will move backward. Always come
to a complete stop before shifting into and
out of R (Reverse).
N (Neutral)
With the gearshift lever in N (Neutral), the
vehicle can be started and is free to roll.
Hold the brake pedal down while in this
position.
D (Overdrive) with tow/haul off
D (Overdrive) with tow/haul off is the
normal driving position for the best fuel
economy. The overdrive function allows
automatic upshifts and downshifts through
gears one through five.
D (Overdrive) with tow/haul on
The tow/haul feature improves
transmission operation when towing a
trailer or a heavy load. All transmission
gear ranges are available when using
tow/haul.
To activate tow/haul, press the
button on the end of the
gearshift lever. The TOW HAUL
indicator light will illuminate in the
instrument cluster.
140
Super Duty (TFA) TransmissionE161511
P R N D 3 2 1 E163182 E161509
Page 144 of 458
Tow/haul delays upshifts to reduce
frequency of transmission shifting.
Tow/haul also provides engine braking in
all forward gears when the transmission is
in the D (Overdrive) position; this engine
braking will slow the vehicle and assist the
driver in controlling the vehicle when
descending a grade. Depending on driving
conditions and load conditions, the
transmission may downshift, slow the
vehicle and control the vehicle speed when
descending a hill, without the accelerator
pedal being pressed. The amount of
downshift braking provided will vary based
upon the amount the brake pedal is
pressed.
To deactivate the tow/haul feature and
return to normal driving mode, press the
button on the end of the gearshift lever.
The TOW HAUL light will no longer be
illuminated.
When you shut-off and restart the engine,
the transmission will automatically return
to normal D (Overdrive) mode (tow/haul
off).
WARNING
Do not use the tow/haul feature
when driving in icy or slippery
conditions as the increased engine
braking can cause the rear wheels to slide
and the vehicle to swing around with the
possible loss of vehicle control. 3 (Third)
Transmission starts and operates in third
gear only
Used for improved traction on slippery
roads. Selecting 3 (Third) provides engine
braking.
2 (Second)
Use 2 (Second) to start-up on slippery
roads or to provide additional engine
braking on downgrades. 1 (First)
•
Provides maximum engine braking
• Allows upshifts by moving gearshift
lever
• The transmission will not downshift
into 1 (First) at high speeds; it will
downshift to a lower gear and then
shift into 1 (First) when the vehicle
reaches slower speeds.
Forced downshifts
• Allowed in D (Overdrive) with the
tow/haul feature on or off
• Press the accelerator to the floor
• Allows transmission to select an
appropriate gear
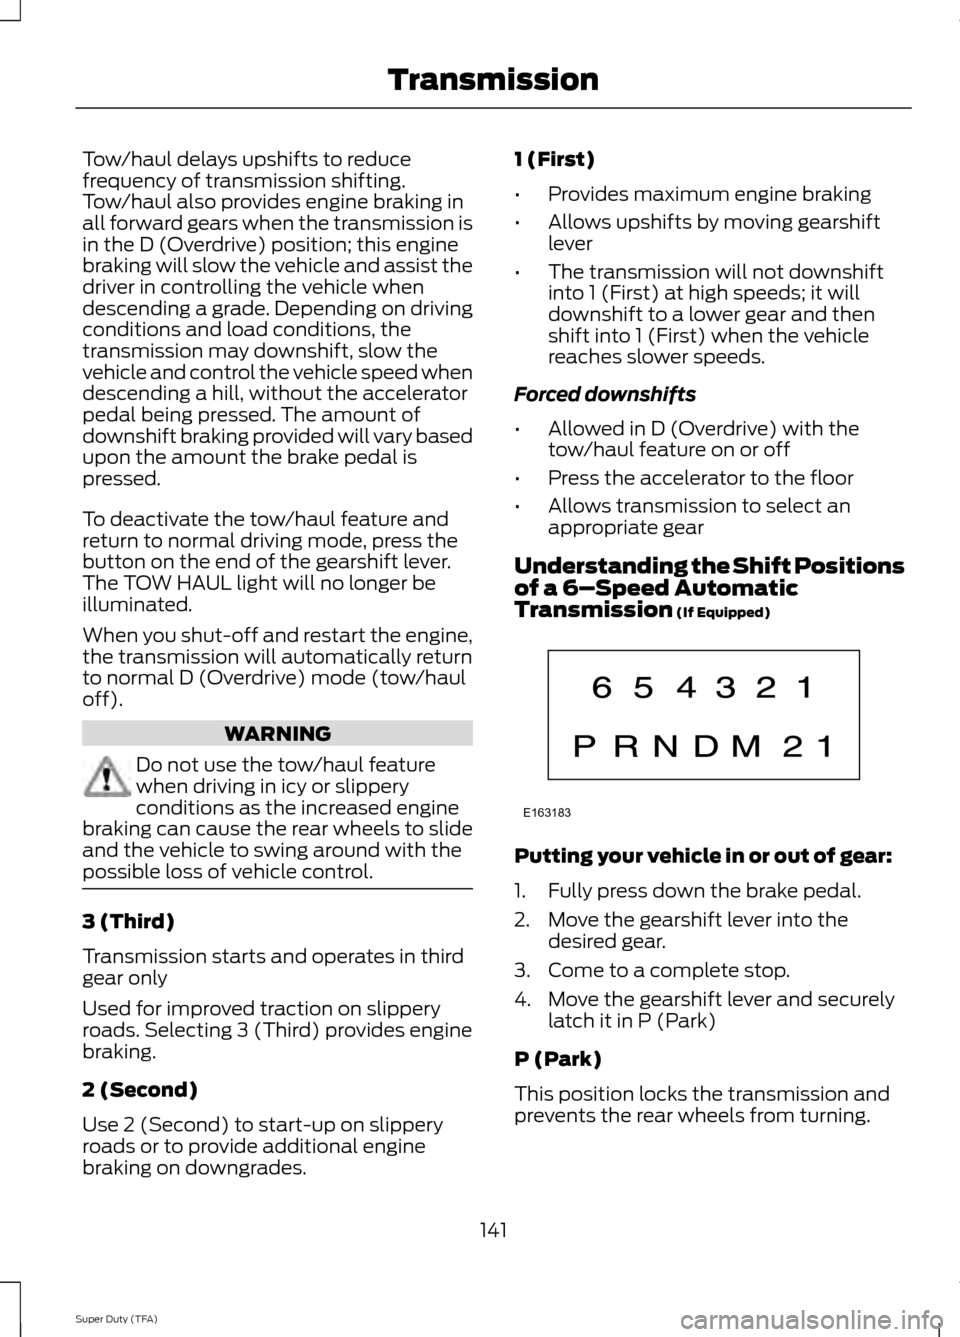
Understanding the Shift Positions
of a 6– Speed Automatic
Transmission (If Equipped) Putting your vehicle in or out of gear:
1. Fully press down the brake pedal.
2. Move the gearshift lever into the
desired gear.
3. Come to a complete stop.
4. Move the gearshift lever and securely latch it in P (Park)
P (Park)
This position locks the transmission and
prevents the rear wheels from turning.
141
Super Duty (TFA) TransmissionE163183
Page 145 of 458
R (Reverse)
With the gearshift lever in R (Reverse), the
vehicle will move backward. Always come
to a complete stop before shifting into and
out of R (Reverse).
N (Neutral)
With the gearshift lever in N (Neutral), the
vehicle can be started and is free to roll.
Hold the brake pedal down while in this
position.
D (Overdrive) with tow/haul off
D (Overdrive) with tow/haul off is the
normal driving position for the best fuel
economy. The overdrive function allows
automatic upshifts and downshifts through
gears one through six.
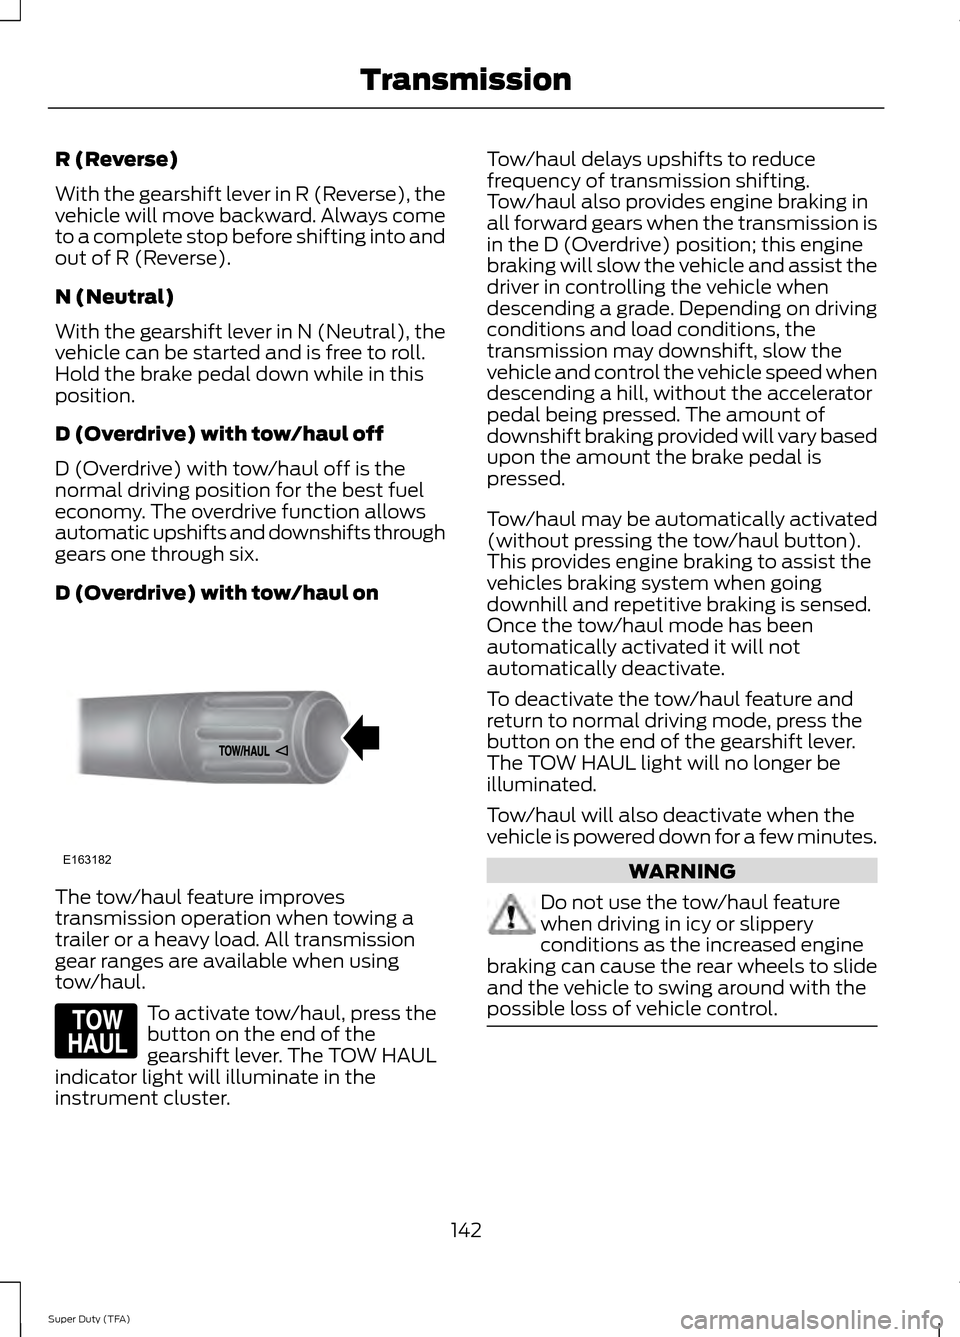
D (Overdrive) with tow/haul on
The tow/haul feature improves
transmission operation when towing a
trailer or a heavy load. All transmission
gear ranges are available when using
tow/haul.
To activate tow/haul, press the
button on the end of the
gearshift lever. The TOW HAUL
indicator light will illuminate in the
instrument cluster. Tow/haul delays upshifts to reduce
frequency of transmission shifting.
Tow/haul also provides engine braking in
all forward gears when the transmission is
in the D (Overdrive) position; this engine
braking will slow the vehicle and assist the
driver in controlling the vehicle when
descending a grade. Depending on driving
conditions and load conditions, the
transmission may downshift, slow the
vehicle and control the vehicle speed when
descending a hill, without the accelerator
pedal being pressed. The amount of
downshift braking provided will vary based
upon the amount the brake pedal is
pressed.
Tow/haul may be automatically activated
(without pressing the tow/haul button).
This provides engine braking to assist the
vehicles braking system when going
downhill and repetitive braking is sensed.
Once the tow/haul mode has been
automatically activated it will not
automatically deactivate.
To deactivate the tow/haul feature and
return to normal driving mode, press the
button on the end of the gearshift lever.
The TOW HAUL light will no longer be
illuminated.
Tow/haul will also deactivate when the
vehicle is powered down for a few minutes.
WARNING
Do not use the tow/haul feature
when driving in icy or slippery
conditions as the increased engine
braking can cause the rear wheels to slide
and the vehicle to swing around with the
possible loss of vehicle control. 142
Super Duty (TFA) TransmissionE163182 E161509
Page 146 of 458
M (Manual) without Overdrive
With the gearshift lever in M (Manual), the
driver can change gears up or down as
desired. This is called SelectShift
Automatic
™ transmission (SST) mode.
By moving the gearshift lever from drive
position D (Overdrive) to M (Manual) you
now have control of selecting the gear you
desire using buttons on the shift lever.
To return to normal D (Overdrive) position,
move the shift lever back from M to D.
The transmission will operate in gears one
through six.
2 (Second)
Use 2 (Second) to start-up on slippery
roads or to provide additional engine
braking on downgrades.
1 (First)
• Provides maximum engine braking
• Allows upshifts by moving gearshift
lever
• The transmission will not downshift
into 1 (First) at high speeds; it will
downshift to a lower gear and then
shift into 1 (First) when the vehicle
reaches slower speeds.
Forced downshifts
• Allowed in D (Overdrive) with the
tow/haul feature on or off
• Press the accelerator to the floor
• Allows transmission to select an
appropriate gear
Understanding your SelectShift
Automatic® transmission (If Equipped)
Your vehicle is equipped with a SelectShift
Automatic transmission gearshift lever.
SelectShift Automatic transmission gives
you the ability to change gears up or down
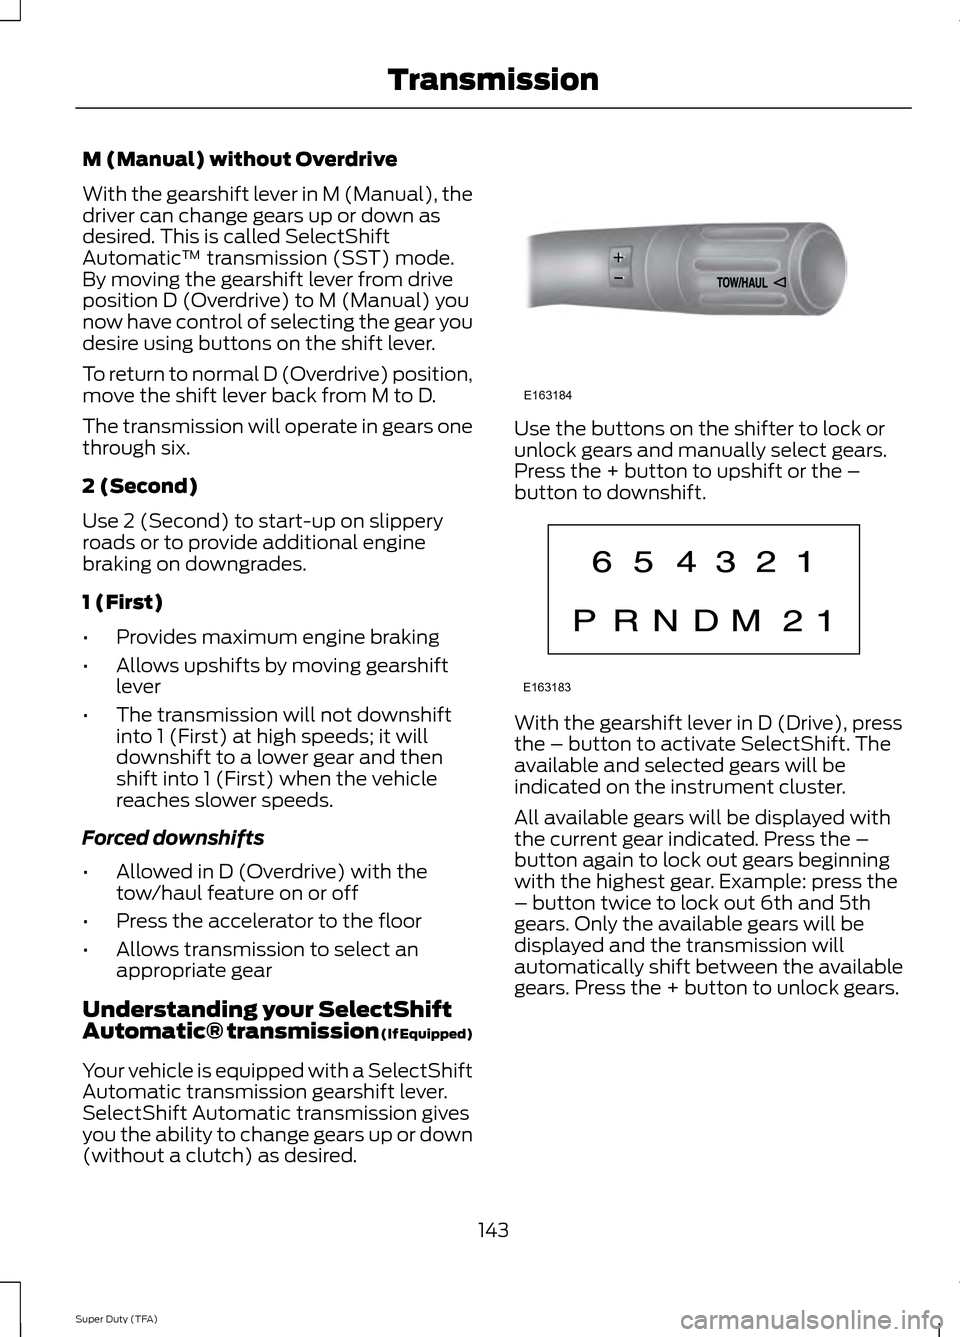
(without a clutch) as desired. Use the buttons on the shifter to lock or
unlock gears and manually select gears.
Press the + button to upshift or the –
button to downshift.
With the gearshift lever in D (Drive), press
the – button to activate SelectShift. The
available and selected gears will be
indicated on the instrument cluster.
All available gears will be displayed with
the current gear indicated. Press the –
button again to lock out gears beginning
with the highest gear. Example: press the
– button twice to lock out 6th and 5th
gears. Only the available gears will be
displayed and the transmission will
automatically shift between the available
gears. Press the + button to unlock gears.
143
Super Duty (TFA) TransmissionE163184 E163183
Page 148 of 458
WARNINGS
When doing this procedure, you will
be taking the vehicle out of park
which means the vehicle can roll
freely. To avoid unwanted vehicle
movement, always fully set the parking
brake prior to doing this procedure. Use
wheel chocks if appropriate. If the parking brake is fully released,
but the brake warning lamp remains
illuminated, the brakes may not be
working properly. See your authorized
dealer. Your vehicle is equipped with a brake-shift
interlock feature that prevents the
gearshift lever from being moved from P
(Park) when the ignition is in the 3 (on)
position and the brake pedal is not pressed.
If you cannot move the gearshift lever out
of P (Park) position with the ignition in the
4 (on) position and the brake pedal
pressed, a malfunction may have occurred.
It is possible that a fuse has blown or the
vehicle
’s brake lamps are not operating
properly. See Fuse Specification Chart
(page 214).
If the fuse is not blown and the brake
lamps are working properly, the following
procedure will allow you to move the
gearshift lever from P (Park):
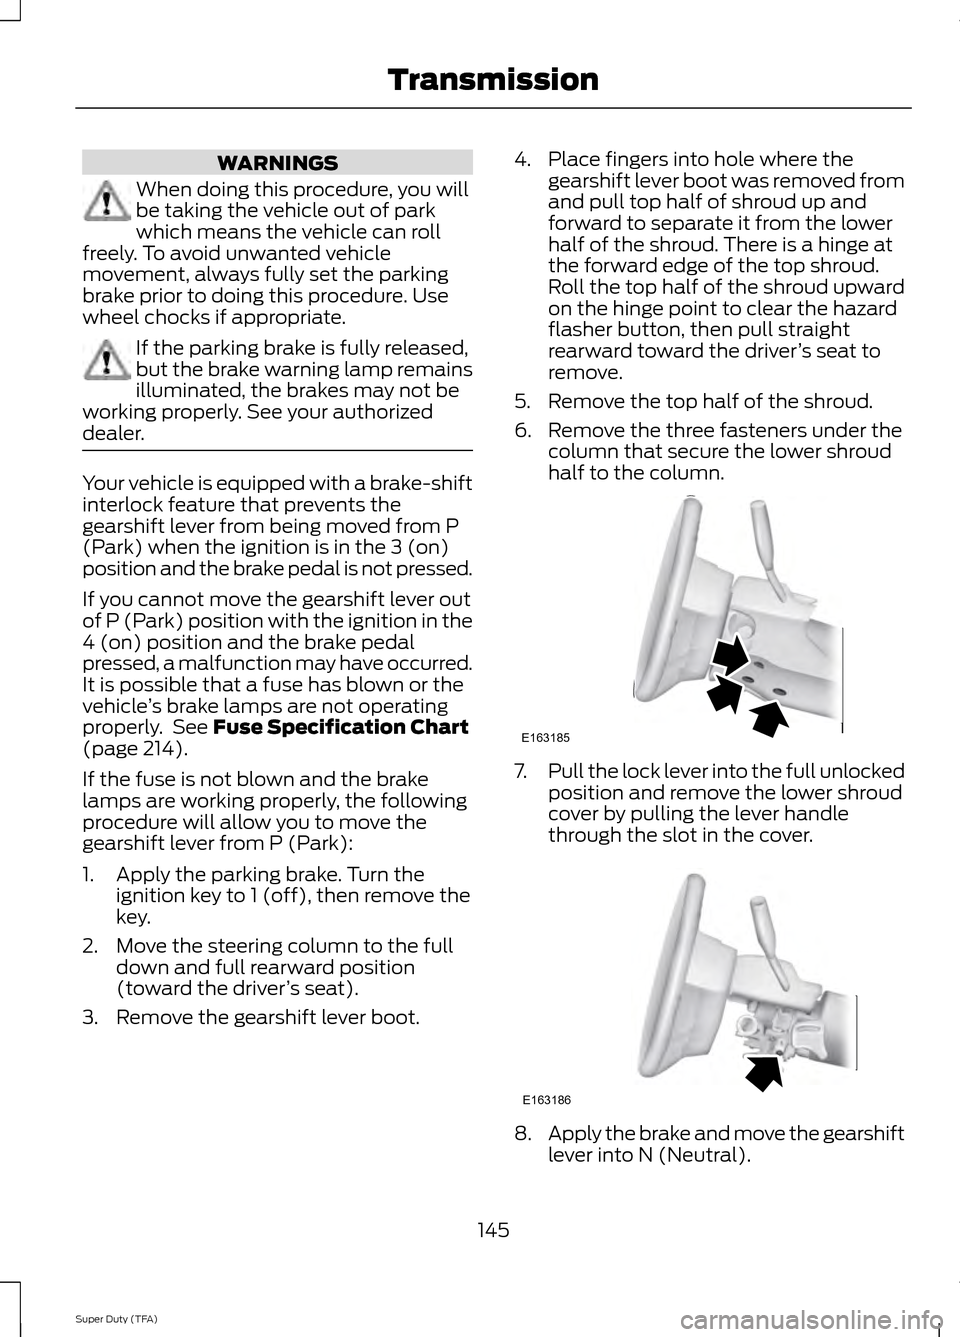
1. Apply the parking brake. Turn the ignition key to 1 (off), then remove the
key.
2. Move the steering column to the full down and full rearward position
(toward the driver ’s seat).
3. Remove the gearshift lever boot. 4. Place fingers into hole where the
gearshift lever boot was removed from
and pull top half of shroud up and
forward to separate it from the lower
half of the shroud. There is a hinge at
the forward edge of the top shroud.
Roll the top half of the shroud upward
on the hinge point to clear the hazard
flasher button, then pull straight
rearward toward the driver ’s seat to
remove.
5. Remove the top half of the shroud.
6. Remove the three fasteners under the column that secure the lower shroud
half to the column. 7.
Pull the lock lever into the full unlocked
position and remove the lower shroud
cover by pulling the lever handle
through the slot in the cover. 8.
Apply the brake and move the gearshift
lever into N (Neutral).
145
Super Duty (TFA) TransmissionE163185 E163186
Page 149 of 458
9. Start the vehicle.
Perform Steps 4 through 8 in reverse order,
making sure to engage the hinge pivots
between the upper and lower halves of the
shroud. Keep slight pressure in the forward
direction as the halves are rotated
together.
If Your Vehicle Gets Stuck In Mud
or Snow
Note:
Do not rock the vehicle if the engine
is not at normal operating temperature or
damage to the transmission may occur.
Note: Do not rock the vehicle for more than
a minute or damage to the transmission and
tires may occur, or the engine may overheat.
If your vehicle gets stuck in mud or snow,
it may be rocked out by shifting between
forward and reverse gears, stopping
between shifts in a steady pattern. Press
lightly on the accelerator in each gear.
POWER TAKE-OFF
Auxiliary equipment called power take-off,
or PTO, is often added to the engine or
transmission to operate utility equipment.
Examples include a wheel-lift for tow
trucks, cranes, tools for construction or tire
service, and pumping fluids. PTO
applications draw auxiliary horsepower
from the powertrain, often while the
vehicle is stationary. In this condition, there
is limited cooling air flow through the
radiator and around the vehicle that
normally occurs when a vehicle is moving.
The aftermarket PTO system installer,
having the most knowledge of the final
application, is responsible for determining
whether additional chassis heat protection
or powertrain cooling is required, and
alerting the user to the safe and proper
operation. Ford Super Duty Vehicles are approved for
use as a stationary (including split shaft
capability) or mobile power source, within
limits and operating guidelines detailed in
the Ford Truck Body Builders Layout Book,
found at www.fleet.ford.com/truckbbas,
and through the Ford Truck Body Builders
Advisory Service.
146
Super Duty (TFA) Transmission
Page 151 of 458
•
provides 4x4 High engagement and
disengagement while the vehicle is
moving.
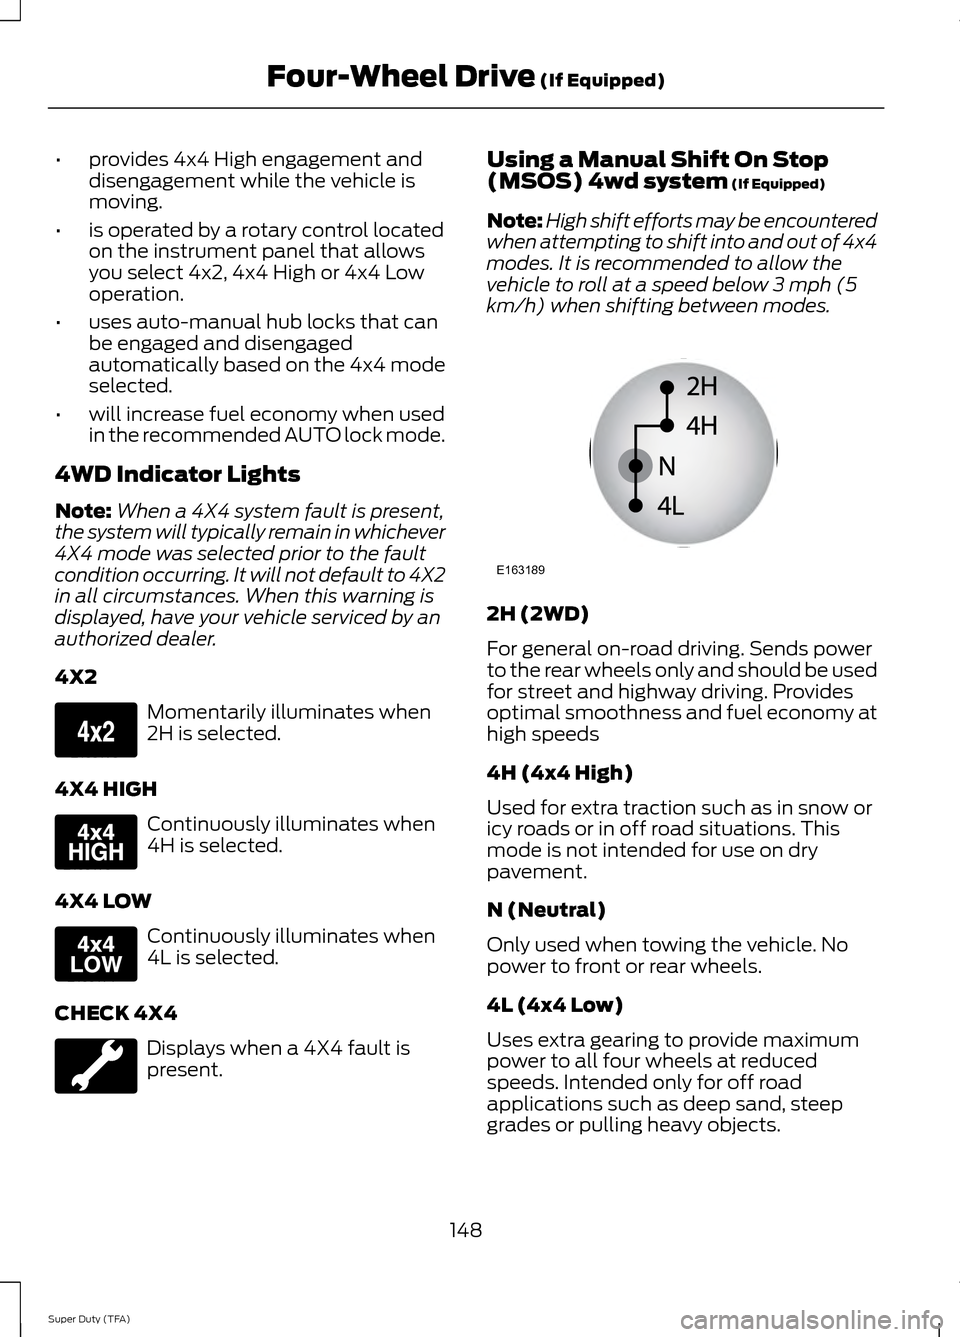
• is operated by a rotary control located
on the instrument panel that allows
you select 4x2, 4x4 High or 4x4 Low
operation.
• uses auto-manual hub locks that can
be engaged and disengaged
automatically based on the 4x4 mode
selected.
• will increase fuel economy when used
in the recommended AUTO lock mode.
4WD Indicator Lights
Note: When a 4X4 system fault is present,
the system will typically remain in whichever
4X4 mode was selected prior to the fault
condition occurring. It will not default to 4X2
in all circumstances. When this warning is
displayed, have your vehicle serviced by an
authorized dealer.
4X2 Momentarily illuminates when
2H is selected.
4X4 HIGH Continuously illuminates when
4H is selected.
4X4 LOW Continuously illuminates when
4L is selected.
CHECK 4X4 Displays when a 4X4 fault is
present. Using a Manual Shift On Stop
(MSOS) 4wd system (If Equipped)
Note: High shift efforts may be encountered
when attempting to shift into and out of 4x4
modes. It is recommended to allow the
vehicle to roll at a speed below 3 mph (5
km/h) when shifting between modes. 2H (2WD)
For general on-road driving. Sends power
to the rear wheels only and should be used
for street and highway driving. Provides
optimal smoothness and fuel economy at
high speeds
4H (4x4 High)
Used for extra traction such as in snow or
icy roads or in off road situations. This
mode is not intended for use on dry
pavement.
N (Neutral)
Only used when towing the vehicle. No
power to front or rear wheels.
4L (4x4 Low)
Uses extra gearing to provide maximum
power to all four wheels at reduced
speeds. Intended only for off road
applications such as deep sand, steep
grades or pulling heavy objects.
148
Super Duty (TFA) Four-Wheel Drive
(If Equipped)E163173 E163175 E163174 E163189
Page 152 of 458
Shifting between system modes
Note:
Do not perform these operations if
the rear wheels are slipping.
Note: Some noise may be heard as the 4x4
system shifts or engages. This is normal. In
order to reduce engagement noise, it is
recommended that all shifts be performed
at speeds below 3 mph (5 km/h).
Note: The vehicle should not be driven in
4X4 High with the hub locks disengaged as
this condition may damage driveline system
components.
Engage the locking hubs by rotating the
hub lock control from FREE to LOCK, then
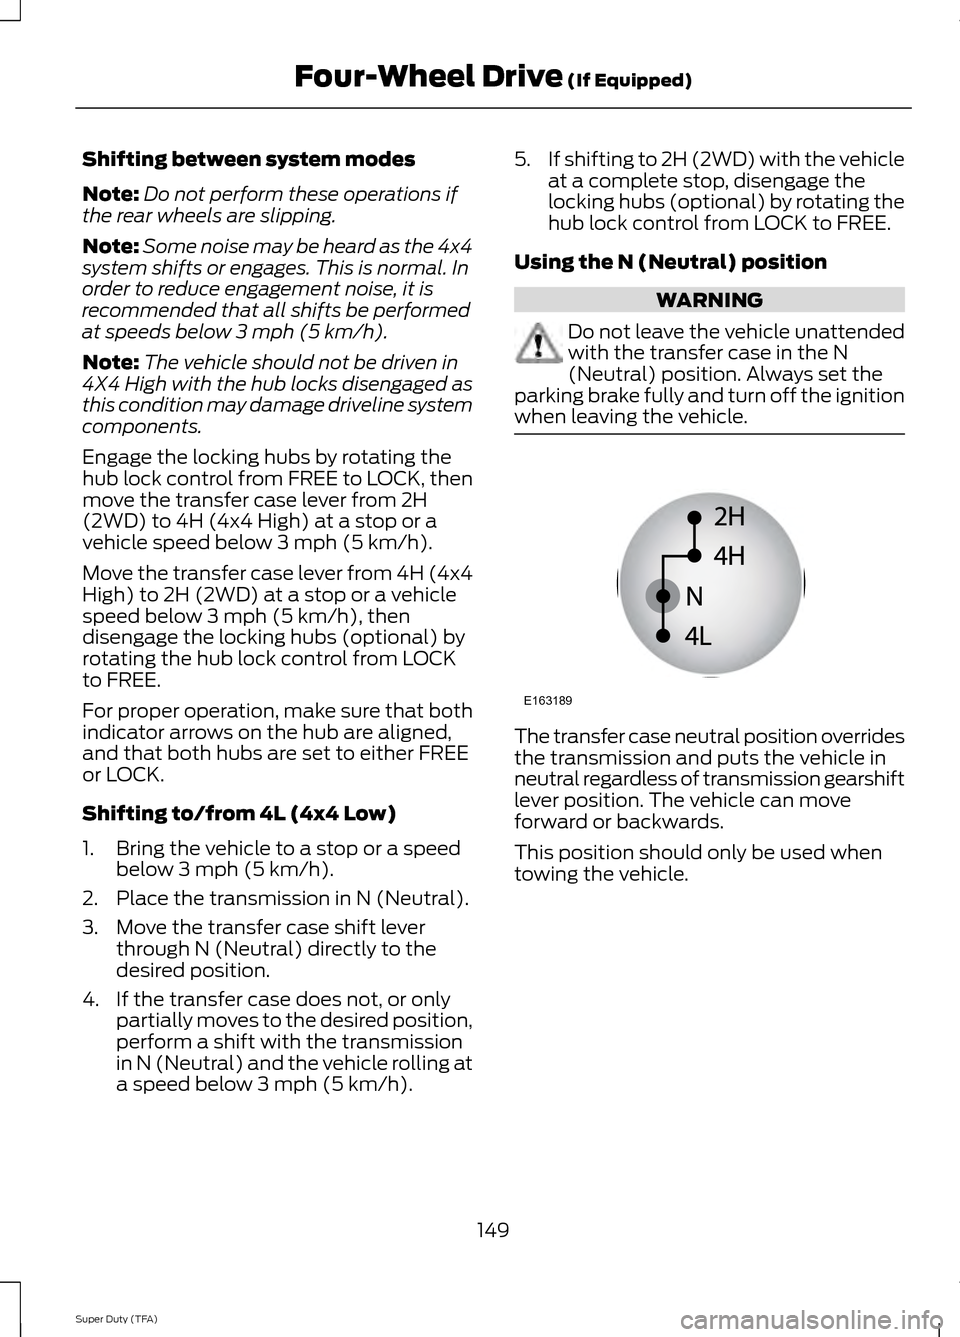
move the transfer case lever from 2H
(2WD) to 4H (4x4 High) at a stop or a
vehicle speed below 3 mph (5 km/h).
Move the transfer case lever from 4H (4x4
High) to 2H (2WD) at a stop or a vehicle
speed below 3 mph (5 km/h), then
disengage the locking hubs (optional) by
rotating the hub lock control from LOCK
to FREE.
For proper operation, make sure that both
indicator arrows on the hub are aligned,
and that both hubs are set to either FREE
or LOCK.
Shifting to/from 4L (4x4 Low)
1. Bring the vehicle to a stop or a speed below 3 mph (5 km/h).
2. Place the transmission in N (Neutral).
3. Move the transfer case shift lever through N (Neutral) directly to the
desired position.
4. If the transfer case does not, or only partially moves to the desired position,
perform a shift with the transmission
in N (Neutral) and the vehicle rolling at
a speed below 3 mph (5 km/h). 5.
If shifting to 2H (2WD) with the vehicle
at a complete stop, disengage the
locking hubs (optional) by rotating the
hub lock control from LOCK to FREE.
Using the N (Neutral) position WARNING
Do not leave the vehicle unattended
with the transfer case in the N
(Neutral) position. Always set the
parking brake fully and turn off the ignition
when leaving the vehicle. The transfer case neutral position overrides
the transmission and puts the vehicle in
neutral regardless of transmission gearshift
lever position. The vehicle can move
forward or backwards.
This position should only be used when
towing the vehicle.
149
Super Duty (TFA) Four-Wheel Drive (If Equipped)E163189