Page 240 of 458
2.Go to the front of the vehicle andlocate the secondary release lever,which is located under the front of thehood, to your right of the center of thevehicle (driver's side), near theheadlight.
3.Release the hood latch by pushing theyellow secondary release lever to yourleft, toward the center of the vehicle.
4.Raise the hood and support it with theprop rod by securing the prop rod in theproper hole in the hood.
5.To close the hood, lift the hood slightlyand separate the prop rod from thehood and secure the prop rod in theclip.
6.Lower the hood and allow it to drop thelast 10-12 inches (25 to 30centimeters).
Note:Make sure that you close the hoodproperly and that it fully latches on bothsides of the hood.
237Fusion (CC7) , enUSAMaintenanceE169261
Page 252 of 458
5.Locate the vertical adjuster on eachheadlamp. Using a Phillips #2screwdriver, turn the adjuster eitherclockwise or counterclockwise in orderto adjust the vertical aim of theheadlamp. The horizontal edge of thebrighter light should touch thehorizontal reference line.
6.Close the hood and turn off the lamps.
Horizontal Aim Adjustment
Horizontal aim is not required for thisvehicle and is not adjustable.
REMOVING A HEADLAMP
1.Make sure the headlamp control is inthe off position and open the hood.
2.Remove the six fasteners securing thefront fascia to the front trim cover.
3.Remove the three bumper cover upperscrews.
4.Remove the fastener at the inboardside of the headlamp you are servicing.
249Fusion (CC7) , enUSAMaintenanceE145594 E159693
Page 258 of 458

CHANGING THE ENGINE AIR
FILTER
WARNING
To reduce the risk of vehicle damageand/or personal burn injuries do notstart your engine with the air cleanerremoved and do not remove it while theengine is running.
When changing the air filter element, useonly the air filter element listed. SeeCapacities and Specifications (page287).
For EcoBoost equipped vehicles: Whenservicing the air cleaner, it is important thatno foreign material enter the air inductionsystem. The engine and turbocharger aresusceptible to damage from even smallparticles.
Change the air filter element at the properinterval. See Scheduled Maintenance(page 428).
Note:Failure to use the correct air filterelement may result in severe enginedamage. The customer warranty may bevoid for any damage to the engine if thecorrect air filter element is not used.
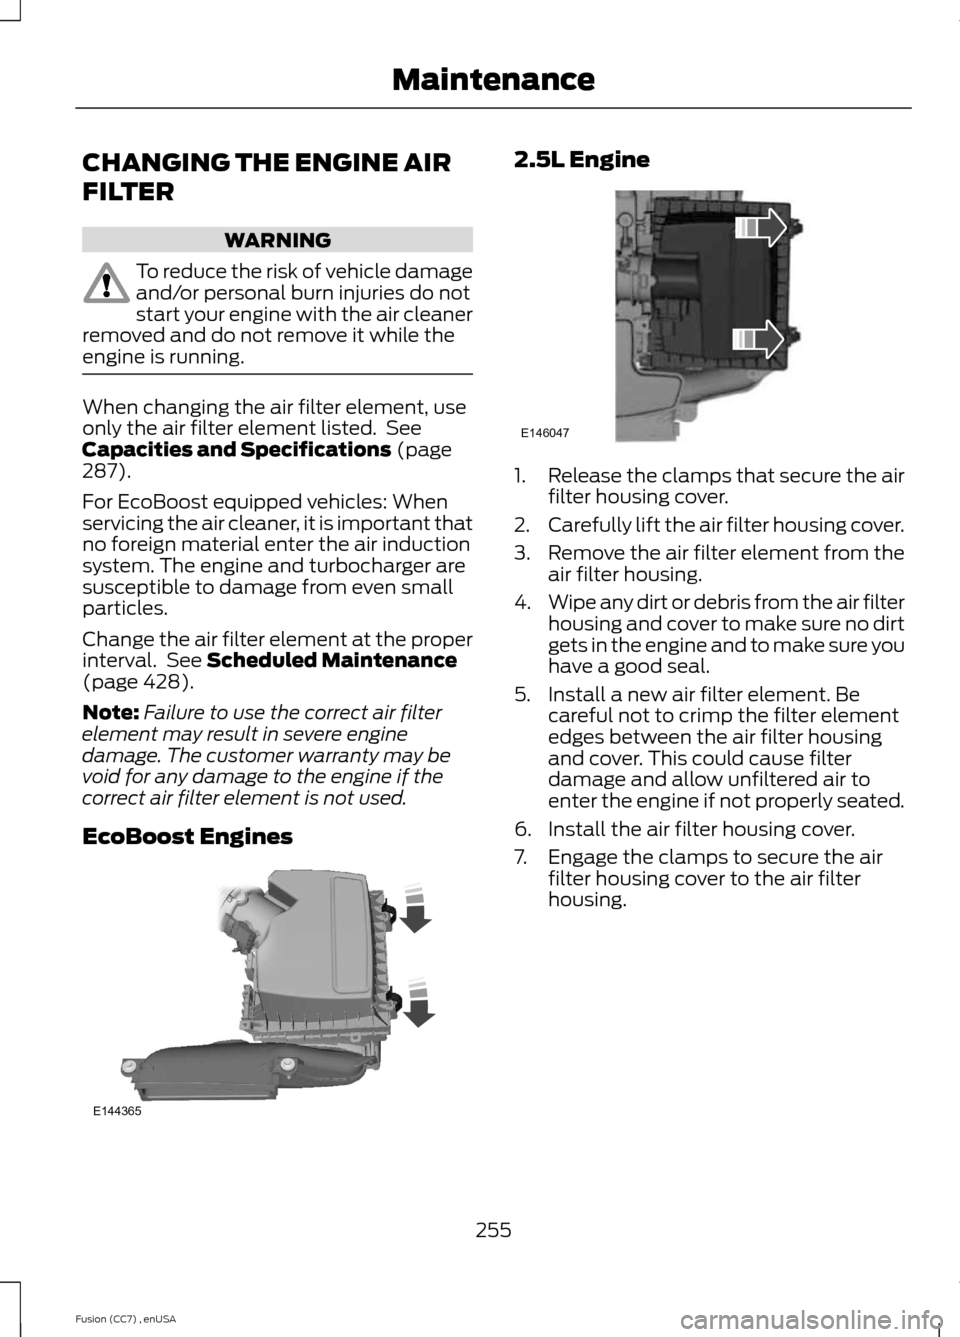
EcoBoost Engines
2.5L Engine
1.Release the clamps that secure the airfilter housing cover.
2.Carefully lift the air filter housing cover.
3.Remove the air filter element from theair filter housing.
4.Wipe any dirt or debris from the air filterhousing and cover to make sure no dirtgets in the engine and to make sure youhave a good seal.
5.Install a new air filter element. Becareful not to crimp the filter elementedges between the air filter housingand cover. This could cause filterdamage and allow unfiltered air toenter the engine if not properly seated.
6.Install the air filter housing cover.
7.Engage the clamps to secure the airfilter housing cover to the air filterhousing.
255Fusion (CC7) , enUSAMaintenanceE144365 E146047
Page 287 of 458

WARNINGS
Never get underneath a vehicle thatis supported only by a jack. If yourvehicle slips off the jack, you orsomeone else could be seriously injured.
Do not attempt to change a tire onthe side of the vehicle close tomoving traffic. Pull far enough off theroad to avoid the danger of being hit whenoperating the jack or changing the wheel.
Always use the jack provided asoriginal equipment with your vehicle.If using a jack other than the oneprovided as original equipment with yourvehicle, make sure the jack capacity isadequate for the vehicle weight, includingany vehicle cargo or modifications.
Note:Passengers should not remain in thevehicle when the vehicle is being jacked.
1.Park on a level surface, set the parkingbrake and activate the hazard flashers.
2.Place the transmission selector leverin position P (automatic transmission)or position R (manual transmission)and turn the engine off.
3.Remove the carpeted wheel cover.
4.Remove the spare tire bolt securing thespare tire by turning itcounterclockwise.
5.Remove the spare tire from the sparetire compartment.
6.Remove the lug wrench and jack fromthe foam holder.
7.Block the diagonally opposite wheel.
8.Loosen each wheel lug nut one-halfturn counterclockwise but do notremove them until the wheel is raisedoff the ground.
Note:Jack at the specified locations toavoid damage to the vehicle.
9.The vehicle jacking points are shownhere, and are depicted on the yellowwarning label on the jack.
10.Small arrow-shaped marks on thesills show the location of the jackingpoints.
284Fusion (CC7) , enUSAWheels and TiresE142550 E142551 E145908
Page 288 of 458
11.Remove the lug nuts with the lugwrench.
12.Replace the flat tire with the sparetire, making sure the valve stem isfacing outward. Reinstall the lug nutsuntil the wheel is snug against thehub. Do not fully tighten the lug nutsuntil the wheel has been lowered.
13.Lower the wheel by turning the jackhandle counterclockwise.
14.Remove the jack and fully tighten thelug nuts in the order shown. SeeTechnical Specifications (page286).
Stowing the flat tire
You can stow the full-size road wheel inthe spare tire compartment.
1.Lift the carpeted wheel cover at anangle to access the spare tirecompartment.
2.Place the wheel in the spare tire wellwith the valve stem facing down. Usethe mini-spare bolt to secure the wheelthrough one of the lug holes.
3.Place the jack, tools and foam blockback into the spare tire compartment.
4.Replace the carpeted wheel cover.
285Fusion (CC7) , enUSAWheels and TiresE142553 12345E75442 E146026
Page 289 of 458

TECHNICAL SPECIFICATIONS
Wheel Lug Nut Torque Specifications
WARNING
When a wheel is installed, always remove any corrosion, dirt or foreign materialspresent on the mounting surfaces of the wheel or the surface of the wheel hub,brake drum or brake disc that contacts the wheel. Make sure that any fastenersthat attach the rotor to the hub are secured so they do not interfere with the mountingsurfaces of the wheel. Installing wheels without correct metal-to-metal contact at thewheel mounting surfaces can cause the wheel nuts to loosen and the wheel to come offwhile your vehicle is in motion, resulting in loss of control.
Ib-ft (Nm)*Bolt size
100 (135)M12 x 1.5
*Torque specifications are for nut and bolt threads free of dirt and rust. Use only Fordrecommended replacement fasteners.
Retighten the lug nuts to the specified torque within 100 miles (160 kilometers) after anywheel disturbance (such as tire rotation, changing a flat tire, wheel removal).
Wheel pilot boreA
Inspect the wheel pilot bore andmounting surface prior to installation.Remove any visible corrosion or looseparticles.
286Fusion (CC7) , enUSAWheels and TiresE145950
Page 291 of 458

MOTORCRAFT PARTS
2.5L Engine2.0L EcoBoostEngine1.6L EcoBoostEngine1.5L EcoBoostEngineComponent
FA-1912Air filter element1
FL-910SOil filter2
BXT-90T5-500
BXT-90T5-5903
BXT-90T5-500BXT-90T5-500
BatteryBXT-90T5-
5903BXT-90T5-
5903
BXT-90T5-5903BAGM-48H6-
7604BAGM-48H6-
7604
SP-530SP-537SP-532SP-539Spark plugs5
FP-71Cabin air filter
WW-2601 (driver side)Windshield wiperbladeWW-2700 (passenger side)
1 Failure to use the correct air filter element may result in severe engine damage. Thecustomer warranty may be void for any damage to the engine if the correct air filterelement is not used.2Only use the specified replacement oil filter. The use of a non-specified oil filter can resultin engine damage.3This part is designed for vehicles with Intelligent Access.4This part is designed for vehicles with Automatic-Start-Stop.5For spark plug replacement, see an authorized dealer. Replace the spark plugs at theappropriate intervals. See Scheduled Maintenance (page 428).
Note: Replace the spark plugs with ones that meet Ford material and design specificationsfor your vehicle, such as Motorcraft or equivalent replacement parts. Your warranty maybe void for any damage to the engine if such spark plugs are not used.
288Fusion (CC7) , enUSACapacities and Specifications
Page 310 of 458

Possible actionConditionRadio display
Contact SIRIUS at 1-888-539-7474 to resolvesubscription issues.
Your satellite service is nolonger available.Call SIRIUS 1-888-539-7474
Use the channel guide toturn off the Lock or Skipfunction on that station.
All the channels in theselected category are eitherskipped or locked.
None found. Check ChannelGuide.
No action required.SIRIUS has updated thechannels available for yourvehicle.
Subscription Updated
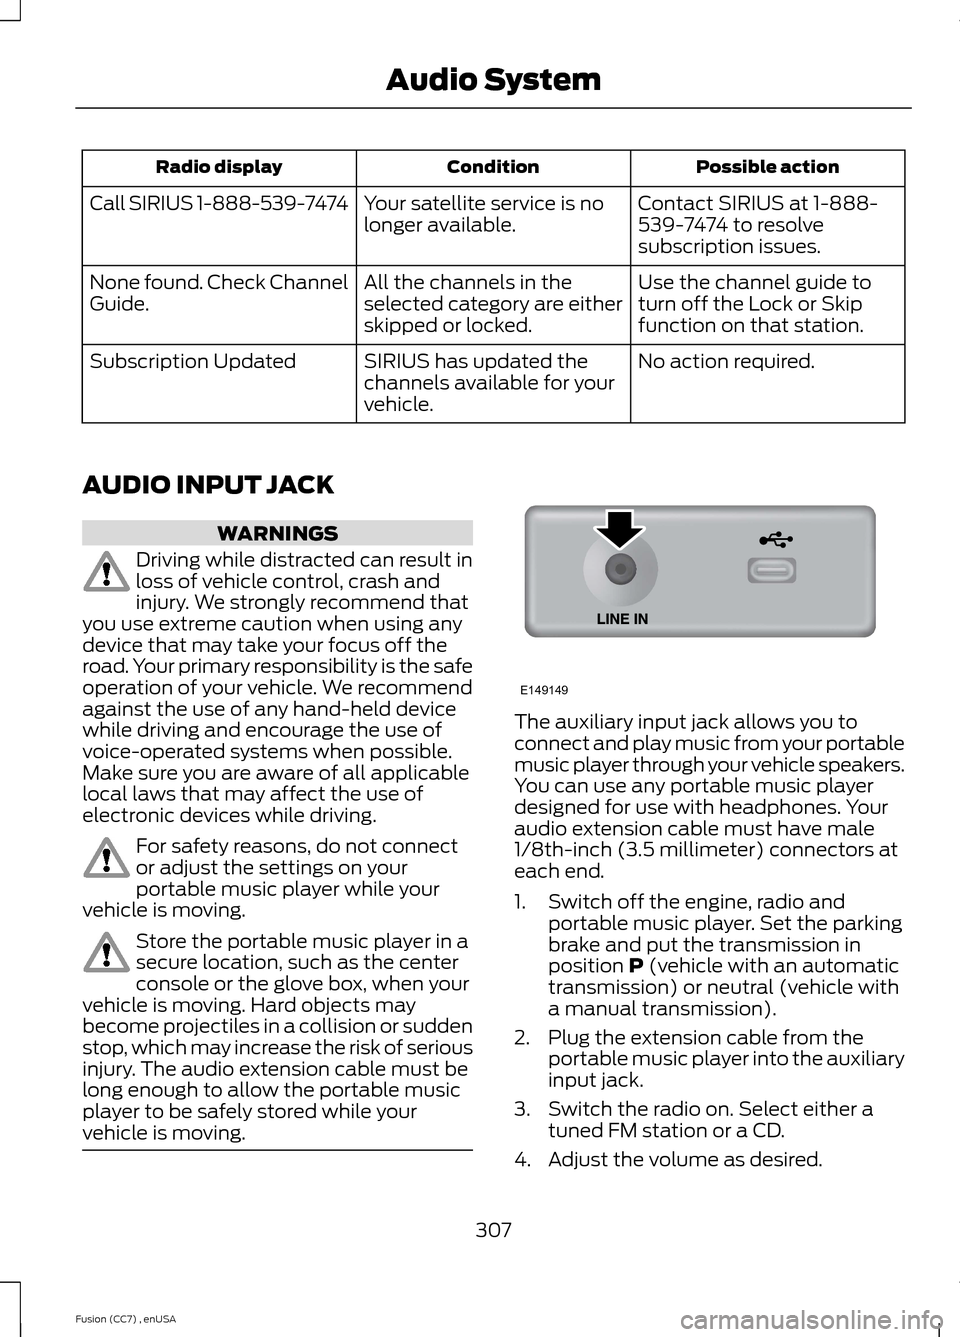
AUDIO INPUT JACK
WARNINGS
Driving while distracted can result inloss of vehicle control, crash andinjury. We strongly recommend thatyou use extreme caution when using anydevice that may take your focus off theroad. Your primary responsibility is the safeoperation of your vehicle. We recommendagainst the use of any hand-held devicewhile driving and encourage the use ofvoice-operated systems when possible.Make sure you are aware of all applicablelocal laws that may affect the use ofelectronic devices while driving.
For safety reasons, do not connector adjust the settings on yourportable music player while yourvehicle is moving.
Store the portable music player in asecure location, such as the centerconsole or the glove box, when yourvehicle is moving. Hard objects maybecome projectiles in a collision or suddenstop, which may increase the risk of seriousinjury. The audio extension cable must belong enough to allow the portable musicplayer to be safely stored while yourvehicle is moving.
The auxiliary input jack allows you toconnect and play music from your portablemusic player through your vehicle speakers.You can use any portable music playerdesigned for use with headphones. Youraudio extension cable must have male1/8th-inch (3.5 millimeter) connectors ateach end.
1.Switch off the engine, radio andportable music player. Set the parkingbrake and put the transmission inposition P (vehicle with an automatictransmission) or neutral (vehicle witha manual transmission).
2.Plug the extension cable from theportable music player into the auxiliaryinput jack.
3.Switch the radio on. Select either atuned FM station or a CD.
4.Adjust the volume as desired.
307Fusion (CC7) , enUSAAudio SystemE149149