Page 177 of 396
Circuits protected
Fuse rating
Fuse
Reversing lamps
10 A
6
Instrument panel, information and entertainment display
7.5 A
7
Moonroof
7.5 A
8
Keyless entry, keyless starting
20 A
9
Audio unit, SYNC
15 A
10
Windshield wipers
20 A
11
Climate control
7.5 A
12
Rear window wiper
15 A
13
Keyless entry, keyless starting
20 A
14
Wiper switch
15 A
15
Electric exterior mirrors, power windows
5 A
16
Heated seats
15 A
17
Brake lamp
10 A
18
Instrument cluster
7.5 A
19
Airbags
10 A
20
Electronic power assisted steering, instrument cluster,
ignition, wipers, passive anti-theft system
7.5 A
21
Transmission control unit, powertrain control module,
anti-lock braking system, electronic stability program
7.5 A
22
Transmission control unit
7.5 A
23
Audio unit
7.5 A
24
Electric exterior mirrors
7.5 A
25
Locking and unlocking
7.5 A
26
Not used
-
27
Not used
-
28
Not used
-
29
Not used
-
30
Power windows
30 A
31
174
Fiesta (CCT) Fuses
Page 180 of 396

GENERAL INFORMATION
Have your vehicle serviced regularly to help
maintain its roadworthiness and resale
value. There is a large network of Ford
authorized dealers that are there to help
you with their professional servicing
expertise. We believe that their specially
trained technicians are best qualified to
service your vehicle properly and expertly.
They are supported by a wide range of
highly specialized tools developed
specifically for servicing your vehicle.
To help you service your vehicle, we
provide scheduled maintenance
information which makes tracking routine
service easy. See Scheduled
Maintenance (page 368).
If your vehicle requires professional service,
your authorized dealer can provide the
necessary parts and service. Check your
warranty information to find out which
parts and services are covered.
Use only recommended fuels, lubricants,
fluids and service parts conforming to
specifications. Motorcraft® parts are
designed and built to provide the best
performance in your vehicle.
Precautions
• Do not work on a hot engine.
• Make sure that nothing gets caught in
moving parts.
• Do not work on a vehicle with the
engine running in an enclosed space,
unless you are sure you have enough
ventilation.
• Keep all open flames and other burning
material (such as cigarettes) away
from the battery and all fuel related
parts. Working with the Engine Off
1. Set the parking brake and shift to
P
(Park).
2. Turn off the engine and remove the key
(if equipped).
3. Block the wheels.
Working with the Engine On WARNING
To reduce the risk of vehicle damage
and/or personal burn injuries, do not
start your engine with the air cleaner
removed and do not remove it while the
engine is running. 1. Set the parking brake and shift to
P
(Park).
2. Block the wheels
OPENING AND CLOSING THE
HOOD
Opening the Hood 1. Pull the hood release handle.
177
Fiesta (CCT) MaintenanceE102165
Page 189 of 396

FUEL FILTER
Your vehicle is equipped with a lifetime
fuel filter that is integrated with the fuel
tank. Regular maintenance or replacement
is not needed.
WASHER FLUID CHECK
Note:
The reservoir supplies the front and
rear washer systems.
When adding fluid, use a mixture of washer
fluid and water to help prevent freezing in
cold weather and improve the cleaning
capability. We recommend that you use
only high quality washer fluid.
For information on fluid dilution, refer to
the product instructions.
CHANGING THE 12V BATTERY WARNING
For vehicles with start-stop the
battery requirement is different. You
must replace the battery with one of
exactly the same specification. Note:
Where applicable you must
reprogram the audio system using the
keycode.
The battery is located in the engine
compartment. See Maintenance (page
177). CHECKING THE WIPER
BLADES Run the tip of your fingers over the edge of
the blade to check for roughness.
Clean the wiper blades with washer fluid
or water applied with a soft sponge or
cloth.
CHANGING THE WIPER
BLADES
Windshield Wiper Blades
Changing the Windshield Wiper Blades
1. Press the locking button.
2. Remove the wiper blade.
3. Install in the reverse order.
Note:
Make sure that the wiper blade locks
into place.
Rear Window Wiper Blade
1. Lift the wiper arm.
186
Fiesta (CCT) MaintenanceE142463 E72899
1
2
Page 190 of 396

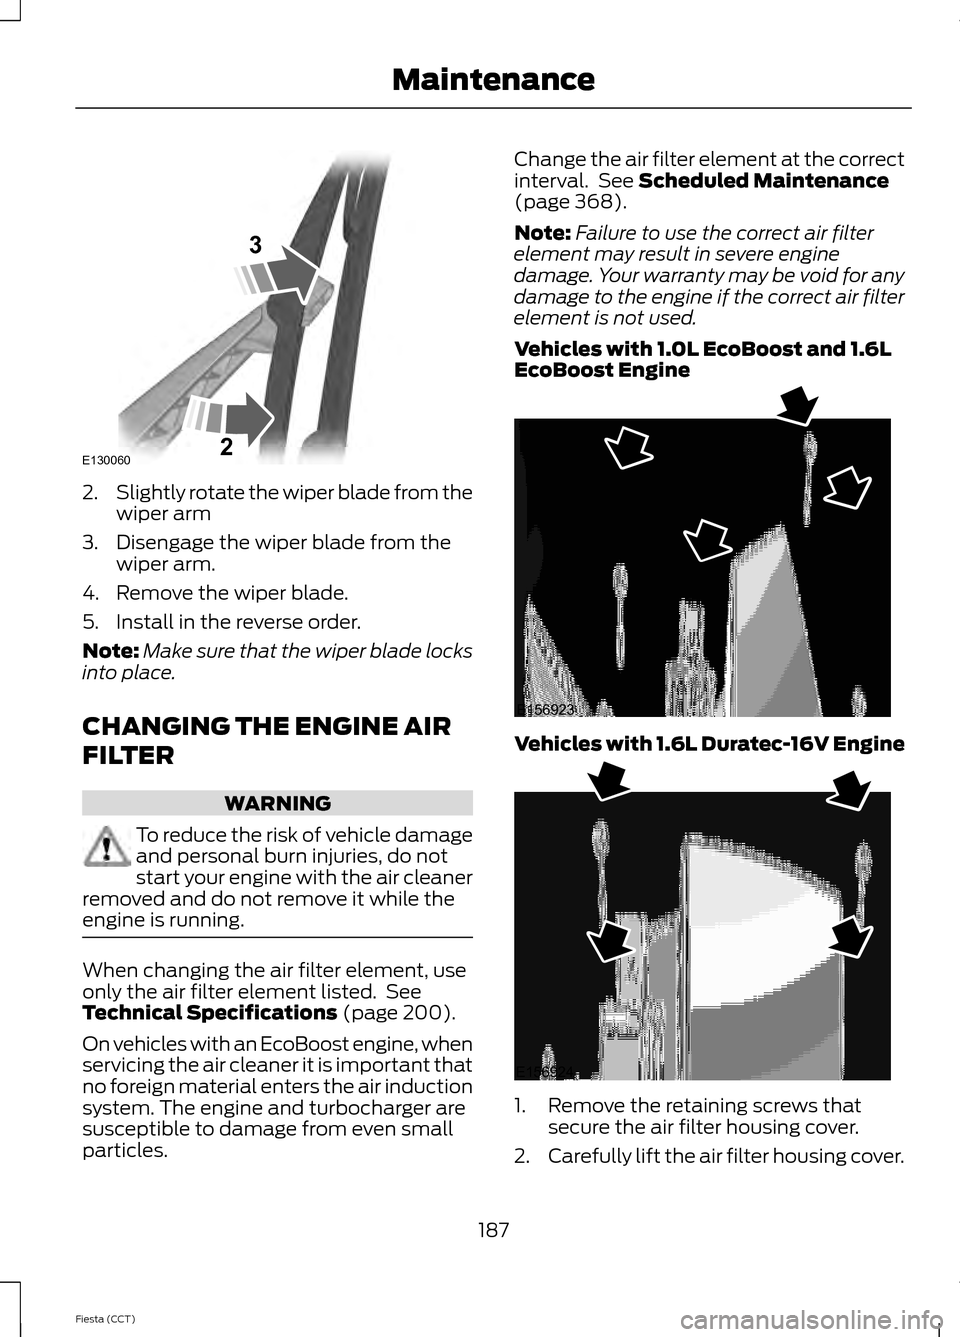
2.
Slightly rotate the wiper blade from the
wiper arm
3. Disengage the wiper blade from the wiper arm.
4. Remove the wiper blade.
5. Install in the reverse order.
Note: Make sure that the wiper blade locks
into place.
CHANGING THE ENGINE AIR
FILTER WARNING
To reduce the risk of vehicle damage
and personal burn injuries, do not
start your engine with the air cleaner
removed and do not remove it while the
engine is running. When changing the air filter element, use
only the air filter element listed. See
Technical Specifications (page 200).
On vehicles with an EcoBoost engine, when
servicing the air cleaner it is important that
no foreign material enters the air induction
system. The engine and turbocharger are
susceptible to damage from even small
particles. Change the air filter element at the correct
interval. See
Scheduled Maintenance
(page 368).
Note: Failure to use the correct air filter
element may result in severe engine
damage. Your warranty may be void for any
damage to the engine if the correct air filter
element is not used.
Vehicles with 1.0L EcoBoost and 1.6L
EcoBoost Engine Vehicles with 1.6L Duratec-16V Engine
1. Remove the retaining screws that
secure the air filter housing cover.
2. Carefully lift the air filter housing cover.
187
Fiesta (CCT) MaintenanceE130060
3
2 E156923 E156924
Page 191 of 396

3.
Remove the air filter element from the
air filter housing.
4. Wipe any dirt or debris from the air filter
housing and cover to make sure no dirt
gets in the engine and to make sure you
have a good seal.
5. Install a new air filter element. Be careful not to crimp the filter element
edges between the air filter housing
and cover. This could cause filter
damage and allow unfiltered air to
enter the engine if not correctly seated.
6. Install the air filter housing cover.
7. Install the retaining screws to secure the air filter housing cover to the air
filter housing.
ADJUSTING THE HEADLAMPS
Vertical Aim Adjustment
If your vehicle has been involved in an
accident, have the alignment of your
headlamps checked by an authorized
dealer.
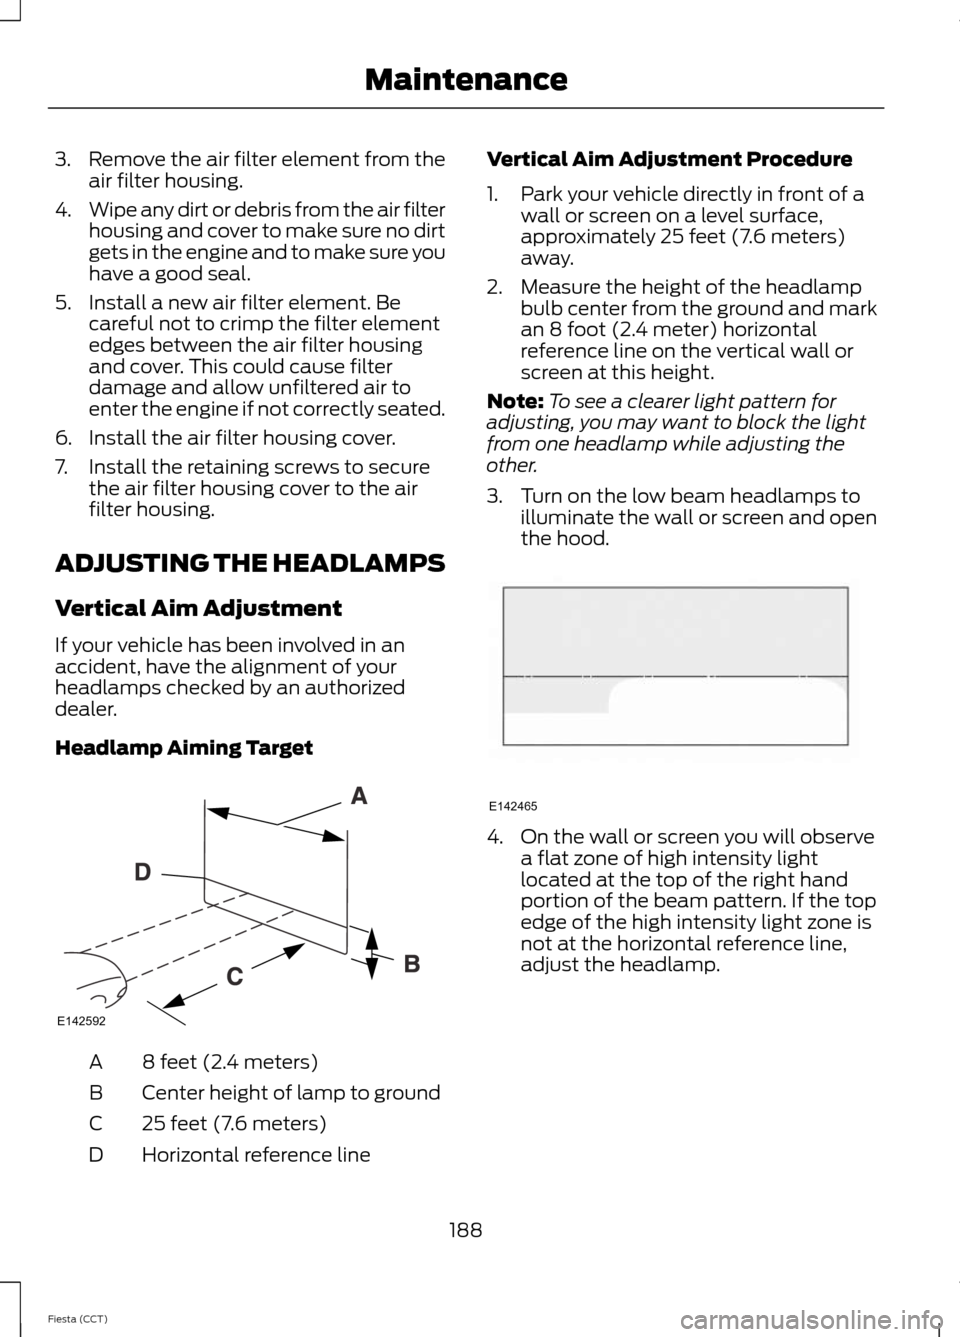
Headlamp Aiming Target 8 feet (2.4 meters)
A
Center height of lamp to ground
B
25 feet (7.6 meters)
C
Horizontal reference line
D Vertical Aim Adjustment Procedure
1. Park your vehicle directly in front of a
wall or screen on a level surface,
approximately 25 feet (7.6 meters)
away.
2. Measure the height of the headlamp bulb center from the ground and mark
an 8 foot (2.4 meter) horizontal
reference line on the vertical wall or
screen at this height.
Note: To see a clearer light pattern for
adjusting, you may want to block the light
from one headlamp while adjusting the
other.
3. Turn on the low beam headlamps to illuminate the wall or screen and open
the hood. 4. On the wall or screen you will observe
a flat zone of high intensity light
located at the top of the right hand
portion of the beam pattern. If the top
edge of the high intensity light zone is
not at the horizontal reference line,
adjust the headlamp.
188
Fiesta (CCT) MaintenanceE142592 E142465
Page 192 of 396
5. Locate the vertical adjuster on each
headlamp. Using a Phillips #2
screwdriver, turn the adjuster either
clockwise or counterclockwise in order
to adjust the vertical aim of the
headlamp. The horizontal edge of the
brighter light should touch the
horizontal reference line.
6. Close the hood and turn the lamps off.
Horizontal Aim Adjustment
Horizontal aim is not required for this
vehicle and is not adjustable.
REMOVING A HEADLAMP
1. Open the hood. See Opening and
Closing the Hood (page 177). 2. Remove the screws.
3. Disconnect the electrical connector.
4. Remove the headlamp.
Note:
When fitting the headlamp, make
sure that you reconnect the electrical
connector correctly.
Note: When fitting the headlamp, make
sure that you fully engage the headlamp in
the retaining clips.
189
Fiesta (CCT) MaintenanceE156848 E146878
2 E102590
3
4
Page 194 of 396
2. Remove the cover.
3. Turn the bulb counterclockwise and
remove it.
Note: Do not touch the glass of the bulb.
Direction Indicator
1. Remove the headlamp. See Removing a Headlamp (page 189). 2.
Turn the bulb holder counterclockwise
and remove it.
3. Gently press the bulb into the bulb holder, turn it counterclockwise and
remove it. Side Direction Indicator
1. Press the side of the cover to release
the clips.
2. Remove the cover. 3. Remove the bulb and bulb holder.
Remove the bulb.
191
Fiesta (CCT) MaintenanceE146804
2
3 E146805
3 1
2
E112777 3
E112778
Page 195 of 396
Front Fog Lamps
1. Remove the retaining clips to gain
access to the lamp assembly. Note:
You cannot separate the fog lamp
bulb from the bulb holder.
2. Using a suitable implement, remove the cover.
3. Remove the screws.
4. Remove the lamp. 5. Disconnect the electrical connector.
6.
Turn the bulb holder counterclockwise
and remove it.
Rear Lamps
Brake, Tail and Direction Indicator
Lamps
1. Remove the trim and disconnect the electrical connector.
2. Loosen the wing nut and carefully pull
out the rear lamp.
192
Fiesta (CCT) MaintenanceE161665
1 234
E161667 5
E161670
6