2014 FORD F250 SUPER DUTY instrument panel
[x] Cancel search: instrument panelPage 7 of 460

Fuse Specification Chart............................215
Maintenance
General Information....................................223
Opening and Closing the Hood..............223
Under Hood Overview - 6.2L...................224
Under Hood Overview - 6.8L...................225
Engine Oil Dipstick......................................226
Engine Oil Check..........................................226
Engine Coolant Check................................227
Automatic Transmission FluidCheck.............................................................231
Transfer Case Fluid Check........................234
Brake Fluid Check........................................234
Power Steering Fluid Check.....................234
Washer Fluid Check....................................235
Fuel Filter........................................................235
Changing the 12V Battery.........................235
Checking the Wiper Blades......................237
Changing the Wiper Blades......................237
Adjusting the Headlamps.........................238
Removing a Headlamp..............................239
Changing a Bulb............................................241
Bulb Specification Chart...........................243
Changing the Engine Air Filter................245
Vehicle Care
General Information....................................247
Cleaning Products.......................................247
Cleaning the Exterior..................................247
Waxing.............................................................248
Cleaning the Engine...................................248
Cleaning the Exhaust.................................249
Cleaning the Windows and WiperBlades..........................................................249
Cleaning the Interior...................................250
Cleaning the Instrument Panel andInstrument Cluster Lens.......................250
Cleaning Leather Seats..............................251
Repairing Minor Paint Damage................251
Cleaning the Alloy Wheels........................251
Vehicle Storage.............................................252
Wheels and Tires
General Information...................................254
Tire Care..........................................................256
Using Snow Chains......................................273
Tire Pressure Monitoring System...........273
Changing a Road Wheel............................279
Technical Specifications..........................290
Capacities and Specific-ations
Engine Specifications................................292
Motorcraft Parts...........................................293
Vehicle Identification Number................294
Vehicle Certification Label.......................294
Transmission Code Designation............295
Technical Specifications..........................296
Audio System
General Information....................................301
Audio unit - Vehicles With: AM/FM......302
Audio unit - Vehicles With: AM/FM/CD/SYNC............................................................303
Audio unit - Vehicles With: Sony AM/FM/CD.................................................................305
Digital Radio..................................................306
Satellite Radio..............................................309
Audio Input Jack.............................................311
USB Port...........................................................312
Media Hub.......................................................312
SYNC™
General Information....................................313
Using Voice Recognition............................315
Using SYNC™ With Your Phone.............317
SYNC™ Applications and Services......328
Using SYNC™ With Your MediaPlayer...........................................................335
4
Super Duty (TFA)
Table of Contents
Page 51 of 460
Sounding a Panic Alarm
Note:The panic alarm will only operatewhen the ignition is off.
Press the button to activate thealarm. Press the button again orturn the ignition on to deactivateit.
Remote Start (If Equipped)
WARNING
To avoid exhaust fumes, do not useremote start if your vehicle is parkedindoors or areas that are not wellventilated.
Note:Do not use remote start if your vehicleis low on fuel.
The remote start button is on thetransmitter.
This feature allows you to start yourvehicle from outside the vehicle. Thetransmitter has an extended operatingrange.
Vehicles with automatic climate controlcan be set to operate when you remotestart the vehicle. See Climate Control(page 103). A manual climate controlsystem will run at the setting it was set towhen you switch the vehicle off.
Many states and provinces haverestrictions for the use of remote start.Check your local and state or provinciallaws for specific requirements regardingremote start systems.
The remote start system will not work if:
•the ignition is on
•the alarm system is triggered
•you disable the feature
•the hood is open
•the transmission is not in P
•the vehicle battery voltage is too low
•the service engine soon indicator is on.
Remote Starting the Vehicle
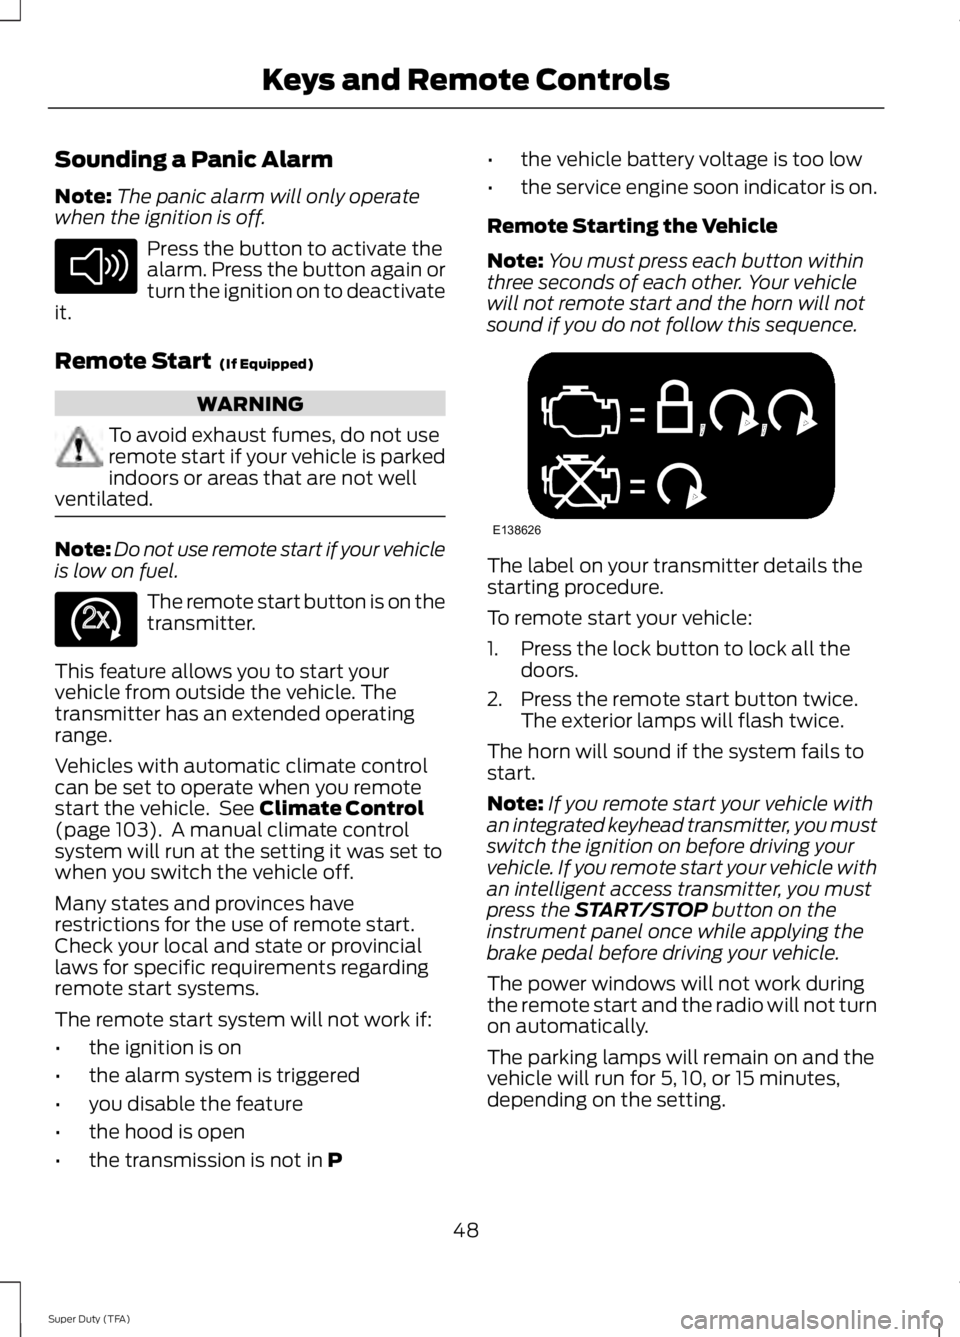
Note:You must press each button withinthree seconds of each other. Your vehiclewill not remote start and the horn will notsound if you do not follow this sequence.
The label on your transmitter details thestarting procedure.
To remote start your vehicle:
1. Press the lock button to lock all thedoors.
2. Press the remote start button twice.The exterior lamps will flash twice.
The horn will sound if the system fails tostart.
Note:If you remote start your vehicle withan integrated keyhead transmitter, you mustswitch the ignition on before driving yourvehicle. If you remote start your vehicle withan intelligent access transmitter, you mustpress the START/STOP button on theinstrument panel once while applying thebrake pedal before driving your vehicle.
The power windows will not work duringthe remote start and the radio will not turnon automatically.
The parking lamps will remain on and thevehicle will run for 5, 10, or 15 minutes,depending on the setting.
48
Super Duty (TFA)
Keys and Remote ControlsE138624 E138625 E138626
Page 68 of 460
LIGHTING CONTROL
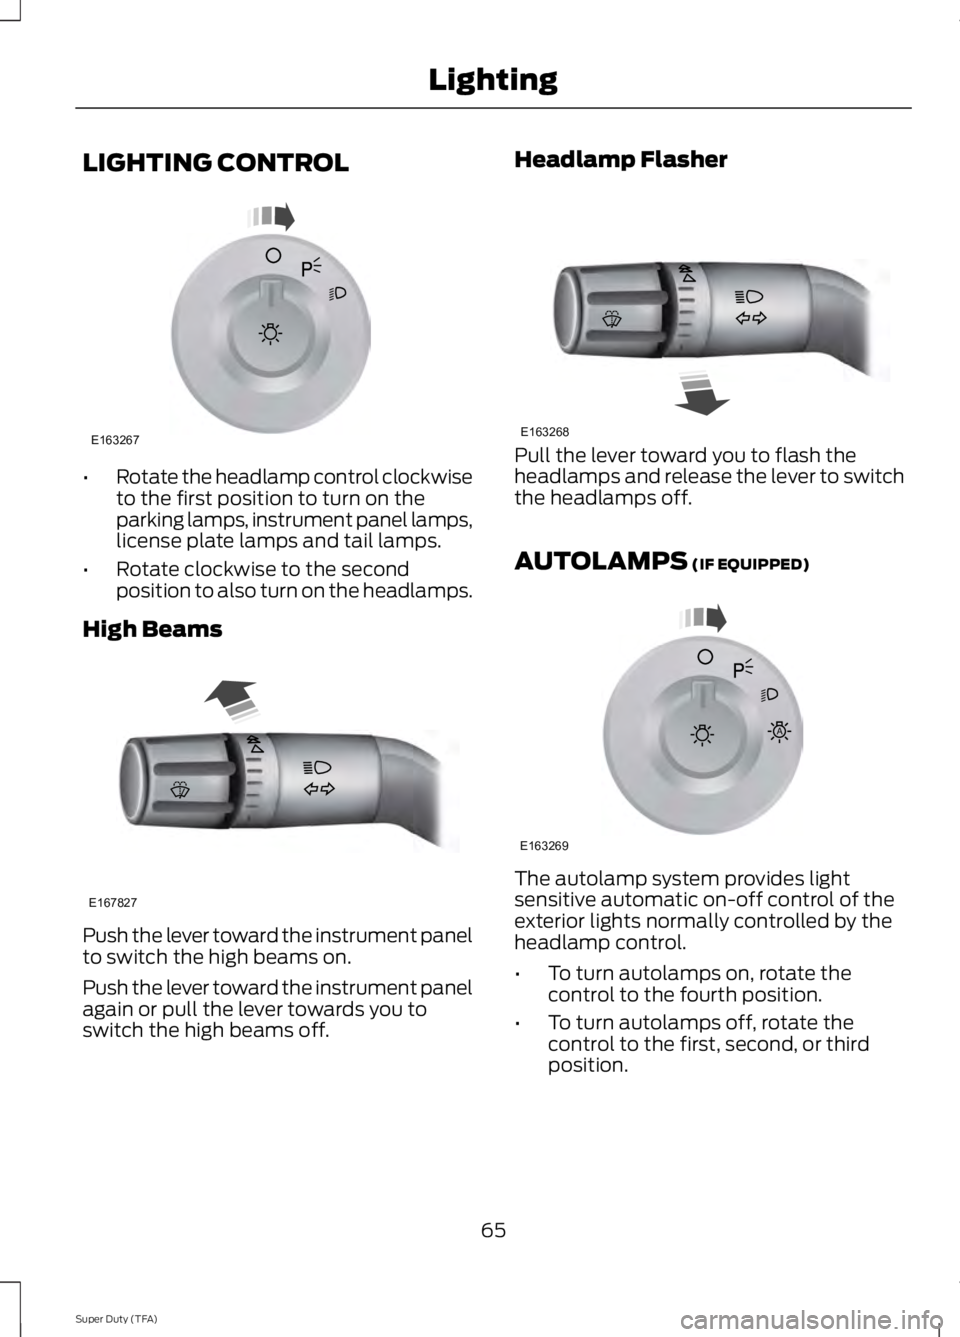
•Rotate the headlamp control clockwiseto the first position to turn on theparking lamps, instrument panel lamps,license plate lamps and tail lamps.
•Rotate clockwise to the secondposition to also turn on the headlamps.
High Beams
Push the lever toward the instrument panelto switch the high beams on.
Push the lever toward the instrument panelagain or pull the lever towards you toswitch the high beams off.
Headlamp Flasher
Pull the lever toward you to flash theheadlamps and release the lever to switchthe headlamps off.
AUTOLAMPS (IF EQUIPPED)
The autolamp system provides lightsensitive automatic on-off control of theexterior lights normally controlled by theheadlamp control.
•To turn autolamps on, rotate thecontrol to the fourth position.
•To turn autolamps off, rotate thecontrol to the first, second, or thirdposition.
65
Super Duty (TFA)
LightingE163267 E167827 E163268 E163269
A
Page 69 of 460
Note:If the vehicle is equipped withautolamps, it will have the headlamps onwith windshield wipers feature. If thewindshield wipers are turned on, the exteriorlamps will turn on with the headlampcontrol in the autolamp position.
The autolamp system also keeps the lightson for a predetermined amount of time afterthe ignition switch is turned to off. You canchange the amount of time the lamps stayon by using the programming procedure thatfollows:
Autolamps - Programmable ExitDelay
Programmable exit delay allows the lengthof the autolamp exit delay to be changed.
To program the auto lamp exit time delay:
1.Start with the ignition in the off positionand the headlamp control in theautolamp position.
2. Turn the headlamp control to off.
3.Turn the ignition switch to on and thenback to off.
4. Turn the headlamp control to theautolamp position. The headlamps willturn on.
5. Wait the desired amount of time forthe exit delay you want (up to threeminutes), then turn the headlamps off.
INSTRUMENT LIGHTING
DIMMER
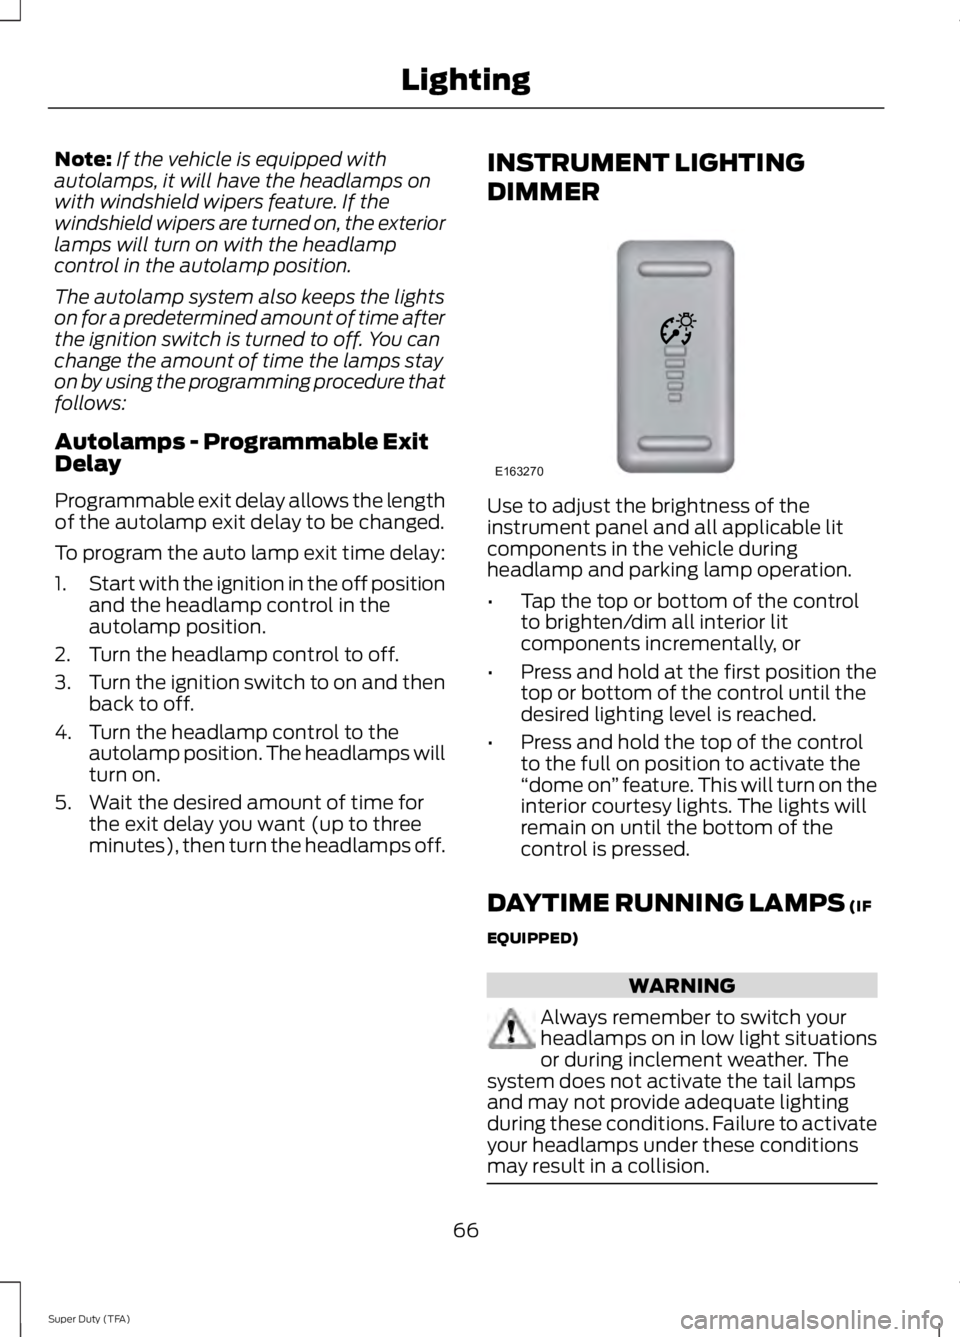
Use to adjust the brightness of theinstrument panel and all applicable litcomponents in the vehicle duringheadlamp and parking lamp operation.
•Tap the top or bottom of the controlto brighten/dim all interior litcomponents incrementally, or
•Press and hold at the first position thetop or bottom of the control until thedesired lighting level is reached.
•Press and hold the top of the controlto the full on position to activate the“dome on” feature. This will turn on theinterior courtesy lights. The lights willremain on until the bottom of thecontrol is pressed.
DAYTIME RUNNING LAMPS (IF
EQUIPPED)
WARNING
Always remember to switch yourheadlamps on in low light situationsor during inclement weather. Thesystem does not activate the tail lampsand may not provide adequate lightingduring these conditions. Failure to activateyour headlamps under these conditionsmay result in a collision.
66
Super Duty (TFA)
LightingE163270
Page 71 of 460
Front Map Lamps (If equipped)
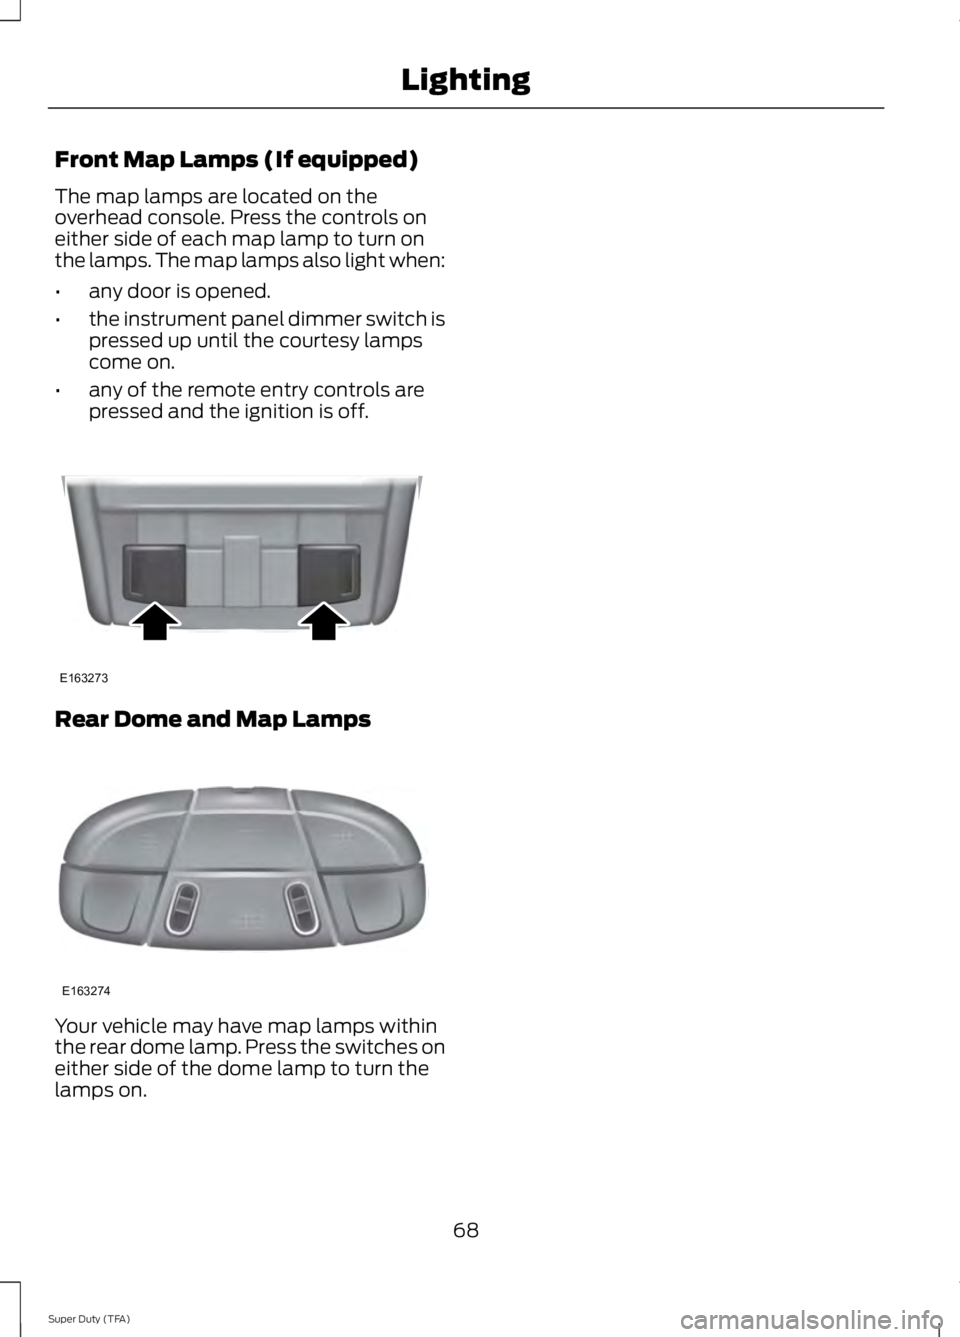
The map lamps are located on theoverhead console. Press the controls oneither side of each map lamp to turn onthe lamps. The map lamps also light when:
•any door is opened.
•the instrument panel dimmer switch ispressed up until the courtesy lampscome on.
•any of the remote entry controls arepressed and the ignition is off.
Rear Dome and Map Lamps
Your vehicle may have map lamps withinthe rear dome lamp. Press the switches oneither side of the dome lamp to turn thelamps on.
68
Super Duty (TFA)
LightingE163273 E163274
Page 106 of 460

MANUAL CLIMATE CONTROL
Defrost: Distributes air through the windshield defroster vents and demistervents. You can also use this setting to defog and clear the windshield of a thincovering of ice.
A
Rear defrost and heated mirrors: Turns the heated mirrors off and on as wellas the heated rear window, if your vehicle has that feature. See HeatedWindows and Mirrors (page 106).
B
Air distribution control: Press to set the air distribution to a position.Floorand defrost distributes air through the windshield defroster vents, demistervents and floor vents.Panel distributes air through the instrument panel vents.Panel and floor distributes air through the instrument panel vents, floor vents,and demister vents.Floor distributes air through the floor vents.
C
A/C: Press to turn air conditioning off and on. Air conditioning cools the vehicleusing outside air. To improve air conditioning when starting your vehicle, drivewith the windows slightly open for two to three minutes.
D
Recirculated air: Press to switch between outside air and recirculated air.When the air in the passenger compartment is recirculating, the LED on thebutton illuminates. Using recirculated air can reduce the time needed to coolthe interior and reduce unwanted odors from entering your vehicle.
E
MAX A/C: Distributes recirculated air through the instrument panel vents tocool the vehicle. This position is more economical and efficient than normalA/C.
F
Temperature control: Controls the temperature of the air circulated in yourvehicle. Turn to select the desired temperature.G
103
Super Duty (TFA)
Climate ControlE163163
ABDCE
F
G
I
H
Page 107 of 460

Fan speed control: Controls the volume of air circulated in your vehicle. Turnto select the desired fan speed.H
Power: Press to switch the system off and on. When the system is off, outsideair cannot enter the vehicle and the windshield may fog up.I
AUTOMATIC CLIMATE CONTROL
Power and Driver temperature control: Press to turn the climate controlsystem off and on. When the system is off, outside air cannot enter the vehicle.Turn to increase or decrease the air temperature for the driver side of the vehicle.This control also adjusts the passenger side temperature when dual zoneoperation is disengaged.
A
Rear defrost: Turns the heated windows and mirrors off and on. See HeatedWindows and Mirrors (page 106).B
Defrost: Distributes air through the windshield defroster vents and demistervents. You can also use this setting to defog and clear the windshield of a thincovering of ice.
C
Air distribution control: Press to set the air distribution to a position.Floorand defrost distributes air through the windshield defroster vents, demistervents and floor vents.Panel distributes air through the instrument panel vents.Panel and floor distributes air through the instrument panel vents, floor vents,and demister vents.Floor distributes air through the floor vents.
D
104
Super Duty (TFA)
Climate ControlE163164
AHCEF
JIK
DBG
Page 108 of 460

A/C: Press to turn air conditioning off and on. Air conditioning cools the vehicleusing outside air. To improve air conditioning when starting your vehicle, drivewith the windows slightly open for two to three minutes. Use air conditioningwith recirculated air to improve cooling performance and efficiency.Note: Airconditioning turns on automatically in MAX A/C, defrost and floor and defrostmodes.
E
MAX A/C: Distributes recirculated air through the instrument panel vents tocool the vehicle. This position is more economical and efficient than normal airconditioning. When in MAX A/C mode, pressing MAX A/C returns you to yourprevious settings.
F
Recirculated air: Press to switch between outside air and recirculated air.When the air currently in the passenger compartment is recirculating, the LEDon the button illuminates. Using recirculated air can reduce the time needed tocool the interior and reduce unwanted odors from entering your vehicle. Evenwhen you do not select this button, air may still recirculate in some instancesin order to reduce vehicle warm-up time in cold conditions or to cool down time
G
in hot conditions.Note: Recirculated air engages automatically when you selectMAX A/C, or turn on manually in any airflow mode except defrost.Note: Youmay notice changes in sound between recirculated mode and other airflowmodes.Note: For better cooling in hot conditions, recirculated air automaticallyengages when the air distribution control is in panel or panel and floor modesand the air conditioning is on. You can switch to fresh air by pressing therecirculated air button again.
PASS TEMP: Press to switch between single and dual zone. Turn to increaseor decrease the air temperature on the passenger side of the vehicle.H
Fan speed control +: Press to increase the volume of air circulated in yourvehicle.I
AUTO: Press to turn on fully automatic operation. Select the desiredtemperature using the temperature control. The system automaticallydetermines fan speed, air distribution, A/C operation, and outside or recirculatedair, to heat or cool the vehicle to maintain the selected temperature.
J
Fan speed control -: Press to decrease the volume of air circulated in yourvehicle.K
HINTS ON CONTROLLING THE
INTERIOR CLIMATE
Note:To reduce fogging of the windshieldduring humid weather, adjust the airdistribution control to the windshield airvents position. Increase the temperatureand fan speed to improve clearing, ifrequired.
Note:To reduce humidity build-up insideyour vehicle, do not drive with the systemswitched off or with recirculated air alwaysswitched on.
Note:Do not place objects under the frontseats as this may interfere with the airflowto the rear seats.
Note:Remove any snow, ice or leaves fromthe air intake area at the base of thewindshield.
105
Super Duty (TFA)
Climate Control