2014 FORD F SERIES MOTORHOME AND COMMERCIAL CHASSIS warning light
[x] Cancel search: warning lightPage 81 of 143
What you Should Know About Fail-Safe Cooling
If you deplete the engine coolant supply,this feature allows you to drive your vehicletemporarily before you incur incrementalcomponent damage. The fail-safe distancedepends on ambient temperatures, vehicleload and terrain.
How Fail-Safe Cooling Works
If the engine begins to overheat, the enginecoolant temperature gauge will move tothe red (hot) area and:
The coolant temperaturewarning indicator will light.
The service engine soonindicator will light.
If the engine reaches a presetover-temperature condition, the enginewill automatically switch to alternatingcylinder operation. Each disabled cylinderacts as an air pump and cools the engine.
When this occurs, the vehicle will stilloperate. However:
•The engine power will be limited.
•This will disable the air conditioningsystem.
Continued operation will increase theengine temperature and the engine willcompletely shut down, causing steeringand braking effort to increase.
Once the engine temperature cools, theengine can be re-started. Take your vehicleto an authorized dealer as soon as possibleto minimize engine damage.
When Fail-Safe Mode Is Activated
WARNINGS
Fail-safe mode is for use duringemergencies only. Operate thevehicle in fail-safe mode only as longas necessary to bring the vehicle to rest ina safe location and seek immediate repairs.When in fail-safe mode, the vehicle willhave limited power, will not be able tomaintain high-speed operation and maycompletely shut down without warning,potentially losing engine power, powersteering assist and power brake assist,which may increase the possibility of acrash resulting in serious injury.
Never remove the coolant reservoircap while the engine is running or hot.
You have limited engine power when in thefail-safe mode, so drive the vehicle withcaution. The vehicle will not be able tomaintain high-speed operation and theengine will run rough. Remember that theengine is capable of completely shuttingdown automatically to prevent enginedamage, therefore:
1.Pull off the road as soon as safelypossible and switch off the engine.
2.Have your vehicle towed to anauthorized dealer.
3.If this is not possible, wait a shortperiod for the engine to cool.
4.Check the coolant level and replenishif low.
5.Re-start the engine and take yourvehicle to an authorized dealer.
Note:Driving the vehicle without repairingthe engine problem increases the chance ofengine damage. Take your vehicle to anauthorized dealer as soon as possible.
78Motorhome (TY3) , enUSAMaintenance
Page 86 of 143
4.Check the fluid level on the dipstick. Itshould be between the arrows in theFULL range on the side of the dipstickwith the words MAX. HOT at the top.Do not add fluid if the level is withinthis range.
5.If the fluid is low, add fluid in smallamounts, continuously checking thelevel until it reaches the FULL range.Be sure to put the dipstick back in thereservoir.
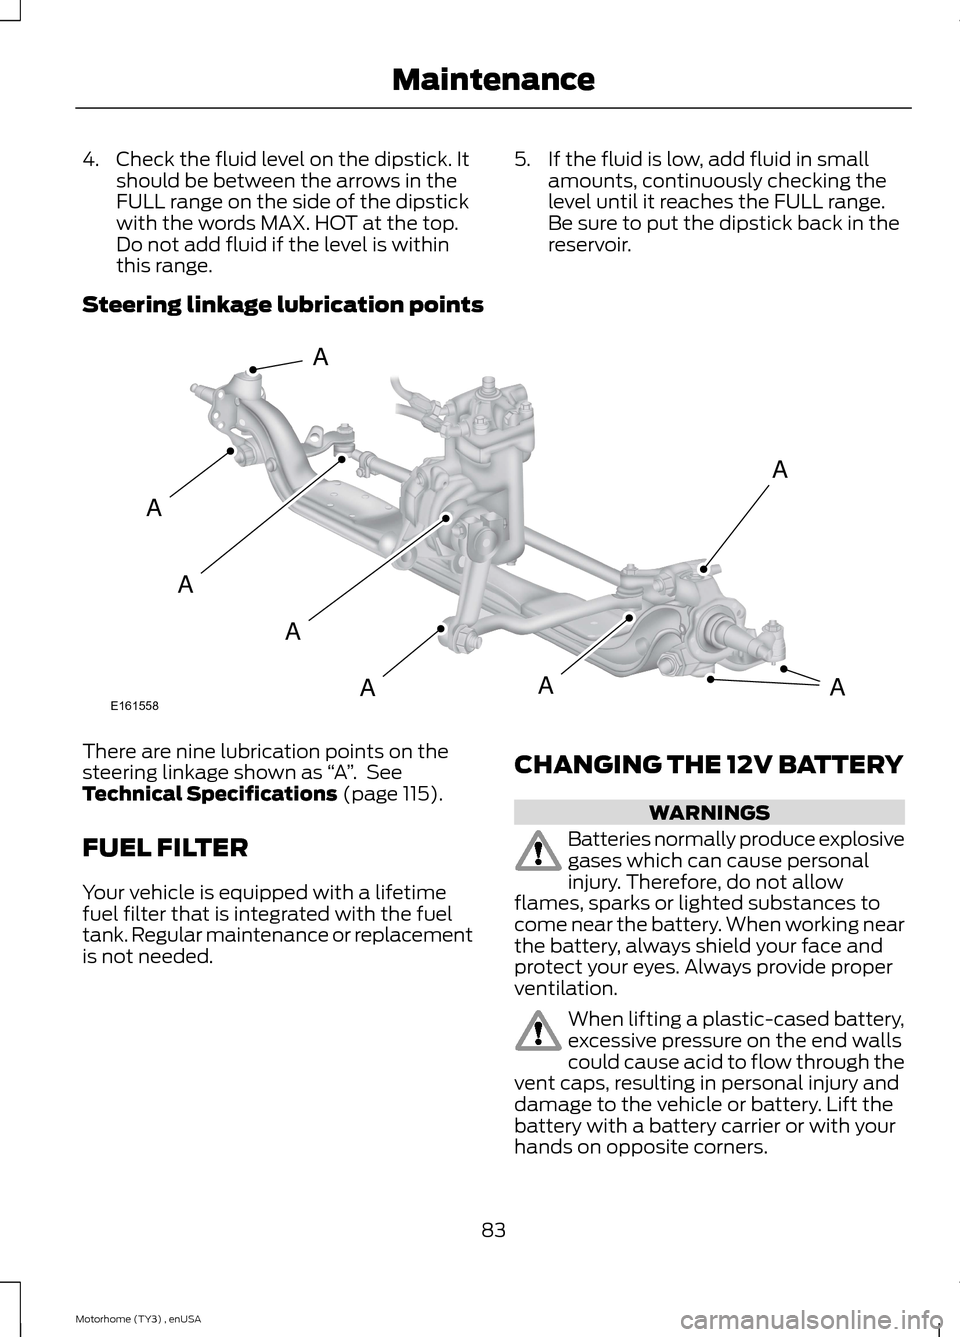
Steering linkage lubrication points
There are nine lubrication points on thesteering linkage shown as “A”. SeeTechnical Specifications (page 115).
FUEL FILTER
Your vehicle is equipped with a lifetimefuel filter that is integrated with the fueltank. Regular maintenance or replacementis not needed.
CHANGING THE 12V BATTERY
WARNINGS
Batteries normally produce explosivegases which can cause personalinjury. Therefore, do not allowflames, sparks or lighted substances tocome near the battery. When working nearthe battery, always shield your face andprotect your eyes. Always provide properventilation.
When lifting a plastic-cased battery,excessive pressure on the end wallscould cause acid to flow through thevent caps, resulting in personal injury anddamage to the vehicle or battery. Lift thebattery with a battery carrier or with yourhands on opposite corners.
83Motorhome (TY3) , enUSAMaintenanceE161558AAAAAAAA
Page 94 of 143
TIRE CARE
Information About UniformTire Quality Grading
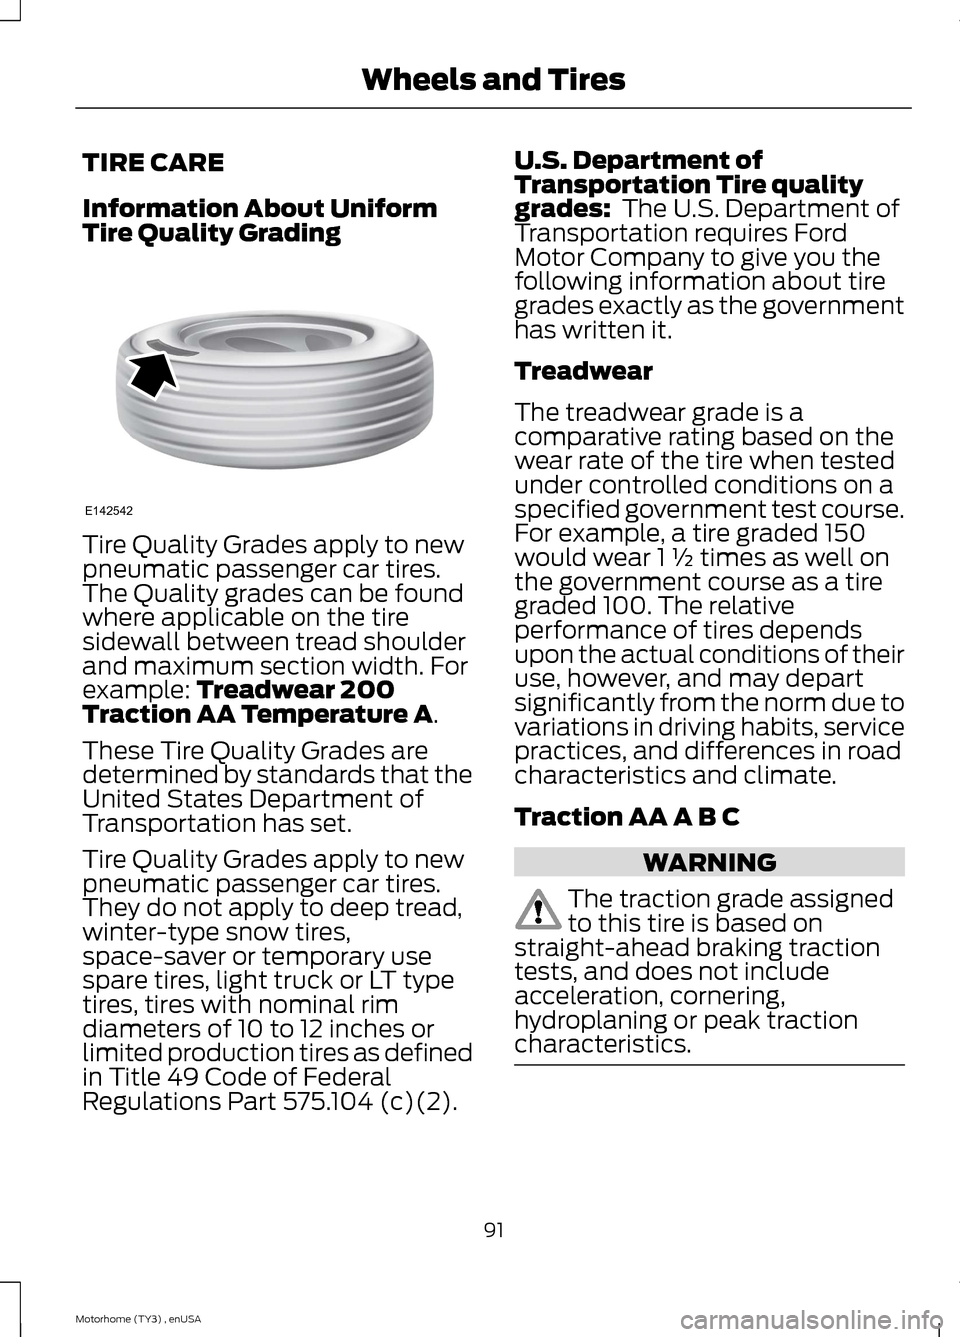
Tire Quality Grades apply to newpneumatic passenger car tires.The Quality grades can be foundwhere applicable on the tiresidewall between tread shoulderand maximum section width. Forexample: Treadwear 200Traction AA Temperature A.
These Tire Quality Grades aredetermined by standards that theUnited States Department ofTransportation has set.
Tire Quality Grades apply to newpneumatic passenger car tires.They do not apply to deep tread,winter-type snow tires,space-saver or temporary usespare tires, light truck or LT typetires, tires with nominal rimdiameters of 10 to 12 inches orlimited production tires as definedin Title 49 Code of FederalRegulations Part 575.104 (c)(2).
U.S. Department ofTransportation Tire qualitygrades: The U.S. Department ofTransportation requires FordMotor Company to give you thefollowing information about tiregrades exactly as the governmenthas written it.
Treadwear
The treadwear grade is acomparative rating based on thewear rate of the tire when testedunder controlled conditions on aspecified government test course.For example, a tire graded 150would wear 1 ½ times as well onthe government course as a tiregraded 100. The relativeperformance of tires dependsupon the actual conditions of their
use, however, and may departsignificantly from the norm due tovariations in driving habits, servicepractices, and differences in roadcharacteristics and climate.
Traction AA A B C
WARNING
The traction grade assignedto this tire is based onstraight-ahead braking tractiontests, and does not includeacceleration, cornering,hydroplaning or peak tractioncharacteristics.
91Motorhome (TY3) , enUSAWheels and TiresE142542
Page 99 of 143
*Temperature: The temperaturegrades are A (the highest), B andC, representing the tire'sresistance to the generation ofheat and its ability to dissipateheat when tested under controlledconditions on a specified indoorlaboratory test wheel.
M.Maximum InflationPressure: Indicates the tiremanufacturers' maximumpermissible pressure or thepressure at which the maximumload can be carried by the tire. Thispressure is normally higher thanthe vehicle manufacturer'srecommended cold inflationpressure which can be found onthe Safety ComplianceCertification Label. See thecompleted vehicle's owner'smanual for the location of theSafety Compliance CertificationLabel. The cold inflation pressureshould never be set lower than therecommended pressure on thevehicle label.
The tire suppliers may haveadditional markings, notes orwarnings such as standard loador radial tubeless.
Additional InformationContained on the Tire Sidewallfor LT Type Tires
Note:Tire Quality Grades do notapply to this type of tire.
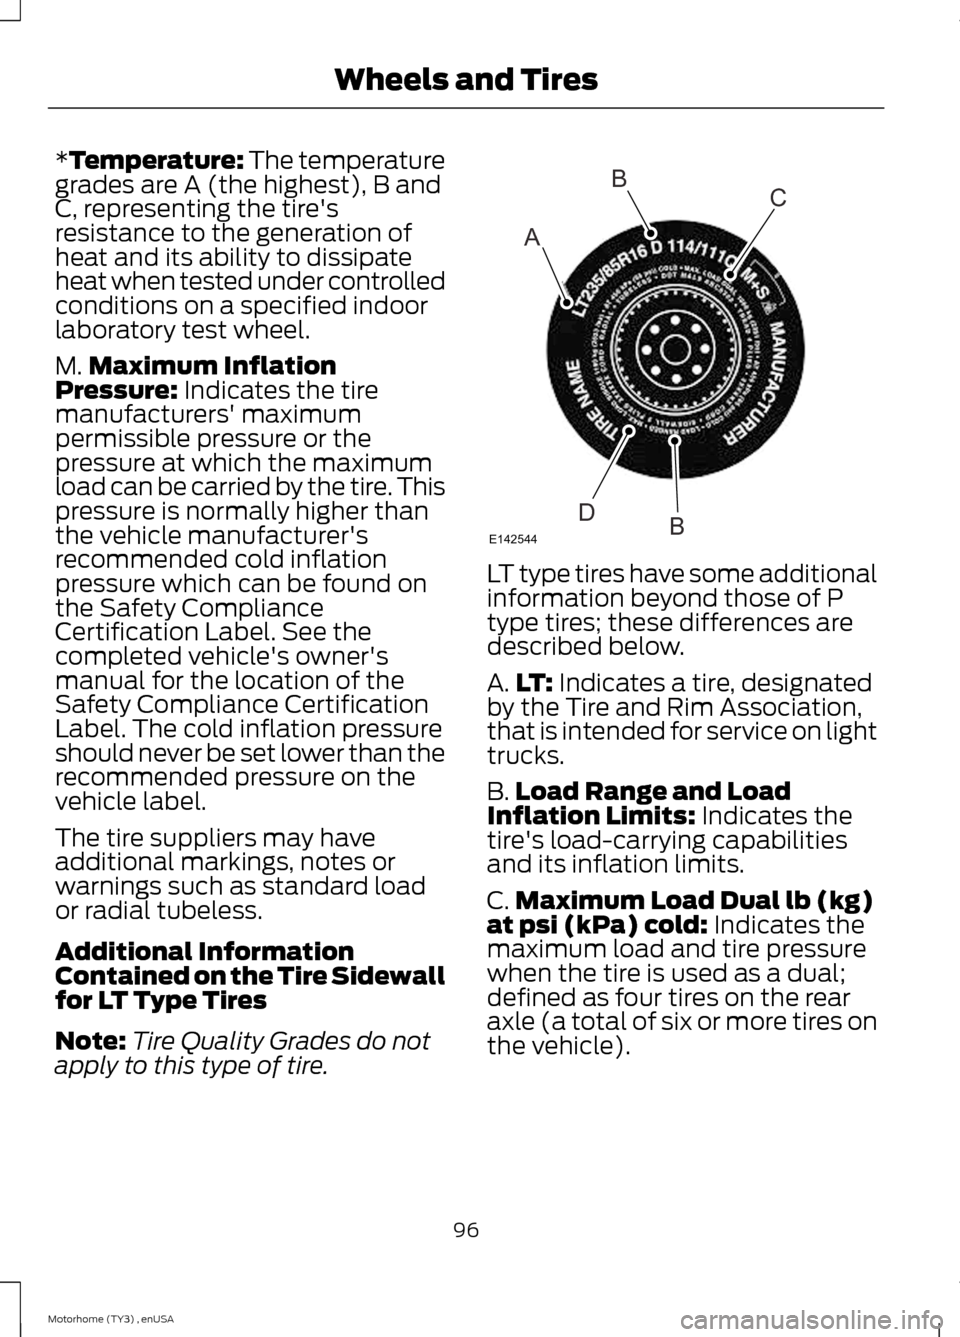
LT type tires have some additionalinformation beyond those of Ptype tires; these differences aredescribed below.
A.LT: Indicates a tire, designatedby the Tire and Rim Association,that is intended for service on lighttrucks.
B.Load Range and LoadInflation Limits: Indicates thetire's load-carrying capabilitiesand its inflation limits.
C.Maximum Load Dual lb (kg)at psi (kPa) cold: Indicates themaximum load and tire pressurewhen the tire is used as a dual;defined as four tires on the rearaxle (a total of six or more tires onthe vehicle).
96Motorhome (TY3) , enUSAWheels and TiresABCBDE142544
Page 103 of 143
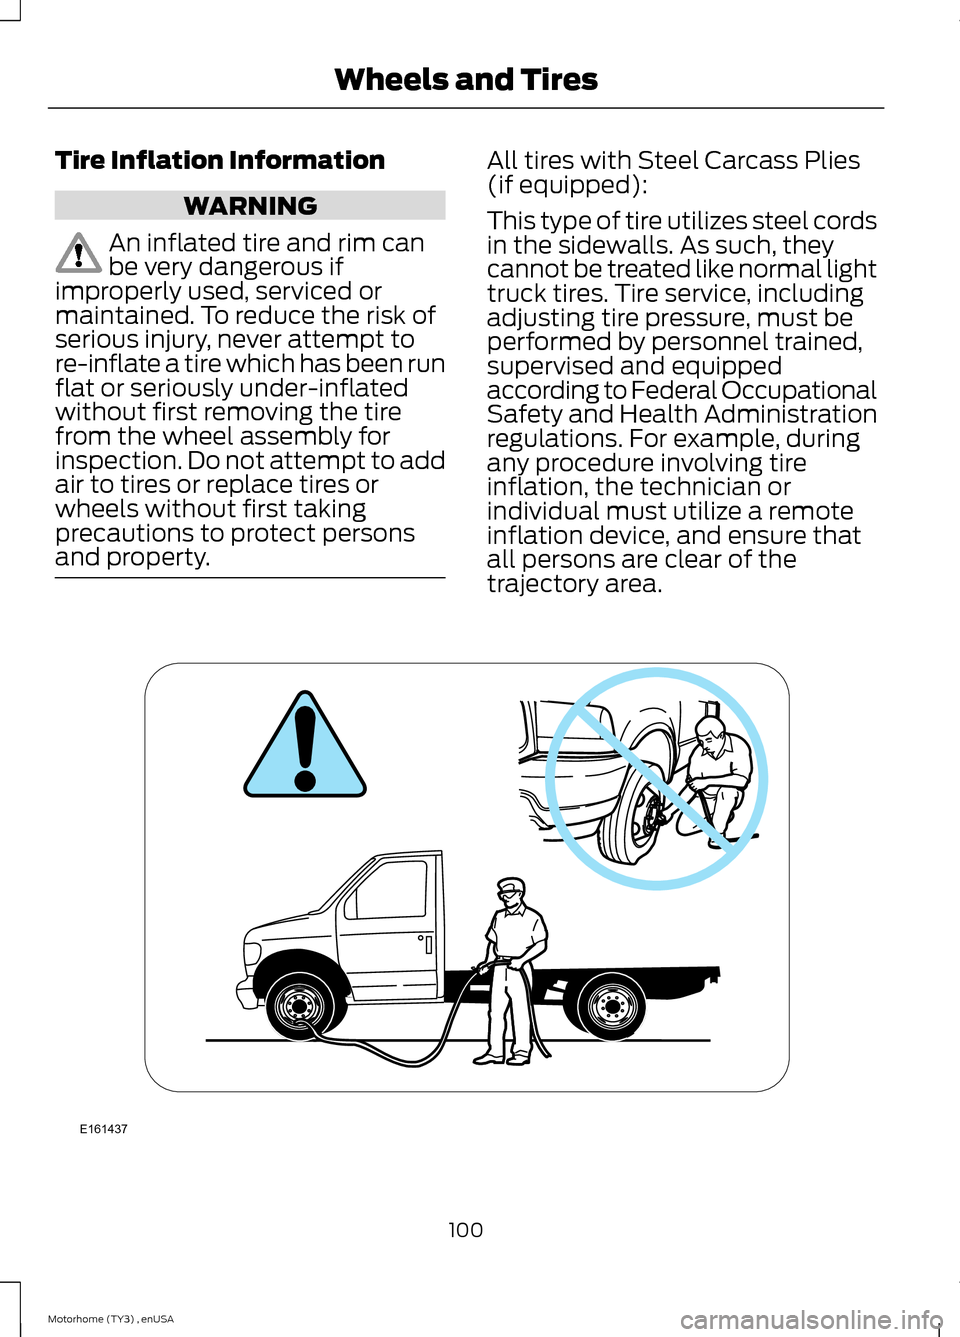
Tire Inflation Information
WARNING
An inflated tire and rim canbe very dangerous ifimproperly used, serviced ormaintained. To reduce the risk ofserious injury, never attempt tore-inflate a tire which has been runflat or seriously under-inflatedwithout first removing the tirefrom the wheel assembly forinspection. Do not attempt to addair to tires or replace tires orwheels without first takingprecautions to protect personsand property.
All tires with Steel Carcass Plies(if equipped):
This type of tire utilizes steel cordsin the sidewalls. As such, theycannot be treated like normal lighttruck tires. Tire service, includingadjusting tire pressure, must beperformed by personnel trained,supervised and equippedaccording to Federal OccupationalSafety and Health Administrationregulations. For example, duringany procedure involving tireinflation, the technician orindividual must utilize a remoteinflation device, and ensure thatall persons are clear of thetrajectory area.
100Motorhome (TY3) , enUSAWheels and TiresE161437
Page 141 of 143
Engine Oil Check.............................................75Adding Engine Oil.................................................75Resetting the Oil Life MonitoringSystem.................................................................75Engine Oil Dipstick.........................................75Engine Specifications....................................111Drivebelt Routing..................................................111Essential Towing Checks............................44Before Towing a Trailer......................................45Hitches.....................................................................44Launching or Retrieving a Boat or PersonalWatercraft (PWC)..........................................46Safety Chains........................................................44Trailer Brakes.........................................................45Trailer Lamps.........................................................45When Towing a Trailer........................................45Export Unique Options...................................7Extended Service Plan (ESP)...................119SERVICE PLANS (CANADA ONLY).............120SERVICE PLANS (U.S. Only)...........................119
F
Ford Credit...........................................................5(U.S. Only).................................................................5Fuel and Refueling.........................................22Fuel Consumption.........................................25Calculating Fuel Economy................................25Filling the Tank......................................................25Fuel Filter...........................................................83Fuel Quality......................................................23Choosing the Right Fuel.....................................23Octane Recommendations..............................23Fuses..................................................................60Fuse Specification Chart............................60Diode and Relay Module...................................66Passenger Compartment Fuse Panel..........67Power Distribution Box......................................60
G
Gauges.................................................................12Engine Coolant Temperature Gauge.............13Engine Oil Pressure Gauge.................................12Fuel Gauge...............................................................13Speedometer..........................................................12Transmission Fluid TemperatureGauge....................................................................12
General Maintenance Information..........121Multi-point Inspection.......................................123Owner Checks and Services...........................122Protecting Your Investment.............................121Why Maintain Your Vehicle?............................121Why Maintain Your Vehicle at YourDealership?.......................................................121Getting Assistance Outside the U.S. andCanada............................................................57Getting the Services You Need.................54Away From Home................................................54
H
HandbrakeSee: Parking Brake...............................................34Hazard Warning Flashers.............................51Hints on Driving With Anti-LockBrakes..............................................................33
I
Ignition Switch................................................20In California (U.S. Only)...............................55Information Displays......................................16General Information.............................................16Information Messages...................................17Engine........................................................................18Maintenance...........................................................18Transmission...........................................................19Instrument Cluster..........................................12Instrument Lighting Dimmer......................10Introduction........................................................3
J
Jump Starting the Vehicle............................51Connecting the Jumper Cables.......................52Jump Starting........................................................53Preparing Your Vehicle.......................................52Removing the Jumper Cables..........................53
L
Lighting Control...............................................10Headlamp Flasher................................................10High Beams.............................................................10Lighting...............................................................10
138Motorhome (TY3) , enUSAIndex