Page 144 of 519
REAR SEATS
Folding Down the 2nd Row 40% Seat System
WARNING:Use caution when folding the seat back to the flat
back position as the system will move forward when you lift the
release handle.
WARNING:Before returning the seat back to its original
position, make sure that cargo or any objects are not trapped
behind the seat back. After returning the seat back to its original
position, pull on the seat back to make sure that it has fully latched.
An unlatched seat may become dangerous in the event of a sudden
stop or crash .
Make sure that the head restraint is in the down position and no objects
such as books, purses or briefcases are on the floor in front of the
second row seats before folding them down.
Move the front passenger seat forward so that the second row seat
headrest clears the front seat.
1. Lower the head restraints by
pulling on the strap.
Seats143
2014 Expedition(exd)
Owners Guide gf, 1st Printing, June 2013
USA(fus)
Page 146 of 519
Placing the Second Row Outboard 40% Seats in Cargo Mode
WARNING:Use caution when folding the seatback to the flat
back position as the system will move forward when you lift the
release handle.
WARNING:Always return the seat from the kneel position prior
to raising the seatback. Failure to do so could result in personal
injury.
Place the second-row seats in a kneel down load floor position to allow
more cargo space.
To place the seats in the cargo mode:
1. Fold down the second row seat.
2. Pull the cargo mode lever up to
release the seat into a kneel down
load floor position.
Seats145
2014 Expedition(exd)
Owners Guide gf, 1st Printing, June 2013
USA(fus)
Page 147 of 519
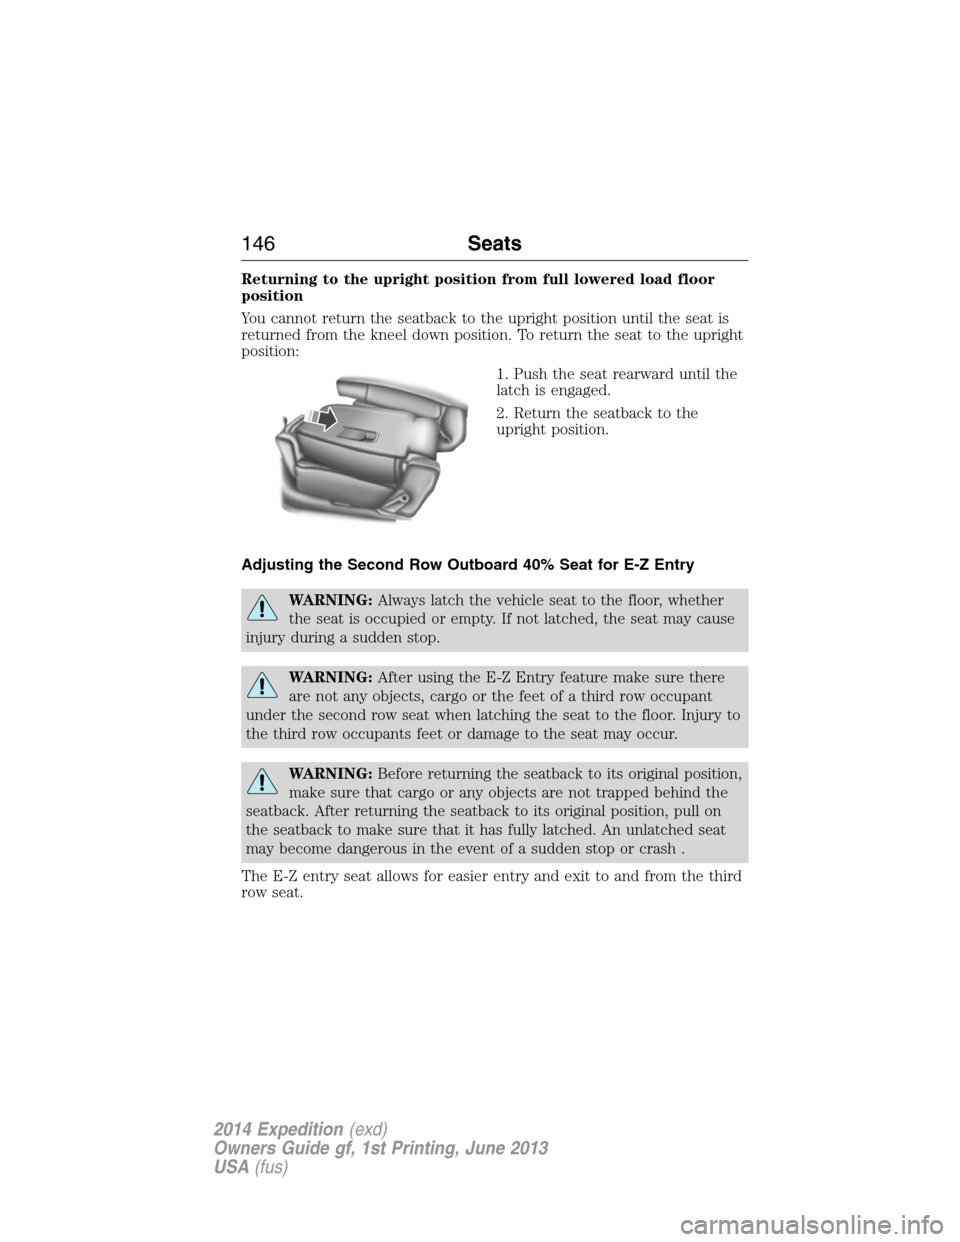
Returning to the upright position from full lowered load floor
position
You cannot return the seatback to the upright position until the seat is
returned from the kneel down position. To return the seat to the upright
position:
1. Push the seat rearward until the
latch is engaged.
2. Return the seatback to the
upright position.
Adjusting the Second Row Outboard 40% Seat for E-Z Entry
WARNING:Always latch the vehicle seat to the floor, whether
the seat is occupied or empty. If not latched, the seat may cause
injury during a sudden stop.
WARNING:After using the E-Z Entry feature make sure there
are not any objects, cargo or the feet of a third row occupant
under the second row seat when latching the seat to the floor. Injury to
the third row occupants feet or damage to the seat may occur.
WARNING:Before returning the seatback to its original position,
make sure that cargo or any objects are not trapped behind the
seatback. After returning the seatback to its original position, pull on
the seatback to make sure that it has fully latched. An unlatched seat
may become dangerous in the event of a sudden stop or crash .
The E-Z entry seat allows for easier entry and exit to and from the third
row seat.
146Seats
2014 Expedition(exd)
Owners Guide gf, 1st Printing, June 2013
USA(fus)
Page 149 of 519
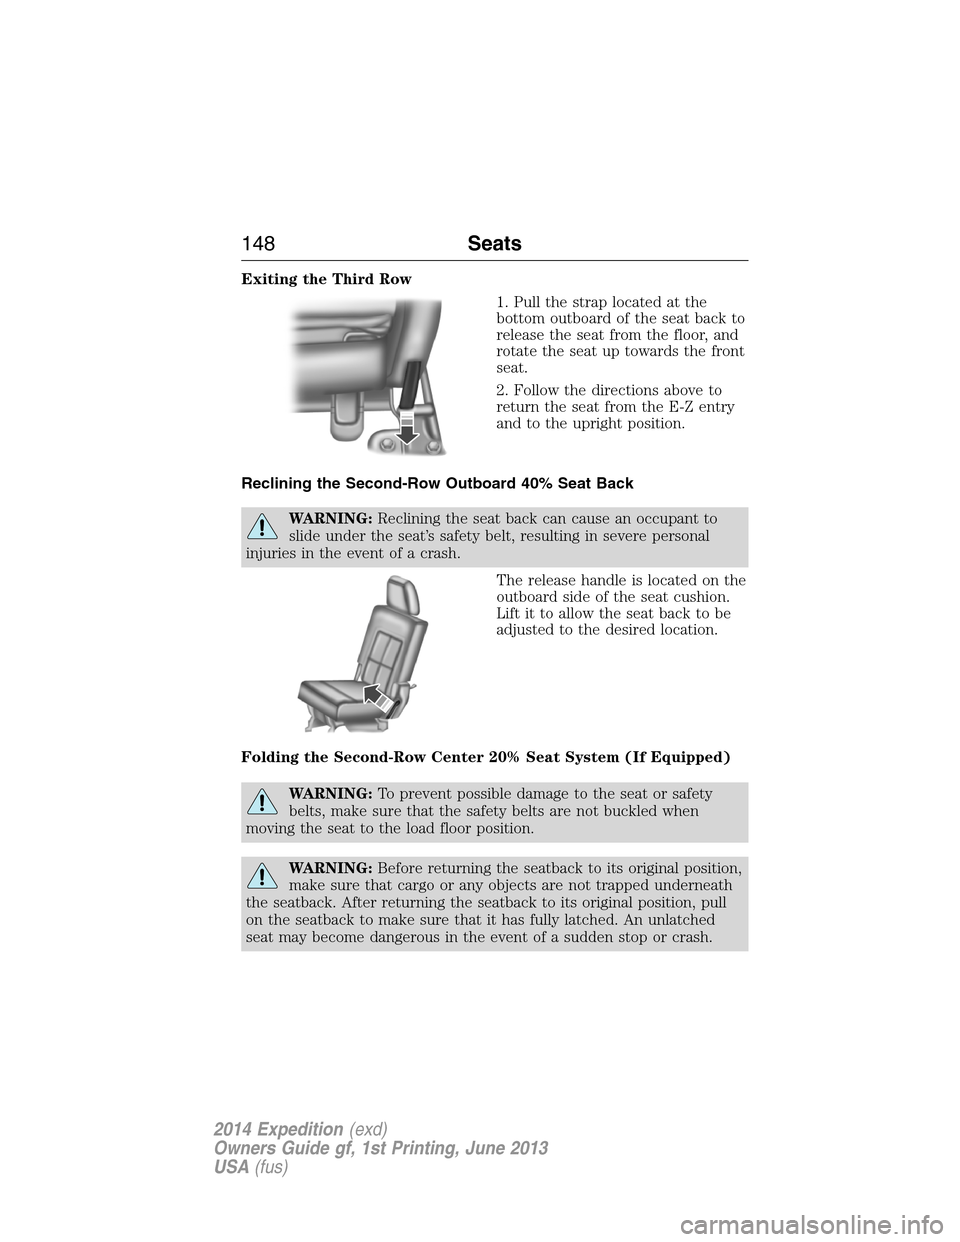
Exiting the Third Row
1. Pull the strap located at the
bottom outboard of the seat back to
release the seat from the floor, and
rotate the seat up towards the front
seat.
2. Follow the directions above to
return the seat from the E-Z entry
and to the upright position.
Reclining the Second-Row Outboard 40% Seat Back
WARNING:Reclining the seat back can cause an occupant to
slide under the seat’s safety belt, resulting in severe personal
injuries in the event of a crash.
The release handle is located on the
outboard side of the seat cushion.
Lift it to allow the seat back to be
adjusted to the desired location.
Folding the Second-Row Center 20% Seat System (If Equipped)
WARNING:To prevent possible damage to the seat or safety
belts, make sure that the safety belts are not buckled when
moving the seat to the load floor position.
WARNING:Before returning the seatback to its original position,
make sure that cargo or any objects are not trapped underneath
the seatback. After returning the seatback to its original position, pull
on the seatback to make sure that it has fully latched. An unlatched
seat may become dangerous in the event of a sudden stop or crash.
148Seats
2014 Expedition(exd)
Owners Guide gf, 1st Printing, June 2013
USA(fus)
Page 151 of 519
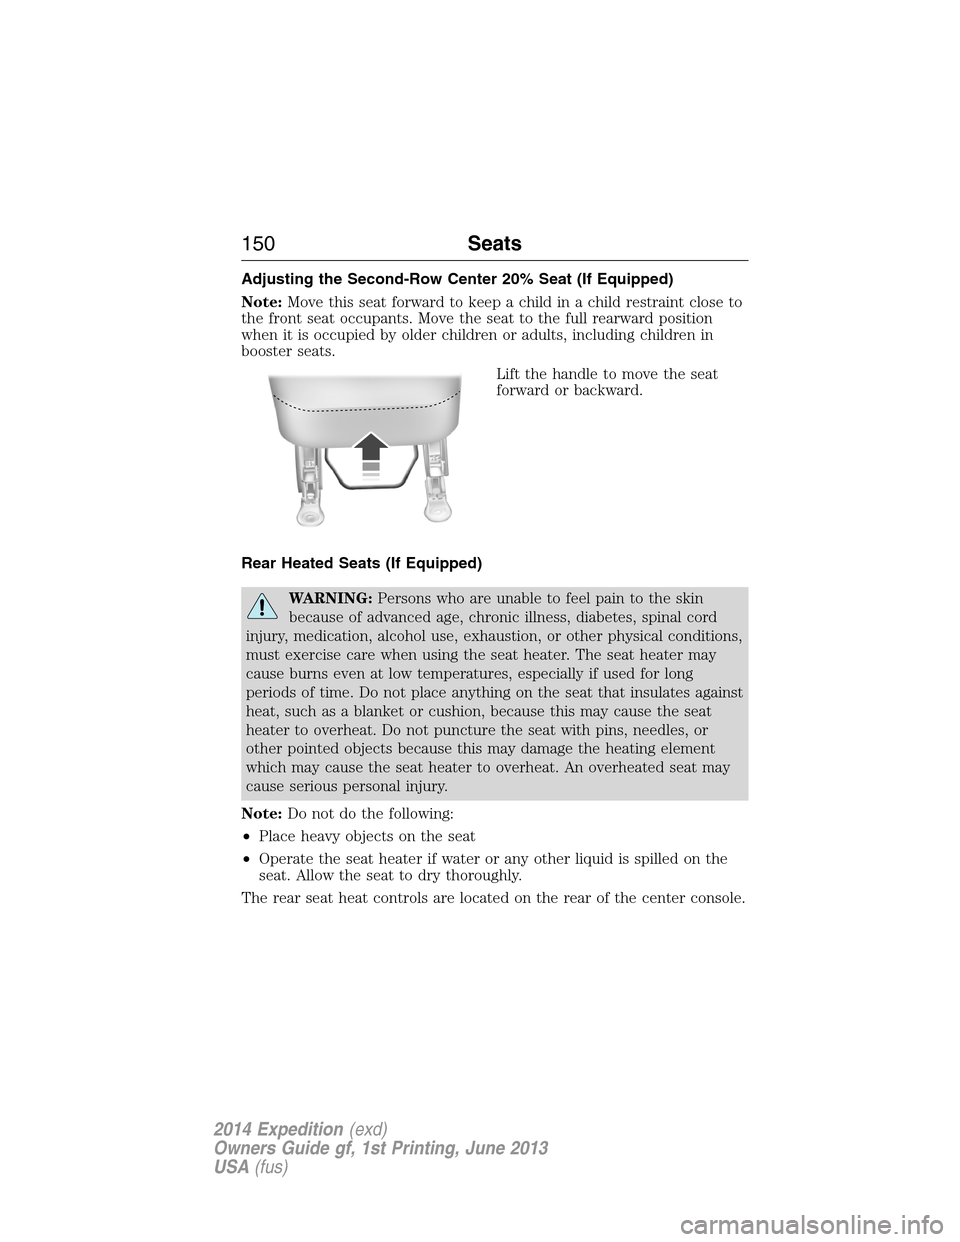
Adjusting the Second-Row Center 20% Seat (If Equipped)
Note:Move this seat forward to keep a child in a child restraint close to
the front seat occupants. Move the seat to the full rearward position
when it is occupied by older children or adults, including children in
booster seats.
Lift the handle to move the seat
forward or backward.
Rear Heated Seats (If Equipped)
WARNING:Persons who are unable to feel pain to the skin
because of advanced age, chronic illness, diabetes, spinal cord
injury, medication, alcohol use, exhaustion, or other physical conditions,
must exercise care when using the seat heater. The seat heater may
cause burns even at low temperatures, especially if used for long
periods of time. Do not place anything on the seat that insulates against
heat, such as a blanket or cushion, because this may cause the seat
heater to overheat. Do not puncture the seat with pins, needles, or
other pointed objects because this may damage the heating element
which may cause the seat heater to overheat. An overheated seat may
cause serious personal injury.
Note:Do not do the following:
•Place heavy objects on the seat
•Operate the seat heater if water or any other liquid is spilled on the
seat. Allow the seat to dry thoroughly.
The rear seat heat controls are located on the rear of the center console.
150Seats
2014 Expedition(exd)
Owners Guide gf, 1st Printing, June 2013
USA(fus)
Page 152 of 519
The heated seats only operate when the ignition is on. To operate the
heated seats:
Press the heated seat button to cycle through the various
heat settings and off. Warmer settings are indicated by
more indicator lights.
Third Row Seats
Make sure that no objects are on the floor in front of the third row seats
or on the seat cushion before lowering them. Make sure that the head
restraints are lowered and the second row seats are not reclined.
Folding Down the Third Row Seats to the Load Floor
WARNING:To prevent possible damage to the seat or safety
belts, make sure that the safety belts are not buckled when
moving the seat to the load floor position.
WARNING:Before returning the seatback to its original position,
make sure that cargo or any objects are not trapped behind the
seatback. After returning the seat back to its original position, pull on
the seatback to make sure that it has fully latched. An unlatched seat
may become dangerous in the event of a sudden stop or crash.
Before folding the third row seats,
fold the head restraints down by
pulling on the strap located at the
bottom of the restraint.
Seats151
2014 Expedition(exd)
Owners Guide gf, 1st Printing, June 2013
USA(fus)
Page 155 of 519
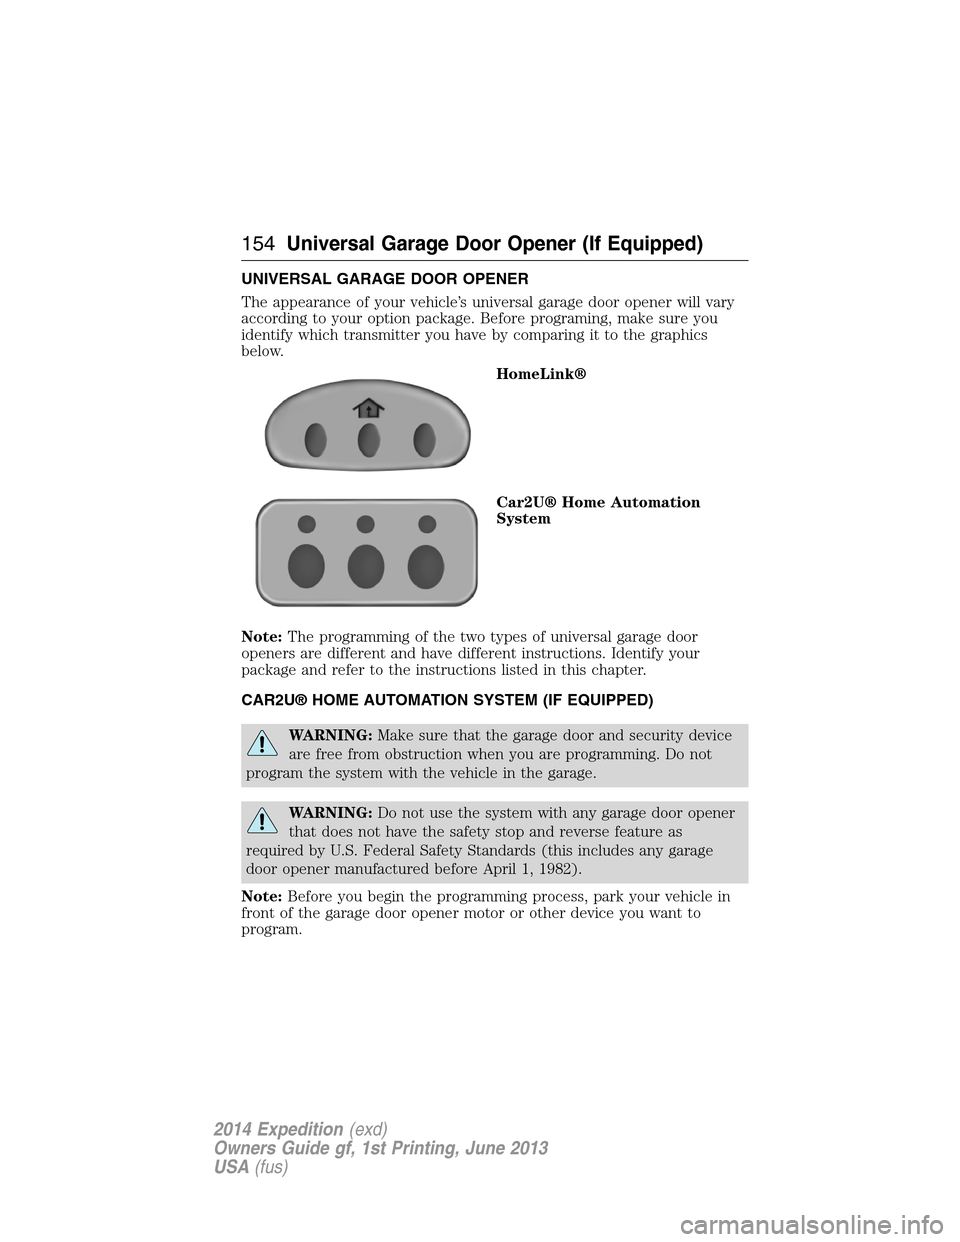
UNIVERSAL GARAGE DOOR OPENER
The appearance of your vehicle’s universal garage door opener will vary
according to your option package. Before programing, make sure you
identify which transmitter you have by comparing it to the graphics
below.
HomeLink®
Car2U® Home Automation
System
Note:The programming of the two types of universal garage door
openers are different and have different instructions. Identify your
package and refer to the instructions listed in this chapter.
CAR2U® HOME AUTOMATION SYSTEM (IF EQUIPPED)
WARNING:Make sure that the garage door and security device
are free from obstruction when you are programming. Do not
program the system with the vehicle in the garage.
WARNING:Do not use the system with any garage door opener
that does not have the safety stop and reverse feature as
required by U.S. Federal Safety Standards (this includes any garage
door opener manufactured before April 1, 1982).
Note:Before you begin the programming process, park your vehicle in
front of the garage door opener motor or other device you want to
program.
154Universal Garage Door Opener (If Equipped)
2014 Expedition(exd)
Owners Guide gf, 1st Printing, June 2013
USA(fus)
Page 159 of 519
8. The LED lamp will begin to flash rapidly until programming is
complete. If your garage door does not operate, repeat the previous
steps. Otherwise, call the toll-free help line at 1-866-572-2728.
The LED lamp above the selected button will illuminate to confirm that
the system is responding to the button command.
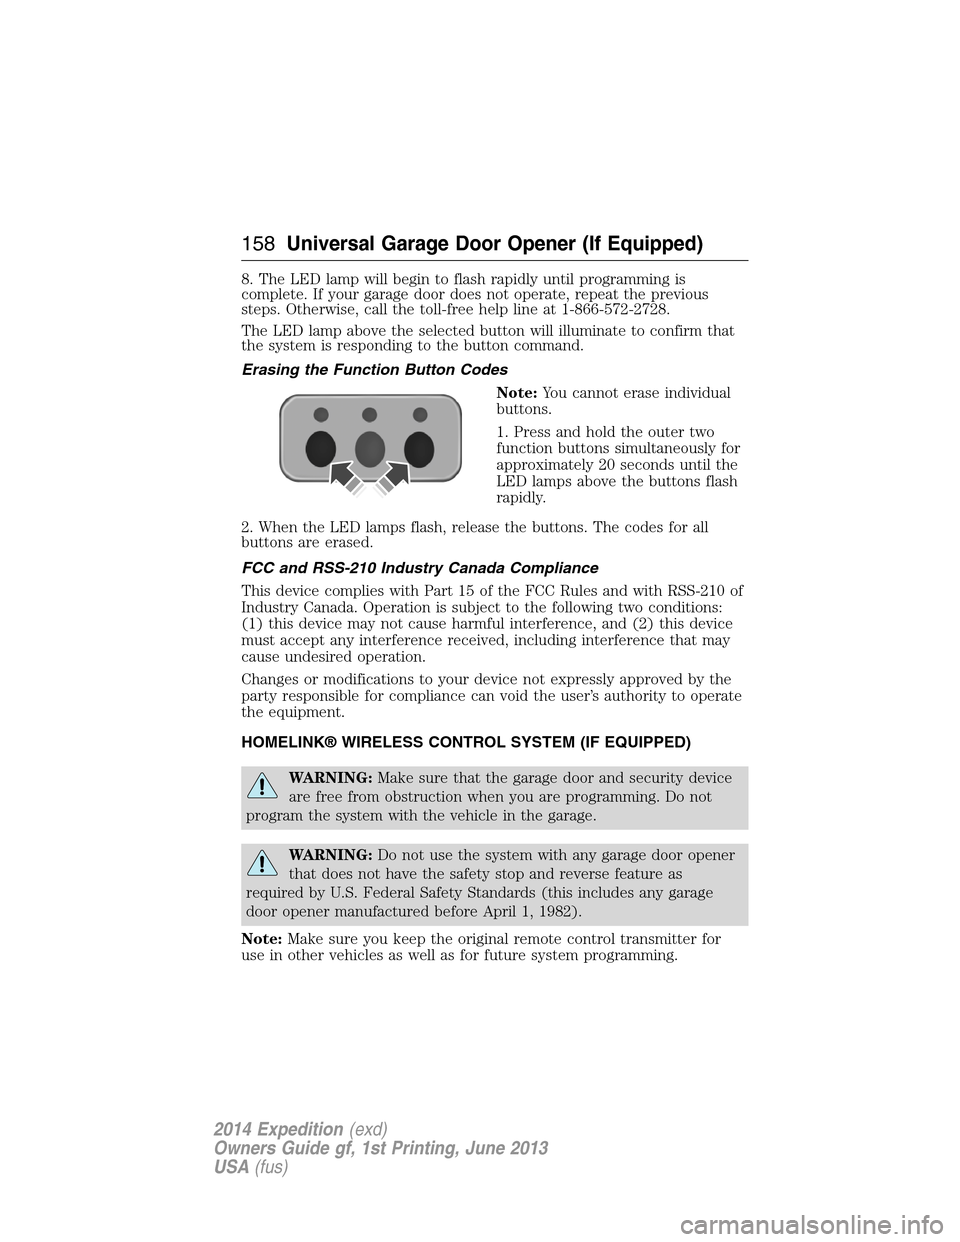
Erasing the Function Button Codes
Note:You cannot erase individual
buttons.
1. Press and hold the outer two
function buttons simultaneously for
approximately 20 seconds until the
LED lamps above the buttons flash
rapidly.
2. When the LED lamps flash, release the buttons. The codes for all
buttons are erased.
FCC and RSS-210 Industry Canada Compliance
This device complies with Part 15 of the FCC Rules and with RSS-210 of
Industry Canada. Operation is subject to the following two conditions:
(1) this device may not cause harmful interference, and (2) this device
must accept any interference received, including interference that may
cause undesired operation.
Changes or modifications to your device not expressly approved by the
party responsible for compliance can void the user’s authority to operate
the equipment.
HOMELINK® WIRELESS CONTROL SYSTEM (IF EQUIPPED)
WARNING:Make sure that the garage door and security device
are free from obstruction when you are programming. Do not
program the system with the vehicle in the garage.
WARNING:Do not use the system with any garage door opener
that does not have the safety stop and reverse feature as
required by U.S. Federal Safety Standards (this includes any garage
door opener manufactured before April 1, 1982).
Note:Make sure you keep the original remote control transmitter for
use in other vehicles as well as for future system programming.
158Universal Garage Door Opener (If Equipped)
2014 Expedition(exd)
Owners Guide gf, 1st Printing, June 2013
USA(fus)