2014 FORD EXPEDITION display
[x] Cancel search: displayPage 193 of 519
•4L (4X4 LOW)provides electronically locked four-wheel drive when
extra power at reduced speeds is required. The message center will
display 4X4 LOW when this mode is selected. This mode is not
recommended for use on dry pavement. Use this mode for off-road
low-speed operation or when extra power is required, such as climbing
steep grades, going through deep sand or pulling a boat out of the
water.
Shifting between system modes
Note:Do not perform these operations if the rear wheels are slipping.
Note:Some noise may be heard as the system shifts or engages.
You can move the control from 2H, 4A or 4H at a stop or while driving.
The information display may display a message indicating a 4X4 shift is
in progress. Once the shift is complete the information display will then
display the system mode selected.
Shifting to/from 4L (4X4 LOW)
1. Bring the vehicle to a rolling speed of 3 mph (5 km/h) or less.
2. Place the gearshift in N (Neutral).
3. Move the 4WD control to the desired mode.
The message center will display a message indicating a 4X4 shift is in
progress. The message center will then display the system mode
selected.
If any of the above shift conditions are not met, the shift will not occur
and the message center will display information guiding the driver
through the proper range of shifting procedures.
IfSHIFT DELAYED PULL FORWARDis displayed in the message
center, transfer case gear tooth blockage is present. To alleviate this
condition, place the transmission in a forward gear, move the vehicle
forward approximately 5 feet (2 meters), and shift the transmission back
to neutral to allow the transfer case to complete the range shift.
Note:4x4 low mode is not intended for use on dry pavement
192Four-Wheel Drive (If Equipped)
2014 Expedition(exd)
Owners Guide gf, 1st Printing, June 2013
USA(fus)
Page 203 of 519
PRINCIPLES OF OPERATION
The traction control system helps avoid drive wheel spin and loss of
traction.
If your vehicle begins to slide, the system applies the brakes to individual
wheels and, when needed, reduces engine power at the same time. If the
wheels spin when accelerating on slippery or loose surfaces, the system
reduces engine power in order to increase traction.
USING TRACTION CONTROL
In certain situations (for example, stuck in snow or mud), turning the
traction control off may be beneficial as this allows the wheels to spin
with full engine power. Turn the traction control system off using the
TCS OFFbutton located on the center of the instrument panel.
System indicator lights and messages
WARNING:If a failure has been detected within the Traction
Control System, the stability control light will illuminate steadily.
Verify that the Traction Control System was not manually disabled.
If the stability control light still illuminates steadily, have the system
serviced by an authorized dealer immediately. Operating your vehicle
with Traction Control disabled could lead to an increased risk of loss of
vehicle control, vehicle rollover, personal injury and death.
The stability control light temporarily illuminates on engine
start-up and flashes when a driving condition activates the
stability system.
The stability control off light temporarily illuminates on engine
start-up and stays on when the traction control system is
turned off or if a problem occurs in the stability system.
When the traction control system is turned off or on, a message appears
in the information display showing system status.
202Traction Control
2014 Expedition(exd)
Owners Guide gf, 1st Printing, June 2013
USA(fus)
Page 209 of 519
REAR VIEW CAMERA SYSTEM (IF EQUIPPED)
WARNING:The rear view camera system is a reverse aid
supplement device that still requires the driver to use it in
conjunction with the interior and exterior mirrors for maximum
coverage.
WARNING:Objects that are close to either corner of the
bumper or under the bumper, might not be seen on the screen
due to the limited coverage of the camera system.
WARNING:Back up as slow as possible since higher speeds
might limit your reaction time to stop the vehicle.
WARNING:Use caution when using the rear video camera
and the liftgate is ajar. If the liftgate is ajar, the camera will be
out of position and the video image may be incorrect. All guidelines
(if enabled) have been removed when the liftgate is ajar.
WARNING:Use caution when turning camera features on or off
while in R (Reverse). Make sure the vehicle is not moving.
The rear view camera system provides a video image of the area behind
the vehicle.
During operation, lines appear in the display which represent your
vehicle’s path and proximity to objects behind the vehicle.
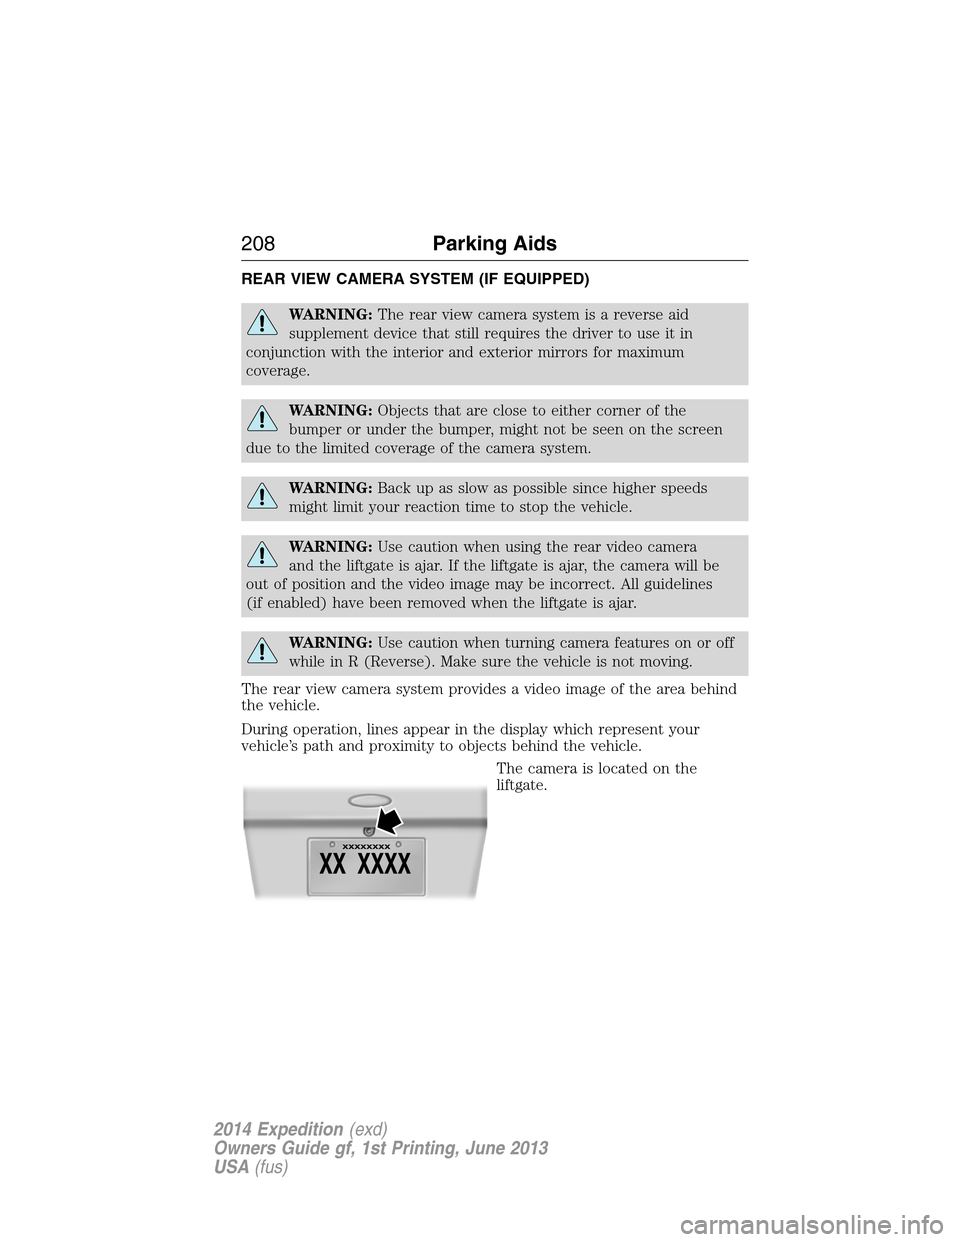
The camera is located on the
liftgate.
208Parking Aids
2014 Expedition(exd)
Owners Guide gf, 1st Printing, June 2013
USA(fus)
Page 210 of 519
Using the Rear View Camera System
The rear view camera system displays what is behind your vehicle when
you place the transmission in R (Reverse). The system uses two types of
guides to help you see what is behind your vehicle:
1. Fixed guidelines: Show the actual path the vehicle is moving in while
reversing in a straight line, which can be helpful when backing into a
parking space or aligning the vehicle with another object behind the
vehicle.
2. Centerline: Helps align the center of the vehicle with an object (i.e. a
trailer).
Note:If the image comes on while the transmission is not in R
(Reverse), have the system inspected by your authorized dealer.
Note:When towing, the camera only sees what is being towed behind
the vehicle. This might not provide adequate coverage as it usually
provides in normal operation and some objects might not be seen.
In some vehicles, the guidelines may disappear once the trailer tow
connector is engaged.
Note:The default setting for the camera delay is off. Press the Settings
button found on the navigation screen (if equipped) to set the camera
delay feature to on or off.
Note:The camera may not operate correctly under the following
conditions:
•Nighttime or dark areas if one or both reverse lamps are not
operating.
•The camera’s view is obstructed by mud, water or debris. Clean the
lens with a soft, lint-free cloth and non-abrasive cleaner.
•The rear of the vehicle is hit or damaged, causing the camera to
become misaligned.
Parking Aids209
2014 Expedition(exd)
Owners Guide gf, 1st Printing, June 2013
USA(fus)
Page 211 of 519
Guidelines and the Centerline
Note:Fixed guidelines are only available when the transmission is in R
(Reverse).
Note:The centerline is only available if fixed guidelines are on.
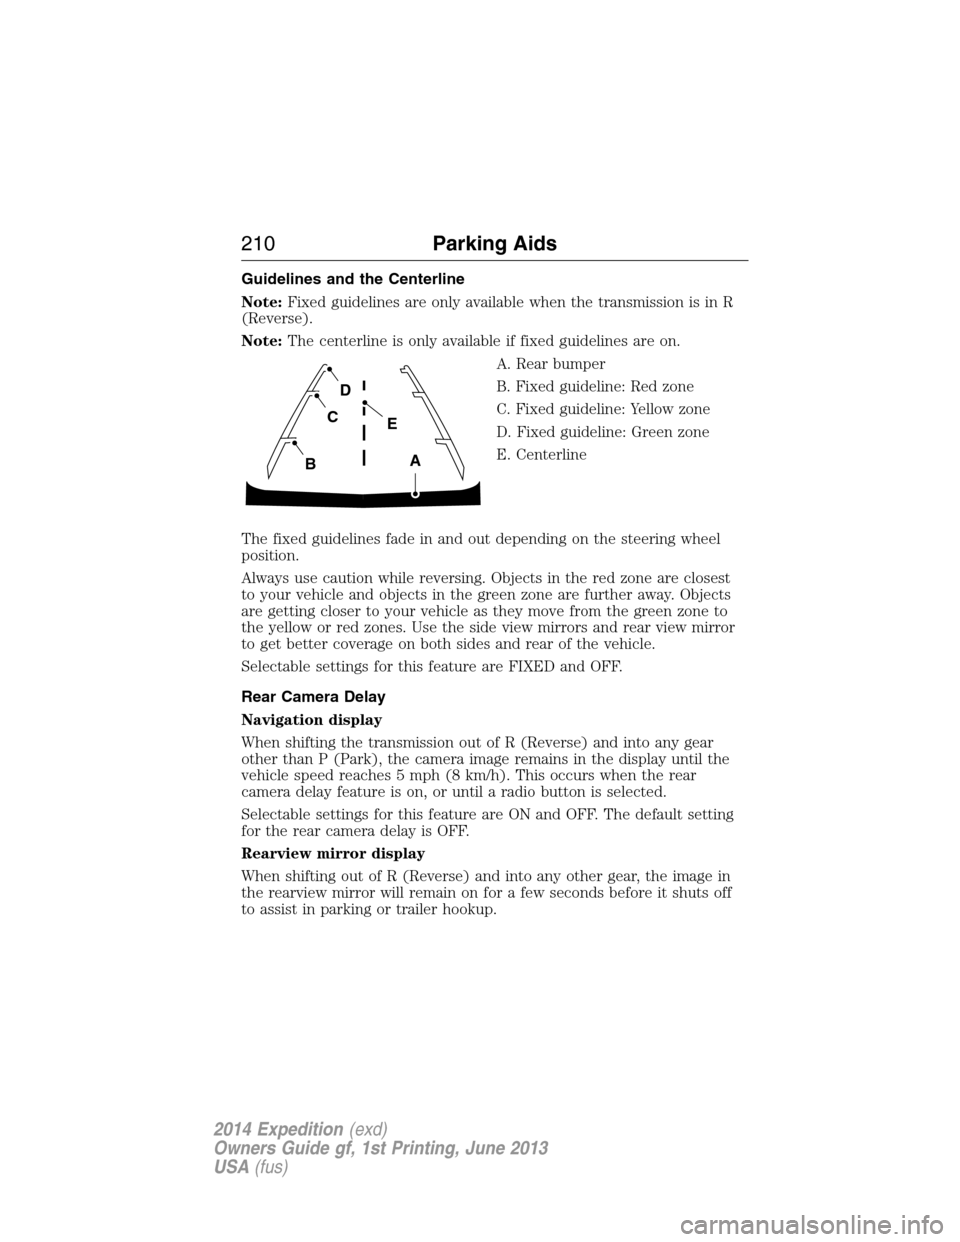
A. Rear bumper
B. Fixed guideline: Red zone
C. Fixed guideline: Yellow zone
D. Fixed guideline: Green zone
E. Centerline
The fixed guidelines fade in and out depending on the steering wheel
position.
Always use caution while reversing. Objects in the red zone are closest
to your vehicle and objects in the green zone are further away. Objects
are getting closer to your vehicle as they move from the green zone to
the yellow or red zones. Use the side view mirrors and rear view mirror
to get better coverage on both sides and rear of the vehicle.
Selectable settings for this feature are FIXED and OFF.
Rear Camera Delay
Navigation display
When shifting the transmission out of R (Reverse) and into any gear
other than P (Park), the camera image remains in the display until the
vehicle speed reaches 5 mph (8 km/h). This occurs when the rear
camera delay feature is on, or until a radio button is selected.
Selectable settings for this feature are ON and OFF. The default setting
for the rear camera delay is OFF.
Rearview mirror display
When shifting out of R (Reverse) and into any other gear, the image in
the rearview mirror will remain on for a few seconds before it shuts off
to assist in parking or trailer hookup.
A
E
D
C
B
210Parking Aids
2014 Expedition(exd)
Owners Guide gf, 1st Printing, June 2013
USA(fus)
Page 226 of 519
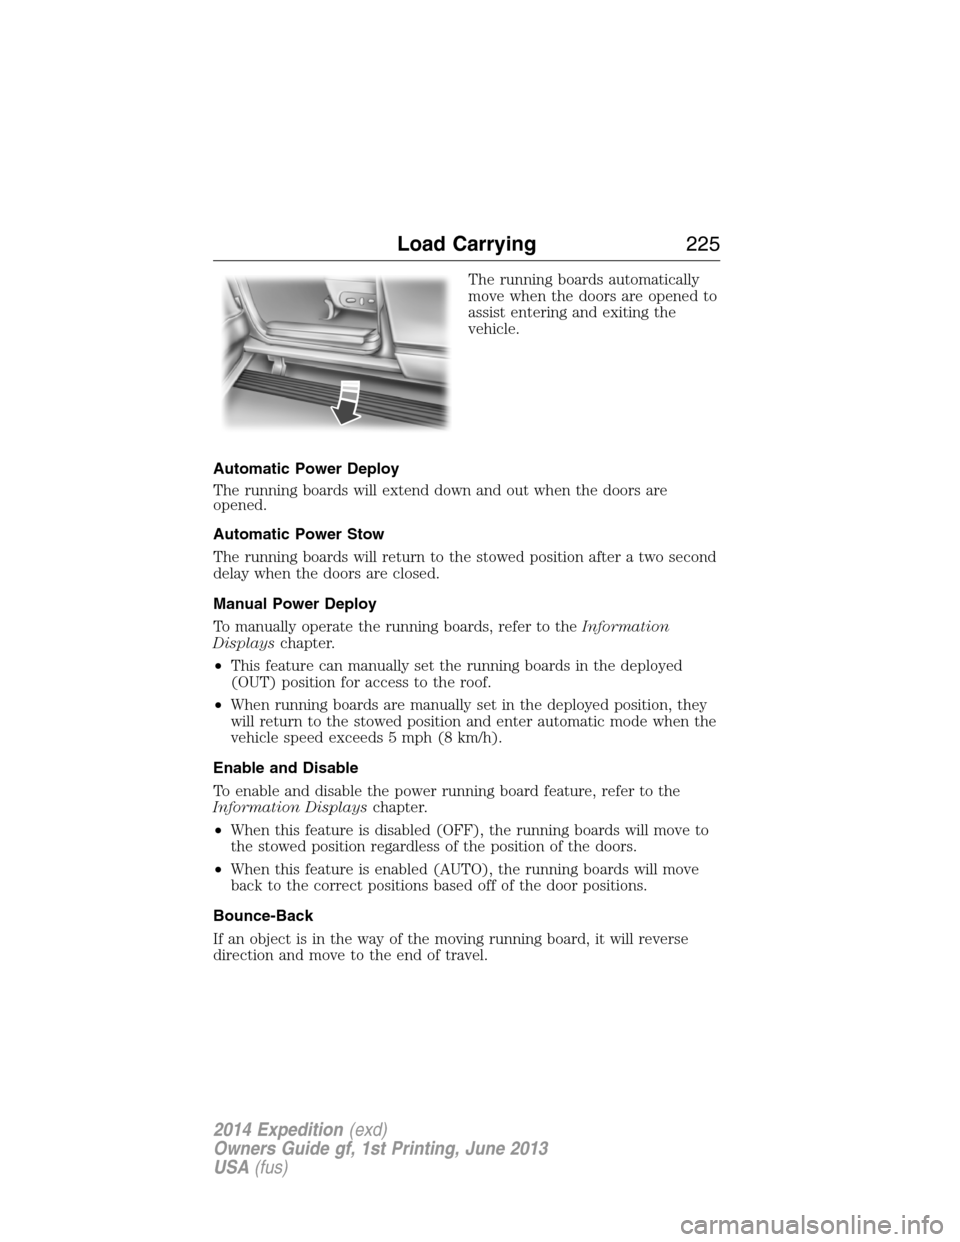
The running boards automatically
move when the doors are opened to
assist entering and exiting the
vehicle.
Automatic Power Deploy
The running boards will extend down and out when the doors are
opened.
Automatic Power Stow
The running boards will return to the stowed position after a two second
delay when the doors are closed.
Manual Power Deploy
To manually operate the running boards, refer to theInformation
Displayschapter.
•This feature can manually set the running boards in the deployed
(OUT) position for access to the roof.
•When running boards are manually set in the deployed position, they
will return to the stowed position and enter automatic mode when the
vehicle speed exceeds 5 mph (8 km/h).
Enable and Disable
To enable and disable the power running board feature, refer to the
Information Displayschapter.
•When this feature is disabled (OFF), the running boards will move to
the stowed position regardless of the position of the doors.
•When this feature is enabled (AUTO), the running boards will move
back to the correct positions based off of the door positions.
Bounce-Back
If an object is in the way of the moving running board, it will reverse
direction and move to the end of travel.
Load Carrying225
2014 Expedition(exd)
Owners Guide gf, 1st Printing, June 2013
USA(fus)
Page 228 of 519
TRAILER SWAY CONTROL
WARNING:Turning off trailer sway control increases the risk of
loss of vehicle control, serious injury or death. Ford does not
recommend disabling this feature except in situations where speed
reduction may be detrimental (such as hill climbing), the driver has
significant trailer towing experience, and can control trailer sway and
maintain safe operation.
Note:This feature does not prevent trailer sway, but reduces it once it
begins.
Note:This feature cannot stop all trailers from swaying.
Note:In some cases, if vehicle speed is too high, the system may turn
on multiple times, gradually reducing vehicle speed.
This feature applies your vehicle brakes at individual wheels and, if
necessary, reduces engine power. If the trailer begins to sway, the
stability control light flashes and the messageTRAILER SWAY
REDUCE SPEEDappears in the information display. The first thing to
do is slow your vehicle down, then pull safely to the side of the road and
check for proper tongue load and trailer load distribution. See theLoad
Carryingchapter for specific loading information.
RECOMMENDED TOWING WEIGHTS
Note:Do not exceed the trailer weight for your vehicle configuration
listed in the chart below.
Note:Make sure to take into consideration trailer frontal area. Do not
exceed:
•36.5 feet
2(3.39 meters2) trailer frontal area for vehicles equipped
with the standard towing package.
•60.0 feet
2(5.57 meters2) trailer frontal area for vehicles equipped
with the optional towing package.
Note:Exceeding this limitation may significantly reduce the
performance of your towing vehicle. Selecting a trailer with a low
aerodynamic drag and rounded front design helps optimize performance
and fuel economy.
Note:For high altitude operation, reduce the gross combined weight by
2% per 1000 feet (300 meters) starting at the 1000 foot (300 meter)
elevation point.
Towing227
2014 Expedition(exd)
Owners Guide gf, 1st Printing, June 2013
USA(fus)
Page 235 of 519
Integrated Trailer Brake Controller (If Equipped)
WARNING:The Ford TBC has been verified to be compatible
with trailers having electric-actuated drum brakes (one to four
axles) and some electric-over-hydraulic (EOH) brakes. It will not
activate hydraulic surge-style trailer brakes. It is the responsibility
of the customer to ensure that the trailer brakes are adjusted
appropriately, functioning normally and all electric connections are
properly made. Failure to do so may result in loss of vehicle control,
crash or serious injury.
When used properly, the trailer brake controller assists in smooth
and effective trailer braking by powering the trailer’s electric or
electric-over-hydraulic brakes with a proportional output based on the
towing vehicle’s brake pressure.
Ford has tested the trailer brake controller to be compatible with several
major brands of electric-over-hydraulic trailer brakes. Contact an
authorized dealer for information on which brands you can use.
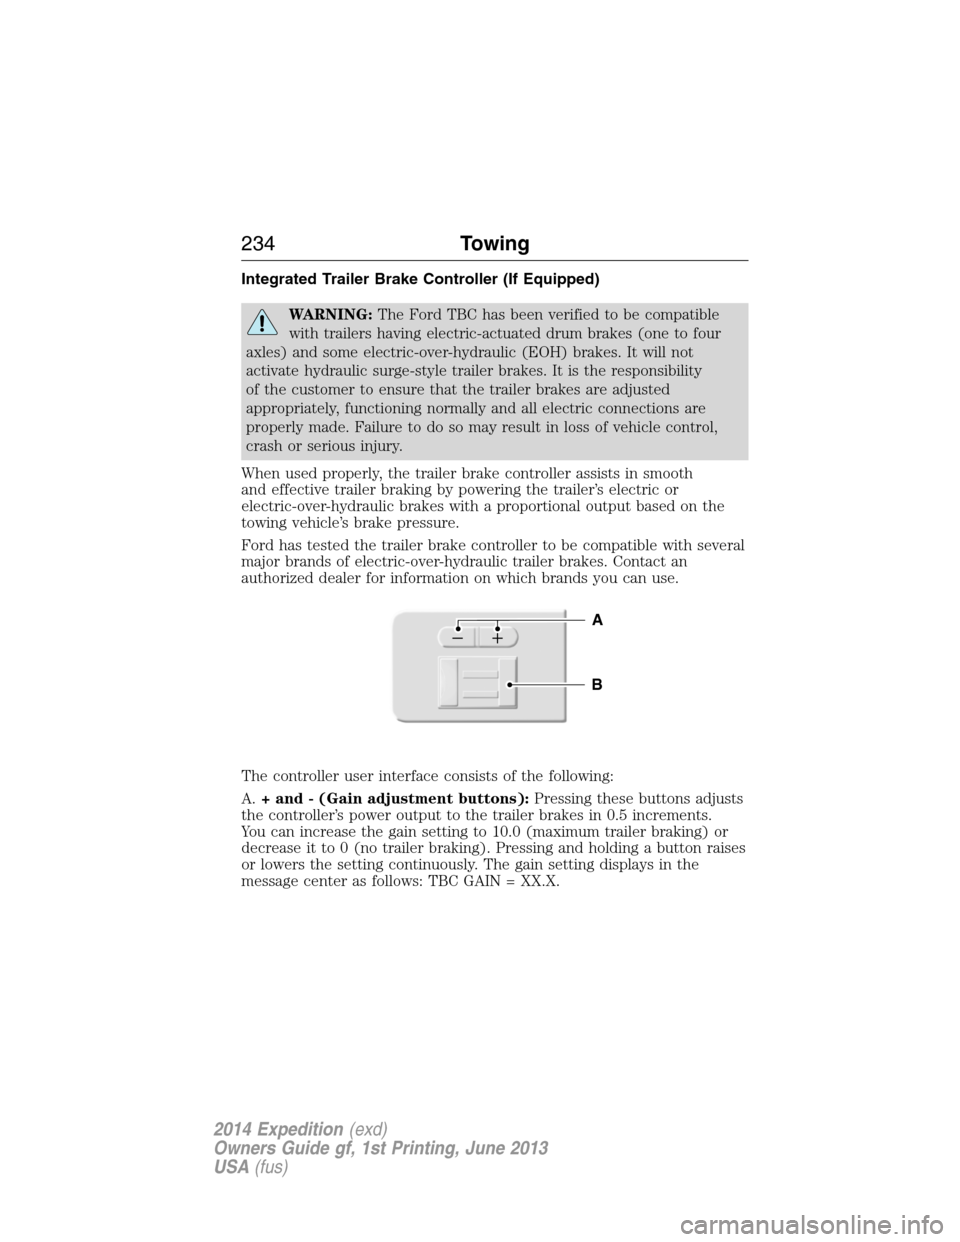
The controller user interface consists of the following:
A.+ and - (Gain adjustment buttons):Pressing these buttons adjusts
the controller’s power output to the trailer brakes in 0.5 increments.
You can increase the gain setting to 10.0 (maximum trailer braking) or
decrease it to 0 (no trailer braking). Pressing and holding a button raises
or lowers the setting continuously. The gain setting displays in the
message center as follows: TBC GAIN = XX.X.
B
A
234Towing
2014 Expedition(exd)
Owners Guide gf, 1st Printing, June 2013
USA(fus)