Page 331 of 519

WARNING:Do not attempt to change a tire on the side of the
vehicle close to moving traffic. Pull far enough off the road to
avoid the danger of being hit when operating the jack or changing the
wheel.
WARNING:Always use the jack provided as original equipment
with your vehicle. If using a jack other than the one provided as
original equipment with your vehicle, make sure the jack capacity is
adequate for the vehicle weight, including any vehicle cargo or
modifications.
WARNING:Disable the power running boards before jacking,
lifting, or placing any object under the vehicle. Never place your
hand between the power running board and vehicle as extended power
running boards will retract when the doors are closed. Failure to follow
these instructions may result in personal injury.
Note:Passengers should not remain in the vehicle when the vehicle is
being jacked.
Park on a level surface, activate the hazard flashers and set the parking
brake. Then, place the transmission selector lever in positionPand turn
the engine off.
Location of the spare tire and tools
The spare tire and tools for your vehicle are stowed in the following
locations:
Item Location
Spare tire Under the vehicle, just forward of
the rear bumper
Jack tools Under the access panel located in
the floor compartment behind the
rear seat
330Wheels and Tires
2014 Expedition(exd)
Owners Guide gf, 1st Printing, June 2013
USA(fus)
Page 332 of 519

Removing the jack and tools
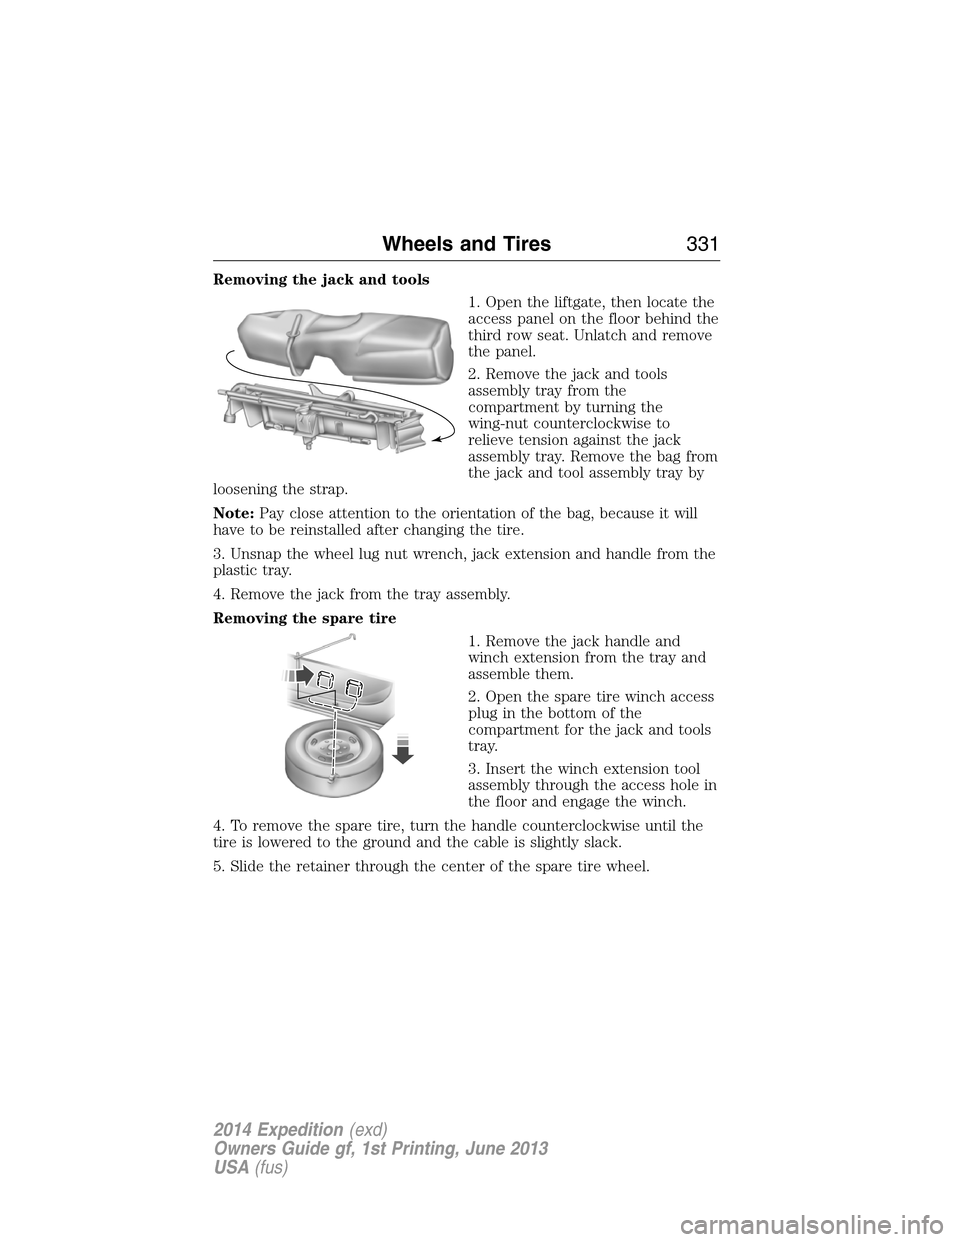
1. Open the liftgate, then locate the
access panel on the floor behind the
third row seat. Unlatch and remove
the panel.
2. Remove the jack and tools
assembly tray from the
compartment by turning the
wing-nut counterclockwise to
relieve tension against the jack
assembly tray. Remove the bag from
the jack and tool assembly tray by
loosening the strap.
Note:Pay close attention to the orientation of the bag, because it will
have to be reinstalled after changing the tire.
3. Unsnap the wheel lug nut wrench, jack extension and handle from the
plastic tray.
4. Remove the jack from the tray assembly.
Removing the spare tire
1. Remove the jack handle and
winch extension from the tray and
assemble them.
2. Open the spare tire winch access
plug in the bottom of the
compartment for the jack and tools
tray.
3. Insert the winch extension tool
assembly through the access hole in
the floor and engage the winch.
4. To remove the spare tire, turn the handle counterclockwise until the
tire is lowered to the ground and the cable is slightly slack.
5. Slide the retainer through the center of the spare tire wheel.
Wheels and Tires331
2014 Expedition(exd)
Owners Guide gf, 1st Printing, June 2013
USA(fus)
Page 333 of 519
6. Block the wheels (both front or
both rear) on the opposite end of
the vehicle from the wheel being
changed. If on a grade, block both
wheels on the downward side of the
hill.
7. Turn off the deployable running boards. See theDriving Aids
chapter.
8. Obtain the spare tire and jack tools from their storage locations.
9. Use the tip of the jack handle to remove any wheel trim.
10. Loosen each wheel lug nut one-half turn counterclockwise but do not
remove them until the wheel is raised off the ground.
11. Position the jack according to
the jack locator arrows found on the
frame and turn the jack handle and
extension tool assembly clockwise.
Note:Use the frame rail as the
jacking location point, not the
control arm.
332Wheels and Tires
2014 Expedition(exd)
Owners Guide gf, 1st Printing, June 2013
USA(fus)
Page 334 of 519
12. Raise the vehicle to provide sufficient ground clearance when
installing the spare tire; about 1/4 inch (6 millimeters).
•Front
•Rear
•Note:Jack at the specified locations to avoid damage to the vehicle.
13. Remove the lug nuts with the lug wrench.
14. Replace the flat tire with the spare tire, making sure the valve stem
is facing outward.
15. Reinstall the lug nuts until the wheel is snug against the hub. Do not
fully tighten the lug nuts until the wheel has been lowered.
16. Lower the wheel by turning the jack handle counterclockwise.
Wheels and Tires333
2014 Expedition(exd)
Owners Guide gf, 1st Printing, June 2013
USA(fus)
Page 335 of 519

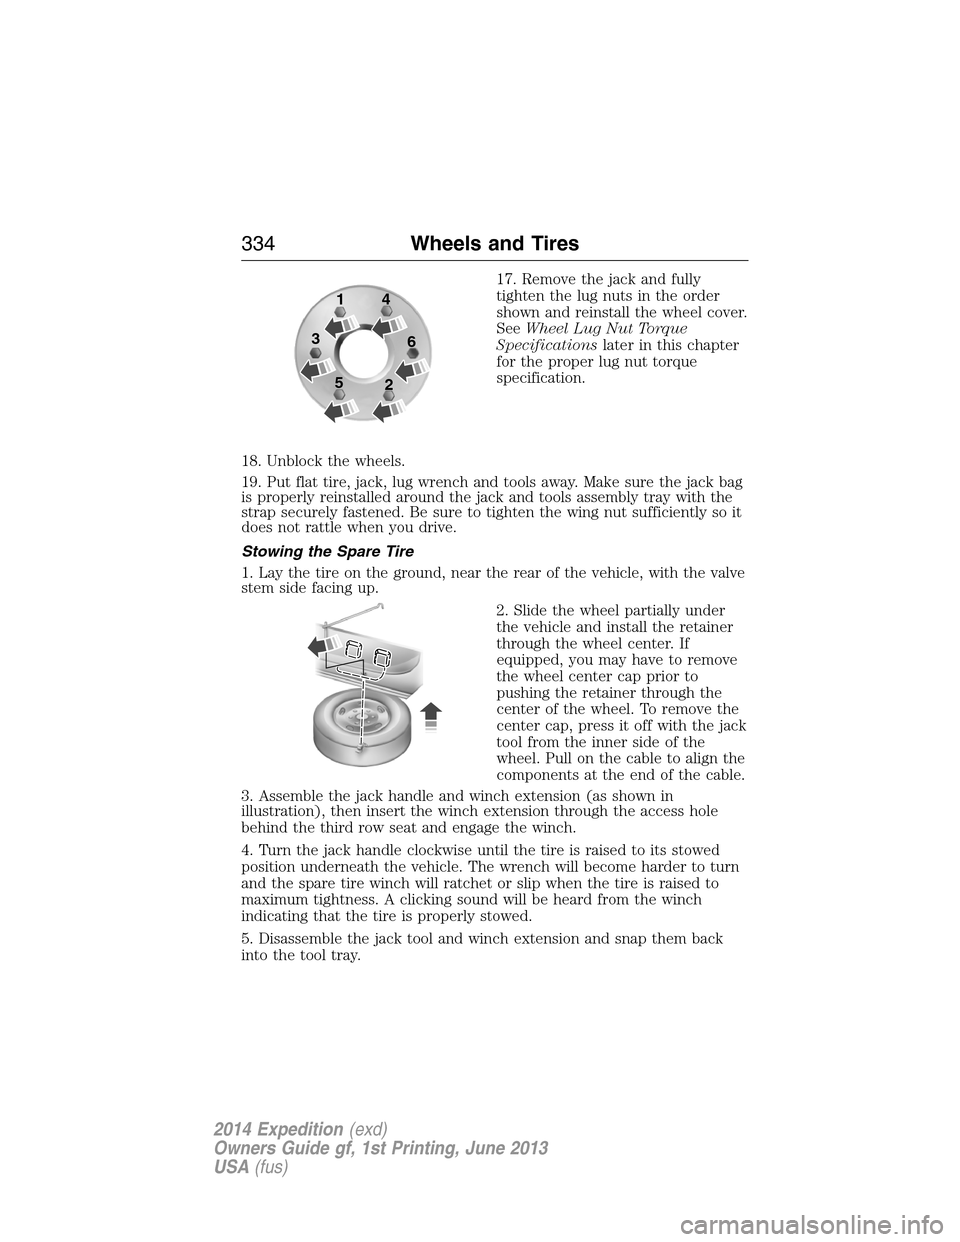
17. Remove the jack and fully
tighten the lug nuts in the order
shown and reinstall the wheel cover.
SeeWheel Lug Nut Torque
Specificationslater in this chapter
for the proper lug nut torque
specification.
18. Unblock the wheels.
19. Put flat tire, jack, lug wrench and tools away. Make sure the jack bag
is properly reinstalled around the jack and tools assembly tray with the
strap securely fastened. Be sure to tighten the wing nut sufficiently so it
does not rattle when you drive.
Stowing the Spare Tire
1. Lay the tire on the ground, near the rear of the vehicle, with the valve
stem side facing up.
2. Slide the wheel partially under
the vehicle and install the retainer
through the wheel center. If
equipped, you may have to remove
the wheel center cap prior to
pushing the retainer through the
center of the wheel. To remove the
center cap, press it off with the jack
tool from the inner side of the
wheel. Pull on the cable to align the
components at the end of the cable.
3. Assemble the jack handle and winch extension (as shown in
illustration), then insert the winch extension through the access hole
behind the third row seat and engage the winch.
4. Turn the jack handle clockwise until the tire is raised to its stowed
position underneath the vehicle. The wrench will become harder to turn
and the spare tire winch will ratchet or slip when the tire is raised to
maximum tightness. A clicking sound will be heard from the winch
indicating that the tire is properly stowed.
5. Disassemble the jack tool and winch extension and snap them back
into the tool tray.
1
3
54
6
2
334Wheels and Tires
2014 Expedition(exd)
Owners Guide gf, 1st Printing, June 2013
USA(fus)
Page 518 of 519

SIRIUS satellite radio voice
commands .................................446
SIRIUS Travel Link ...................457
Snowplowing ...............................15
SOS Post Crash Alert .................48
Spark plugs,
specifications .....................336, 341
Special notice
ambulance conversions ............15
Specification chart,
lubricants ...................................337
Stability system .........................204
Starting a flex fuel vehicle .......171
Starting your vehicle ........170–171
jump starting ..........................249
Status bars ................................429
Steering wheel ............................82
controls ......................................82
tilting .........................................82
Supplemental Restraint System
(SRS) (see airbags) ....................49
Suspension ................................214
SYNC® AppLink™ ...................407
SYNC® customer support ........382
SYNC® Services ........................405
System overview .......................426
T
Temperature control
(see Climate control) ..............121,
123, 125, 127
Text messaging .........................393
Text messaging (sending,
downloading, deleting) .....393, 395Third-row power fold seat .......152
Tilt steering wheel ......................82
Tires ...........................306–307, 327
alignment ................................320
care ..........................................306
changing ..........................327, 329
checking the pressure ............316
inflating ...................................314
label .........................................313
replacing ..................................318
rotating ....................................321
safety practices .......................320
sidewall information ...............309
snow tires and chains ............322
spare tire .................................327
terminology .............................308
tire grades ...............................307
treadwear ........................307, 316
Towing .......................226, 240–241
recreational towing .................241
Trailer Brake
Controller-Integrated ..............234
trailer towing ..........................226
wrecker ....................................240
Traction control ........................202
Traffic, Directions and
Information ................................405
Trailer Brake
Controller-Integrated ................234
Trailer sway control ..................227
Transmission
brake-shift interlock
(BSI) ................................187–188
fluid, checking and adding
(automatic) .............................278
fluid, refill capacities ..............337
lubricant specifications ..........337
Troubleshooting ................376, 480
Turn signal ..................................89
Index517
2014 Expedition(exd)
Owners Guide gf, 1st Printing, June 2013
USA(fus)
Page:
< prev 1-8 9-16 17-24