2014 FORD EXPEDITION ignition
[x] Cancel search: ignitionPage 79 of 519

SECURILOCK® PASSIVE ANTI-THEFT SYSTEM
Note:The system is not compatible with non-Ford aftermarket remote
start systems. Use of these systems may result in vehicle starting
problems and a loss of security protection.
Note:Metallic objects, electronic devices or a second coded key on the
same key chain may cause vehicle starting issues if they are too close to
the key when starting your vehicle. Prevent these objects from touching
the coded key while starting the engine. Switch the ignition off, move all
objects on the key chain away from the coded key and restart your
vehicle if a problem occurs.
Note:Do not leave a duplicate coded key in your vehicle. Always take
your keys and lock all doors when leaving your vehicle.
The system helps prevent the engine from starting unless you use a
coded key programmed to your vehicle. Using the wrong key may
prevent your vehicle from starting. A message may appear in the
information display.
If you are unable to start your vehicle with a correctly coded key, a
malfunction has occurred. A message may appear in the information display.
Automatic Arming
Your vehicle arms immediately after you switch the ignition off.
Anti-Theft Indicator
The anti-theft indicator is located in the instrument cluster.
•When the ignition is off, the indicator will flash once every
two seconds to indicate the SecuriLock system is functioning
as a theft deterrent.
•When the ignition is on, the indicator will glow for three seconds, then
turn off to indicate normal system functionality.
If a problem occurs with the SecuriLock system, the indicator will flash
rapidly or glow steadily when the ignition is on. If this occurs, switch
the ignition off then back on to make sure there was no electronic
interference with the programmed key. If your vehicle does not start, try
to start it with the second programmed key and if successful contact
your authorized dealership for key replacement. If the indicator still
flashes rapidly or glows steadily, your vehicle will not start. Contact
your authorized dealer as soon as possible for service.
78Security
2014 Expedition(exd)
Owners Guide gf, 1st Printing, June 2013
USA(fus)
Page 80 of 519
Automatic Disarming
Your vehicle disarms when you switch the ignition on with a coded key.
Replacement Keys
Note:Your vehicle may come with two integrated keyhead transmitters.
The integrated keyhead transmitter functions as a programmed ignition
key that operates all the locks and starts the vehicle, as well as a remote
control.
If your programmed transmitters or standard SecuriLock coded keys are
lost or stolen and you do not have an extra coded key, you will need to
have your vehicle towed to an authorized dealer. The key codes need
to be erased from your vehicle and new coded keys will need to be
programmed.
Store an extra programmed key away from the vehicle in a safe place to
help prevent any inconveniences. See an authorized dealer to purchase
additional spare or replacement keys.
Programming a Spare Key
Note:A maximum of eight coded keys can be programmed to your
vehicle. Only four of these eight can be integrated keyhead transmitters.
You can program your own integrated keyhead transmitters or standard
SecuriLock coded keys to your vehicle. This procedure will program both
the engine immobilizer key code and the remote entry portion of the
remote control to your vehicle.
Only use integrated keyhead transmitters or standard SecuriLock keys.
You must have two previously programmed coded keys and the new
unprogrammed key readily accessible. See your authorized dealer to have
the spare key programmed if two previously programmed coded keys are
not available.
Read and understand the entire procedure before you begin.
1. Insert the first previously programmed coded key into the ignition.
2. Turn the ignition from off to on. Keep the ignition on for at least three
seconds, but no more than 10 seconds.
3. Turn the ignition off and remove the first coded key from the ignition.
4. After three seconds but within 10 seconds of turning the ignition off,
insert the second previously coded key into the ignition.
5. Turn the ignition from off to on. Keep the ignition on for at least three
seconds, but no more than 10 seconds.
Security79
2014 Expedition(exd)
Owners Guide gf, 1st Printing, June 2013
USA(fus)
Page 81 of 519
6. Turn the ignition off and remove the second previously programmed
coded key from the ignition.
7. After three seconds but within 20 seconds of turning the ignition off
and removing the previously programmed coded key, insert the new
unprogrammed key into the ignition.
8. Turn the ignition from off to on. Keep the ignition on for at least six
seconds.
9. Remove the newly programmed coded key from the ignition.
The key will start the vehicle’s engine and will operate the remote entry
system (if the new key is an integrated keyhead transmitter) if it has
been successfully programmed. The theft indicator light will illuminate
for three seconds and then go out to indicate successful programming.
If the key was not successfully programmed, the theft indicator light may
flash on and off. Wait 20 seconds and repeat Steps 1 through 8. Take
your vehicle to your authorized dealer to have the new key programmed
if you are still unsuccessful.
Wait 20 seconds and then repeat this procedure from Step 1 to program
an additional key.
ANTI-THEFT ALARM
The system will warn you of unauthorized entry to your vehicle.
The turn signal lamps will flash and the horn will sound when:
•any door or the hood is opened without using the key or the remote
control
•the ignition is turned on with an invalid key.
Take all keys and remote controls to your authorized dealer if there is
any potential alarm problem with your vehicle.
Arming the Alarm
The system is ready to arm whenever the ignition is off. Lock the vehicle
to arm the alarm.
The turn signal lamps will flash once after locking the vehicle to indicate
the alarm is in the pre-armed mode and will become fully armed in
20 seconds.
80Security
2014 Expedition(exd)
Owners Guide gf, 1st Printing, June 2013
USA(fus)
Page 82 of 519
Disarming the Alarm
To disarm the alarm, do any of the following:
•Press the power door unlock button within the 20-second pre-armed
mode.
•Press the unlock button on the remote control.
•Unlock the doors with the keyless entry pad.
•Turn the ignition on with a valid key.
•Press the panic button on the remote control. The alarm system will
still be armed, but this shuts off the horn and turn lamps when the
alarm is sounding.
Note:If the driver’s door is unlocked with a key, a chime will sound
when you open the door. You will have 12 seconds to disarm the alarm
using any of the actions above, otherwise the alarm will trigger.
Security81
2014 Expedition(exd)
Owners Guide gf, 1st Printing, June 2013
USA(fus)
Page 89 of 519
AUTOLAMPS
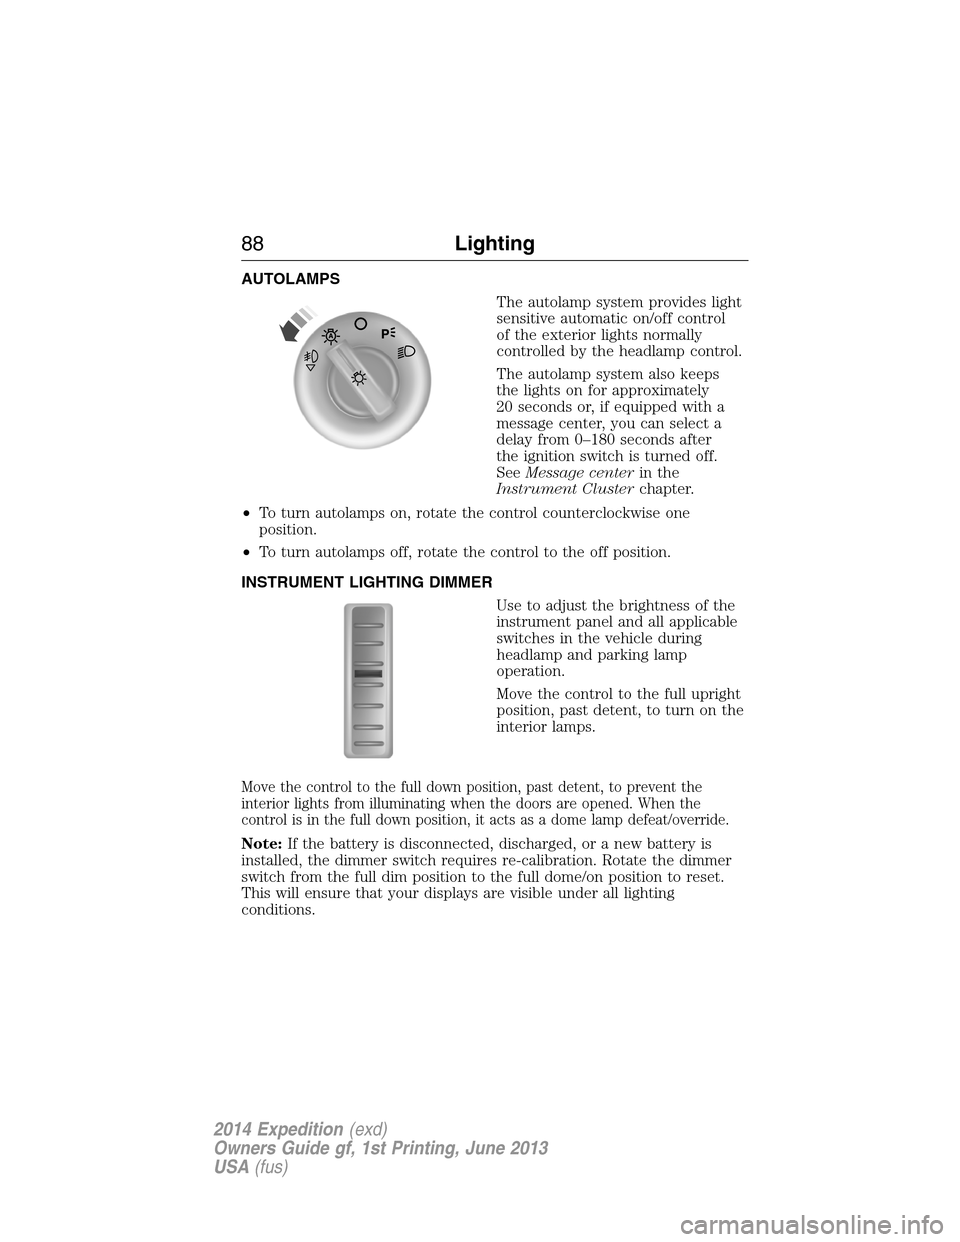
The autolamp system provides light
sensitive automatic on/off control
of the exterior lights normally
controlled by the headlamp control.
The autolamp system also keeps
the lights on for approximately
20 seconds or, if equipped with a
message center, you can select a
delay from 0–180 seconds after
the ignition switch is turned off.
SeeMessage centerin the
Instrument Clusterchapter.
•To turn autolamps on, rotate the control counterclockwise one
position.
•To turn autolamps off, rotate the control to the off position.
INSTRUMENT LIGHTING DIMMER
Use to adjust the brightness of the
instrument panel and all applicable
switches in the vehicle during
headlamp and parking lamp
operation.
Move the control to the full upright
position, past detent, to turn on the
interior lamps.
Move the control to the full down position, past detent, to prevent the
interior lights from illuminating when the doors are opened. When the
control is in the full down position, it acts as a dome lamp defeat/override.
Note:If the battery is disconnected, discharged, or a new battery is
installed, the dimmer switch requires re-calibration. Rotate the dimmer
switch from the full dim position to the full dome/on position to reset.
This will ensure that your displays are visible under all lighting
conditions.
88Lighting
2014 Expedition(exd)
Owners Guide gf, 1st Printing, June 2013
USA(fus)
Page 90 of 519

DAYTIME RUNNING LAMPS (IF EQUIPPED)
WARNING:Always remember to switch your headlamps on in
low light situations or during inclement weather. The system does
not activate the tail lamps and may not provide adequate lighting
during these conditions. Failure to activate your headlamps under these
conditions may result in a collision.
The system turns the headlamps on with a reduced intensity output
(halogen headlamps) or turns the front turn lamps on (HID headlamps)
in daylight conditions.
To switch the system on, ignition must be in the on position, then switch
the lighting control to the off, autolamp, or parking lamp position.
FRONT FOG LAMPS (IF EQUIPPED)
The control also operates the fog
lamps. The fog lamps can be turned
on when the control is in the
parking lamps on, headlamps on, or
autolamps positions and the high
beams are not turned on.
Pull the control towards you to turn
the fog lamps on. The fog lamp
indicator light will illuminate.
DIRECTION INDICATORS
•Push down to activate the left
turn signal.
•Push up to activate the right turn
signal.
120
Lighting89
2014 Expedition(exd)
Owners Guide gf, 1st Printing, June 2013
USA(fus)
Page 91 of 519
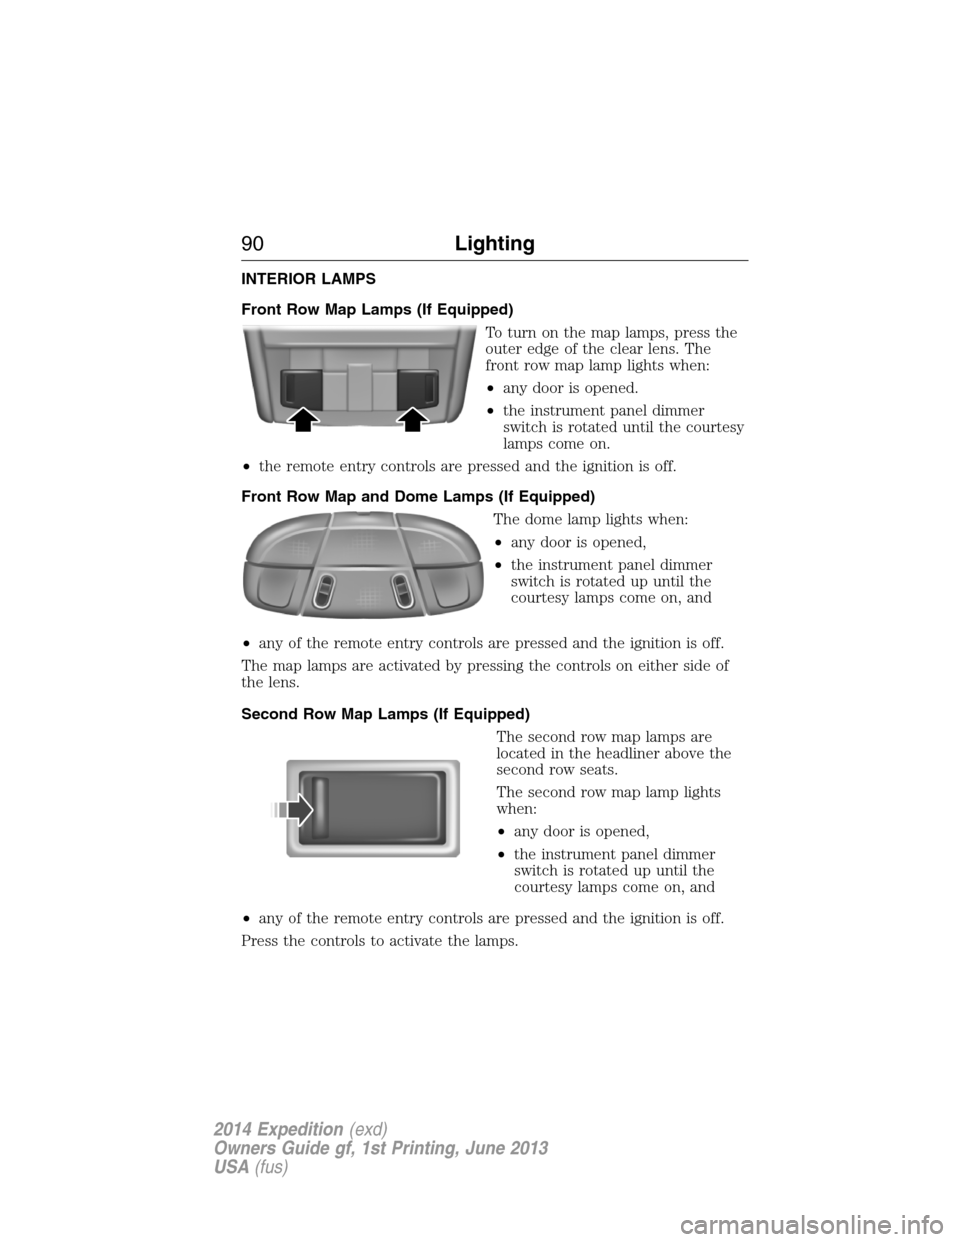
INTERIOR LAMPS
Front Row Map Lamps (If Equipped)
To turn on the map lamps, press the
outer edge of the clear lens. The
front row map lamp lights when:
•any door is opened.
•the instrument panel dimmer
switch is rotated until the courtesy
lamps come on.
•the remote entry controls are pressed and the ignition is off.
Front Row Map and Dome Lamps (If Equipped)
The dome lamp lights when:
•any door is opened,
•the instrument panel dimmer
switch is rotated up until the
courtesy lamps come on, and
•any of the remote entry controls are pressed and the ignition is off.
The map lamps are activated by pressing the controls on either side of
the lens.
Second Row Map Lamps (If Equipped)
The second row map lamps are
located in the headliner above the
second row seats.
The second row map lamp lights
when:
•any door is opened,
•the instrument panel dimmer
switch is rotated up until the
courtesy lamps come on, and
•any of the remote entry controls are pressed and the ignition is off.
Press the controls to activate the lamps.
90Lighting
2014 Expedition(exd)
Owners Guide gf, 1st Printing, June 2013
USA(fus)
Page 92 of 519
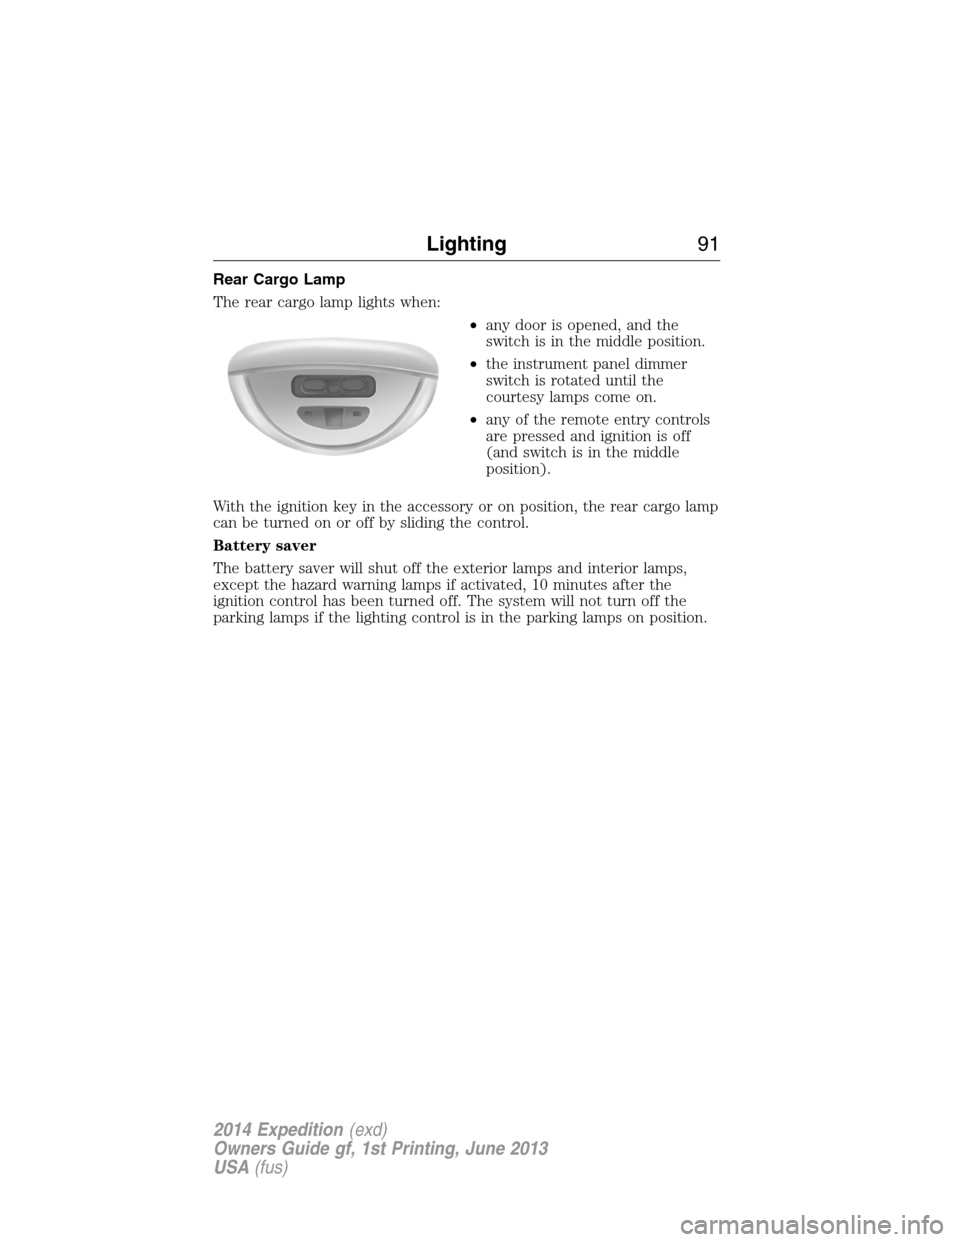
Rear Cargo Lamp
The rear cargo lamp lights when:
•any door is opened, and the
switch is in the middle position.
•the instrument panel dimmer
switch is rotated until the
courtesy lamps come on.
•any of the remote entry controls
are pressed and ignition is off
(and switch is in the middle
position).
With the ignition key in the accessory or on position, the rear cargo lamp
can be turned on or off by sliding the control.
Battery saver
The battery saver will shut off the exterior lamps and interior lamps,
except the hazard warning lamps if activated, 10 minutes after the
ignition control has been turned off. The system will not turn off the
parking lamps if the lighting control is in the parking lamps on position.
Lighting91
2014 Expedition(exd)
Owners Guide gf, 1st Printing, June 2013
USA(fus)