Page 68 of 275

FUEL CUT-OFF SWITCH
(as an alternative to the fuel cut-off system, for
versions/markets where provided)
It is located in the bottom, near the passenger side
pillar fig. 48. It is triggered in the event of an impact,
causing:
❒the fuel supply cut-off with the engine
consequently switching off;
❒the automatic unlocking of the doors;
❒the interior lights being switched on (for about 15
minutes).
The intervention of the switch is indicated by the
switching on of the
warning light on the
instrument panel or the
symbol on the display
(together with a message) (see “Warning lights and
messages” section).Carefully check the car for fuel leaks, for instance in
the engine compartment, under the car or near
the tank area.
If no fuel leaks are found and the car can be started
again, press button A to reactivate the fuel system
and the lights.
After a collision, turn the ignition key to STOP to
prevent the battery from running down.
WARNING
If, after a collision, you smell fuel or
notice leaks from the fuel supply system,
do not reset the switch to avoid fire risk.
fig. 48
F0Q0638
64GETTING TO
KNOW YOUR CAR
SAFETY
STARTING AND
DRIVING
WARNING LIGHTS
AND MESSAGES
IN AN EMERGENCY
SERVICING AND
MAINTENANCE
TECHNICAL
SPECIFICATIONS
INDEX
Page 69 of 275

FUEL CUT-OFF SYSTEM
(as an alternative to the fuel cut-off switch, for
versions/markets where provided)
It is triggered in the event of a collision, causing:
❒the fuel supply cut-off with the engine
consequently switching off;
❒the automatic unlocking of the doors;
❒the interior lights being switched on.
The intervention of the system is indicated by a
message shown on the display.
Carefully check the car for fuel leaks, for instance in
the engine compartment, under the car or near
the tank area.
After a collision, turn the ignition key to STOP to
prevent the battery from running down.The following procedure should be carried out to
restore the correct operation of the vehicle:
❒turn the ignition key to the MAR-ON position;
❒turn on the right direction indicator;
❒turn off the right direction indicator;
❒turn on the left direction indicator;
❒turn off the left direction indicator;
❒turn on the right direction indicator;
❒turn off the right direction indicator;
❒turn on the left direction indicator;
❒turn off the left direction indicator;
❒turn the ignition key to the OFF position;
❒turn the ignition key to the MAR-ON position.
WARNING
If, after an impact , you smell fuel or
notice leaks from the fuel supply system,
do not reactivate the system to avoid the risk of
fire.
65GETTING TO
KNOW YOUR CARSAFETY
STARTING AND
DRIVING
WARNING LIGHTS
AND MESSAGES
IN AN EMERGENCY
SERVICING AND
MAINTENANCE
TECHNICAL
SPECIFICATIONS
INDEX
Page 72 of 275

There are two cup and/or can holders B in the
armrest. To use these, pull tab C in the direction
shown by the arrow.
A storage compartment is available inside the
armrest; this can be accessed by raising the flap.
STORAGE COMPARTMENTS
Passenger side compartment
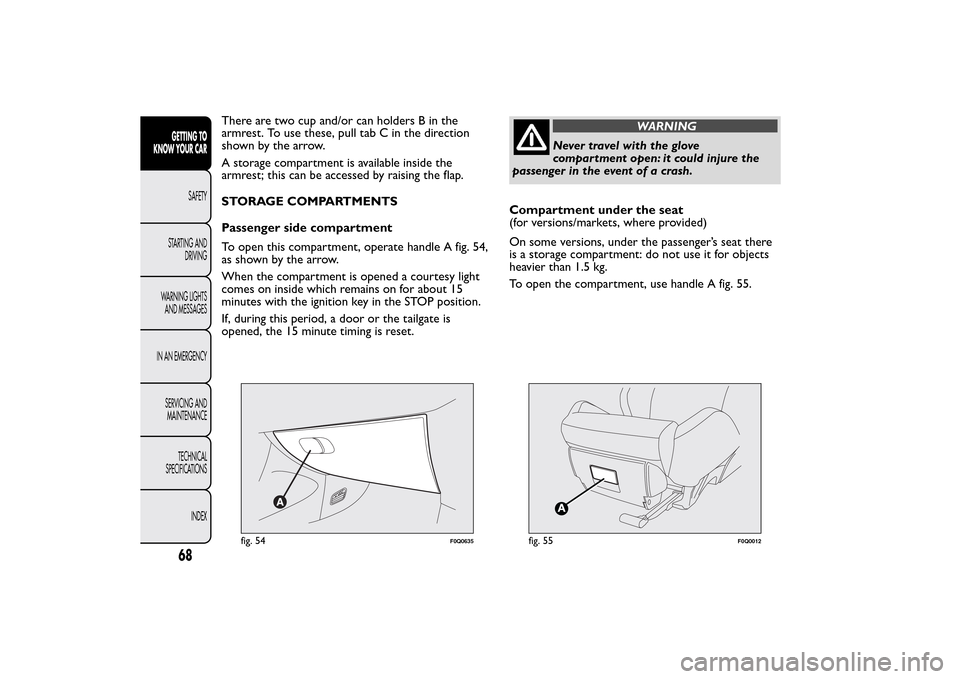
To open this compartment, operate handle A fig. 54,
as shown by the arrow.
When the compartment is opened a courtesy light
comes on inside which remains on for about 15
minutes with the ignition key in the STOP position.
If, during this period, a door or the tailgate is
opened, the 15 minute timing is reset.
WARNING
Never travel with the glove
compartment open: it could injure the
passenger in the event of a crash.
Compartment under the seat
(for versions/markets, where provided)
On some versions, under the passenger’s seat there
is a storage compartment: do not use it for objects
heavier than 1.5 kg.
To open the compartment, use handle A fig. 55.
fig. 54
F0Q0635
fig. 55
F0Q0012
68GETTING TO
KNOW YOUR CAR
SAFETY
STARTING AND
DRIVING
WARNING LIGHTS
AND MESSAGES
IN AN EMERGENCY
SERVICING AND
MAINTENANCE
TECHNICAL
SPECIFICATIONS
INDEX
Page 73 of 275

POWER SOCKET (12 V)
It is located on the central tunnel and is only
operational when the ignition key is turned to
MAR-ON. If a smokers' kit is requested, the socket
is replaced by a cigar lighter (see next paragraph).
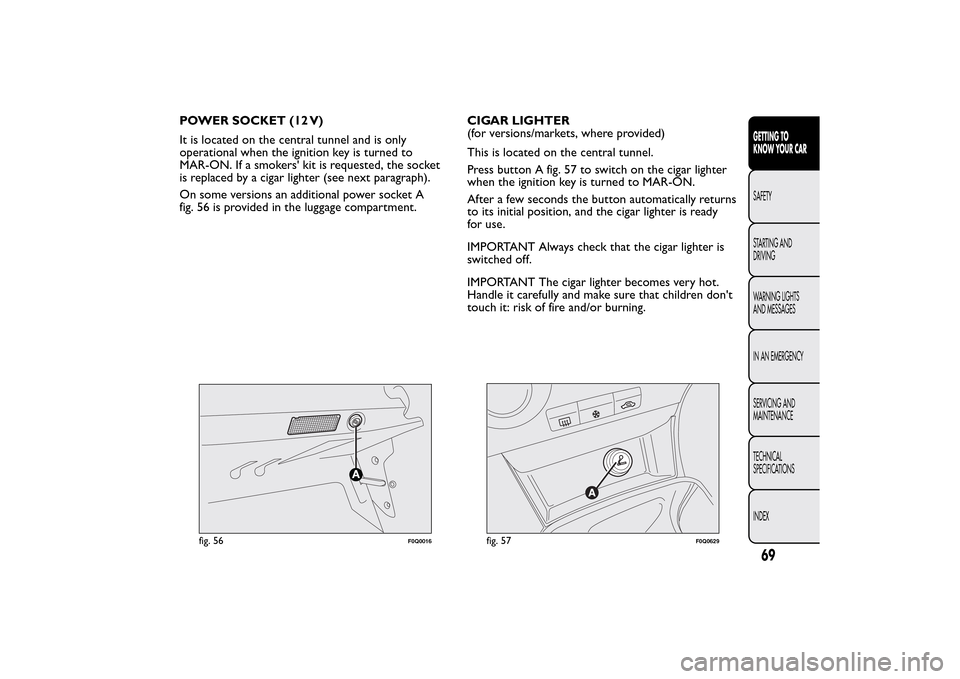
On some versions an additional power socket A
fig. 56 is provided in the luggage compartment.CIGAR LIGHTER
(for versions/markets, where provided)
This is located on the central tunnel.
Press button A fig. 57 to switch on the cigar lighter
when the ignition key is turned to MAR-ON.
After a few seconds the button automatically returns
to its initial position, and the cigar lighter is ready
for use.
IMPORTANT Always check that the cigar lighter is
switched off.
IMPORTANT The cigar lighter becomes very hot.
Handle it carefully and make sure that children don't
touch it: risk of fire and/or burning.
fig. 56
F0Q0016
fig. 57
F0Q0629
69GETTING TO
KNOW YOUR CARSAFETY
STARTING AND
DRIVING
WARNING LIGHTS
AND MESSAGES
IN AN EMERGENCY
SERVICING AND
MAINTENANCE
TECHNICAL
SPECIFICATIONS
INDEX
Page 76 of 275

On some versions, a courtesy mirror with courtesy
light is fitted on the back of the visors. The light
allows the mirror to be used even in poor visibility
conditions.
Lift cover A to access the mirror.
If the ignition key is at STOP position, the light stays
on for about 15 minutes. If, during this period, a
door or the tailgate is opened, the 15 minute timing
is reset.
IMPORTANT On both sides of the sun visor there is
a label remembering that it is compulsory to
deactivate the airbags if a rearward facing child
restraint system is fitted. Always comply with the
instructions on the sun visor. (see the "Front airbags"
paragraph in chapter "Safety").
SUN ROOF(for versions/markets, where provided)
The large electric sun roof comprises two panes of
glass, one of which is mobile and the other fixed.
These are equipped with two
sun blinds (front and rear) that can be moved
manually.
The sun blinds be used in "fully closed" or "fully
open" positions (they have no fixed intermediate
positions).
To open the sun blinds: grip handle A fig. 65, release
it and move it in the direction of the arrows to
the "fully open" position.
To close them, carry out the procedure in reverse.
The sun roof can be operated only with the ignition
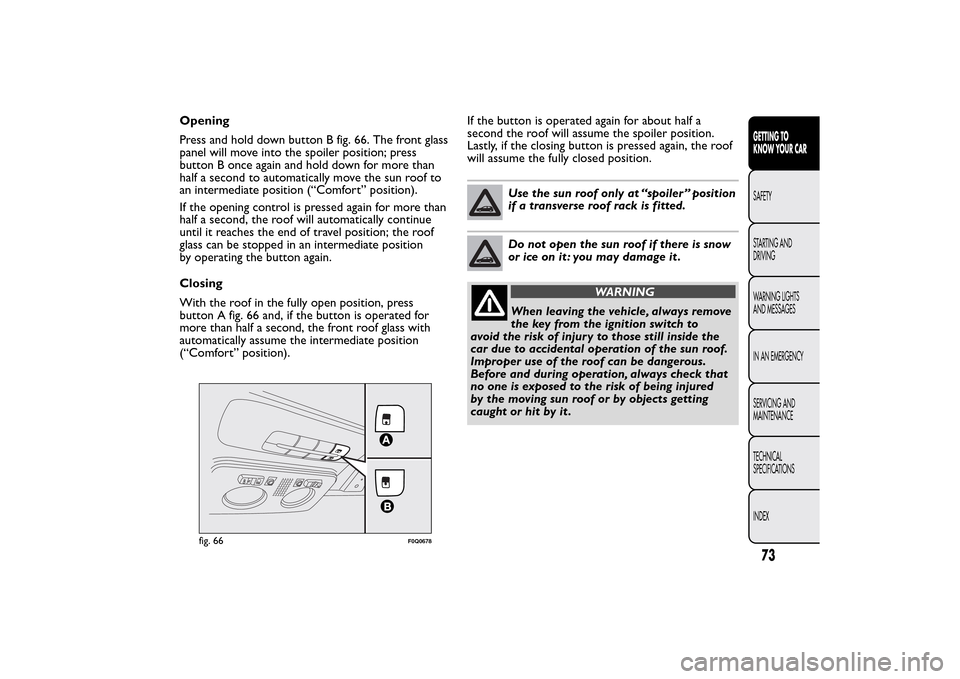
key turned to MAR-ON. The controls A and B fig. 66
on the trim next to the front roof light operate the
sun roof opening/closing functions.
fig. 65
F0Q0737
72GETTING TO
KNOW YOUR CAR
SAFETY
STARTING AND
DRIVING
WARNING LIGHTS
AND MESSAGES
IN AN EMERGENCY
SERVICING AND
MAINTENANCE
TECHNICAL
SPECIFICATIONS
INDEX
Page 77 of 275

Opening
Press and hold down button B fig. 66. The front glass
panel will move into the spoiler position; press
button B once again and hold down for more than
half a second to automatically move the sun roof to
an intermediate position (“Comfort” position).
If the opening control is pressed again for more than
half a second, the roof will automatically continue
until it reaches the end of travel position; the roof
glass can be stopped in an intermediate position
by operating the button again.
Closing
With the roof in the fully open position, press
button A fig. 66 and, if the button is operated for
more than half a second, the front roof glass with
automatically assume the intermediate position
(“Comfort” position).If the button is operated again for about half a
second the roof will assume the spoiler position.
Lastly, if the closing button is pressed again, the roof
will assume the fully closed position.
Use the sun roof only at “spoiler ” position
if a transverse roof rack is fitted.Do not open the sun roof if there is snow
or ice on it : you may damage it .
WARNING
When leaving the vehicle, always remove
the key from the ignition switch to
avoid the risk of injur y to those still inside the
car due to accidental operation of the sun roof.
Improper use of the roof can be dangerous.
Before and during operation, always check that
no one is exposed to the risk of being injured
by the moving sun roof or by objects getting
caught or hit by it .
fig. 66
F0Q0678
73GETTING TO
KNOW YOUR CARSAFETY
STARTING AND
DRIVING
WARNING LIGHTS
AND MESSAGES
IN AN EMERGENCY
SERVICING AND
MAINTENANCE
TECHNICAL
SPECIFICATIONS
INDEX
Page 78 of 275

ANTI-PINCH SAFETY DEVICE
The sun roof has an anti-pinch safety system capable
of detecting the presence of an obstacle whilst the
roof is closing: if this happens, the system intervenes
and the movement of the glass is immediately
reversed.
INITIALISATION PROCEDURE
After the battery has been disconnected or a fuse
has blown, the operation of the sun roof must be
initialised again.
Proceed as follows:
❒press button A fig. 66 until the roof is completely
closed. Release the button;
❒press button A and keep it pressed for at least 10
seconds and/or until the glass panel clicks
forwards. Release the button at this point;
❒press button A within 5 seconds of this operation
and keep it pressed: the glass panel will complete a
full opening and closing cycle. Only release the
button at the end of this cycle.EMERGENCY MANOEUVRE
If the switch does not work, the sun roof can be
operated manually as follows:
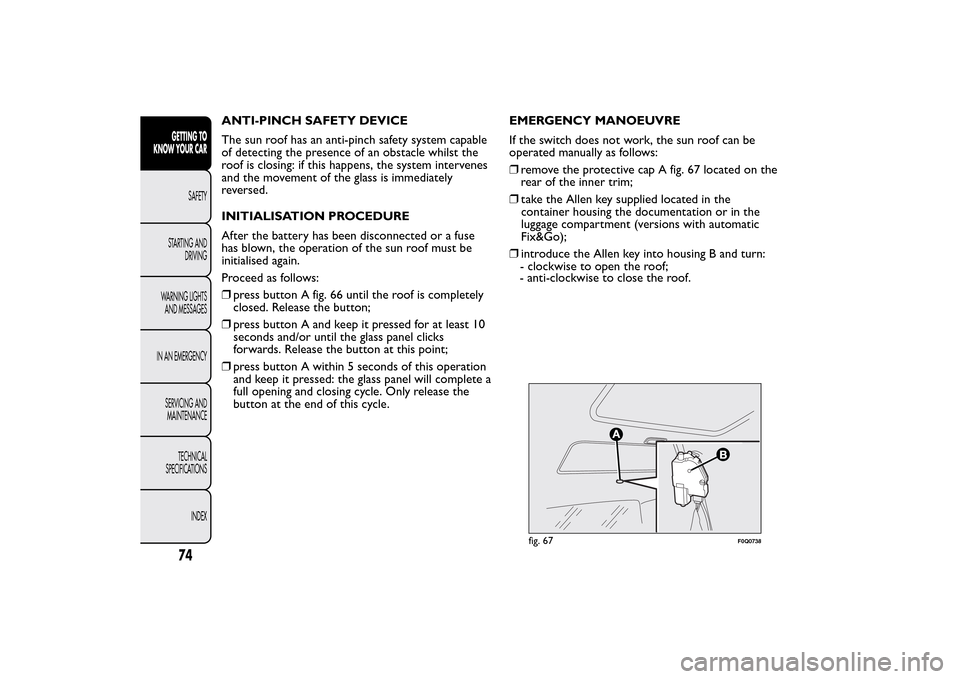
❒remove the protective cap A fig. 67 located on the
rear of the inner trim;
❒take the Allen key supplied located in the
container housing the documentation or in the
luggage compartment (versions with automatic
Fix&Go);
❒introduce the Allen key into housing B and turn:
clockwise to open the roof;
- anti-clockwise to close the roof.
fig. 67
F0Q0738
74GETTING TO
KNOW YOUR CAR
SAFETY
STARTING AND
DRIVING
WARNING LIGHTS
AND MESSAGES
IN AN EMERGENCY
SERVICING AND
MAINTENANCE
TECHNICAL
SPECIFICATIONS
INDEX
-
Page 79 of 275
DOORSCENTRAL LOCKING
From outside
With the doors closed, insert and turn the key in
one of the front door locks.
From inside
Press the door lock/release button fig. 68 located in
the dashboard, from inside the car (with the doors
shut).
If the electrical system has failed, it is still possible to
lock the doors manually.
IMPORTANT The rear doors cannot be opened
from the inside when the child lock device is
engaged.CHILD LOCK DEVICE
This prevents the rear doors from being opened
from the inside.
Device fig. 69 can only be engaged with the doors
open:
❒position1-device engaged (door locked);
❒position2-device not engaged (door may be
opened from the inside).
The device remains on even if the doors are
unlocked electrically.
Always use this device when carr ying
children.
fig. 68
F0Q0641
fig. 69
F0Q0677
75GETTING TO
KNOW YOUR CARSAFETY
STARTING AND
DRIVING
WARNING LIGHTS
AND MESSAGES
IN AN EMERGENCY
SERVICING AND
MAINTENANCE
TECHNICAL
SPECIFICATIONS
INDEX