Page 363 of 476
To enable the Service Position Strategy, the wipers must
be in the Park position before placing the ignition in the
OFF mode.
Service mode must be activated within two minutes
after the ignition is placed in the OFF mode.
To have a correct activation of strategy, the Service
Position command (antipanic) must be active for at least
half a second.
At every valid activation of Service Position command,
the wiper blades are activated for 250 ms.
The Service Position command can be repeated several
times to bring the blades into the desired position, up to
a maximum of three times.
After three subsequent activations the strategy is dis-
abled.
Function Deactivation:
The functionality is reset if:
•The ignition is turned to the RUN mode.
• Number of subsequent activations is three.
• Two minutes timer has expired after cycling the
ignition OFF. NOTE:
When turning the ignition ON, the blades will
go into the parking position.
Front Wiper Blade Removal/Installation
1. Lift the front wiper arm upward to raise the wiper blade off of the windshield.
2. Push the release button on the arm of the wiper blade.
3. Push the wiper blade up and remove it.
1—WiperBlade
2 — Release Button
3—WiperArm
9
MAINTAINING AND CARING FOR YOUR VEHICLE 361
Page 366 of 476
To minimize the possibility of catalytic converter dam-
age:
•Do not shut off the engine or interrupt the ignition,
when the transmission is in gear and the vehicle is in
motion.
• Do not try to start the engine by pushing or towing
the vehicle.
• Do not idle the engine with any spark plug wires
disconnected or removed, such as when diagnostic
testing, or for prolonged periods during very rough
idle or malfunctioning operating conditions.
Cooling System
WARNING!
• Turn vehicle off and disconnect the fan motor
lead before working near the radiator cooling fan.
• You or others can be badly burned by hot engine
coolant (antifreeze) or steam from your radiator. If
you see or hear steam coming from under the
hood, do not open the hood until the radiator has
had time to cool. Never open a cooling system
(Continued)
WARNING! (Continued)
pressure cap when the radiator or coolant bottle is
hot.
• Keep hands, tools, clothing, and jewelry away
from the radiator cooling fan when the hood is
raised. The fan starts automatically and may start
at any time, whether the engine is running or not.
• When working near the radiator cooling fan,
disconnect the fan motor lead or turn the ignition
switch to the OFF position. The fan is temperature
controlled and can start at any time the ignition
switch is in the ON position.
• You or others can be badly burned by hot engine
coolant (antifreeze) or steam from your radiator. If
you see or hear steam coming from under the
hood, do not open the hood until the radiator has
had time to cool. Never try to open a cooling
system pressure cap when the radiator is hot.
Coolant Checks
Check engine coolant (antifreeze) protection every 12
months (before the onset of freezing weather, where
applicable). If the engine coolant (antifreeze) is dirty or
rusty in appearance, the system should be drained,
364 MAINTAINING AND CARING FOR YOUR VEHICLE
Page 403 of 476
across dirty surfaces. Do not use plastic sheeting
which will not allow the evaporation of moisture
present on the surface of the vehicle.
• Inflate the tires at a pressure of +7.25 psi (+0.5 bar)
higher than recommended on the tire placard and
check it periodically.
• Do not drain the engine cooling system.
• Whenever you leave the vehicle is stationary for two
weeks or more, idle the engine for approximately five
minutes with the air conditioning system on and
high fan speed. This will ensure a proper lubrication
of the system, thus minimizing the possibility of
damage to the compressor when the vehicle is put
back into operation.
NOTE: When the vehicle has not been started or driven
for at least 30 days, an Extended Park Start Procedure is
required to start the vehicle. Refer to “Starting The
Engine” in “Starting And Operating” for further infor-
mation.CAUTION!
Before removal of the positive and negative termi-
nals to the battery, wait at least a minute with
ignition switch in the OFF position and close the
drivers door. When reconnecting the positive and
negative terminals to the battery be sure the igni-
tion switch is in the OFF position and the drivers
door is closed.
9
MAINTAINING AND CARING FOR YOUR VEHICLE 401
Page 417 of 476
Buttons On The Faceplate
Buttons on the faceplate are located below, and beside
the Uconnect system in the center of the instrument
panel. In addition, there is a Scroll/Enter control knob
located on the right side. Turn the control knob to scroll
through menus and change settings (i.e., 30, 60, 90),
push the center of the control knob one or more times to
select or change a setting (i.e., ON, OFF).
Your Uconnect system may also have Display Off and
back arrow buttons on the faceplate.
Push the Display Off button on the faceplate to turn off
the Uconnect screen. Push the Display Off button on the
faceplate a second time to turn the screen on.
Push the Back Arrow button on the faceplate to exit out
of a Menu or certain option on the Uconnect system.
Buttons On The Touchscreen
Buttons on the touchscreen are accessible on the
Uconnect touchscreen.
Customer Programmable Features — Uconnect
5.0 Settings
Push the Settingsbutton on the faceplate, to dis-
play the settings menu screen. In this mode the Uconnect system allows you to access programmable
features that may be equipped such as Display,
Units, Voice, Clock & Date, Safety/Assistance,
Lights, Doors & Locks, Engine Off Options, Audio,
Phone/Bluetooth, Radio Setup, Restore Settings and
Clear Personal Data.
NOTE:
Only one touchscreen area may be selected at a
time.
When making a selection, press the button on the
touchscreen to enter the desired mode. Once in the
desired mode, press and release the preferred setting
and make your selection. Once the setting is complete,
either press the Back Arrow button on the touchscreen
or the Back button on the faceplate to return to the
previous menu or press the “X” button on the touch-
screen to close out of the settings screen. Pressing the
Up or Down Arrow buttons on the right side of the
screen will allow you to toggle up or down through the
available settings.
NOTE: All settings should be changed with the ignition
in the “RUN” position.
11
MULTIMEDIA 415
Page 421 of 476
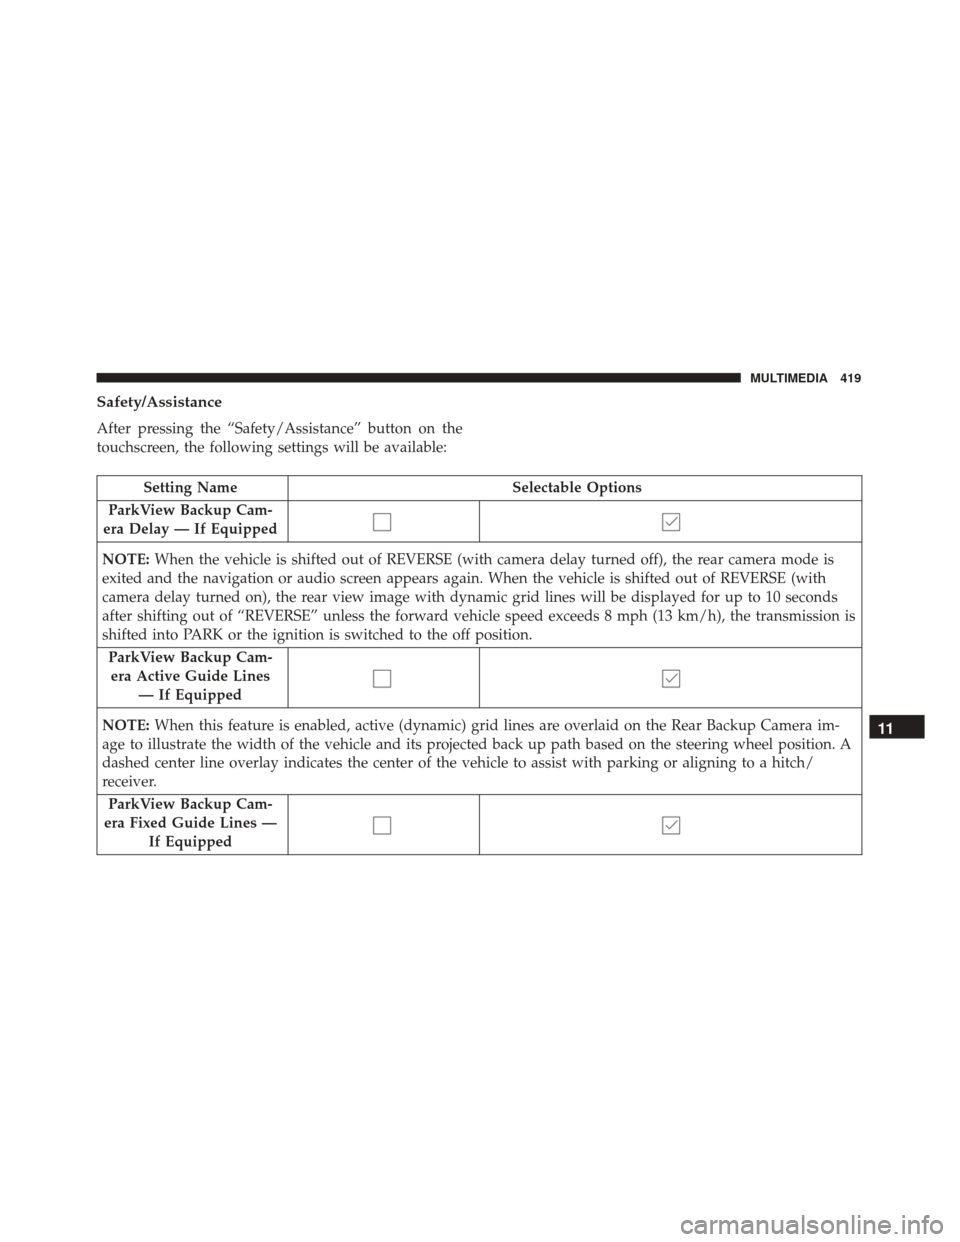
Safety/Assistance
After pressing the “Safety/Assistance” button on the
touchscreen, the following settings will be available:
Setting NameSelectable Options
ParkView Backup Cam-
era Delay — If Equipped
NOTE: When the vehicle is shifted out of REVERSE (with camera delay turned off), the rear camera mode is
exited and the navigation or audio screen appears again. When the vehicle is shifted out of REVERSE (with
camera delay turned on), the rear view image with dynamic grid lines will be displayed for up to 10 seconds
after shifting out of “REVERSE” unless the forward vehicle speed exceeds 8 mph (13 km/h), the transmission is
shifted into PARK or the ignition is switched to the off position.
ParkView Backup Cam-era Active Guide Lines — If Equipped
NOTE: When this feature is enabled, active (dynamic) grid lines are overlaid on the Rear Backup Camera im-
age to illustrate the width of the vehicle and its projected back up path based on the steering wheel position. A
dashed center line overlay indicates the center of the vehicle to assist with parking or aligning to a hitch/
receiver.
ParkView Backup Cam-
era Fixed Guide Lines — If Equipped
11
MULTIMEDIA 419
Page 428 of 476
Audio
After pressing the “Audio” button on the touchscreen,
the following settings will be available:
Setting NameSelectable Options
Equalizer +–
NOTE: Bass/Mid/Treble allow you to simply slide your finger up or down to change the setting as well as
press directly on the desired setting.
Balance/Fade When in this display you may adjust the Balance and Fade settings.
Speed Adjusted Volume 12
3
Surround Sound — If Equipped On
Off
Loudness — If Equipped Ye s
N o
AUX Volume Off-
set — If Equipped On
Off
Auto-On Radio OnOff Recall Last
NOTE: The Radio automatically turns on when vehicle is in run or will recall whether it was on or off at last
ignition off.
426 MULTIMEDIA
Page 439 of 476
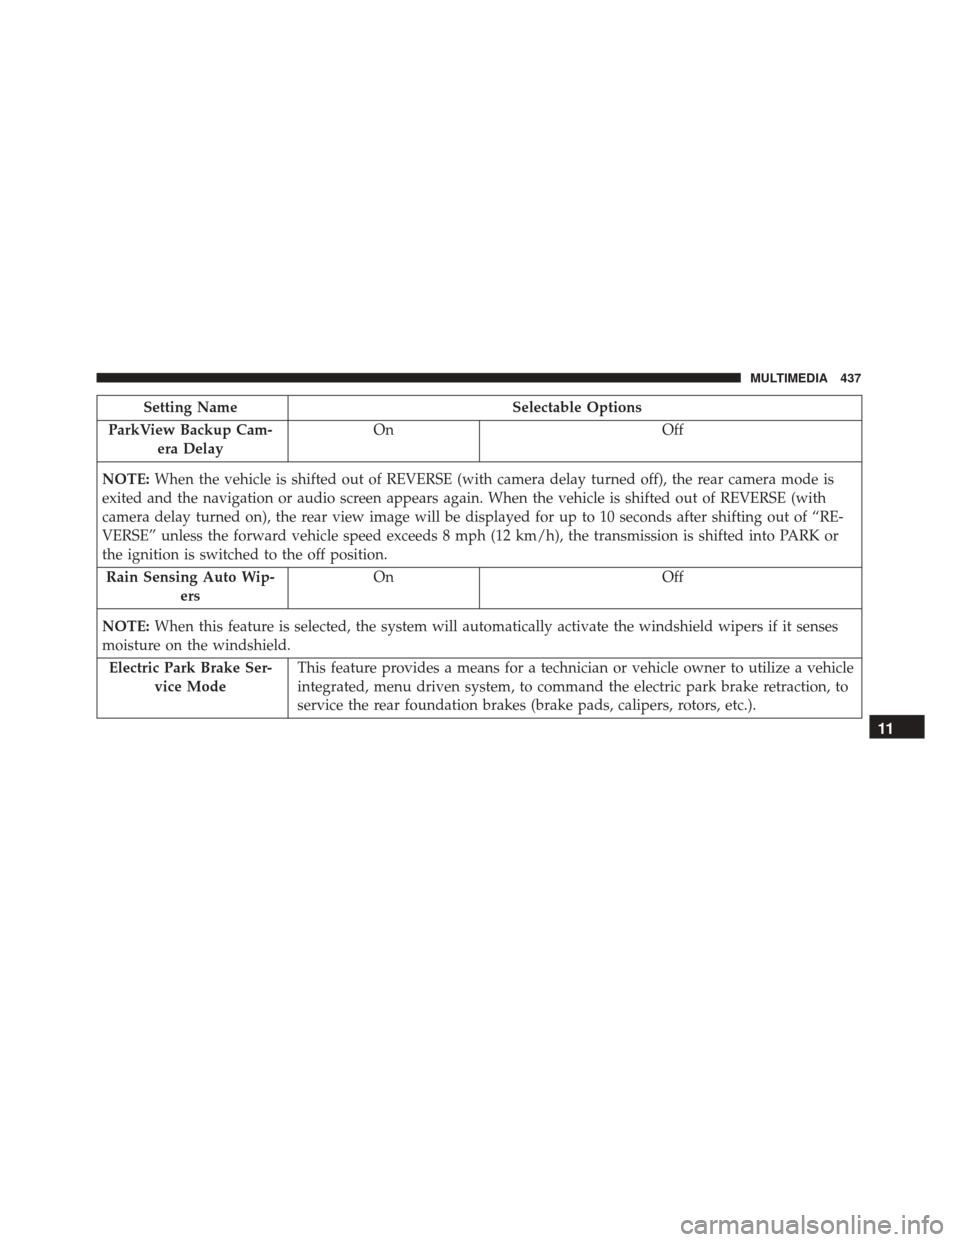
Setting NameSelectable Options
ParkView Backup Cam- era Delay On
Off
NOTE: When the vehicle is shifted out of REVERSE (with camera delay turned off), the rear camera mode is
exited and the navigation or audio screen appears again. When the vehicle is shifted out of REVERSE (with
camera delay turned on), the rear view image will be displayed for up to 10 seconds after shifting out of “RE-
VERSE” unless the forward vehicle speed exceeds 8 mph (12 km/h), the transmission is shifted into PARK or
the ignition is switched to the off position.
Rain Sensing Auto Wip- ers On
Off
NOTE: When this feature is selected, the system will automatically activate the windshield wipers if it senses
moisture on the windshield.
Electric Park Brake Ser- vice Mode This feature provides a means for a technician or vehicle owner to utilize a vehicle
integrated, menu driven system, to command the electric park brake retraction, to
service the rear foundation brakes (brake pads, calipers, rotors, etc.).
11
MULTIMEDIA 437
Page 444 of 476
Setting NameSelectable Options
Speed Adjusted Volume 12
3
Surround Sound — If Equipped On
Off
Loudness — If Equipped Ye s
N o
AUX Volume Off-
set — If Equipped On
Off
Auto-On Radio OnOff Recall Last
NOTE: The Radio automatically turns on when vehicle is in run or will recall whether it was on or off at last
ignition off.
Phone/Bluetooth
After pressing the “Phone/Bluetooth” button on the
touchscreen, the following settings will be available:
Setting Name Selectable Options
Paired Phones This feature shows which mobile phones are paired to the Phone/
Bluetooth system.
Paired Audio Sources This feature shows which audio devices are paired to the Phone/
Bluetooth system.
442 MULTIMEDIA