2014 FIAT 500L LIVING tow
[x] Cancel search: towPage 34 of 420
STEERING LOCK
Engagement:when the key is in position STOP,
remove the key and turn the steering wheel until it is
locked.
Disengagement:move the steering wheel slightly
as you turn the ignition key to MAR.
WARNING
It is absolutely forbidden to carr y out
any after-market operation involving
steering system or steering column
modifications (e.g.: installation of anti-theft
device) that could badly affect performance and
safety, invalidate the warranty and also result
in non-compliance of the car with type-
approval requirements.
WARNING
Never remove the key while the car is
moving.The steering wheel will lock
as soon as it is turned.This holds true for cars
being towed as well.
SEATS
WARNING
All adjustments must be made with the
car stationary.The fabric upholstery of the seats has
been designed to withstand long-term
wear deriving from normal use of the car.
Some precautions are however required. Avoid
prolonged and/or excessive rubbing against
clothing accessories such as metal buckles and
Velcro strips which, by applying a high pressure on
the fabric in a small area, could cause it to
break, thereby damaging the upholstery.
30GETTING TO
KNOW YOUR CAR
SAFETY
STARTING AND
DRIVING
WARNING LIGHTS
AND MESSAGES
IN AN EMERGENCY
SERVICING AND
MAINTENANCE
TECHNICAL
SPECIFICATIONS
INDEX
Page 67 of 420
AUTOMATIC LIGHT CONTROL
(AUTOLIGHT)
(Dusk sensor)
(for versions/markets, where provided)
This infrared LED sensor, combined with the rain
sensor and located on the windscreen, detects the
variations in outside brightness depending on the
light sensitivity set with the Setup Menu: the greater
the sensitivity, the less external light is required to
activate the exterior lights.
Activation
The dusk sensor activates when ring nut A fig. 45 is
turned to
. In this way the side lights and dipped
headlights are activated automatically according to
the external light level.
Following automatic light activation, the fog lights
(for versions/markets, where provided) and rear fog
light may still be switched on. When the lights are
automatically switched off, the front and rear fog
lights (if activated) are also switched off. The next
time the lights are switched on automatically, the fog
lights must be reactivated manually (if required).
With dusk sensor active, it is not possible to keep
the main beam headlights on constantly; only flashing
is permitted. To switch these lights on constantly,
turn ring nut A to
and pull the stalk towards the
steering wheel.On automatic sensor controlled deactivation, the
dipped headlights are deactivated first, followed
by the side lights a few seconds later.
If the sensor is activated but is malfunctioning, the
side lights and dipped beam headlights are switched
on irrespective of the outside light level: the sensor
failure is indicated on the display. It is also possible to
deactivate the sensor and switch on the desired
lights, if necessary.
IMPORTANT The sensor cannot detect the presence
of fog. These lights must therefore be switched on
manually in these circumstances.
MAIN BEAM HEADLIGHTS
To activate the main beam headlights, with ring nut A
at
, pull the stalk towards the steering wheel
beyond the end of travel position.
Thewarning light switches on in the instrument
panel.
When the stalk is pulled towards the steering wheel
again, beyond the end of travel position, the main
beam headlights deactivate, the dipped beam
headlights reactivate and the warning light
switches off.
It is not possible to switch on the main beam
headlights in fixed mode if the automatic lighting
control system is active.
63GETTING TO
KNOW YOUR CARSAFETY
STARTING AND
DRIVING
WARNING LIGHTS
AND MESSAGES
IN AN EMERGENCY
SERVICING AND
MAINTENANCE
TECHNICAL
SPECIFICATIONS
INDEX
Page 68 of 420
FLASHING
To do this, pull the stalk towards the steering wheel
(unstable position) regardless of the position of
ring nut A.
The
warning light switches on in the instrument
panel.
DIRECTION INDICATORS
Bring the stalk to the (stable) position:
upwards:right-hand direction indicator activation;
downwards:left-hand direction indicator activation.
Theor
warning light will flash on the
instrument panel.
Direction indicators are switched off automatically
when the steering wheel is straightened.
Lane change function
If you wish to signal a lane change, put the left stalk
in the unstable position for less than half a second.
The direction indicator on the side selected will
be activated for 5 flashes and then go out
automatically.
“Cornering lights”
When the dipped headlamps are on and the speed is
below 40 km/h, if the steering wheel rotation angle
is large or the direction indicators are on, a light
(incorporated in the fog light) will switch on on the
relevant side to improve visibility at nighttime.“FOLLOW ME HOME” DEVICE
This allows the space in front of the car to be lit up
for a certain period of time.
Activation: with the ignition key turned to STOP or
removed, pull the stalk towards the steering wheel
within 2 minutes from when the engine is turned off.
Each time the stalk is moved, the lights stay on for
an extra 30 seconds up to a maximum of 210
seconds; then the lights are switched off
automatically.
Also, each time the stalk is operated, the
warning light on the instrument panel switches
on. The display shows a message and the time set for
the function.
The
warning light switches on when the stalk is
first moved and stays on until the function is
automatically deactivated. Each movement of the
stalk only increases the amount of time the lights
stay on.
Deactivation: keep the stalk pulled towards the
steering wheel for more than two seconds.
64GETTING TO
KNOW YOUR CAR
SAFETY
STARTING AND
DRIVING
WARNING LIGHTS
AND MESSAGES
IN AN EMERGENCY
SERVICING AND
MAINTENANCE
TECHNICAL
SPECIFICATIONS
INDEX
Page 70 of 420
"Smart washing" function
Pull the lever towards the steering wheel (unstable
position) to activate the windscreen washer.
Keeping the stalk pulled for more than half a second,
with just one movement it is possible to operate
the washer jet and the wiper at the same time.
The wiper stops working three strokes after the
stalk is released.
A further stroke after approximately six seconds
completes the wiping cycle (for versions/markets,
where provided).
RAIN SENSOR
(for versions/markets, where provided)
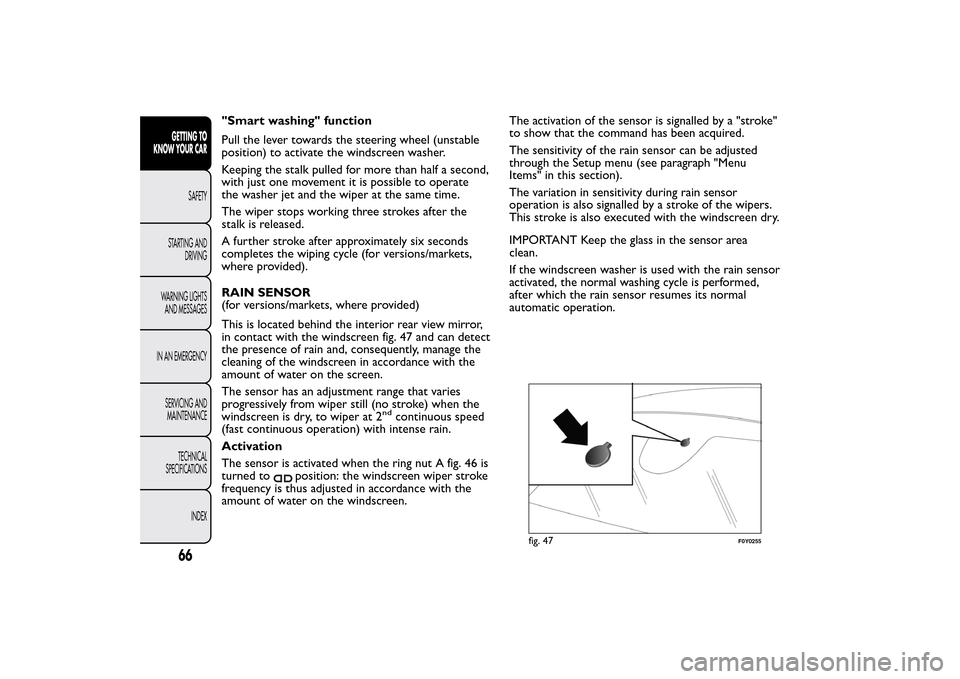
This is located behind the interior rear view mirror,
in contact with the windscreen fig. 47 and can detect
the presence of rain and, consequently, manage the
cleaning of the windscreen in accordance with the
amount of water on the screen.
The sensor has an adjustment range that varies
progressively from wiper still (no stroke) when the
windscreen is dry, to wiper at 2
nd
continuous speed
(fast continuous operation) with intense rain.
Activation
The sensor is activated when the ring nut A fig. 46 is
turned to
position: the windscreen wiper stroke
frequency is thus adjusted in accordance with the
amount of water on the windscreen.The activation of the sensor is signalled by a "stroke"
to show that the command has been acquired.
The sensitivity of the rain sensor can be adjusted
through the Setup menu (see paragraph "Menu
Items" in this section).
The variation in sensitivity during rain sensor
operation is also signalled by a stroke of the wipers.
This stroke is also executed with the windscreen dry.
IMPORTANT Keep the glass in the sensor area
clean.
If the windscreen washer is used with the rain sensor
activated, the normal washing cycle is performed,
after which the rain sensor resumes its normal
automatic operation.
fig. 47
F0Y0255
66GETTING TO
KNOW YOUR CAR
SAFETY
STARTING AND
DRIVING
WARNING LIGHTS
AND MESSAGES
IN AN EMERGENCY
SERVICING AND
MAINTENANCE
TECHNICAL
SPECIFICATIONS
INDEX
Page 72 of 420
REAR WINDOW WASHER/ WIPER
It can be operated only with the ignition key turned
to MAR.
Activation
Turn the ring nut B fig. 46 from
to
to operate
the rear window wiper as follows:
❒in intermittent mode when the windscreen wiper
is not operating;
❒in synchronous mode (at half the speed of the
windscreen wiper) when the windscreen wiper
is operating;
❒in continuous mode with reverse engaged.
With the windscreen wiper on and reverse gear
engaged, rear window wiping will be continuous in
the same way.
Pushing the stalk towards the dashboard (unstable
position) the rear window washer jet will activate.
Keep the stalk pushed for more than half a second to
activate the rear window wiper as well. Releasing
the stalk will activate the smart washing function, as
described for the windscreen wiper.
Deactivation
The function stops when the stalk is released.
Do not use the rear window wiper to
removelayersofsnoworice.In
such conditions, the wiper may be
subjected to excessive stress and the motor
protection, which prevents operation for a few
seconds, may intervene. If operation is not
restored, contact a Fiat Dealership.
68GETTING TO
KNOW YOUR CAR
SAFETY
STARTING AND
DRIVING
WARNING LIGHTS
AND MESSAGES
IN AN EMERGENCY
SERVICING AND
MAINTENANCE
TECHNICAL
SPECIFICATIONS
INDEX
Page 73 of 420
CRUISE CONTROL(for versions/markets, where provided)
This is an electronically controlled driving assistance
device that allows the desired car speed to be
maintained, without having to press the accelerator
pedal.
This device can be used at a speed above 30 km/h on
long stretches of dry, straight roads with few
variations (e.g. motorways).
The use of this device on extra-urban roads with
traffic is not therefore recommended. Do not use
the device in town.
ACTIVATING THE DEVICE
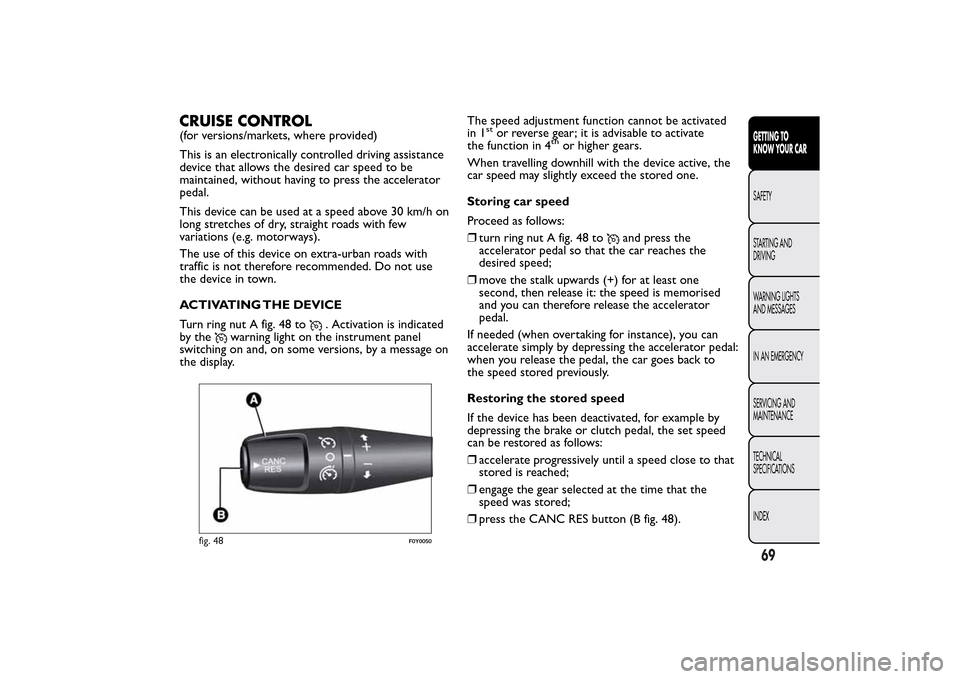
Turn ring nut A fig. 48 to
. Activation is indicated
by the
warning light on the instrument panel
switching on and, on some versions, by a message on
the display.The speed adjustment function cannot be activated
in 1
stor reverse gear; it is advisable to activate
the function in 4
th
or higher gears.
When travelling downhill with the device active, the
car speed may slightly exceed the stored one.
Storing car speed
Proceed as follows:
❒turn ring nut A fig. 48 to
and press the
accelerator pedal so that the car reaches the
desired speed;
❒move the stalk upwards (+) for at least one
second, then release it: the speed is memorised
and you can therefore release the accelerator
pedal.
If needed (when overtaking for instance), you can
accelerate simply by depressing the accelerator pedal:
when you release the pedal, the car goes back to
the speed stored previously.
Restoring the stored speed
If the device has been deactivated, for example by
depressing the brake or clutch pedal, the set speed
can be restored as follows:
❒accelerate progressively until a speed close to that
stored is reached;
❒engage the gear selected at the time that the
speed was stored;
❒press the CANC RES button (B fig. 48).
fig. 48
F0Y0050
69GETTING TO
KNOW YOUR CARSAFETY
STARTING AND
DRIVING
WARNING LIGHTS
AND MESSAGES
IN AN EMERGENCY
SERVICING AND
MAINTENANCE
TECHNICAL
SPECIFICATIONS
INDEX
Page 87 of 420
CIGAR LIGHTER
(for versions/markets, where provided)
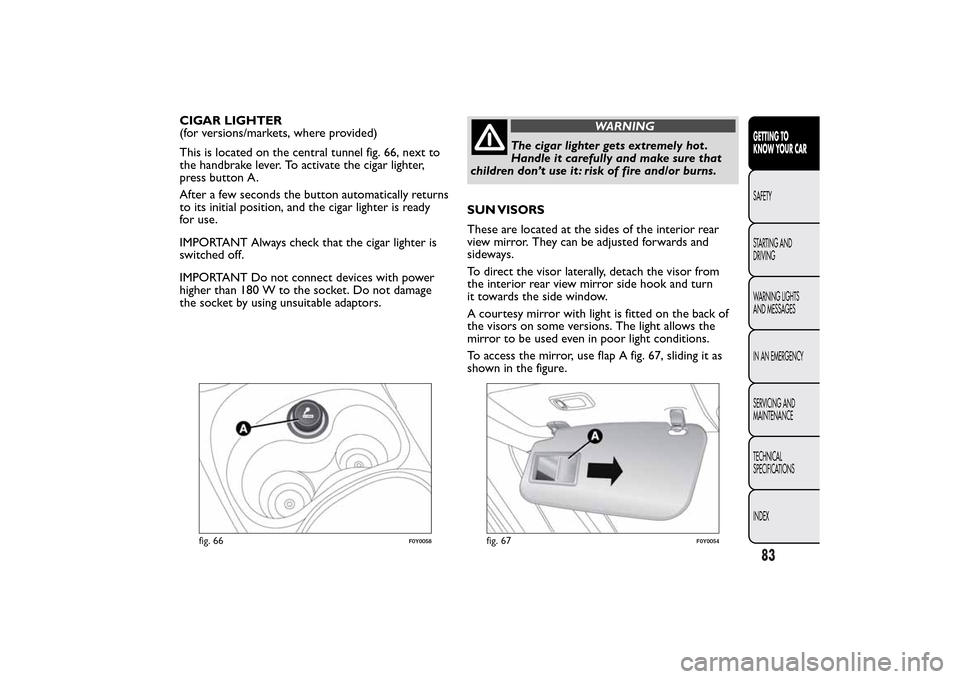
This is located on the central tunnel fig. 66, next to
the handbrake lever. To activate the cigar lighter,
press button A.
After a few seconds the button automatically returns
to its initial position, and the cigar lighter is ready
for use.
IMPORTANT Always check that the cigar lighter is
switched off.
IMPORTANT Do not connect devices with power
higher than 180 W to the socket. Do not damage
the socket by using unsuitable adaptors.
WARNING
The cigar lighter gets extremely hot .
Handle it carefully and make sure that
children don’t use it : risk of fire and/or burns.
SUN VISORS
These are located at the sides of the interior rear
view mirror. They can be adjusted forwards and
sideways.
To direct the visor laterally, detach the visor from
the interior rear view mirror side hook and turn
it towards the side window.
A courtesy mirror with light is fitted on the back of
the visors on some versions. The light allows the
mirror to be used even in poor light conditions.
To access the mirror, use flap A fig. 67, sliding it as
shown in the figure.
fig. 66
F0Y0058
fig. 67
F0Y0054
83GETTING TO
KNOW YOUR CARSAFETY
STARTING AND
DRIVING
WARNING LIGHTS
AND MESSAGES
IN AN EMERGENCY
SERVICING AND
MAINTENANCE
TECHNICAL
SPECIFICATIONS
INDEX
Page 89 of 420
FIXED GLASS ROOF(for versions/markets, where provided)
It comprises an extensive fixed glass panel and is
fitted with an electrically operated sun blind.
BLIND MOVEMENT
Blind operation is carried out with the key at
MAR-ON only.
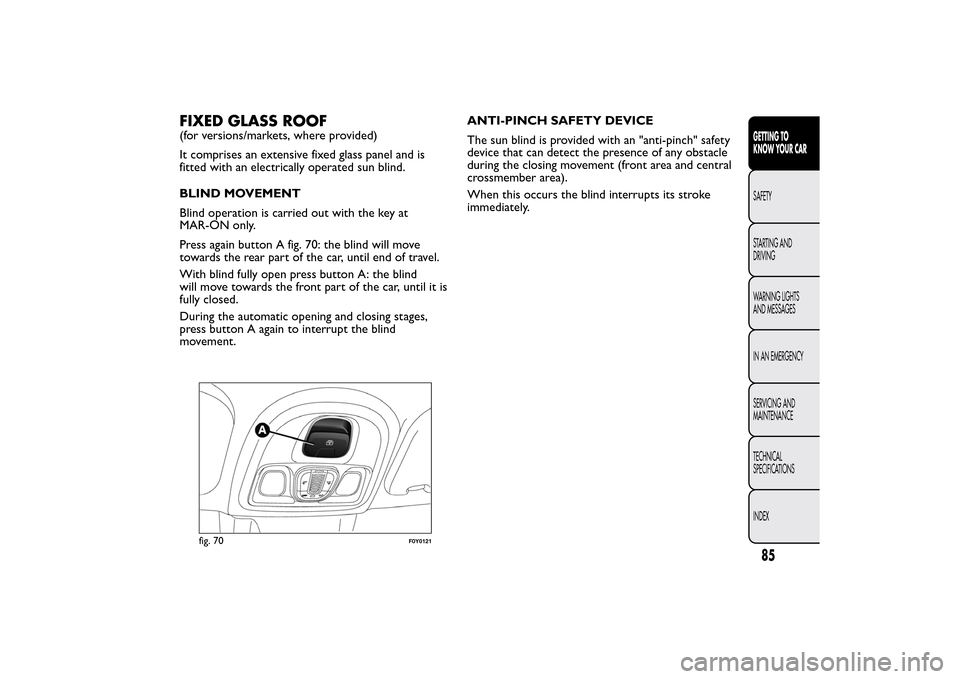
Press again button A fig. 70: the blind will move
towards the rear part of the car, until end of travel.
With blind fully open press button A: the blind
will move towards the front part of the car, until it is
fully closed.
During the automatic opening and closing stages,
press button A again to interrupt the blind
movement.ANTI-PINCH SAFETY DEVICE
The sun blind is provided with an "anti-pinch" safety
device that can detect the presence of any obstacle
during the closing movement (front area and central
crossmember area).
When this occurs the blind interrupts its stroke
immediately.
fig. 70
F0Y0121
85GETTING TO
KNOW YOUR CARSAFETY
STARTING AND
DRIVING
WARNING LIGHTS
AND MESSAGES
IN AN EMERGENCY
SERVICING AND
MAINTENANCE
TECHNICAL
SPECIFICATIONS
INDEX