Page 87 of 420
CIGAR LIGHTER
(for versions/markets, where provided)
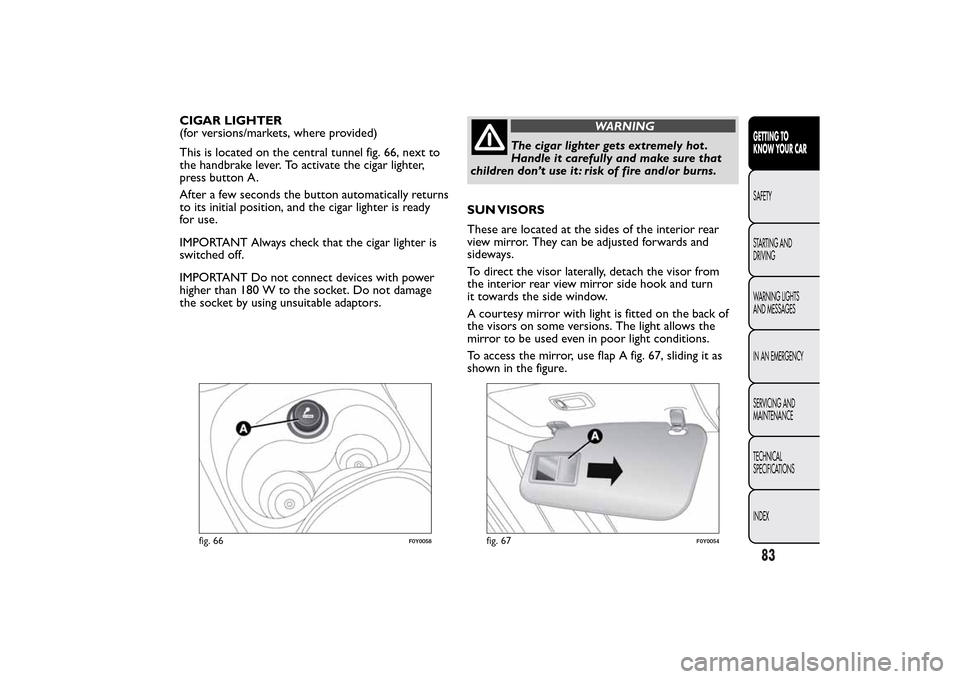
This is located on the central tunnel fig. 66, next to
the handbrake lever. To activate the cigar lighter,
press button A.
After a few seconds the button automatically returns
to its initial position, and the cigar lighter is ready
for use.
IMPORTANT Always check that the cigar lighter is
switched off.
IMPORTANT Do not connect devices with power
higher than 180 W to the socket. Do not damage
the socket by using unsuitable adaptors.
WARNING
The cigar lighter gets extremely hot .
Handle it carefully and make sure that
children don’t use it : risk of fire and/or burns.
SUN VISORS
These are located at the sides of the interior rear
view mirror. They can be adjusted forwards and
sideways.
To direct the visor laterally, detach the visor from
the interior rear view mirror side hook and turn
it towards the side window.
A courtesy mirror with light is fitted on the back of
the visors on some versions. The light allows the
mirror to be used even in poor light conditions.
To access the mirror, use flap A fig. 67, sliding it as
shown in the figure.
fig. 66
F0Y0058
fig. 67
F0Y0054
83GETTING TO
KNOW YOUR CARSAFETY
STARTING AND
DRIVING
WARNING LIGHTS
AND MESSAGES
IN AN EMERGENCY
SERVICING AND
MAINTENANCE
TECHNICAL
SPECIFICATIONS
INDEX
Page 88 of 420
GLASSES HOLDER
(for versions/markets, where provided)
This is located on the left of the driver side sun visor,
above the door fig. 68.REAR SEAT SURVEILLANCE MIRROR
(for versions/markets, where provided)
This is located next to the front roof light.
To bring it to usage position, operate in area A
fig. 69, turning it downwards.
EXTINGUISHER
(for versions/markets, where provided)
Where required, the fire extinguisher is located in
the luggage compartment.
fig. 68
F0Y0051
fig. 69
F0Y0122
84GETTING TO
KNOW YOUR CAR
SAFETY
STARTING AND
DRIVING
WARNING LIGHTS
AND MESSAGES
IN AN EMERGENCY
SERVICING AND
MAINTENANCE
TECHNICAL
SPECIFICATIONS
INDEX
Page 89 of 420
FIXED GLASS ROOF(for versions/markets, where provided)
It comprises an extensive fixed glass panel and is
fitted with an electrically operated sun blind.
BLIND MOVEMENT
Blind operation is carried out with the key at
MAR-ON only.
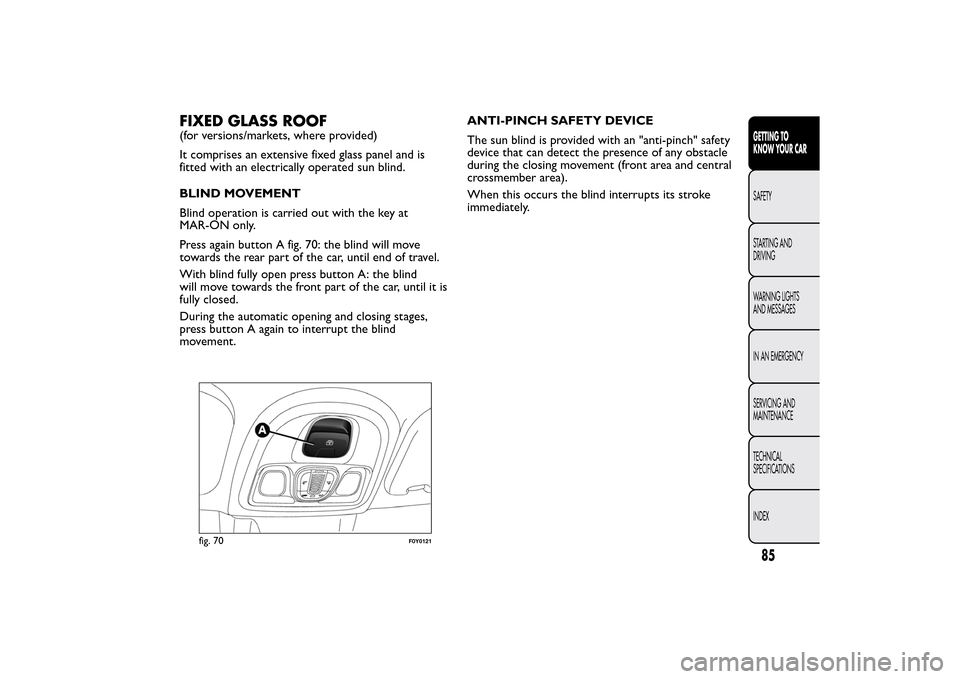
Press again button A fig. 70: the blind will move
towards the rear part of the car, until end of travel.
With blind fully open press button A: the blind
will move towards the front part of the car, until it is
fully closed.
During the automatic opening and closing stages,
press button A again to interrupt the blind
movement.ANTI-PINCH SAFETY DEVICE
The sun blind is provided with an "anti-pinch" safety
device that can detect the presence of any obstacle
during the closing movement (front area and central
crossmember area).
When this occurs the blind interrupts its stroke
immediately.
fig. 70
F0Y0121
85GETTING TO
KNOW YOUR CARSAFETY
STARTING AND
DRIVING
WARNING LIGHTS
AND MESSAGES
IN AN EMERGENCY
SERVICING AND
MAINTENANCE
TECHNICAL
SPECIFICATIONS
INDEX
Page 90 of 420
EMERGENCY OPERATION
If the control button fails, the sun curtain can be
moved manually proceeding as described below:
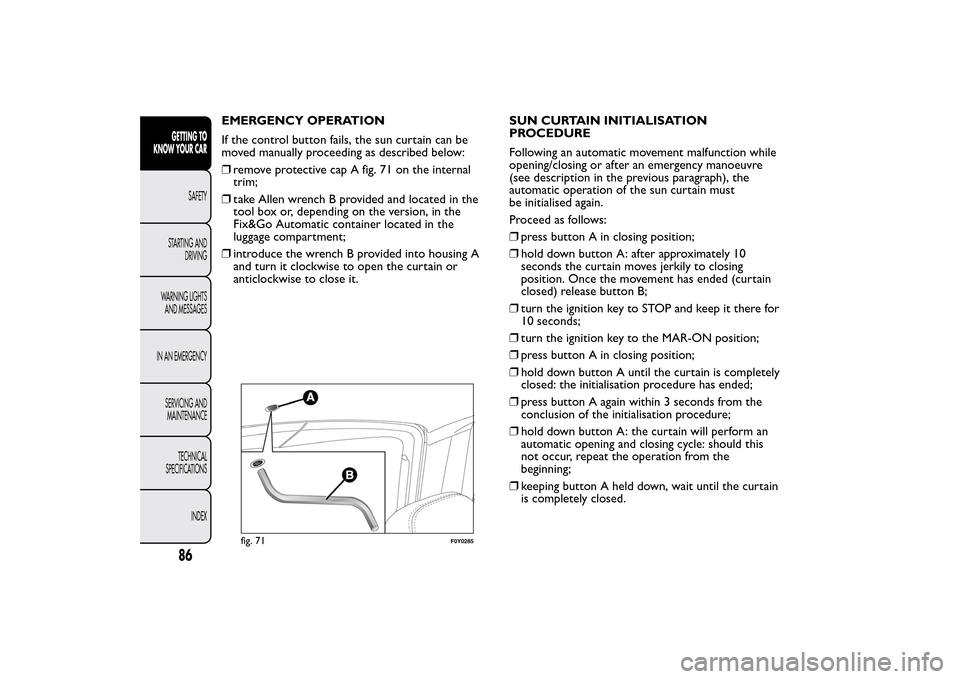
❒remove protective cap A fig. 71 on the internal
trim;
❒take Allen wrench B provided and located in the
tool box or, depending on the version, in the
Fix&Go Automatic container located in the
luggage compartment;
❒introduce the wrench B provided into housing A
and turn it clockwise to open the curtain or
anticlockwise to close it.SUN CURTAIN INITIALISATION
PROCEDURE
Following an automatic movement malfunction while
opening/closing or after an emergency manoeuvre
(see description in the previous paragraph), the
automatic operation of the sun curtain must
be initialised again.
Proceed as follows:
❒press button A in closing position;
❒hold down button A: after approximately 10
seconds the curtain moves jerkily to closing
position. Once the movement has ended (curtain
closed) release button B;
❒turn the ignition key to STOP and keep it there for
10 seconds;
❒turn the ignition key to the MAR-ON position;
❒press button A in closing position;
❒hold down button A until the curtain is completely
closed: the initialisation procedure has ended;
❒press button A again within 3 seconds from the
conclusion of the initialisation procedure;
❒hold down button A: the curtain will perform an
automatic opening and closing cycle: should this
not occur, repeat the operation from the
beginning;
❒keeping button A held down, wait until the curtain
is completely closed.
fig. 71
F0Y0285
86GETTING TO
KNOW YOUR CAR
SAFETY
STARTING AND
DRIVING
WARNING LIGHTS
AND MESSAGES
IN AN EMERGENCY
SERVICING AND
MAINTENANCE
TECHNICAL
SPECIFICATIONS
INDEX
Page 91 of 420
ELECTRIC SUN ROOF(for versions/markets, where provided)
The sun roof comprises two glass panels (the front
one is mobile and the rear one fixed) and is fitted
with an electrically operated sun blind.
The sun roof and the blind can be operated only with
the ignition key turned to MAR-ON.
OPENING
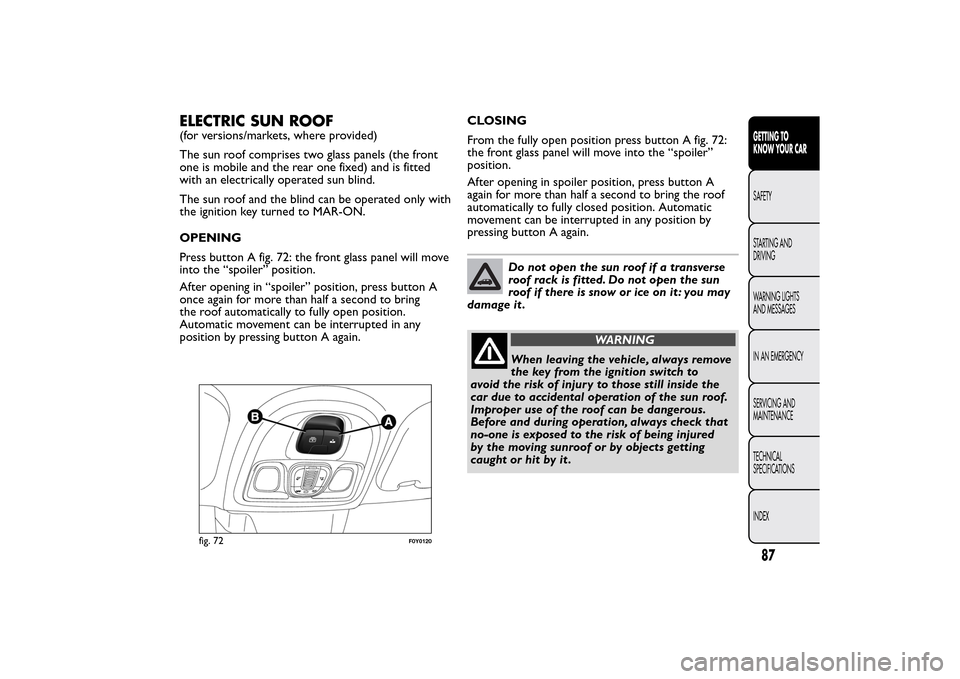
Press button A fig. 72: the front glass panel will move
into the “spoiler” position.
After opening in “spoiler” position, press button A
once again for more than half a second to bring
the roof automatically to fully open position.
Automatic movement can be interrupted in any
position by pressing button A again.CLOSING
From the fully open position press button A fig. 72:
the front glass panel will move into the “spoiler”
position.
After opening in spoiler position, press button A
again for more than half a second to bring the roof
automatically to fully closed position. Automatic
movement can be interrupted in any position by
pressing button A again.
Do not open the sun roof if a transverse
roof rack is fitted. Do not open the sun
roof if there is snow or ice on it : you may
damage it .
WARNING
When leaving the vehicle, always remove
the key from the ignition switch to
avoid the risk of injur y to those still inside the
car due to accidental operation of the sun roof.
Improper use of the roof can be dangerous.
Before and during operation, always check that
no-one is exposed to the risk of being injured
by the moving sunroof or by objects getting
caught or hit by it .
fig. 72
F0Y0120
87GETTING TO
KNOW YOUR CARSAFETY
STARTING AND
DRIVING
WARNING LIGHTS
AND MESSAGES
IN AN EMERGENCY
SERVICING AND
MAINTENANCE
TECHNICAL
SPECIFICATIONS
INDEX
Page 92 of 420
BLIND MOVEMENT
Press again button B fig. 72: the blind will move
towards the rear part of the car, until it is fully open.
With blind fully open press button B: the blind will
move towards the front part of the car, until it is fully
closed.
During the automatic opening and closing stages,
press button B again to interrupt the blind
movement.
ANTI-PINCH SAFETY DEVICE
The sun roof and the electric blind are equipped with
an anti-pinch safety system capable of detecting the
presence of an obstacle whilst the roof is closing:
if this happens, the system intervenes and the
movement of the glass is immediately reversed.EMERGENCY OPERATION
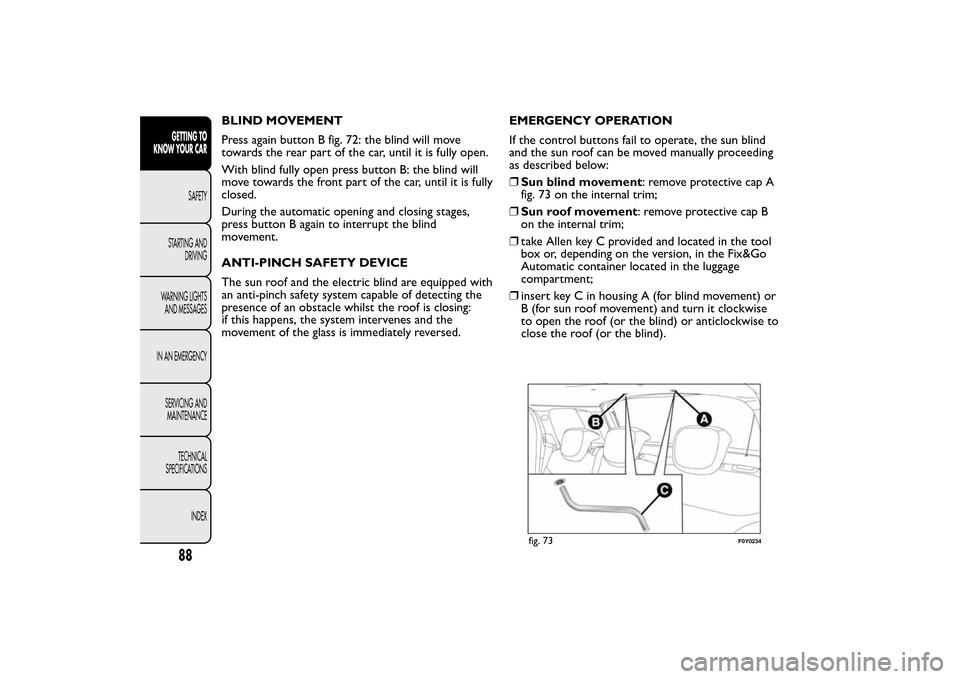
If the control buttons fail to operate, the sun blind
and the sun roof can be moved manually proceeding
as described below:
❒Sun blind movement: remove protective cap A
fig. 73 on the internal trim;
❒Sun roof movement: remove protective cap B
on the internal trim;
❒take Allen key C provided and located in the tool
box or, depending on the version, in the Fix&Go
Automatic container located in the luggage
compartment;
❒insert key C in housing A (for blind movement) or
B (for sun roof movement) and turn it clockwise
to open the roof (or the blind) or anticlockwise to
close the roof (or the blind).
fig. 73
F0Y0234
88GETTING TO
KNOW YOUR CAR
SAFETY
STARTING AND
DRIVING
WARNING LIGHTS
AND MESSAGES
IN AN EMERGENCY
SERVICING AND
MAINTENANCE
TECHNICAL
SPECIFICATIONS
INDEX
Page 93 of 420
INITIALISATION PROCEDURE
Following an automatic movement malfunction while
opening/closing or after an emergency manoeuvre
(see description in the previous paragraph), the
automatic operation of the sun roof must be
initialised again.
Proceed as follows:
❒press button A fig. 72 in closing position;
❒turn the ignition key to STOP and keep it there for
10 seconds;
❒turn the ignition key to the MAR-ON position;
❒hold down button A: after approximately 10
seconds the roof moves jerkily to closing position.
When the movement stops (closed roof ), release
button A (if the roof is already closed, you will
hear the mechanical lock only);
❒press button A again within 3 seconds from the
conclusion of the initialisation procedure;
❒hold down button A: the roof will perform an
automatic opening and closing cycle. Should this
not occur, repeat the operation from the
beginning;
❒keeping button A held down, wait until the roof is
completely closed;
❒the initialisation procedure is over.
DOORSDOOR CENTRAL LOCKING/UNLOCKING
Locking the doors from outside
With doors closed, press the
button on the
remote control or turn the metal insert (located
inside the key) in the driver side door lock.
The LED above the
fig. 74 button switches on to
indicate that the doors have been locked.
Door locking is carried out with all doors shut,
irrespective of the luggage compartment open/closed
status.
fig. 74
F0Y0039
89GETTING TO
KNOW YOUR CARSAFETY
STARTING AND
DRIVING
WARNING LIGHTS
AND MESSAGES
IN AN EMERGENCY
SERVICING AND
MAINTENANCE
TECHNICAL
SPECIFICATIONS
INDEX
Page 94 of 420
Unlocking the doors from outside
Press button
on the remote control or turn the
metal insert (located inside the key) in the driver's
side door lock.
Locking/unlocking the doors from inside
Press button. The button has an LED that
indicates whether the doors are locked or unlocked.
LED on: doors locked. Press button
once again
to centrally unlock all doors. The LED will switch off.
LED off: doors unlocked. Press the button
again
to centrally lock all doors. The doors will be locked
only if all the doors are properly shut.
Once the doors have been locked via the remote
control or the key pawl, it will no longer be possible
to unlock them by pressing button
.
In the absence of electrical power supply (blown
fuse, battery disconnected, etc.) it is still possible to
lock the doors manually.IMPORTANT With central locking active, pulling the
internal opening lever of the passenger side door
unlocks the door (the LED stays on). Pulling the
internal opening lever of the driver side door
activates central unlocking.
IMPORTANT The rear doors cannot be opened
from the inside when the child-lock system is
engaged (see the description in the following
paragraph).
90GETTING TO
KNOW YOUR CAR
SAFETY
STARTING AND
DRIVING
WARNING LIGHTS
AND MESSAGES
IN AN EMERGENCY
SERVICING AND
MAINTENANCE
TECHNICAL
SPECIFICATIONS
INDEX