Page 55 of 92

TRIP BUTTON
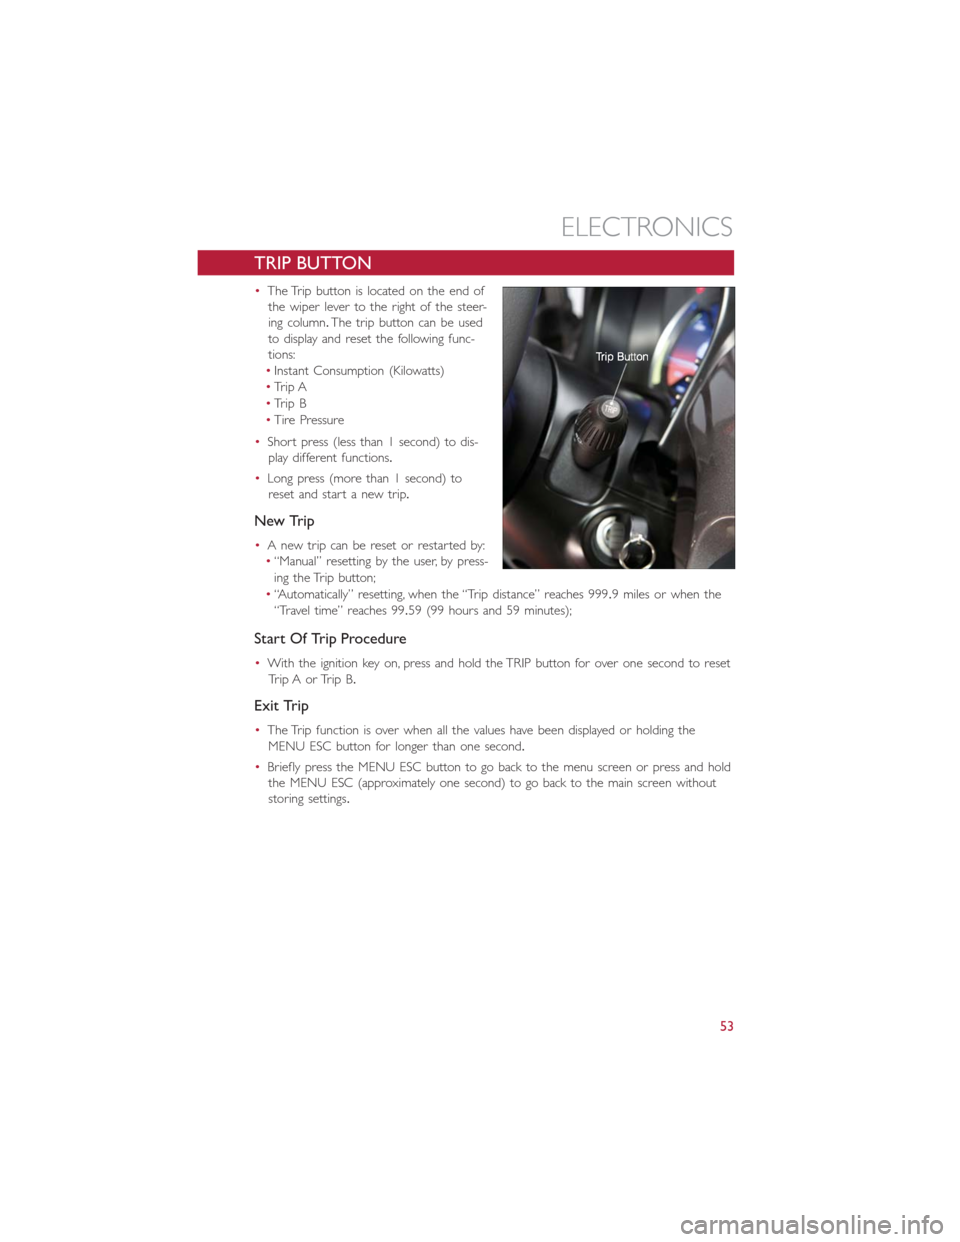
•The Trip button is located on the end of
the wiper lever to the right of the steer-
ing column.The trip button can be used
to display and reset the following func-
tions:
•Instant Consumption (Kilowatts)
•Trip A
•Trip B
•Tire Pressure
•Short press (less than 1 second) to dis-
play different functions.
•Long press (more than 1 second) to
reset and start a new trip.
New Trip
•A new trip can be reset or restarted by:
•“Manual” resetting by the user, by press-
ing the Trip button;
•“Automatically” resetting, when the “Trip distance” reaches 999.9 miles or when the
“Travel time” reaches 99.59 (99 hours and 59 minutes);
Start Of Trip Procedure
•With the ignition key on, press and hold the TRIP button for over one second to reset
Trip A or Trip B.
Exit Trip
•The Trip function is over when all the values have been displayed or holding the
MENU ESC button for longer than one second.
•Briefly press the MENU ESC button to go back to the menu screen or press and hold
the MENU ESC (approximately one second) to go back to the main screen without
storing settings.
ELECTRONICS
53
Page 72 of 92

ENHANCED ACCIDENT RESPONSE SYSTEM
•In the event of an impact causing air bag deployment, if the communication network
and power remains intact, depending on the nature of the event, the ORC will deter-
mine whether to have the Enhanced Accident Response System perform the following
functions:
•Disable the high voltage battery.
•Place the transmission into PARK.
•Flash hazard lights as long as the 12 Volt battery has power or until the ignition key is
turned off.
•Turn on the interior lights, which remain on as long as the 12 Volt battery has power
or until the ignition key is removed.
•Unlock the doors automatically.
•In order to move your vehicle to the side of the road the transmission must be in
NEUTRAL and the 12 Volt system must be functional.To place the transmission into
NEUTRAL you must turn the ignition OFF and then back to the RUN position (cycle
the ignition) then press the NEUTRAL button.
NOTE:
The high voltage battery will remain disabled after an Enhanced Accident Response Event
and must be reset by your authorized dealership.
FREEING A STUCK VEHICLE
•If your vehicle becomes stuck in mud, sand or snow, it can often be moved using a
rocking motion.Turn the steering wheel right and left to clear the area around the
front wheels.Then shift back and forth between DRIVE and REVERSE while gently
pressing the accelerator.Use the least amount of accelerator pedal pressure that will
maintain the rocking motion, without spinning the wheels.
NOTE:
Press the “ESC Off ” switch, to place the Electronic Stability Control (ESC) system in “Par-
tial Off ” mode, before rocking the vehicle.Refer to “Electronic Brake Control” in “Start-
ing And Operating” for further information.Once the vehicle has been freed, press the
“ESC Off ” switch again to restore “ESC On” mode.
CAUTION!
•When “rocking” a stuck vehicle by shifting between DRIVE and REVERSE, do not
spin the wheels faster than 15 mph (24 km/h), or drivetrain damage may result.
•Spinning the wheels too fast may lead to transmission overheating and failure.It
can also damage the tires.Do not spin the wheels above 30 mph (48 km/h) while
in gear.
WHAT TO DO IN EMERGENCIES
70
Page 87 of 92
FAQ’s
GETTING STARTED
•How do I charge my vehicle? pg.16
•How do I install my LATCH Equipped Child Seat? pg.24
•How do I fold down my rear seat? pg.30
ELECTRONICS
•What Sound System do I have? pg.42
•How do I set the general settings? pg.51
•How do I set the presets on my radio? pg.45
•How do I connect my portable media player/iPod/MP3? pg.51
•How do I pair my cell phone via Bluetooth® with the BLUE&ME™ Hands-Free
Communication System? pg.48
WHAT TO DO IN EMERGENCIES
•What do I do if my TPMS warning light is blinking? pg.57
•How do I Jump-Start my vehicle? pg.65
MAINTAINING YOUR VEHICLE
•Where is my underhood fuse block located? pg.77
•Where is my interior fuse block located? pg.77
•What should my tire pressure be set at? pg.79
FREQUENTLY ASKED QUESTIONS
85
Page 89 of 92

Lights
Turn Signal...............34
Locks
Key s...................20
Liftgate, Tailgate.............20
Lower Anchors and Tether for CHildren
(LATCH).................24
Maintenance Schedule............75
Mirrors
Heated.................40
MOPAR® Accessories............84
Phone (Pairing)...............48
Placard, Tire and Loading Information....79
Power
Door Locks...............21
Steering.................56
Programmable Electronic Features.....52
Radio (Sound Systems)...........44
Reclining Front Seats............28
Recreational Towing.............55
Remote Keyless Entry (RKE)
Disarm The Alarm............21
Replacement Bulbs.............81
Reporting Safety Defects..........83
Rotation, Tires................80
Schedule, Maintenance............75
Seat Belt
Automatic Locking Retractor (ALR)...21
Child Restraints.............21
Energy Management Feature......21
Engage The Automatic Locking Mode..25
Lap/Shoulder Belts............21
Seat Belt Pretensioner.........21
Seat Belt Reminder...........21
Seats
Adjustment...............28
Heated.................31Security Alarm
Disarm The System...........21
Security Alarm..............21
Signals, Turn.................34
Speed Control
Accel/Decel...............37
Cancel..................38
Speed Control (Cruise Control)......37
Store Radio Presets.............45
Stuck, Freeing................70
TIREFIT.................59, 60
Tires
Air Pressure...............79
Pressure Warning Light.........57
Rotation.................80
Towing....................55
Disabled Vehicle.............69
Recreational...............55
Towing Vehicle Behind a Motorhome....55
Trailer Towing
Trailer and Tongue Weight.......55
Trailer Weight................55
Transmission
Capacities................74
Turn Signals.................34
Uconnect® (Hands-Free Phone)
Making A Phone Call..........49
Underhood Compartment.........73
Vehicle Security Alarm Disarming......21
Washer
Rear...................36
Wheel and Wheel Trim Care........81
Wind Buffeting
...............41
Wiper, Rear.................36
INDEX
87