2014 CHRYSLER 300 audio
[x] Cancel search: audioPage 3 of 132

INTRODUCTION/WELCOME
WELCOME FROM CHRYSLER GROUP LLC..2
CONTROLS AT A GLANCE
DRIVER COCKPIT...............4
INSTRUMENT CLUSTER ...........6
GETTING STARTED
KEYFOB ....................8
REMOTE START...............10
KEYLESS ENTER-N-GO™ ..........10
VEHICLE SECURITY ALARM ........13
SEATBELT ...................14
SUPPLEMENTAL RESTRAINT
SYSTEM (SRS) — AIR BAGS .........14
CHILD RESTRAINTS .............15
FRONTSEATS ................18
REAR SEAT ...................21
HEATEDSEATS ................21
HEATED AND COOLED CUPHOLDERS..22ADJUSTABLE PEDALS............23TILT/TELESCOPING STEERING COLUMN..24
OPERATING YOUR VEHICLE
ENGINE BREAK-IN
RECOMMENDATIONS ............25
TURN SIGNAL/WIPER/WASHER/HIGH
BEAM LEVER . ................26
HEADLIGHT SWITCH ............27
SPEED CONTROL ..............28
ELECTRONIC SHIFTER — 3.6L ENGINE . . 32
TRANSMISSION MODES/AUTOSTICK® . . 33
CLIMATE CONTROLS ............35
BLIND SPOT MONITORING ........36
POWER SUNROOF ..............37
WIND BUFFETING ..............39
ELECTRONICS
YOUR VEHICLE'S SOUND SYSTEM ....40
IDENTIFYING YOUR RADIO ........42
Uconnect® 8.4 & 8.4N AT A GLANCE ....42
RADIO .....................44
SiriusXM SATELLITE RADIO .........45
STEERING WHEEL AUDIO CONTROLS...47
SETTING THE ANALOG CLOCK .....47
iPod®/CD/AUX CONTROLS .........48
GARMIN® NAVIGATION (8.4N Only) ....48
SiriusXM TRAVEL LINK (8.4N ONLY) . . . . 52
PLAYING iPod/USB/MP3 DEVICES .....53
Uconnect® PHONE
(Bluetooth® HANDS FREE CALLING) ....54
Uconnect® VOICE COMMAND
(8.4&8.4NONLY) ...............58
ELECTRONIC VEHICLE INFORMATION
CENTER (EVIC) ................61
PROGRAMMABLE FEATURES .......62UNIVERSAL GARAGE DOOR OPENER
(HomeLink®)
..................62
POWER OUTLETS ..............65
UTILITY
TRAILER TOWING WEIGHTS (MAXIMUM
TRAILER WEIGHT RATINGS) . ......66
RECREATIONAL TOWING (BEHIND
MOTORHOME, ETC.) . . ..........66
SRT
AUTOSTICK® .................67
ELECTRONIC CONTROL DAMPING
SYSTEM....................68
SRT PERFORMANCE FEATURES .....69
SUMMER/THREE-SEASON TIRES ......71
WHAT TO DO IN EMERGENCIES
ROADSIDE ASSISTANCE..........72
INSTRUMENT CLUSTER WARNING
LIGHTS .....................72
IF YOUR ENGINE OVERHEATS .......76
JACKING AND TIRE CHANGING .....76
TIREFIT KIT ..................82
BATTERY LOCATION ............88
JUMP-STARTING ...............88
SHIFT LEVER OVERRIDE — 5 SPEED
TRANSMISSION ...............90
TOWING A DISABLED VEHICLE . . ....92
FREEING A STUCK VEHICLE ........93
EVENT DATA RECORDER (EDR) ......94
MAINTAINING YOUR VEHICLE
OPENING THE HOOD . . .........95
FUEL DOOR RELEASE . . .........96
ENGINE COMPARTMENT .........98
FLUIDSANDCAPACITIES .........101
MAINTENANCE SCHEDULE .......104
FUSES .....................112
TIRE PRESSURES ...............117
WHEEL AND WHEEL TRIM CARE . ....118
EXTERIOR BULBS ..............118
CONSUMER ASSISTANCE
CHRYSLER GROUP LLC
CUSTOMER CENTER ............119
CHRYSLER CANADA INC.
CUSTOMER CENTER ............119
PUBLICATIONS ORDERING ........119
ASSISTANCE FOR THE HEARING
IMPAIRED ...................119
REPORTING SAFETY DEFECTS IN
THEUNITEDSTATES ............120
MOPAR® ACCESSORIES
AUTHENTIC ACCESSORIES BY MOPAR®. . 121
FREQUENTLY ASKED QUESTIONS
FREQUENTLY ASKED QUESTIONS ....122
INDEX................... 123
TABLE OF CONTENTS
Page 6 of 132

DRIVER COCKPIT
1. Memory Seat pg. 19
2. Headlight Switch pg. 27
3. Turn Signal/Wiper/Washer/High Beams Lever (behind steering wheel) pg. 26
4. Instrument Cluster pg. 6
5. Electronic Vehicle Information Center (EVIC) Display
6. Engine Starting/Stopping pg. 12
7. Audio System (Touch-Screen Radio Shown) pg. 40
8. Switch Panel• Hazard Lights
• Electronic Stability Control (ESC) OFF pg. 74
9. Climate Control Knobs pg. 35
CONTROLS AT A GLANCE
4
Page 15 of 132

Accessory Positions With Engine Off
NOTE:
The following functions are with the driver’s foot OFF the Brake Pedal (transmission in PARK or
NEUTRAL).
Beginning With The Ignition Switch In The OFF Position:
• Push the ENGINE START/STOP button once to cycle the ignition to the ACC position.
• Push the ENGINE START/STOP button a second time to cycle the ignition to the ON/RUNposition.
• Push the ENGINE START/STOP button a third time to return the ignition to the OFF position.
NOTE:
If the ignition is left in the ACC or ON/RUN
(engine not running) position and the transmis-
sion is in PARK, the system will automatically
time out after 30 minutes of inactivity and the
ignition is returned to the OFF position.
VEHICLE SECURITY ALARM
This Vehicle Security Alarm monitors the doors, liftgate, and ignition switch for unauthorized operation.
When the alarm is activated, the interior switches for door locks are disabled. The Vehicle Security
Alarm provides both audio and visual signals repeatedly for three minutes. If the disturbance is still
present (driver's door, passenger door, other doors, ignition) after three minutes, the parking lights
and tail lights will flash for an additional 15 minutes.
To Arm:
• Press the Keyless Enter-N-Go™ START/STOP button until the Electronic Vehicle Information Center (EVIC) indicates that the vehicle ignition is “OFF”. Press the power door lock switch
while the door is open, press the Key Fob LOCK button, or with one of the Key Fobs located
outside the vehicle and within 5 ft (1.5 m) of the driver's and passenger front door handles,
press the Keyless Enter-N-Go™ LOCK button located on the door handle.
NOTE:
After pressing the Keyless Enter-N-Go™ LOCK button, you must wait two seconds before you
can lock or unlock the vehicle via the door handle.
To Disarm:
• Press the Key Fob UNLOCK button or with one of the Key Fobs located outside the vehicle and within 5 ft (1.5 m) of the driver's and passenger front door handles, grab the Keyless
Enter-N-Go™ door handle and enter the vehicle, then press the Keyless Enter-N-Go™
START/STOP button (requires at least one valid Key Fob in the vehicle).
Accessory Positions
GETTING STARTED
13
Page 42 of 132

YOUR VEHICLE'S SOUND SYSTEM
1. Uconnect® Voice Command Button pg. 58
2. Uconnect® Phone Button pg. 54
3. Steering Wheel Audio Controls (Left) pg. 47
4. Steering Wheel Audio Controls (Right) pg. 47
5. Microphone (located on top of rear view mirror)
6. Volume Knob/Audio Power Button
ELECTRONICS
40
Page 43 of 132

7. SD Card Slot pg. 53
8. Uconnect® 8.4 / 8.4N Radio pg. 42
9. Tune/Scroll Knob Browse/Enter Button
10. Audio Jack/USB Port (inside center console) pg. 53
11. CD Player
12. CD Eject Button
ELECTRONICS
41
Page 45 of 132

Setting The Time
• Model 8.4N synchronizes time automatically via GPS, so should not require any timeadjustment. If you do need to set the time manually, follow the instructions below for
Model 8.4.
• For Model 8.4, turn the unit on, then touch the time display at the top of the screen. Touch the Yes soft-key.
• If the time is not displayed at the top of the screen, touch the More soft-key and then touch the Settings soft-key. In the Settings screen, touch the Clock soft-key, then check or uncheck this
option.
• Touch + or – next to Set Time Hours and Set Time Minutes to adjust the time.
• If these features are not available, uncheck the Sync with GPS box.
• Touch the X soft-key to save your settings and exit out of the Clock Setting screen.
Audio Settings
• Touch the Audio soft-key to activate the Audio settings screen to adjust Balance/Fade, Equalizer, and Speed Adjusted Volume.
• You can return to the Radio screen by touching the X soft-key located at the top right.
Balance/Fade
• Touch the Balance/Fade soft-key to Balance audio between the front speakers or fade the audio between the rear and front speakers.
• Touching the Front, Rear, Left, or Right soft-keys or touch and drag the blue Speaker Icon to adjust the Balance/Fade.
Equalizer
• Touch the Equalizer soft-key to activate the Equalizer screen.
• Touch the + or - soft-keys, or by touching and dragging over the level bar for each of the equalizer bands. The level value, which spans between plus or minus 9, is displayed at the
bottom of each of the Bands.
Speed Adjusted Volume
• Touch the Speed Adjusted Volume soft-key to activate the Speed Adjusted Volume screen. The Speed Adjusted Volume is adjusted by touching the + and - buttons or by touching and
dragging over the level bar. This alters the automatic adjustment of the audio volume with
variation to vehicle speed.
ELECTRONICS
43
Page 49 of 132

STEERING WHEEL AUDIO CONTROLS
The steering wheel audio controls are located on the rear surface of the steering wheel.
Left Switch
• Press the switch up or down to search for thenext listenable station or select the next or
previous CD track.
• Press the button in the center to select the next preset station (radio) or to change CDs
if equipped with a CD Changer.
Right Switch
• Press the switch up or down to increase ordecrease the volume.
• Press the button in the center to change modes AM/FM/CD/SAT.
SETTING THE ANALOG CLOCK
• To set the analog clock at the top center of the instrument panel, press and hold the button until the setting is correct.
Setting The Analog Clock
ELECTRONICS
47
Page 51 of 132

3. The Navigation system will then repeat the distance to your next turn.
4. While the Navigation system is speaking, use the ON/OFF VOLUME rotary knob to adjustthe volume to a comfortable level. Please note the volume setting for Navigation Voice
Prompt is different than the audio system.
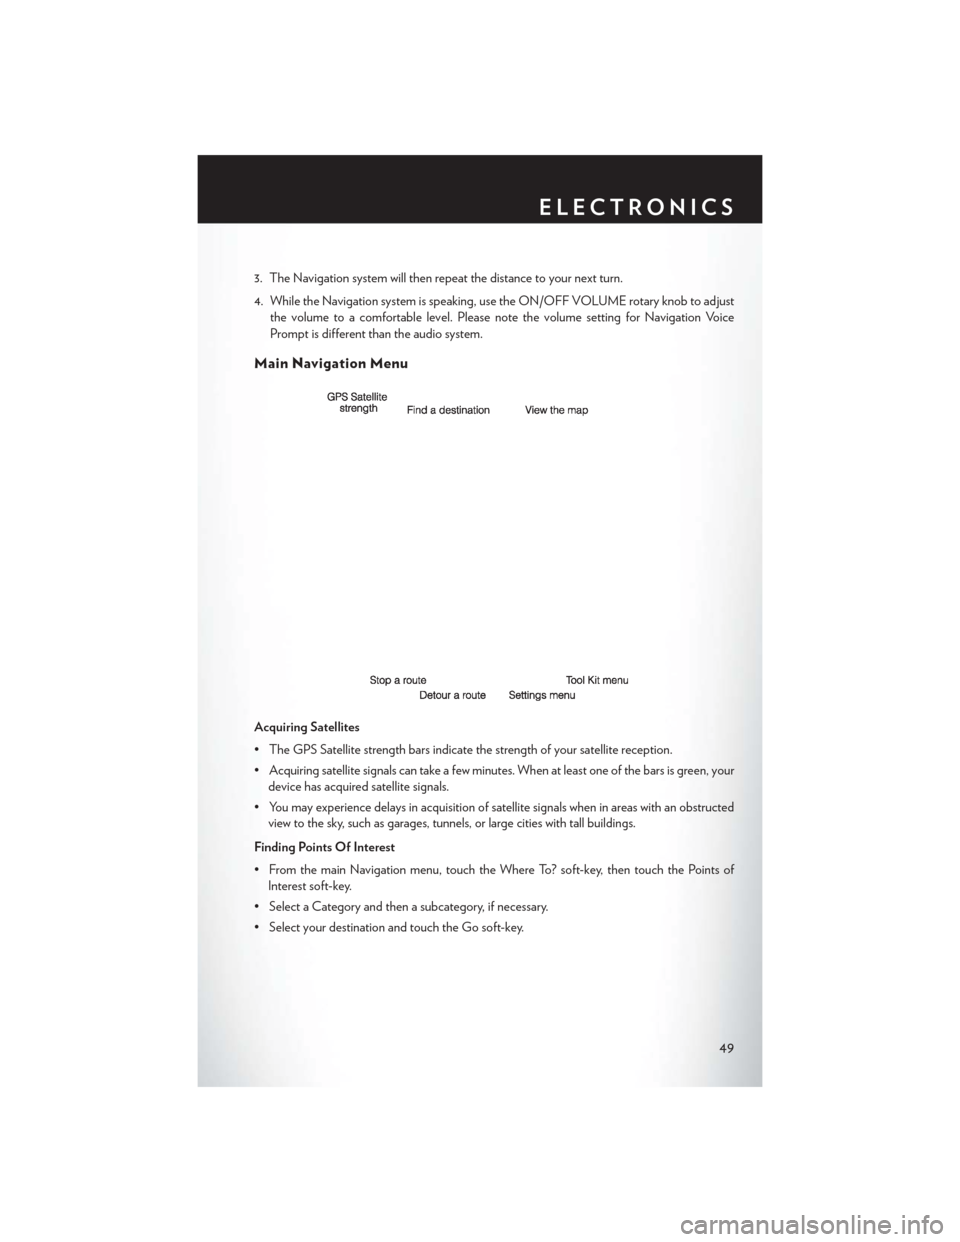
Main Navigation Menu
Acquiring Satellites
• The GPS Satellite strength bars indicate the strength of your satellite reception.
• Acquiring satellite signals can take a few minutes. When at least one of the bars is green, yourdevice has acquired satellite signals.
• You may experience delays in acquisition of satellite signals when in areas with an obstructed view to the sky, such as garages, tunnels, or large cities with tall buildings.
Finding Points Of Interest
• From the main Navigation menu, touch the Where To? soft-key, then touch the Points of Interest soft-key.
• Select a Category and then a subcategory, if necessary.
• Select your destination and touch the Go soft-key.
ELECTRONICS
49