Page 37 of 432
Black plate (11,1)Chevrolet Camaro Owner Manual (GMNA-Localizing-U.S./Canada/Mexico-
6042601) - 2014 - CRC - 1/21/14
Keys, Doors, and Windows 2-11
3. Firmly turn the key clockwise tounlatch the trunk lid.
4. Remove the key.
Emergency Trunk Release
Handle
{Caution
Do not use the emergency trunk
release handle as a tie-down or
anchor point when securing items
in the trunk as it could damage
the handle.
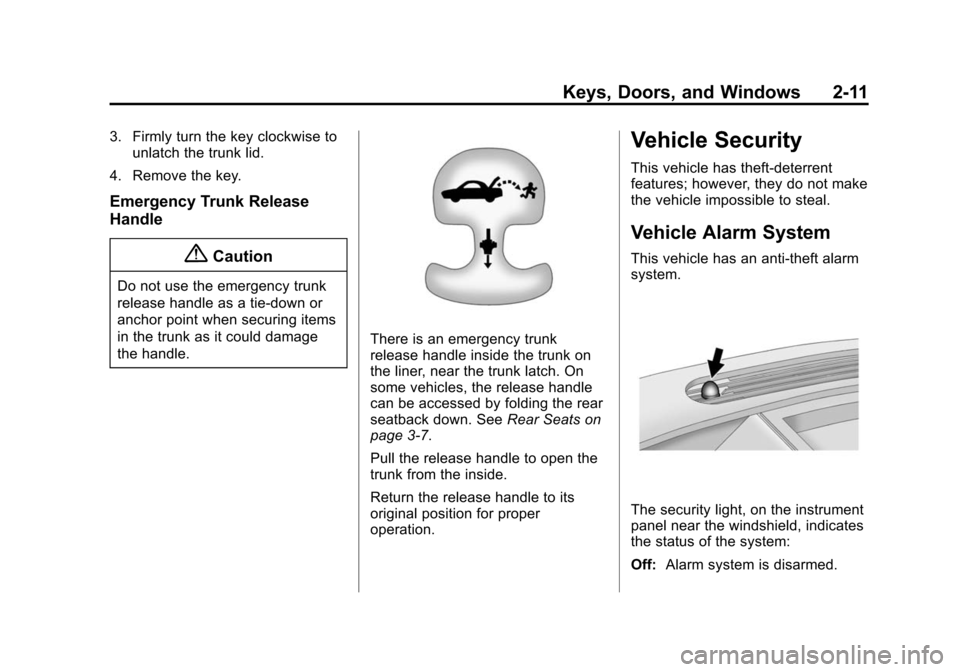
There is an emergency trunk
release handle inside the trunk on
the liner, near the trunk latch. On
some vehicles, the release handle
can be accessed by folding the rear
seatback down. See Rear Seats on
page 3-7.
Pull the release handle to open the
trunk from the inside.
Return the release handle to its
original position for proper
operation.
Vehicle Security
This vehicle has theft-deterrent
features; however, they do not make
the vehicle impossible to steal.
Vehicle Alarm System
This vehicle has an anti-theft alarm
system.
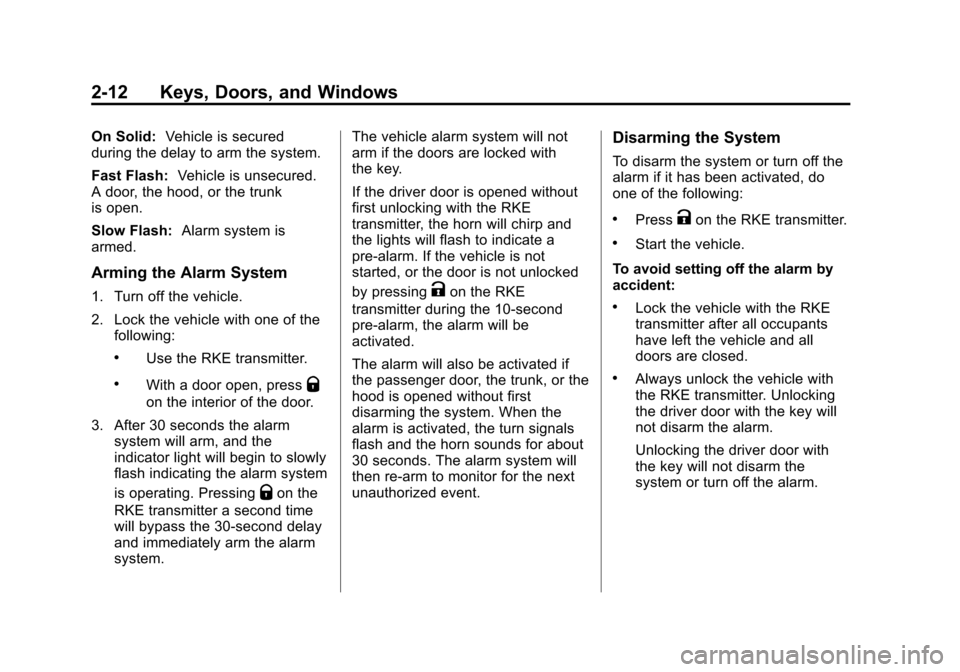
The security light, on the instrument
panel near the windshield, indicates
the status of the system:
Off: Alarm system is disarmed.
Page 38 of 432
Black plate (12,1)Chevrolet Camaro Owner Manual (GMNA-Localizing-U.S./Canada/Mexico-
6042601) - 2014 - CRC - 1/21/14
2-12 Keys, Doors, and Windows
On Solid:Vehicle is secured
during the delay to arm the system.
Fast Flash: Vehicle is unsecured.
A door, the hood, or the trunk
is open.
Slow Flash: Alarm system is
armed.
Arming the Alarm System
1. Turn off the vehicle.
2. Lock the vehicle with one of the following:
.Use the RKE transmitter.
.With a door open, pressQ
on the interior of the door.
3. After 30 seconds the alarm system will arm, and the
indicator light will begin to slowly
flash indicating the alarm system
is operating. Pressing
Qon the
RKE transmitter a second time
will bypass the 30-second delay
and immediately arm the alarm
system. The vehicle alarm system will not
arm if the doors are locked with
the key.
If the driver door is opened without
first unlocking with the RKE
transmitter, the horn will chirp and
the lights will flash to indicate a
pre-alarm. If the vehicle is not
started, or the door is not unlocked
by pressing
Kon the RKE
transmitter during the 10-second
pre-alarm, the alarm will be
activated.
The alarm will also be activated if
the passenger door, the trunk, or the
hood is opened without first
disarming the system. When the
alarm is activated, the turn signals
flash and the horn sounds for about
30 seconds. The alarm system will
then re-arm to monitor for the next
unauthorized event.
Disarming the System
To disarm the system or turn off the
alarm if it has been activated, do
one of the following:
.PressKon the RKE transmitter.
.Start the vehicle.
To avoid setting off the alarm by
accident:
.Lock the vehicle with the RKE
transmitter after all occupants
have left the vehicle and all
doors are closed.
.Always unlock the vehicle with
the RKE transmitter. Unlocking
the driver door with the key will
not disarm the alarm.
Unlocking the driver door with
the key will not disarm the
system or turn off the alarm.
Page 45 of 432
Black plate (19,1)Chevrolet Camaro Owner Manual (GMNA-Localizing-U.S./Canada/Mexico-
6042601) - 2014 - CRC - 1/21/14
Keys, Doors, and Windows 2-19
Dirt and debris may collect on the
sunroof seal or in the track. This
could cause an issue with sunroof
operation or noise. It could also plug
the water drainage system.
Periodically open the sunroof and
remove any obstacles or loose
debris. Wipe the sunroof seal and
roof sealing area using a clean
cloth, mild soap, and water. Do not
remove grease from the sunroof.
If water is seen dripping into the
water drainage system, this is
normal.
Convertible Top
Power Operation
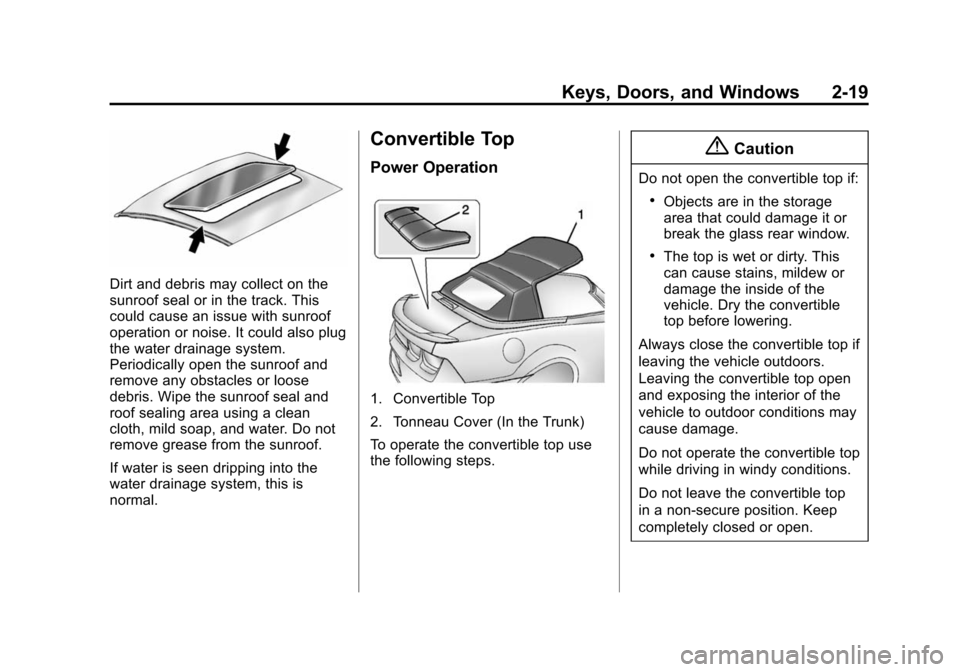
1. Convertible Top
2. Tonneau Cover (In the Trunk)
To operate the convertible top use
the following steps.
{Caution
Do not open the convertible top if:
.Objects are in the storage
area that could damage it or
break the glass rear window.
.The top is wet or dirty. This
can cause stains, mildew or
damage the inside of the
vehicle. Dry the convertible
top before lowering.
Always close the convertible top if
leaving the vehicle outdoors.
Leaving the convertible top open
and exposing the interior of the
vehicle to outdoor conditions may
cause damage.
Do not operate the convertible top
while driving in windy conditions.
Do not leave the convertible top
in a non-secure position. Keep
completely closed or open.
Page 46 of 432

Black plate (20,1)Chevrolet Camaro Owner Manual (GMNA-Localizing-U.S./Canada/Mexico-
6042601) - 2014 - CRC - 1/21/14
2-20 Keys, Doors, and Windows
{Caution
If you raise or lower the
convertible top while the vehicle
is in motion, you could damage
the top or the top mechanism.
The repairs would not be covered
by the warranty. Always put an
automatic transmission in P (Park)
or a manual transmission in
Neutral before raising or lowering
the convertible top.
Lowering the Convertible Top
1. Park on a level surface. Place the vehicle in P (Park) with an
automatic transmission and
Neutral with a manual
transmission. Set the parking
brake.
2. Remove the tonneau cover from the trunk.
3. The rear trunk partition must be in the fastened position. See
Rear Storage on page 4-1. 4. Remove all objects on or above
the rear trunk partition.
5. Close the trunk.
6. Start the engine.
7. Release the convertible top front latch above the inside rearview
mirror, by pulling down and
turning it clockwise.
8. Return the convertible top front latch to the closed position.
9. Press and hold the rear of theconvertible top button. The
windows will automatically lower
and the convertible top will lower
into the rear of the vehicle.
A chime will sound when the
convertible top has lowered
completely. If the radio is on the
sound may be muted for a brief
time so the chime can be heard.
10. Install the tonneau cover. See Tonneau Cover on page 4-3.
Page 47 of 432

Black plate (21,1)Chevrolet Camaro Owner Manual (GMNA-Localizing-U.S./Canada/Mexico-
6042601) - 2014 - CRC - 1/21/14
Keys, Doors, and Windows 2-21
If the convertible top is operated
multiple times, the engine should be
running to prevent drain on the
vehicle's battery. Under certain
conditions, the Driver Information
Center (DIC) may display a
message regarding the convertible
top. SeeConvertible Top Messages
on page 5-33.
{Caution
Raising the top without removing
the tonneau cover may damage
the top components and the
tonneau cover. Remove the
tonneau cover before operating
the convertible top.
Raising the Convertible Top
1. Park on a level surface. Place the vehicle in P (Park) with an
automatic transmission and
Neutral with a manual
transmission. Set the parking
brake. 2. Remove the tonneau cover if
installed. See Tonneau Cover on
page 4-3.
3. Move any objects that have fallen against the convertible top
inside the trunk.
4. Close the trunk.
5. Start the engine.
{Warning
Placing hands on the top of the
windshield frame when closing
the convertible soft top could
cause fingers to be pinched and
may cause injury. Keep hands
below the windshield frame when
closing the convertible top.
6. Press and hold the front of the convertible top button. The top
will raise and the windows will
lower.
7. After the convertible top is completely raised, release the
convertible top button.
Page 48 of 432
Black plate (22,1)Chevrolet Camaro Owner Manual (GMNA-Localizing-U.S./Canada/Mexico-
6042601) - 2014 - CRC - 1/21/14
2-22 Keys, Doors, and Windows
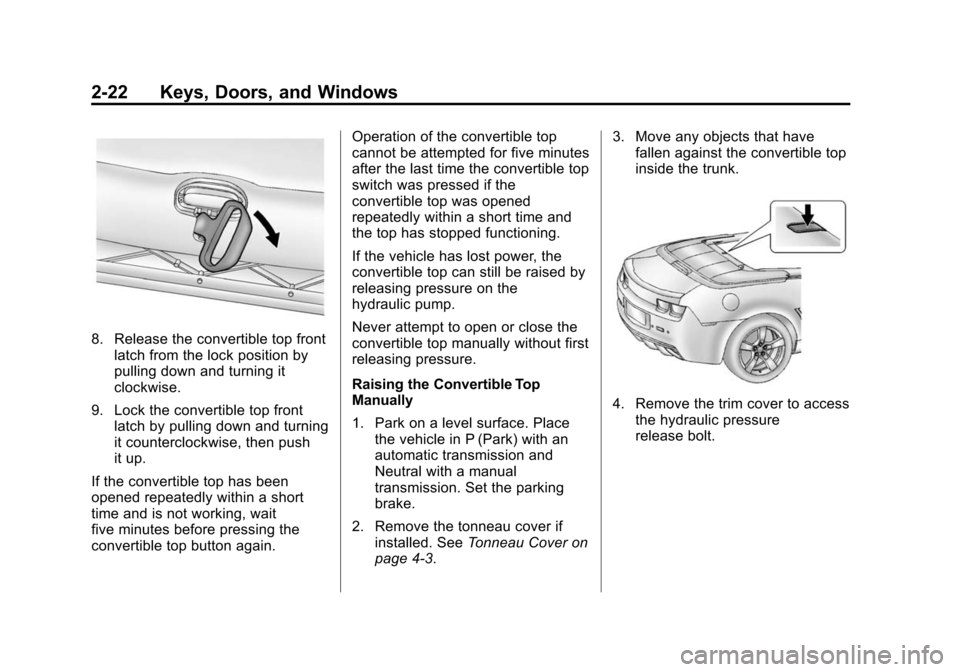
8. Release the convertible top frontlatch from the lock position by
pulling down and turning it
clockwise.
9. Lock the convertible top front latch by pulling down and turning
it counterclockwise, then push
it up.
If the convertible top has been
opened repeatedly within a short
time and is not working, wait
five minutes before pressing the
convertible top button again. Operation of the convertible top
cannot be attempted for five minutes
after the last time the convertible top
switch was pressed if the
convertible top was opened
repeatedly within a short time and
the top has stopped functioning.
If the vehicle has lost power, the
convertible top can still be raised by
releasing pressure on the
hydraulic pump.
Never attempt to open or close the
convertible top manually without first
releasing pressure.
Raising the Convertible Top
Manually
1. Park on a level surface. Place
the vehicle in P (Park) with an
automatic transmission and
Neutral with a manual
transmission. Set the parking
brake.
2. Remove the tonneau cover if installed. See Tonneau Cover on
page 4-3. 3. Move any objects that have
fallen against the convertible top
inside the trunk.
4. Remove the trim cover to access
the hydraulic pressure
release bolt.
Page 99 of 432
Black plate (1,1)Chevrolet Camaro Owner Manual (GMNA-Localizing-U.S./Canada/Mexico-
6042601) - 2014 - CRC - 1/21/14
Storage 4-1
Storage
Storage Compartments
Storage Compartments . . . . . . . 4-1
Glove Box . . . . . . . . . . . . . . . . . . . . 4-1
Rear Storage . . . . . . . . . . . . . . . . . 4-1
Center Console Storage . . . . . . 4-2
Additional Storage Features
Tonneau Cover . . . . . . . . . . . . . . . . 4-3
Convenience Net . . . . . . . . . . . . . 4-5
Storage
Compartments
{Warning
Do not store heavy or sharp
objects in storage compartments.
In a crash, these objects may
cause the cover to open and
could result in injury.
Glove Box
Open the glove box by lifting up on
the lever. Use the key to lock and
unlock the glove box.
Rear Storage
Rear Trunk Partition
The trunk partition keeps cargo
away from the convertible top.The trunk partition attaches to the
sides of the trunk to protect the
convertible top or can be rolled up
and stored when the convertible top
is up.
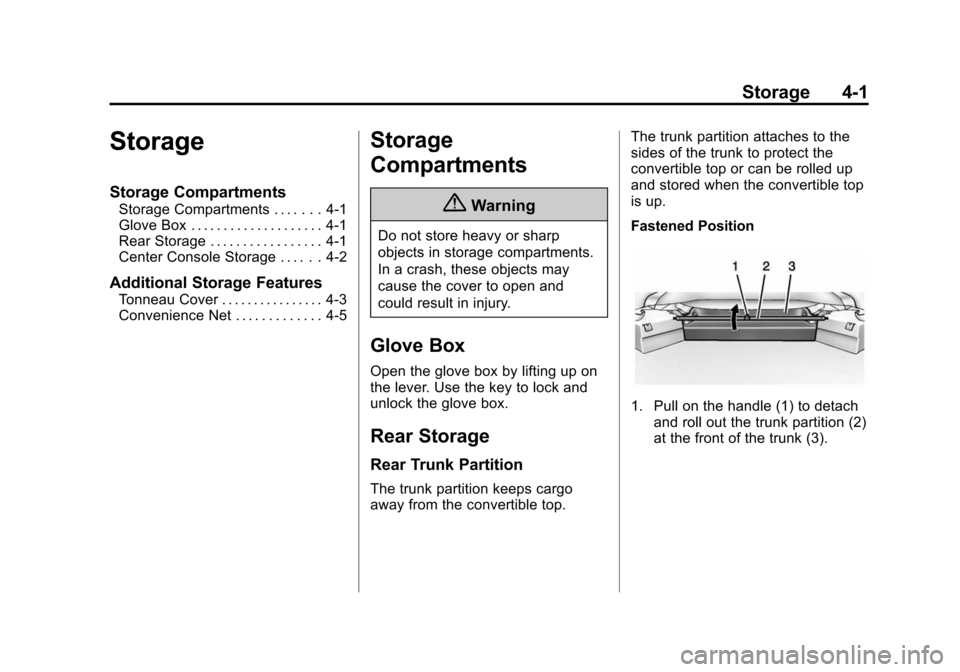
Fastened Position
1. Pull on the handle (1) to detach
and roll out the trunk partition (2)
at the front of the trunk (3).
Page 100 of 432
Black plate (2,1)Chevrolet Camaro Owner Manual (GMNA-Localizing-U.S./Canada/Mexico-
6042601) - 2014 - CRC - 1/21/14
4-2 Storage
2. Attach the trunk partition (2) intothe brackets (1).
3. Remove any objects from the top of the trunk partition (2).
Stored Position
1. Pull the handle (3) toward the rear of the trunk while pulling up
to release the trunk partition (2)
from the brackets (1).
2. Hold the handle (3) and slowly let the trunk partition (2) roll up
toward the front of the trunk (4).
3. Attach the handle (1) to the
rolled-up trunk partition (2) at the
front of the trunk (3).
See Convertible Top Messages on
page 5-33.
Center Console Storage
To open, lift the latch on the front
edge of the armrest.
There is an accessory power outlet.
If equipped, there is a USB port and
auxiliary jack in the storage area.
See Power Outlets on page 5-5,
Auxiliary Devices on page 7-14, and
the infotainment manual.