2014 CADILLAC ELR charging
[x] Cancel search: chargingPage 2 of 20

2
Cruise Control/Voice Recognition/Forward Collision Alert/Heated Steering Wheel Buttons
Electric Parking Brake Switch
Instrument Cluster/Driver Information Center
Regen on Demand™ Paddles (behind steering wheel)
Audio Steering Wheel Controls/ 5-way Control
Power Rake/ Telescope Steering Wheel Control
POWER Button
Traction Control and StabiliTrak Button/ Drive Mode Control
Turn Signal Lever/ Pedestrian Safety Signal Lever/Exterior Lamps Control
Memory Seat Buttons
Door Latch Button
Review this guide for an overview of some important features in your Cadillac ELR. Some optional equipment (denoted by ♦) described in this guide may not be included in your vehicle. More detailed information can be found in your Owner Manual.
Instrument Panel Controls
Charging Status Indicator
Heated Seat Buttons
Climate Controls
Windshield Wipers Lever
Hazard Warning Flashers/Lane Departure Warning Buttons
CUE Touch Screen
Glove Box/ Parking Assist Buttons
Audio System Controls
Power Mirror and Window Controls
Page 3 of 20

Instrument Cluster Symbols
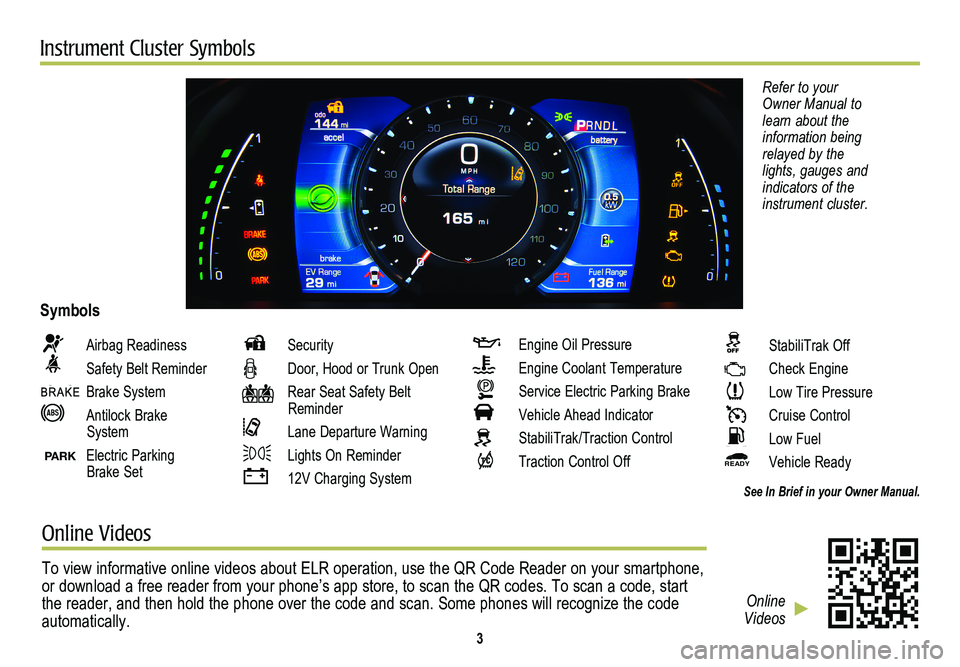
Refer to your Owner Manual to learn about the information being relayed by the lights, gauges and indicators of the instrument cluster.
Airbag Readiness
Safety Belt Reminder
Brake System
Antilock Brake System
PARK Electric Parking Brake Set
Security
Door, Hood or Trunk Open
Rear Seat Safety Belt Reminder
Lane Departure Warning
Lights On Reminder
12V Charging System
Engine Oil Pressure
Engine Coolant Temperature
Service Electric Parking Brake
Vehicle Ahead Indicator
StabiliTrak/Traction Control
Traction Control Off
Symbols
See In Brief in your Owner Manual.
StabiliTrak Off
Check Engine
Low Tire Pressure
Cruise Control
Low Fuel
READY Vehicle Ready
Online Videos
To view informative online videos about ELR operation, use the QR Code R\
eader on your smartphone, or download a free reader from your phone’s app store, to scan the QR\
codes. To scan a code, start the reader, and then hold the phone over the code and scan. Some phones \
will recognize the code automatically. 3
Online Videos
Page 9 of 20

9
Efficiency
Information Displays
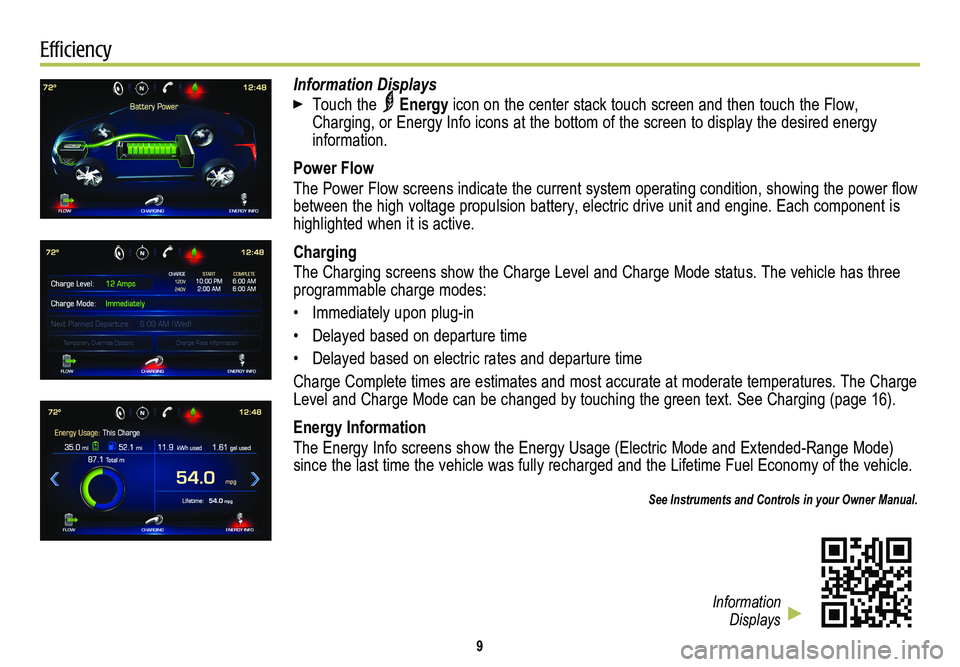
Touch the Energy icon on the center stack touch screen and then touch the Flow, Charging, or Energy Info icons at the bottom of the screen to display the desired energy information.
Power Flow
The Power Flow screens indicate the current system operating condition, showing the power flow between the high voltage propulsion battery, electric drive unit and eng\
ine. Each component is highlighted when it is active.
Charging
The Charging screens show the Charge Level and Charge Mode status. The v\
ehicle has three programmable charge modes:
• Immediately upon plug-in
• Delayed based on departure time
• Delayed based on electric rates and departure time
Charge Complete times are estimates and most accurate at moderate temperatures. The Charge Level and Charge Mode can be changed by touching the green text. See Cha\
rging (page 16).
Energy Information
The Energy Info screens show the Energy Usage (Electric Mode and Extend\
ed-Range Mode) since the last time the vehicle was fully recharged and the Lifetime Fuel Economy of the vehicle.
See Instruments and Controls in your Owner Manual.
Information Displays
Page 16 of 20

Battery
The ELR is powered by a lithium-ion high voltage battery pack, which holds its charge efficiently and has no memory effect (so it doesn’t have to be run down completely before recharging). Keep the vehicle plugged in, even when fully charged, to keep the battery temperature ready for the next drive.
Charging Time
The ELR can be programmed for three charging modes: Immediately upon plug-in; Delayed based on departure time; and Delayed (Electric Rate and Departure Time).
Using a 120-volt standard outlet will take approximately 12.5 hours to charge the ELR at the 12 amp setting, or 18 hours at the 8 amp default setting. Using a 240-volt charging station will take approximately 5 hours. Charge times will vary with outside temperature.
Touch the Energy icon on the touch screen and then touch the Charging icon to view the current Charge Level and Charge Mode status.
Touch the green Charge Level text to select a different charge level.
Touch the green Charge Mode text to select a different charge mode.
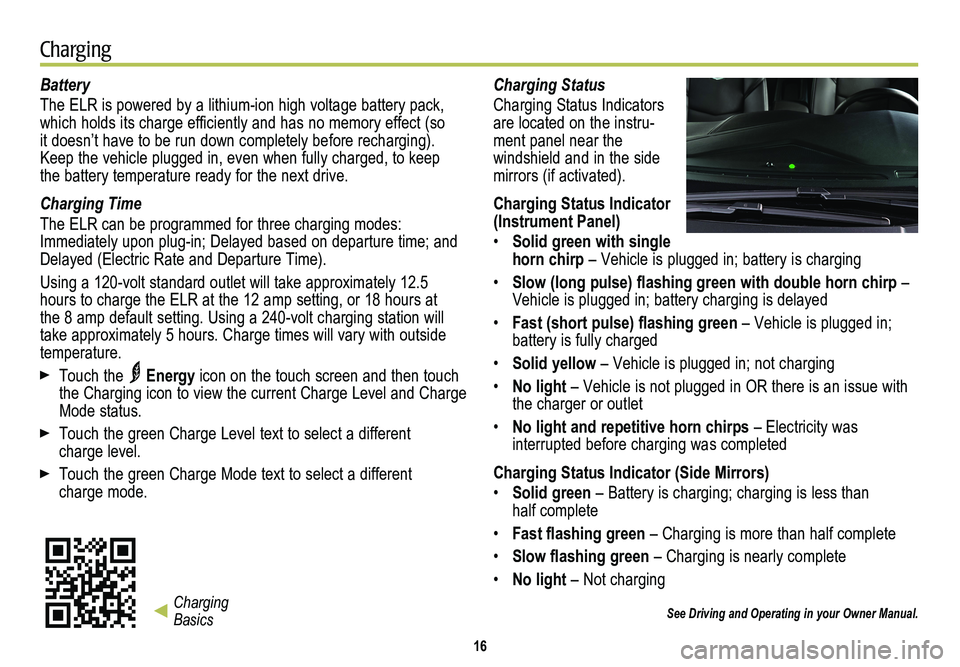
Charging Status
Charging Status Indicators are located on the instru-ment panel near the
windshield and in the side mirrors (if activated).
Charging Status Indicator (Instrument Panel)
• Solid green with single horn chirp – Vehicle is plugged in; battery is charging
• Slow (long pulse) flashing green with double horn chirp – Vehicle is plugged in; battery charging is delayed
• Fast (short pulse) flashing green – Vehicle is plugged in; battery is fully charged
• Solid yellow – Vehicle is plugged in; not charging
• No light – Vehicle is not plugged in OR there is an issue with the charger or outlet
• No light and repetitive horn chirps – Electricity was
interrupted before charging was completed
Charging Status Indicator (Side Mirrors)
• Solid green – Battery is charging; charging is less than half complete
• Fast flashing green – Charging is more than half complete
• Slow flashing green – Charging is nearly complete
• No light – Not charging
See Driving and Operating in your Owner Manual.
16
Charging
Charging Basics
Page 17 of 20

17
Start Charging
The provided 120-volt travel charge cord is located in the storage compartment under the cargo floor.
1. With the vehicle parked, select the Charging icon at the bottom of the Energy screen on t\
he touch screen.
2. Review the selected Charge Level and Charge Mode. Touch the green text i\
f an increased Charging Level or different Charge Mode is desired. Use the reduced char\
ge level until a
qualified electrician inspects your electrical circuit capacity, or if the electrical circuit or socket capacity is not known. Once the Charge Level and Charge Mode are selected, turn off the vehicle.
Note: The Charge Level selection returns to the reduced level each time the ve\
hicle is driven.
3. Remove the charge cord from the trunk and plug it into an electrical outlet. DO NOT PLUG INTO AN EXTENSION CORD. The charge cord indicator should be green. Where possible, secure the charge cord to the wall.
4. Press and release the rear edge of the charge port door, located just in\
front of the driver’s door, to open the door. Plug the charge cord into the charge port.
5. The Charging Status Indicator on the instrument panel illuminates green and the horn chirps when properly connected. The side mirror lights illuminate green and may flash (if activated).See Charging Status.
Note: Immediately after plugging in, the Charging Status Indicator on the inst\
rument panel may be yellow for a few seconds before turning green. The charging system may run fans and pumps when the vehicle is turned off.
If the Charge Cord Theft Alert has been enabled, it is armed automatical\
ly when the vehicle is locked with the Remote Keyless Entry transmitter.
Note: When the theft alert is armed, the alarm will sound when the plug is dis\
connected from the locked vehicle. To change the charge cord theft alert option, go to Energy in the Vehicle Settings menu.
To temporarily override a delayed charge event, remove and reconnect the charge cord into the vehicle within five seconds. The
vehicle will begin charging immediately.
See Driving and Operating in your Owner Manual.
Page 18 of 20

Charging equipment with a rating of at least 240 volt/ 20 amp will provide the
fastest charging time to recharge the high voltage propulsion battery.
Contact your dealer or an ELR Concierge
representative, or go to www.cadillaccharging.com, for more information about an available 240V home charging station.
See Driving and Operating in your Owner Manual.
18
End ChargingHome Charging Station
1. Unlock the vehicle with the RKE transmitter to disarm the charge cord theft alert.
2. Unplug the charge cord from the vehicle by
pressing the plug button and close the charge port door.
3. Unplug the charge cord from the electrical outlet.
4. Properly stow the charge cord in the trunk.
See Driving and Operating in your Owner Manual.
Page 19 of 20

19
Auxiliary Door ReleasesMobile Apps
The Keyless Access System enables operation of the doors without removing the Remote Keyless Entry transmitter from your pocket or purse by pressing the door handle touch pad at the rear edge of the door (from outside the vehicle), or pressing the door latch but-ton on the inside pull handle (from inside the vehicle).
If the vehicle’s 12-volt battery is weak or disconnected, the door handle touch pads and door latch buttons may not operate. The doors can be opened manually.
Open the Doors Manually from Outside
1. Remove the door key from the transmitter.
2. Insert it into the lock cylinder above the license plate and turn it to open the trunk.
3. Pull the Door release tab on the driver’s side of the trunk, below the package shelf, to unlatch the doors.
Open the Doors Manually from Inside
Pull the Door release handle on the floor next to each front seat.
See Keys, Doors and Windows in your Owner Manual.
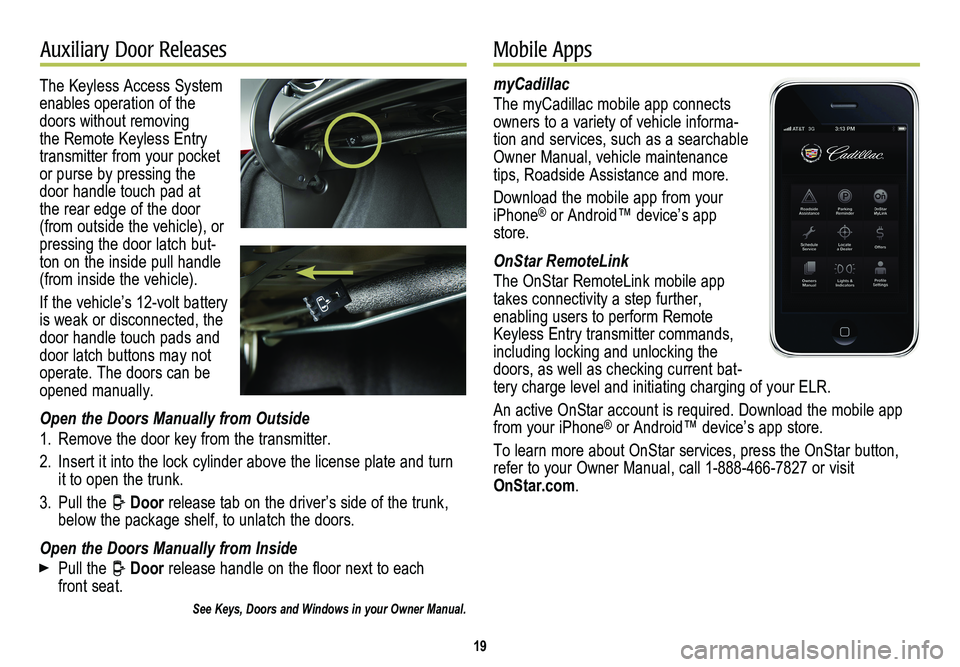
myCadillac
The myCadillac mobile app connects owners to a variety of vehicle informa-tion and services, such as a searchable Owner Manual, vehicle maintenance tips, Roadside Assistance and more.
Download the mobile app from your iPhone® or Android™ device’s app store.
OnStar RemoteLink
The OnStar RemoteLink mobile app takes connectivity a step further, enabling users to perform Remote Keyless Entry transmitter commands, including locking and unlocking the doors, as well as checking current bat-tery charge level and initiating charging of your ELR.
An active OnStar account is required. Download the mobile app from your iPhone® or Android™ device’s app store.
To learn more about OnStar services, press the OnStar button, refer to your Owner Manual, call 1-888-466-7827 or visit OnStar.com.