2014 AUDI RS7 SPORTBACK display
[x] Cancel search: displayPage 219 of 292
temperatures stay below freezing point for l ong periods.
Detergent add itives in the o il w il l make fresh
oil look dark after the eng ine has been run
ning fo r a short time . This is norma l and is not
a reason to change the oi l more often than
recommended.
D am ag e or m alfun ction s due to lack of
ma intenanc e
It is essential that you change your oil at the
r ecommended inte rva ls using only engine o il
t hat complies wi th A udi oi l standard
VW 502 00 . Your Limited New Vehicle War
ranty does not cover damage or malfunctions
d ue to fa ilure to fo llow recommended mainte
nance and use requ irements as set forth in
the Audi Owner's Manua l and Warranty
&
Maintenance book let . Your dea ler will have to
deny warranty coverage u nless you present to
the dea ler p roof in the fo rm of Serv ice or Re
pa ir Orde rs that all s chedu led maintenance
wa s pe rformed in a t imely manner .
Engine oil consumption
The engine in your vehicle dep ends on an ade
quate amount of oil to lubricate and cool all
of its moving parts.
In o rder to provide effective lubrication and
cool ing of i nternal engine components, a ll in
ternal comb ustion eng ines consume a cert ain
amo unt of o il. Oil cons umption varies from
engine to engine and may change significantly
over the life of the engine. Typ ica lly, engines
with a specified break-in per iod (see
¢
page 198) consume more oil during the
break-in per iod than they consume after oil
consumption has stabilized .
Under norma l conditions, the rate of oil con
sumpt ion depends on the quality and viscosity
of the oil, the RPM (revo lutions per m inute) at
which the engine is operated, the amb ient
temperature and road condit ions. Furthe r fac
tors ar e the amount of o il d ilution from wate r
condensation or fuel residue and the ox ida
tion level of the oi l. As any engine is s ubje ct to
Checkin g and fillin g 217
wear as m ileage builds up, the oil consump
tion may increase over time until replacement
of worn components may become necessary.
Wi th a ll these variab les coming into p lay, no
standard rate of oil consumpt ion can be es
tablished or specified. There is no alternative
to regular and frequent check ing of the o il lev
el, see
Note .
If the yellow engine oil leve l warning symbo l
in the instrument cluster
II li ghts up, you
sho uld check the oil leve l as soon as possib le
¢
page 218. Top off the oil at your earliest
convenience
¢ page 218.
A WARNING
Before you c heck anythi ng i n the engine
com partment, always read a nd heed all
WARNINGS¢ .&.
in Working in th e engine
c ompartment on page 213.
(D Note
D riving w ith an insufficient o il level is like
ly to cause sever e damage to the engine .
(D Tips
- The oil pressure warning display. is
not an indicator of the oil le vel. Do not
rely on it . Instead, check the oil level in
your engine at regu lar intervals, pref
erably ea ch time you refuel, and always
before going on a long trip .
-If you have the impression yo ur engi ne
c ons umes ex ce ss ive amoun ts of o il, we
recommend that you consul t your Au di
de aler to have the cause of your concern
properly diagnosed . Keep in mind that
the accurate meas urement of o il con
sumption requires great care and may
take some t ime. Y our Audi dea ler has in
struct ions about how to measure oil con
sumption accurately.
-
•
•
Page 220 of 292
218 Check ing and filling
Checking the engine oil level
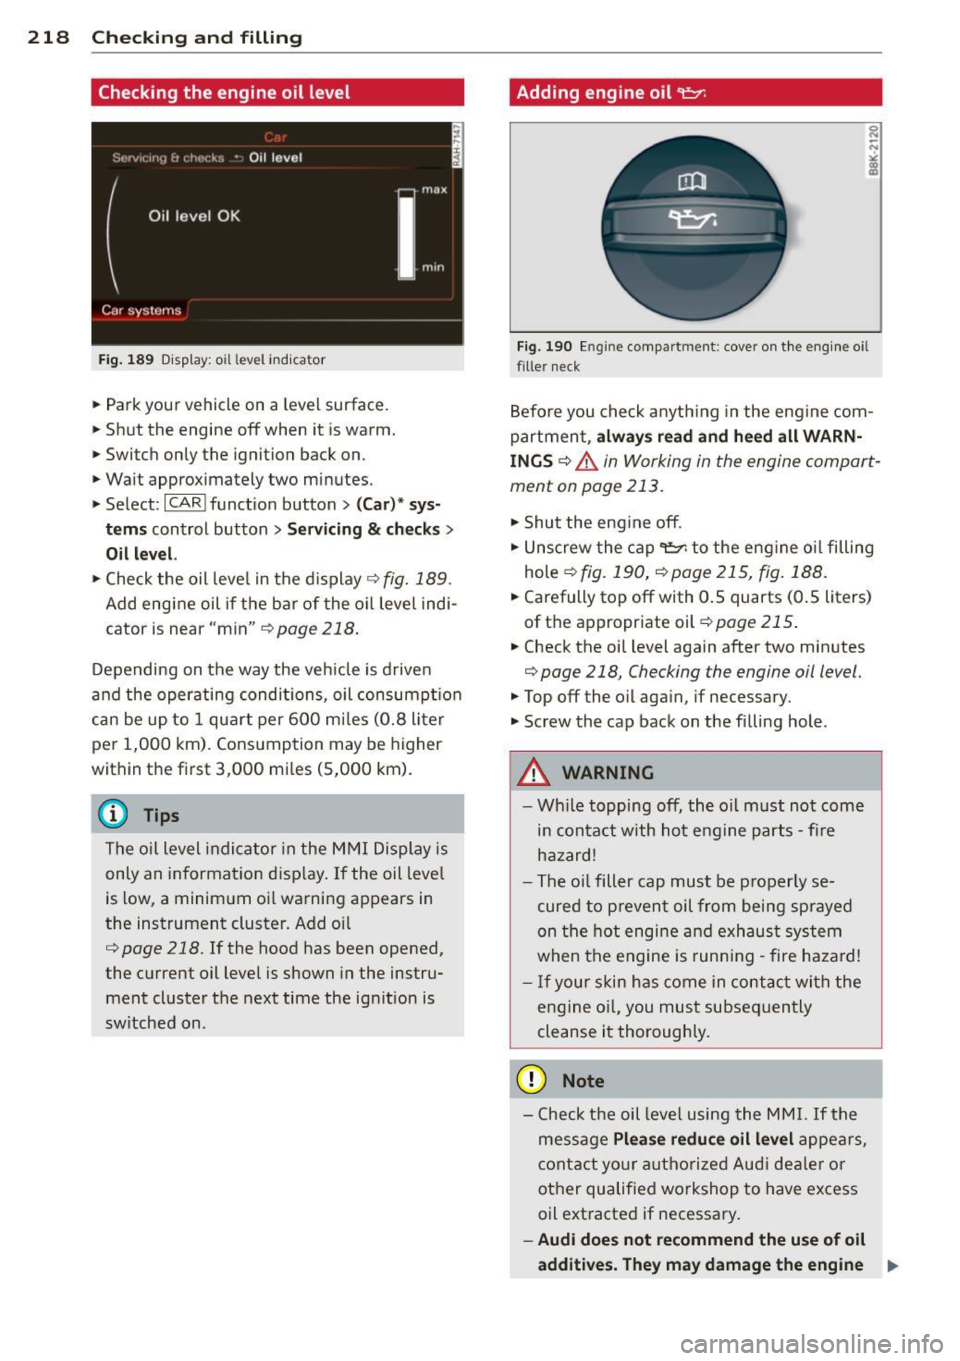
Fig. 189 Disp lay: oil level indica tor
• Park your vehicle on a level surface .
• Shut the engine off when it is warm.
• Switch only the ignition back on .
• Wait approximately two minutes.
• Select :
I CAR I function button> (Ca r)* sys
t e m s
control button > Se rv ici ng & ch ecks >
Oil l evel.
• Check the oil leve l in the d isplay r::;, fig. 189.
Add engine oil if the bar of the oil leve l indi
cator is near "min"
¢page 218.
Depending on the way the veh icle is driven
and the operating condi tions, oil consumpt ion
can be up to 1 qua rt per 600 m iles (0.8 liter
per 1,000 km) . Consumption may be higher
within the first 3 ,000 mi les (5,000 km).
@ Tips
The oil level indicator in the MMI Display is
only an information disp lay . If the oil leve l
is low, a minim um oil warning appears in
the instrument cluster. Add oil
r:::;, page 218. If the hood has been opened,
the current oil level is shown in the instru ment cluster the next time the ignition is
sw itched on .
Adding engin e oil 't:::r.
Fig. 190 Engin e compart men t: cover on the engine oi l
fille r neck
Befo re you check anyth ing in the engine com
partment,
a lw ay s re ad and h eed all WARN
IN GS
r::;, .&. in Working in the engine compart
ment on page 213.
• Shut the eng ine off .
• Unscrew the cap
't=;rl to the eng ine oi l filling
hole
¢ fig. 190, r:=:,page 215, fig. 188 .
• Carefully top off with 0 .5 quarts (0 .5 liters)
of the appropr iate oil¢
page 215.
• Check the oil level again after two minutes
r:::;, page 218, Checking the engine oil level.
• Top off the oil again, if necessary.
• Screw the cap back on the filling hole .
.&_ WARNING
--Wh ile topping off, the o il m ust not come
in conta ct with hot engine parts - fire
hazard!
- The oi l filler cap must be properly se
cured to prevent oil from being sprayed
on the hot engine and exhaust system
when the engine is runn ing -fire haza rd!
- If you r skin has come in contact with the
engine o il, you must subsequen tly
cleanse it thoroughly.
(D Note
- Check the oil level using the MMI. If the
message
Ple ase redu ce oil l evel appears,
contact you r authorized Aud i deale r or
other qualified workshop to have excess
oil extracted if necessary.
- Audi d oes n ot r ecommend the u se of o il
a dd iti ve s. The y may dama ge the en gine
II>-
Page 249 of 292
-Do not change the tire pressure when the
temperature of the tire is high. This
could result in serious damage to the tire
and even cause the tire to burst, increas
ing the risk of an accident.
- A tire with low pressure flexes more. This
heats the tire up too much . Th is could
cause the tread to separate and even
cause the tire to burst, increasing the
risk of an accident .
- The tire pressure monitoring system
does not warn about damage or defects
in the tire construct ion that could cause
the tire to burst, for examp le. Inspect
your ti res regularly.
@) For the sake of the environment
Low tire pressure increases fuel consump
tion and tire wear.
(D Tips
-If tires are replaced, the sensors/valves
do not need to be removed or replaced.
Just replace the valve stem and, if neces
sary, the valve and the wheel electronics.
If you have questions, see your author
ized Audi dealer or a qualified workshop.
- Using the tire mobility kit can results in
an incorrect display or a malfunction in
the tire pressure monitoring system.
Have the sensors replaced by an author
ized Audi dealer or a qualified workshop.
Display tire pressures/temperatures
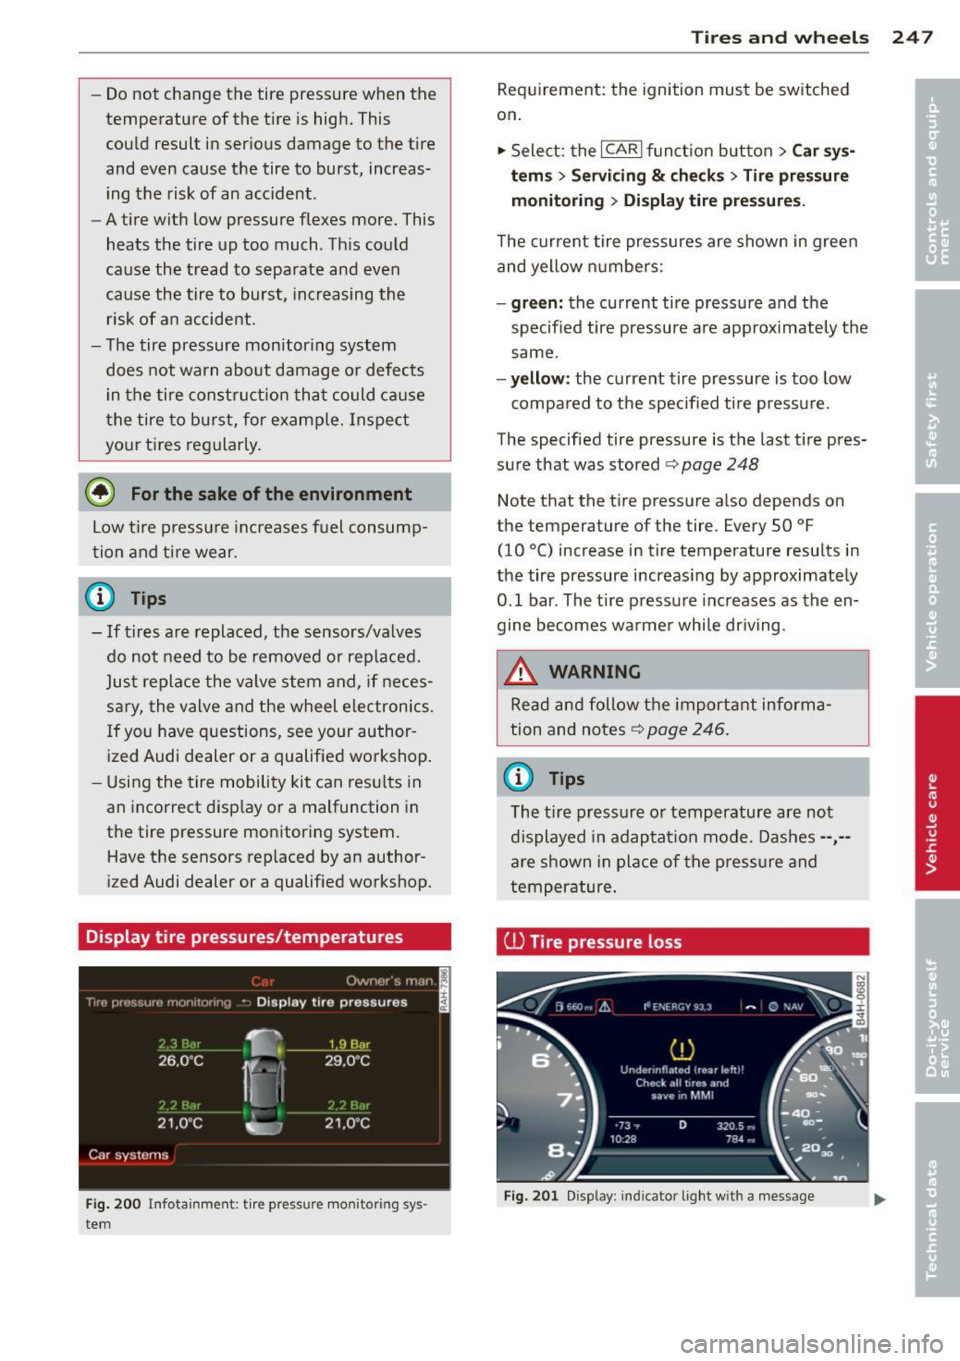
Fig. 200 Infotai nm en t: t ire pres sur e mo nito rin g sys
tem
Tires and wheels 247
Requirement: the ignition must be switched
on .
'" Select: the
I CAR I function button > Car sys
tem s
> Servicing & checks > Tire pressure
monitoring
> Di sp lay tire pressures.
The current tire pressures are shown in green
and yellow numbers:
-green: the current tire pressure and the
specified tire pressure are approximately the
same.
-yellow: the current tire pressure is too low
compared to the specified tire pressure.
The specified tire pressure is the last tire pres
sure that was stored
c::> page 248
Note that the tire pressure also depends on
the temper ature of the tire . Every 50 °F
(10
°() increase in tire temperature results in
the tire pressure increas ing by approximately
0.1 bar . The tire pressure increases as the en
gine becomes warmer while driving .
.&_ WARNING
Read and follow the important informa
tion and notes
c::> page 246 .
© Tips
The t ire pressure or temperature are not
displayed in adaptat ion mode. Dashes--,-
are shown in place of the pressure and
temperature.
ill Tire pressure loss
Fig. 201 Disp lay: in dic ator light w ith a message
-
Page 250 of 292
![AUDI RS7 SPORTBACK 2014 Owners Manual 248 Tires and wheels
If the [fJ] indicator light turns on, the pressure
in at least one tire is too low or new sensors
were not adapted:
[f!l indicator lights turns on after t AUDI RS7 SPORTBACK 2014 Owners Manual 248 Tires and wheels
If the [fJ] indicator light turns on, the pressure
in at least one tire is too low or new sensors
were not adapted:
[f!l indicator lights turns on after t](/manual-img/6/57649/w960_57649-249.png)
248 Tires and wheels
If the [fJ] indicator light turns on, the pressure
in at least one tire is too low or new sensors
were not adapted:
[f!l indicator lights turns on after turning
the ignition on
The tire pressure is too low compared to the
specified pressure.
.,. Check and store the tire pressure(s) the next
time it is possible¢
page 248.
[f!l indicator light turns on while driving
Wheels with new sensors were not adapted or
the tire pressure has reached a critical level
compared to the spec ified pressure.
.,. Avoid unnecessary steering and braking ma
neuvers .
.,. Adapt your driving style to the situation .
.,. Stop as soon as possible and check the
ti re(s).
.,. If it is possible to continue driving, see an
authorized Audi dealer or a qualified work
shop immediately and have your tire(s) re
paired or replaced.
A WARNING
Read and follow the important informa
tion and notes
~page 246.
Storing new tire pressures
-
Correctly stored tire pressure specifications
are necessary for reliable tire pressure moni
toring.
.,. Check the tire pressures in all wheels.
.,. If necessary, correct the tire pressure ac
cording to the specifications on the sticker
on the side of the driver's door . Only correct
the pressure in tires whose temperature is
approximately the same as the ambient
temperature. If the temperature of the tire
is higher than ambient temperature, the tire
pressure must be increased approximately
0.2 bar above the value on the sticker.
.,. Switch on the ignition.
.,. Select :
I CARI function button > Car systems
> Tire pressure monitoring > Store tire pressures.
After storing,
the tire pressure
monitoring system measures the current
tire pressures and stores them as the new
specified pressures.
,. If the changed tire pressures are not dis
played in the Infotainment system, drive the
veh icle for approx imately 10 minutes so
that the sensor signal from the wheels is re
ceived aga in .
During this adaptation phase,--,--is displayed
for the pressure and temperature and the tire
pressure monitoring system is only partially
available.
It only provides a warning if one or
more tire pressures is be low the min imum
permitted spec ified pressure . If this is the
case, the
[fJ] indicator light appears with a
message.
A WARNING
Read and follow the important informa
tion and notes¢
page 246.
Malfunctions
Fig. 202 Display : indicator light with a message
-
If the tire pressure monitoring system is not
available,
the m indicator light appears in
the driver information system. The
[fJ] indica
tor light also blinks for approximately one mi
nutes each time the ignition is switched on.
The tire pressure monitoring system cannot be selected in the Infotainment system. The
malfunction could be caused by the following
examples:
- If the message appears at the end of the
adaptation phase, the system cannot detect
the wheels installed on the vehicle. This may
resu lt from one or more wheels being ..,.
Page 253 of 292
Tire repair
General and safety pointers
Tire repair is intended only for temporary,
short -term use .
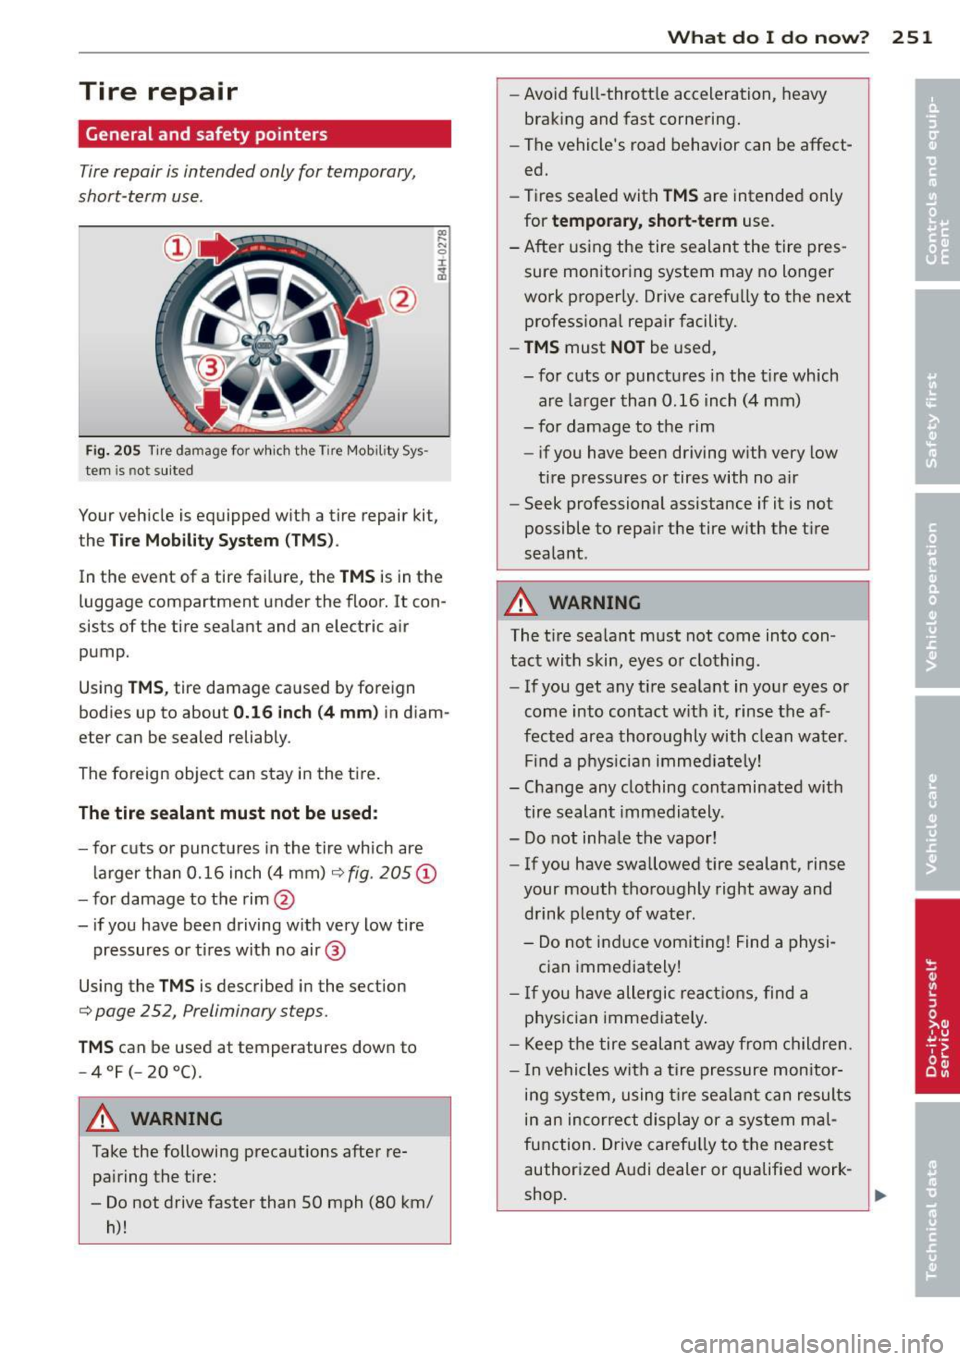
Fig. 205 Tire damage for w hich the Tire Mobil ity Sys ·
tern is not su ited
Your veh icle is equipped w ith a tire repair kit,
the
Ti re Mob ilit y Sys tem (TM S).
In the event of a tire fai lure, the TM S is in the
luggage compartment under the floor. It con
sists of the tire sealant and an electric air
pump.
Using
TMS , tire damage caused by foreign
bodies up to about
0.1 6 inch (4 mm ) in diam
eter can be sealed reliably.
The foreign object can stay in the tire .
The tire se alant must not be us ed :
- for c uts or punct ures in the tire which are
larger than 0.16 inch (4 mm)
¢ fig. 205 @
- for damage to the rim@
- if you have been driving with very low tire pressures or tires with no air @
Using the
TM S is described in the section
¢ page 252, Preliminary steps.
TM S can be used at temperatures down to
-4°F(-20°C) .
A WARNING
Take the following precautions after re
pairing the tire:
- Do not drive faster than
50 mph (80 km/
h)!
What do I d o now ? 251
-Avoid full-throttle acceleration, heavy
brak ing and fast cornering.
- The vehicle's road behavior can be affect
ed.
- Tires sea led with
T MS are intended only
for
t e mpo rary, sh or t-t erm use.
-After using the tire sealant the tire pres sure mon itoring system may no longer
work properly. Drive carefully to the next
professional repa ir facility.
- TMS must NOT be used,
- for cuts or punctu res in the t ire which
are larger than 0.16 inch (4 mm)
- for damage to the rim
- if you have been driving with very low
tire pressures or tires with no a ir
- Seek professional assistance if it is not
possible to repa ir the tire with the t ire
sealant .
A WARNING
The tire sea lant must not come into con
tact with skin, eyes o r clothing .
- If you get any tire sealant in your eyes or
come into contact w ith it, rinse the af
fected area thoroughly with clean water .
Find a phys ician immed iately!
- Change any clothing contaminated with
tire sealant immediately .
- Do not inha le the vapor!
- If you have swallowed tire sealant, rinse
your mouth thoroughly right away and
drink plenty of water .
- Do not induce vomiting! Find a physi
c ian immediately!
- I f you have allergic react ions, find a
physician immediately .
- Keep the tire sealant away from ch ildren .
- In vehicles with a tire pressure monitor-
ing system, using t ire sealant can results
in an incorrect display or a system mal
fu nction. Drive carefu lly to the neares t
authorized Audi dealer or qualified work-
shop . ..,.
Page 263 of 292

No. Equ ipment Amps
4 Suspension control system sen-s sor
s
E
lectronic Stabilization Cont rol
s (ESC) module
6 Climate control
5
7 Adaptive cruise control 10
8
Airbag control module, front
5
passenger's seat sensor system
9 Gateway 5
Homelink (garage doo r opener),
10 night vis ion system cont ro l 5
module
11 Image
processing (active lane
10
ass ist, adaptive cruise control)
12 Dynamic steering 5
13 Terminal 15 in
the instrument
15
panel
14 Terminal 15
in the luggage com-
partment 30
15 Terminal 15
(engine)
15
16 Starter 40
Fu se pa nel ® (b rown )
No . Equipment Amps
1 Gateway
5
2 C limate control 10
3 E
lectronic Stabili zation Contro l
10
(ESC) module
4 Fron
t door (driver 's side)
30
s
Power seat adjustment (driver's
7,5
seat)
6 Dynam
ic steering
35
7 Sunroof 20
8
Rear door control module (driv-
15
er 's side)
9 Lumbar support (
Front passen-
s ger seat)
10 Tire pressure
monitoring system
5
11 Su
nroof, rear spoi ler (Sportba ck)
20
12 Driver
door control module
15
Fuse s and bulb s 261
Fuse pan el© (r e d )
No . Equipment
2 Fuel pump
3 Brake light sensor/brake pedal
sensor system
AdBlue control module (Diesel)/
4 Engine acoust ics
5 Left rear door cont rol modu le
6 Power seat adjustment
(pas-
senge r's seat)
7 Horn
8 Windshield wiper motor
9 Light/rain sensor, heater
for vid-
eo camera in windscreen
10 L umba r support (driver seat)
1 1 Front
passenger door control
modu le
12 Right rea r door cont rol modu le
Front passenger side cockpit fuse
assignment Amp
s
25
5/5
5/7,S 30
7,5 15
30
s
5
15
15
F ig . 217 Front passenger side cockpit: fuse pa nel w it h
plast ic brac ket
Fuse panel @ (bla ck)
No . Equipment Amps
1 Head-up
Display
5
2 MMI Display 5
3 CO/DVD changer
5
4 MMI unit/drives 7,5
5 Chip
card reader (not in all coun-
5
tries)
6 Instrument
cluster
5
7 Steering column switch module 5 ...
Page 279 of 292
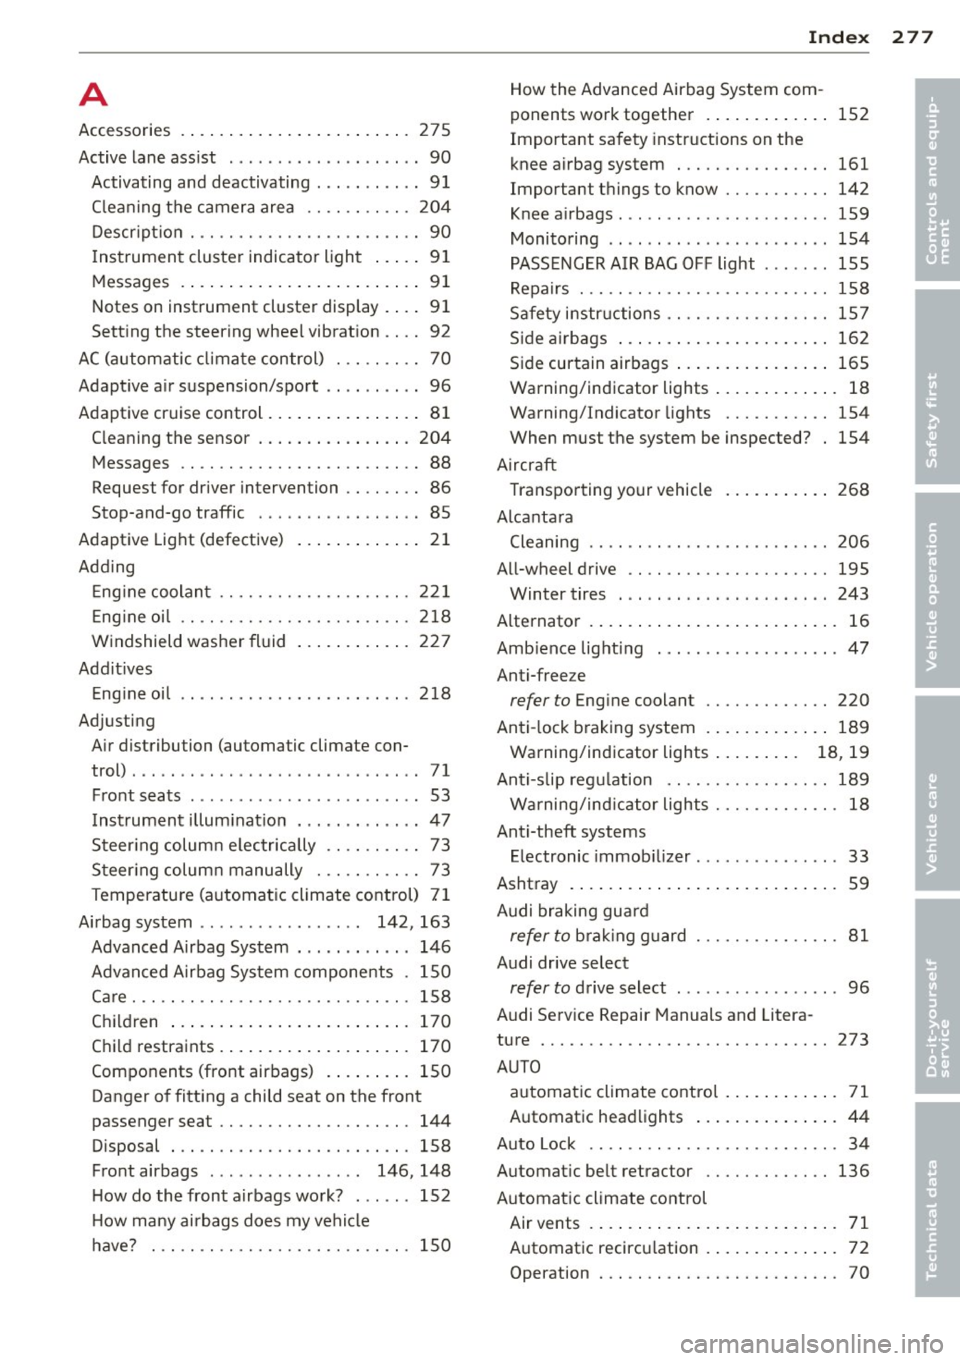
A
Accessories . . . . . . . . . . . . . . . . . . . . . . . . 2 7 5
Active lane assist . . . . . . . . . . . . . . . . . . . . 90
Activating and deactivating . .. .. .. .. .. 91
C leaning the camera area .. .. .. .. .. . 204
Description .............. .... .. .... 90
Instrument cluster indicator light . . . . . 91
Messages .. ................ ... .... 91
Notes on instrument cluster display . . . . 91
Setting the steering wheel vibration .. .. 92
AC (automatic climate control) . .. .. .. .. 70
Adaptive air suspension/sport .. .. ... ... 96
Adaptive cruise control ......... ... .... 81
Cleaning the sensor .......... ..... . 204
Messages .. ............. .... .. .... 88
Request for driver intervention . . . . . . . . 86
Stop-and-go traffic . . . . . . . . . . . . . . . . . 85
Adaptive Light (defective) ............. 21
Adding Engine coolant ........... .. .. .. .. . 221
Engine oil .. ............. .... .. ... 218
Windshield washer fluid ............ 227
Additives Engine oil .. ....... ...... .... .. .. . 218
Adjusting Air distribution (automatic climate con-
trol) ..... ... ...... ....... ...... ... 71
Front seats . . . . . . . . . . . . . . . . . . . . . . . . 53
Instrument illumination ... .. .. .. .. .. 47
Steering column e lectrically .. .. .. .. .. 73
Steering column manually . .. .. .. .. .. 73
Temperature (automatic climate control) 71
Airbag system . . . . . . . . . . . . . . . . . 142, 163
Advanced Airbag System . . . . . . . . . . . . 146
Advanced Airbag System components . 150
Care . .. .. .. .... ............. .. .. . 158
Children ... ................ ... ... 170
Child restraints .............. ... ... 170
Components (front airbags) . ... .. .. . 150
Danger of fitting a child seat on the front
passenger seat . . . . . . . . . . . . . . . . . . . . 144
Disposal . .. ............. .... .. .. . 158
Front airbags . . . . . . . . . . . . . . . . 146, 148
How do the front airbags work? . ..... 152
H ow many airbags does my vehicle
have? ... .. .... ............. .. .. . 150
Index 277
How the Advanced Airbag System com-
ponents work together ............ . 152
Important safety instructions on the
knee airbag system ................ 161
Important things to know ......... .. 142
Knee airbags . .. .. .. ............... 159
Monitoring .. .. .. .. . .. .... ........ 154
PASSENGER AIR BAG OFF light ....... 155
Repairs . . . . . . . . . . . . . . . . . . . . . . . . . . 158
Safety instructions .... ......... .. .. 157
Side airbags ... .. .. ............... 162
Side curtain airbags ............... . 165
Warning/indicator lights ............ . 18
Warning/Indicator lights ....... .. .. 154
When must the system be inspected? 154
Aircraft Transporting your vehicle
Alcantara 268
Cleaning .. .. .. .. .... ........... .. 206
All-wheel drive .. .. .. ............... 195
Winter tires . .. .. .... ... .... .... .. 243
Alternator ... ..... .. ................ 16
Ambience lighting ... ... ..... ... .... . 47
Anti-freeze
refer to Engine coolant ............. 220
Anti-lock braking system ............ . 189
Warning/indicator lights . . . . . . . . . 18, 19
Anti-s lip regu lation .... ......... .. .. 189
Warning/indicator lights ........ .. .. . 18
Anti-theft systems Electronic immobilizer ............. .. 33
Ashtray ..... ... .... ................ 59
Audi braking guard
refer to brak ing guard .......... .... . 81
Audi drive select
refer to drive select ... .. ...... .... .. 96
Audi Serv ice Repair Manuals and Litera-
ture ......... .. .. ................. 273
AUTO automatic climate control .......... .. 71
Automatic headlights ............... 44
Auto Lock . . . . . . . . . . . . . . . . . . . . . . . . . . 34
Automatic belt retractor ......... .. .. 136
Automatic climate control
Air vents .. .. .... .. ................ 71
Automatic recirculation ............ .. 72
Operation . . . . . . . . . . . . . . . . . . . . . . . . . 70
•
•
Page 280 of 292

278 Index
Setup . . . . . . . . . . . . . . . . . . . . . . . . . . . . 72
synchronizing ............. ... .... .. 71
Automatic Shift Lock (ASL) .......... . 105
Automatic transmission . . . . . . . . . . . . . . 104
Automatic Shift Lock (ASL) . .. .. .. .. . 105
Driving .... .. ........ .... ... .. .. . 106
Emergency mode ........... .. .. ... 108
E mergency release ........ .. .. .. .. . 109
Kick -down ............... .... .... . 108
Manual shift program ......... .. .. . 108
Selector lever ............. ... .... . 104
Automatic wipers . .. ........ ... .. .. .. 48
Auto Safety Hotline . . . . . . . . . . . . . . . . . 131
Average consumption ....... .. .. .. .. . . 24
Average speed . . . . . . . . . . . . . . . . . . . . . . . 24
Avoid damaging the vehicle ........ .. . 199
B
Bag hooks . . . . . . . . . . . . . . . . . . . . . . . . . . 67
Battery ... .. .. .. ............ ... .. . 223
Charging ... .. .. .. .......... ... .. . 226
I mportant warnings ...... .. .. .. .. . 224
Jump starting .. ........ .. .. .. .. .. . 264
L ocat ion ..... ........... ........ . 224
l ow ... .... ................ ..... . 195
Rep lacing the battery ...... ... .. .. . 227
State of charge ............ ... .. .. . 195
Winter operation ......... .... .... . 223
Working on the battery .... .. .. .. .. . 224
Before driving . . . . . . . . . . . . . . . . . . . . . . 123
Blended gasoline .... ...... .. .. .. .. . 208
Blower (automatic climate control) . . . . . . 71
Boost display . . . . . . . . . . . . . . . . . . . . . . . . 28
Booster seats ... .... ...... .. .. .. .. . 177
Boost pressure indicator .......... .. .. 28
Brake fluid Changing the brake fl uid ... .... .. .. . 223
Check ing the brake fluid level . .. .. .. . 222
What is the correct brake fluid leve l? .. 222
What should I do if the brake fluid warn-
ing light comes on? ........ .... ... . 222
Brake system Anti-lock braking system ..... .. ...... 19
Brake assist system ........ ... .. .. . 189
Brake booster ............. ... .... . 193
Brake fluid ............... ... .... . 222 Brake fluid specifications for refill and re
placement
. . . . . . . . . . . . . . . . . . . . . . . 223
Brake light defective . . . . . . . . . . . . . . . . 21
Brake pads ...... ............. .... 198
Electromechanical parking brake . .... . 77
Fluid reservoir . .. ................ . 222
How does moisture or road salt affect the
brakes? ....... .. .. ........ ... ... . 193
Warning/ind icator lights ...... .. .. .. . 14
Worn b rake pads symbo l ........ .. .. . 20
braking guard
Settings . . . . . . . . . . . . . . . . . . . . . . . . . . 88
Braking guard ..... ............. ... .. 81
Messages . .. .. .. .. ........... .... . 88
Break-in per iod .... ............. .... 198
Brake pads .... .. ................ . 198
Tires .... ..... .. .. .............. . 198
Bu lbs .. .. .. .. .. .. .. .. ...... ... .. .. 263
C
California Proposition 65 Warn ing .... . 214
Battery specific .. ..... ......... ... 225
Capacities .. .... .. ................. 271
Engine oil ....... ............. .... 215
Carbon parts Cleaning . . . . . . . . . . . . . . . . . . . . 205, 206
Car carrier Transporting your vehicle ....... .. .. 268
Care ... .. .. .. .. .. ............. .. .. 203
Cargo area . ..... .. ............. ... . 129
Cargo net . . . . . . . . . . . . . . . . . . . . . . . . . . . 66
Catalytic converter .............. .. .. 199
Center armrest Cockpit . . . . . . . . . . . . . . . . . . . . . . . . . . . 56
Central locking .. .. .......... ...... .. 34
Emergency locking ... ....... ...... .. 38
Certification ..................... .. 276
Changi ng a wheel .. ... .......... .. .. 254
Changing engine oil .......... ...... . 219
Checking Engine coolant level ............ .... 220
Tire pressure ... .. ... .......... .. .. 234