2014 AUDI RS7 SPORTBACK transmission
[x] Cancel search: transmissionPage 109 of 292
activate the parking brake and move the
selector lever to P.
- Power is sti ll transmitted to the wheels
when the engine is running at idle. To
prevent the vehicle from "creeping", you
must keep your foot on the brake when
the engine is running and the selector
lever is in D/S or R or "tiptronic" mode is
selected.
- Do not press the accelerator pedal when changing the selector lever pos ition
wh ile the vehicle is stat ionary and the
engine is running .
- Never shift into
R or P wh ile driving .
- Before driv ing down a steep slope, re -
duce your speed and shift into a lower
gear with "tiptronic".
- Do not ride the brakes or press the brake
peda l too often or too long when dr iv ing
down a hill. Constant braking causes the brakes to ove rheat and substant ially re
duces braking performance, increases
braking distance or ca uses comp lete fail
vre of the brake system .
- To prevent the vehicle from rolling back
when stopping on inclines, always hold it in place with the brake pedal or parking
brake.
- Never hold the vehic le on an incline with
a slipping clutch . The clutch opens auto
matically when it becomes too hot from
the overload. An indicator lamp
[O] illu
minates and a dr iver message appears
~ page 108 when the clutch is overload
ed .
- If the engine must remain running, never have any driv ing position engaged when
check ing under the hood.
M ake sure the
selector lever has secure ly engaged and
is locked in P with the parking bra ke set
¢ page 213 . Otherwise, any increase in
engine speed may set the vehicle in mo
t ion, even with the park ing brake ap
plied.
(D Note
- When stopping on an incline, do not try to hold the vehicle in place by pressing
Aut omat ic Tr ans missio n 107
the acce lerator pedal while a d riving gea r
is se lected. This can cause the transmis
sion to ove rheat and can damage it. Acti
vate the parking brake or press the brake peda l to prevent the vehicle from rolling .
- Allowing the vehicle to roll when the en gine is stopped and the selector lever is
in N will damage the transmission be
cause
i t is not lubricated under those cir
cumstances.
(D Tips
For safety reasons, the parking brake is re
leased automatically o nly when the driv
e r's safety belt is engaged in the buckle .
, Hill descent control
The hill descent control system assists the
driver when driving down declines .
Hill descent contro l is activa ted when these
lector lever is in D/S and you press the brake
pedal. The transmission automatically selects
a gear that is suitable for the incline . H ill de
scent cont ro l t ries to ma inta in the speed ach
ieved a t the t ime of braking, with in phys ica l
and tec hni cal lim itations. If may st ill be nec
essary to adj ust the speed with the brakes .
Hill descent contro l sw itches off once the de
cl in e leve ls out or yo u press the acce le rato r
pedal.
On vehicles with the cruise cont ro l system*
¢ page 79 , hill descent control is also activat
ed whe n the speed is set.
&_ WARNING
-
Hill descent co nt rol cannot overcome
physical lim itations, so it may not be ab le
to maintain a constant speed under a ll
conditions. A lways be ready to apply the
brakes .
Page 110 of 292
108 Automatic Transmission
Manual shift program
Using the manual shift program you can
manually select gears .
,
I f I
I
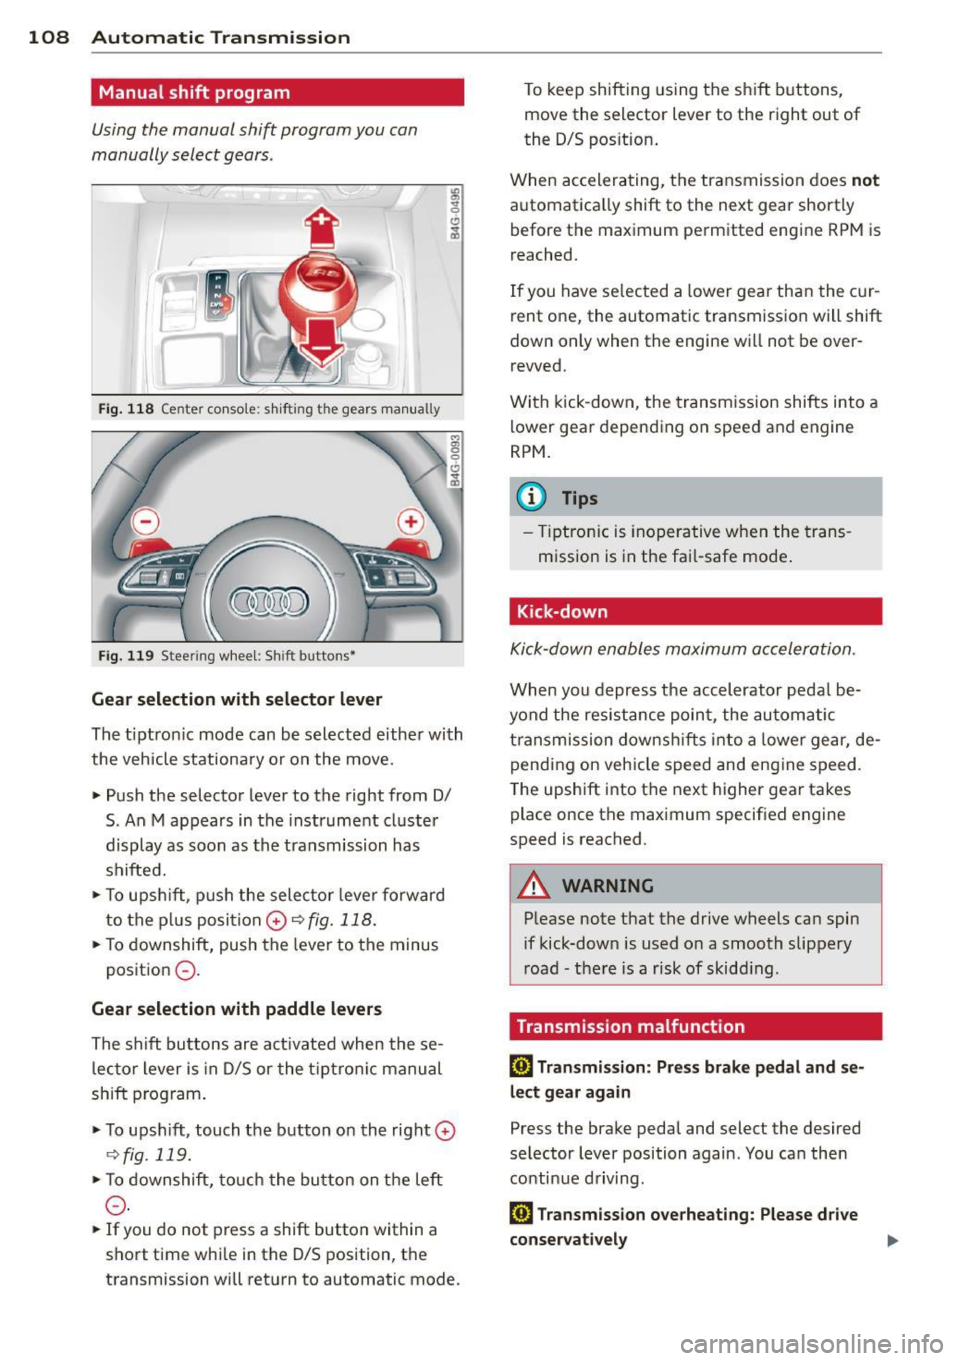
Fi g. 118 Center co nsole: s hiftin g t he gears ma nua lly
Fi g. 119 Stee ring wheel : Sh ift butto ns•
Gear s election w ith selector l ever
The tiptro nic mode can be selected e ither with
the vehicle stationary or on the move.
,.. Push the selector lever to the right from 0/
S. An M appears in the instrument cluster
display as soon as the transmission has
shifted.
,.. To upsh ift, push the selector lever forward
to the pl us posi tion
0 c::::> fig. 118.
,.. To downshift, push the lever to the minus
position
0 -
Gear selection with paddle levers
The shift buttons are act ivated when these
lector lever is in 0/S or the t iptro nic manual
shift p rogram .
,.. To upsh ift, touch the button on the right
0
c::::> fig . 119.
,.. To downshift, touch the button on the left
0 -
... If you do not press a shift button within a
short time whi le in the 0/S posit ion, the
transmission will return to automatic mode . To keep shifting using the sh
ift buttons,
move the selector lever to the right out of
the 0/S position.
When accelerating, the transmission does
not
automat ica lly shift to the next gear shortly
before the maximum permitted engine RPM is
reached.
If you have se lected a lower gear than the c ur
rent one, the automatic transmissio n will shift
down only when the engine will not be over
revved.
With kick-down , the transmission shifts into a
lower gear depending on speed and engine
RPM.
(D Tips
- Tiptron ic is inoperative when the trans
m ission is in the fa il-safe mode .
Kick-down
Kick-down enables maximum acceleration .
When you depress the accelerator pedal be
yond the resistance point , the au tomatic
t ransmission downsh ifts into a lower gear, de
pending on vehicle speed and engine speed .
T he upsh ift into the next higher gear takes
place once the maximum specified engine
speed is reached .
_& WARNING
-
Please note that the drive wheels can spin
if kick-down is used on a smooth slippery
r oad -there is a risk of skidd ing .
Transmission malfunction
[O] Tran smi ssion: Press br ake pedal and s e
lect ge ar again
Press the brake pedal and select the desired
selector lever position again . You ca n the n
continue d riving .
[O] Transmi ssion o verheating: Please d riv e
conse rvat ively
Page 111 of 292
The transmission temperature has increased
significantly due to the sporty driving manner. Drive in a less sporty manner until the tem
perature returns to the normal range and the
indicator light switches of.
[O] Transmission malfunction: You can con
tinue driving
There is a system ma lfunction in the transmis
sion. You may continue driving. Drive to your
authorized Audi dealer or qualified repair fa
cility soon to have the malfunction corrected .
[O] Transmission malfunction: You can con
tinue driving with limited functionality
There is a system malfunction in the transmis
sion . The transmission is switching to emer
gency mode. This mode only shifts into cer
tain gears or will no longer shift at a ll. The en
gine may stall. Drive to your authorized Audi
dealer or qualified repair facility immediately
to have the malfunction corrected .
[O] Transmission malfunction: Stop vehicle
and shift to P
Do not continue driving. Select the P selector
l eve r position and see you r autho rized Aud i
dealer or qualified repair facility for assis
tance.
(D Note
If the transmission switches to emergency
mode, you should take the vehicle to an
authorized Audi dealership as soon as pos
sible to have the condition corrected .
Automatic Transmission 109
Selector lever emergency release
If the vehicle's power supply fails, the selec
tor lever can be released in an emergency.
F ig . 1 20 Fro nt center co nsole: se lector lever emerge n
cy release
.,. To reach the emergency release mechanism,
remove the ashtray insert*.
.,. Loosen and remove the small cap in the ash
tray mount
q fig. 120 .
.,. You now have access to a bolt. Using a
screwd river or similar, press the bolt down
and hold it down.
.,. Now press the interlock and move the se lec-
tor lever to the N position .
T he selector lever can only be moved from the
P position if the ignit ion is turned on . If the
power supply fai ls (for example, the battery is
discharged) and the vehicle must be pushed
or towed, move the selector lever to the N po
s ition first using the emergency release.
Page 195 of 292

Braking
General information
What affects braking efficiency?
Operating condit ions and d riv ing hab it s
The brakes on today's automobi les are sti ll
subject to wear, depending largely on operat
ing conditions and dr iving habits
c:> A . On
vehicles that are either driven mostly in stop
and-go city traffic or are driven hard, the brake pads should be checked by your author
i zed Audi dealer more often than specified in
the
Warr ant y & Maint enan ce bookle t. Failure
to have your b rake pads inspected can res ult
i n red uced brake performance.
On steep slopes, you should use the brak ing
effect of the engine. This way, you p revent un
necessa ry wea r on the brake system.
If you
must use yo ur brakes, do not ho ld the brakes
down continuously. Pump the brakes at in ter
va ls.
Moistu re or road salt
Unde r ce rtain conditions, for example, when
driving through wate r or very heavy rain, or
even after washing your vehicle, the braking
effect can be reduced d ue to moisture (or in
freezing conditions ice) on the brake pads . A
few careful brake app lications should dry
off
the brake pads or remove any ice coatings.
When you are driving at higher speeds with
the windshield wipers on, the brake pads will
briefly touch the brake discs in regular inter
vals so as to improve reaction t ime when brak
ing on wet surfaces . You the driver w ill not no
tice anything .
The effectiveness of the brakes can be reduced
when the vehicle is dr iven on a salt-covered
road and the brakes are not used . Here too,
you should clean
off accumulated salt coat ing
from b rake discs and pads with a few careful
applications of the brake
c:> ,&. .
Cor ro sion
There may be a tendency for dirt to build up
on the brake pads and corrosion to form on
Int ellig ent technolog y 193
the d iscs if the car is not driven regu larly or
only for short trips with litt le use of the
brakes.
If the brakes a re not used frequently, o r if cor
rosion has formed on the discs, it is adv isable
to clean
off the pads and discs by braking
firmly a few times from a moderately high
speed
c:> ,&. .
Fault s in the brak e syste m
If you shou ld notice a sudden increase in
brake pedal trave l, then one of the two brake
circuits may have fai led ¢
A.
Low brake fluid lev el
Malfunctions can occu r in the bra ke system if
the b rake fluid level is too low. The brake flu id
level is monitored elec tronica lly.
Brake booster
The brake booster works with vacuum pres
su re which is created only whe n the engine is
runn ing ¢,&. .
Brake lining we ar s tatus
Brake lining wear may be checked by visual in
spection of the condition of the brake pads
through the open ings in the w heel. If neces
sary, the wheel may be removed fo r thi s in
spe ction ¢
page 2 54, Changing a wheel.
_& WARNING
-You should perform braking maneuvers
for the purpose of cleaning the brake system only if road conditions permit .
Other road users must not be put at risk -
you may ca use an accident!
- Before descend ing a steep grade, reduce
speed and sh ift transmission into a lower
gear or lower dr iving range. Do not ride
the brakes or hold the pedal down too long or too often . Th is could cause the
brakes to get hot and diminish braking
efficiency.
- Do not " ride the brakes" by rest ing your
foot on the pedal when you do not intend
to b rake. This may cause the brakes to
•
•
Page 201 of 292
Avoid damaging the
vehicle
When you are driving on poor roads, or over
curbs, steep ramps, etc., make certain that
low-lying parts such as spoilers and exhaust
system parts do not bottom out and get dam
aged.
T his is especially true for vehicles with low
slung chassis (sports chassis) * and fully load
ed veh icles .
Driving through water
on roads
Note the following to avoid vehicle damage
when driving through water, for example on
flooded roads:
- T he water must not be any h igher than the
bottom of the veh icle body.
- Do not d rive faster than wa lking speed.
..&, WARNING
After driving through wate r, m ud, slush,
etc., the brakes may be slow to take effect
because o f wet brake rotors and pads . Dry
the brakes first by braking carefully to re
store the full braking effect.
(D Note
- Vehicle components such as the eng ine,
transmission, suspension or e lectrical
system can be severely damaged by driv ing through water.
- Check the depth o f the water before driv
ing through it.
- Do not s top the veh icle, drive in reverse
or switc h the engine off when driving
through water.
- Keep in mind that oncoming vehicles may create waves that raise the water
level and make it too deep for your vehi
cle to drive through safely.
- Avoid driving thro ugh sa lt water because
it can ca use corrosion.
-
Dri vin g and en vironm ent 199
Warming up and
cooling down
By carefully warming up and cooling down
your vehicle, you can help ensure that it is not
overstressed unnecessar ily during sporty dr iv
ing.
When warming up, the vehicle is dr iven at a
maximum engine speed of 6000 RPM in order
to raise the engine o il temperature to a mini
mum of 140
°F (60 °() . The t ires a lso on ly
reach the ir full road holdi ng capabi lity once
they have warmed up.
The cooli ng fan can cont inue to run in your ve
hicle after the engine is switched off . Howev
er, driving the veh icle to coo l it down is pa rti c
ul arly important. Dur ing spo rty driving , the
engine and b rakes, the exhaust system, and
the transmission a ll become extremely hot.
Before you park the vehicle, you should drive
it for a few miles/kilometers at light load in
the low rpm range to allow it to cool down .
Catalytic converter
App lies to vehicles: wi th gaso line e ngi ne
It is very important that your emission con
trol system (catalytic converter) is function
ing properly to ensure that your vehicle is run
ning in an environmentally sound manner.
"' Always use lead-free gasoline c:> page 208,
Fuel supply .
"' Never run the tank down all the way to emp
ty.
"' Never put too much mo to r o il in yo ur eng ine
c:> page 218, Adding engine oil "t:::r..
"' Never try to push -or tow -start you r vehicle .
T he catalytic co nve rter is an efficient "clean
u p" dev ice bui lt into t he exhaus t system of
the ve hicle . The cata lytic converter bu rns
many of the pollutants in the exha ust gas be
fore they are re leased into the atmosphere.
T he exclus ive use of unleaded fuel is c ritical ly
i mportant for the life of the catalyt ic convert -
er and proper functioning of the engine .
Iii>
•
•
Page 231 of 292
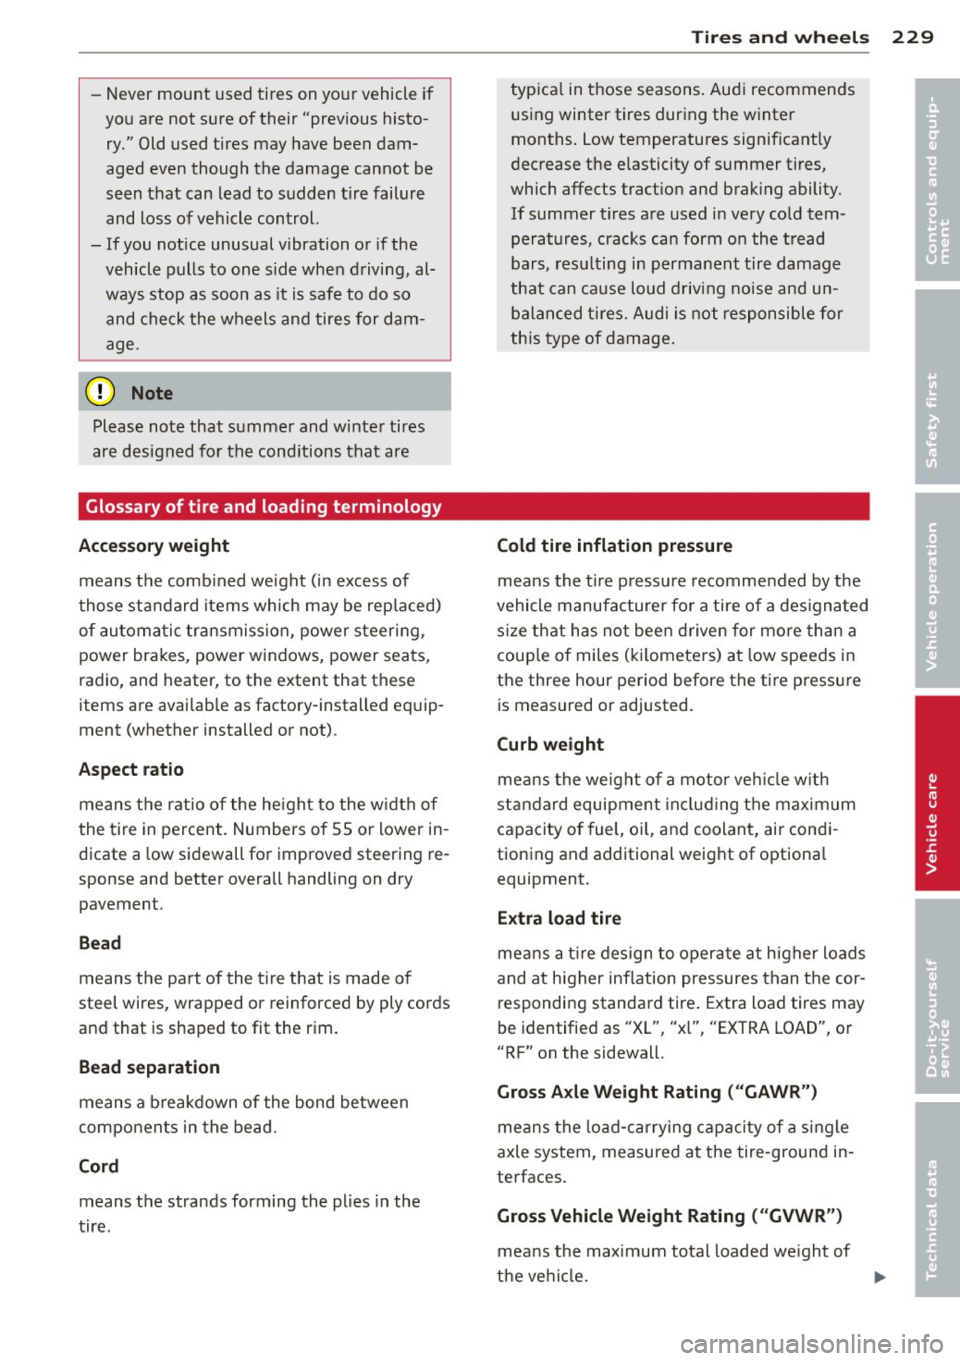
-Never mount used tires on yo ur vehicle if
yo u are not sure of their "previous histo
ry." Old used tires may have been dam
aged even though the damage cannot be
seen that can lead to sudden tire failure
and loss of vehicle control.
- If you notice unusual vibration or if the
vehicle pulls to one side when d riving, al
ways stop as soon as it is safe to do so
and check the wheels and tires for dam
age .
(D Note
Please note that summe r and wi nte r tires
are designed for the cond itions that are
Glossary of tire and loading terminology
Accessory weight means the comb ined weight (in excess of
those sta ndard items which may be rep laced)
of au toma tic transmission, power steer ing ,
power brakes, power windows, power seats,
radio, and heater, to the extent that these
items are availab le as factory-installed equip
ment (whether installed or not) .
Aspect ratio
means the rat io o f the height to the w idth of
the tire in percent . Numbers of 55 or lower in
dicate a low sidewall for improved steering re
sponse and better overa ll handling on dry
pavement .
Bead
means the part of the t ire t hat is made o f
steel wires, wrapped or reinforced by ply cords
and that is shaped to fit the r im.
Bead separation
means a b reakdown of the bond between
components in the bead .
Cord means the strands forming the plies in the
tire.
Tire s an d wheel s 229
typica l in those seasons . Aud i recommends
using winter tires during the winter
months . Low temperatures signif icant ly
dec rease the e lasticity of summer t ires,
which affects tract ion and brak ing ability.
If summer t ires are used i n very co ld tem
peratures, cracks ca n form o n the tread
bars , res ulting in perma nen t tire damage
that can cause loud driving noise and un
bala nced ti re s. Audi i s not respon sible for
th is type of damage .
Cold tire inflation pressure
means the t ire p ress ure recommended by t he
vehicle manufacture r fo r a tire o f a des ignated
s ize t hat has not bee n driven for more than a
coup le o f miles (k ilometers) at low speeds in
the three hour period before the tire press ure
is m easured or adjusted.
Curb weight
me ans the we ight of a motor ve hicle with
st andard equipmen t incl ud ing the max imum
capacity of fuel, oi l, and coolant, air condi
tioning and additional weig ht of optiona l
equipment.
Extra load tire
means a t ire design to oper ate a t higher load s
and at higher inflation pressures than the cor
responding standa rd tire . Extra load tires may
be identified as "XL", "x l", "EXTRA LOAD", o r
"RF" on the sidewal l.
Gross Axle Weight Rating ("GAWR")
me ans the load-ca rry ing capac ity of a single
axle system , measured at the tire -ground in
te rfaces.
Gross Vehicle Weight Rating ( "GVWR ")
mea ns the maximum total loaded we ight of
the ve hicl e. .,..
•
•
Page 264 of 292
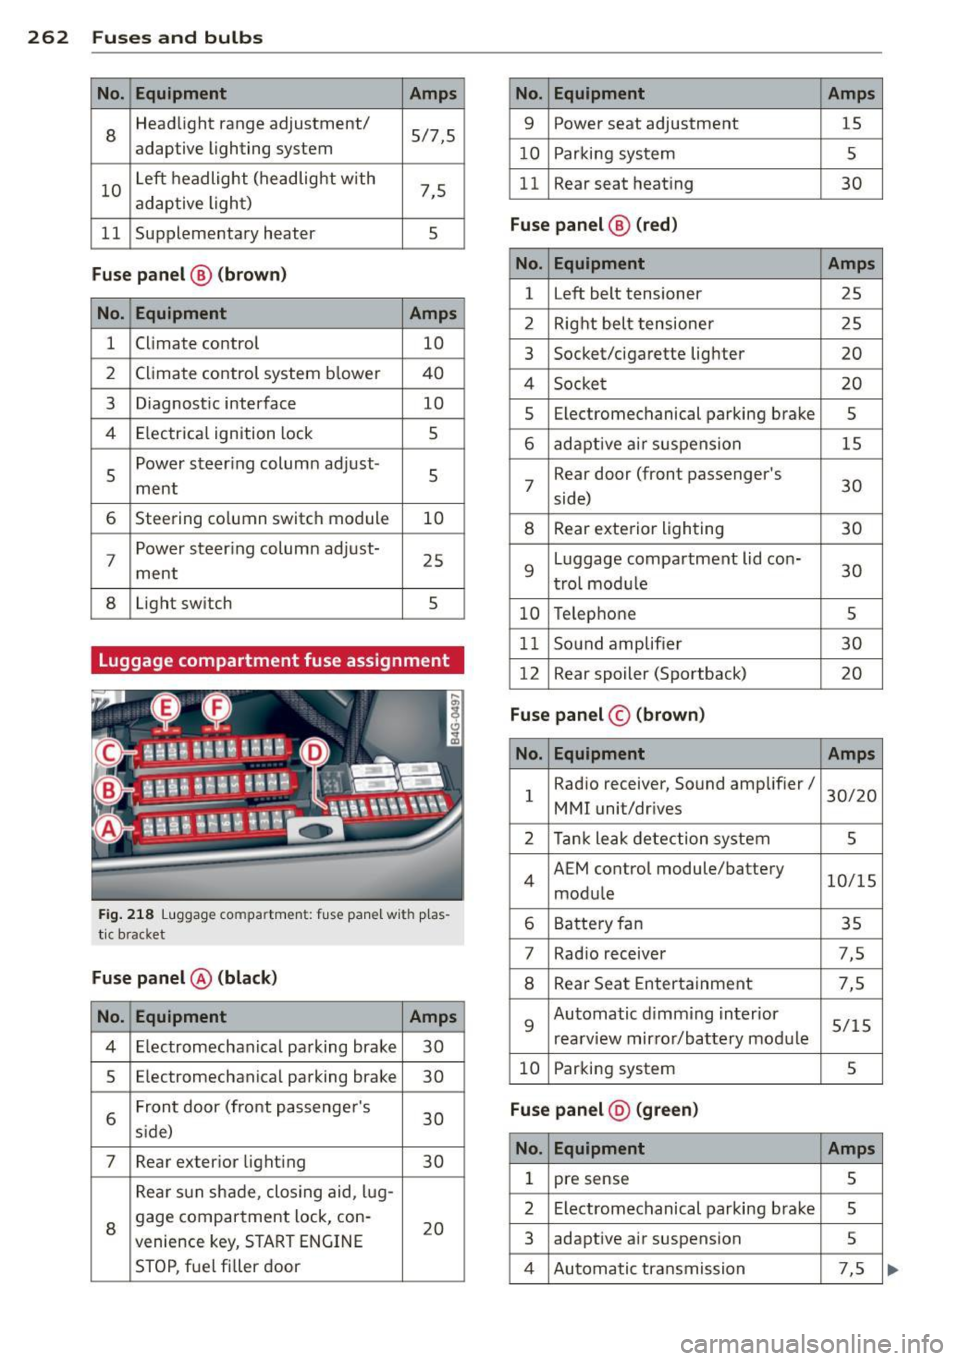
262 Fuses and bulb s
No. Equ ipment Amps
8
Headlight range adjustment/
5/7,S
adaptive lighting system
10 Left headlight
(headlight with
7,5
adaptive light)
11 Supplementary
heater
s
Fuse p ane l@ (b ro w n)
No . Equipment Amps
1 Climate control
10
2 Climate control system blower 40
3 Diagnostic interface
10
4 E lectrical ignition lock
s
s
Power steering column adjust-
s ment
6 Steering column switch module
10
7 Power steering column adjust-
ment
25
8 Light
switch
s
Luggage compartment fuse assignment
Fig. 218 Luggage compartment: fuse panel with plas
tic bracket
Fuse p anel @ (b la ck )
No. Equipment Amps
4 E lectromechanical parking brake 30
s Electromechanical parking brake
30
6 Front door
(front passenger's
30
s ide)
7 Rear exter ior lighting
30
Rear sun shade, closing aid, lug-
8 gage compartment lock, con-
20
venience key, START ENGINE
STOP, fuel filler door
No. Equipment Amps
9 Power seat adjustment
15
10 Parking system
s
11 Rear seat
heating
30
Fuse pan el@ (r e d )
No . Equipment Amps
l Left belt tensioner
25
2 Right belt tensioner 25
3 Socket/cigarette
lighter
20
4 Socket 20
s Electromechanical parking brake s
6 adaptive ai r suspension 15
7 Rear door
(front passenger's
30
side)
8 Rear exterior lighting 30
9 Luggage compartment
lid con-
30
t rol modu le
10 Telephone
s
11 Sound amplifier 30
12 Rear
spoiler (Sportback)
20
Fuse pan el© (brown)
No . Equipment Amps
1 Radio
receiver, Sound amplifier/
30/20
MMI unit/drives
2 Tank leak detection system
s
4 AEM
control module/battery
10/15
module
6 Battery fan 35
7 Rad
io receiver 7,S
8 Rear Seat Entertainment 7,5
9 Automatic d
imming interior
5/15
rearview mirror/battery module
10 Parking system
s
Fuse pan el@ (gre en)
No . Equipment Amps
1 pre sense s
2 Electromechanical parking brake s
3 adaptive
air suspension 5
4 Automatic transmission 7,5
Page 266 of 292
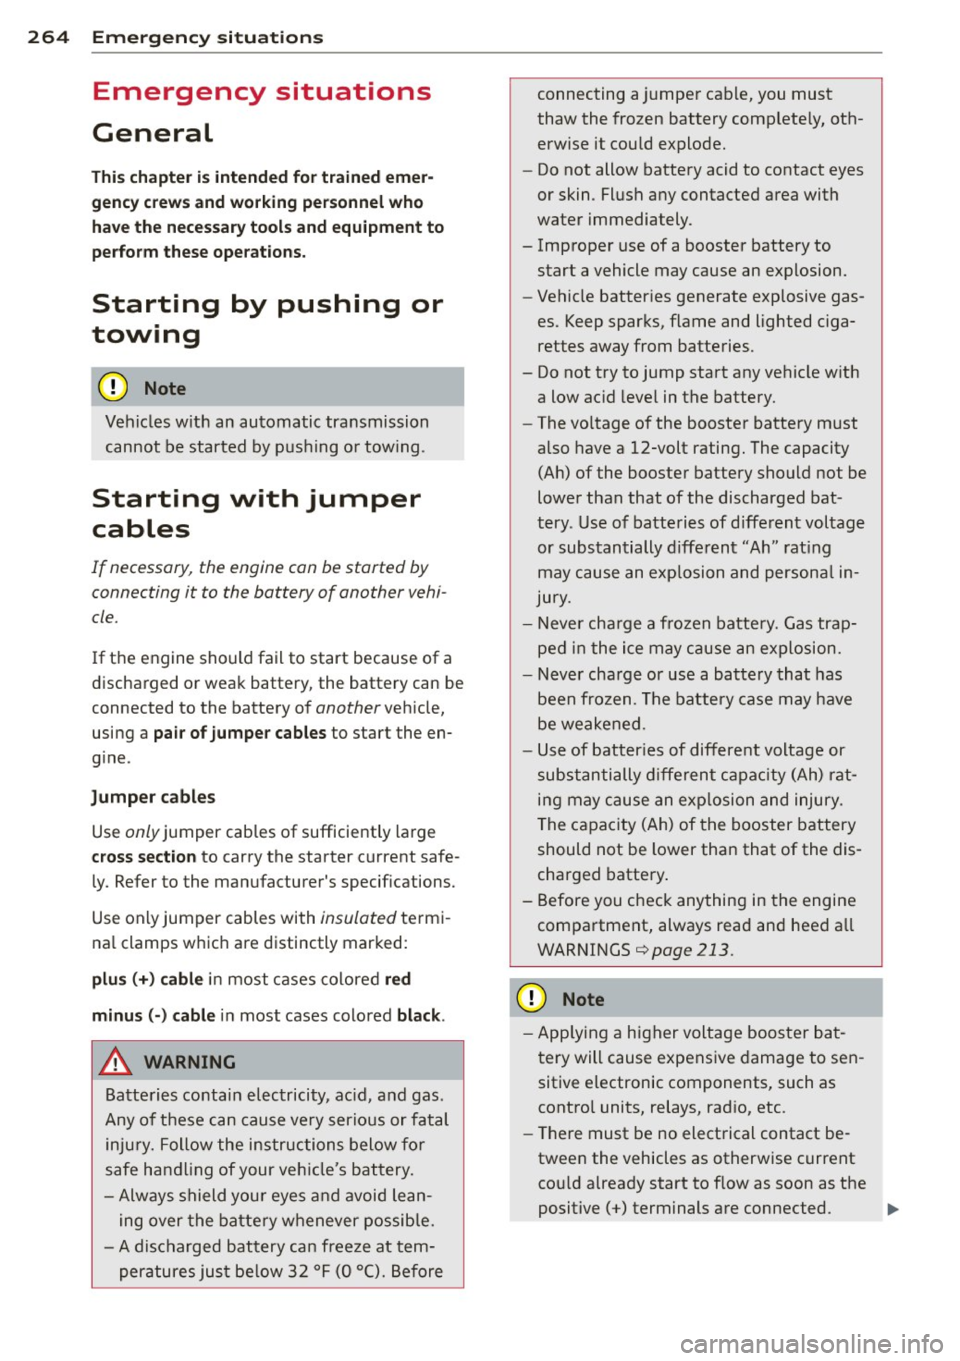
264 Emergency situations
Emergency situations
General
This chapter is intended for trained emer
gency crews and working personnel who
have the necessary tools and equipment to
perform these ope rations.
Starting by pushing or
towing
Q;) Note
Vehicles w ith an automatic transmission
cannot be started by pus hing o r tow ing.
Starting with jumper
cables
If necessary, the engine can be started by
connecting it to the battery of another vehi
cle.
If the engine should fail to start because of a
discharged or weak battery, the battery can be
connected to the battery of
another veh icle,
using a
pair of jumpe r cables to start the en
g ine .
Jumper cables
Use only jumper cables of sufficiently large
cross section to carry the starter current safe
ly. Refer to the manufacturer's specif ications.
Use only jumper cables with
insulated termi
na l clamps which are distinctly marked:
plus(+) cable in most cases colored red
minu s(-) cable
in most cases colored black .
A WARNING
Batteries contain electricity, acid, and gas.
Any of these can cause very serious or fatal
inju ry. Follow the instructions below for
safe handling of your veh icle's battery.
- Always shield you r eyes and avoid lean
ing over the battery whenever possible.
- A discharged battery can freeze at tem
peratures just be low 32 °F (0 °C). Before connecting a
jumper cable, you must
thaw the frozen battery complete ly, oth
erwise it could explode.
- Do not allow battery acid to contact eyes
or skin. Flush any contacted area with
water immediately.
- Improper use of a booster battery to start a vehicle may cause an explosion.
- Vehicle batteries generate explosive gas
es. Keep sparks, flame and lighted ciga
rettes away from batteries.
- Do not try to jump start any vehicle with a low acid level in the battery.
- The vo ltage of the booster battery must
also have a 12-volt rating. The capacity
(Ah) of the booster battery should not be
lower than that of the discharged bat
tery . Use of batteries of d ifferent voltage
or substantially different "Ah" rating
may cause an exp losion and personal in
jury.
- Never charge a frozen batte ry. Gas trap
ped in the ice may cause an explosion.
- Never charge or use a battery that has
been frozen. The battery case may have
be weakened.
- Use of batter ies of different voltage or
substantially different capacity (Ah) rat
ing may cause an exp losion and injury.
The capacity (Ah) of the booster battery
should not be lower than that of the dis
charged battery.
- Before you check anything in the engine
compartment, always read and heed a ll
WARNINGS¢
page 213.
(D Note
- App lying a higher voltage booster bat
tery will cause expensive damage to sen
sitive electronic components, such as
control units, relays, radio, etc.
- Th ere must be no electrical contact be
tween the vehicles as otherwise current cou ld already start to f low as soon as the
positive(+) terminals are connected. .,.