2014 AUDI RS7 SPORTBACK remote control
[x] Cancel search: remote controlPage 49 of 292
instrument cluster illuminates when the
high beams are on.
- The
headlight flasher works only as long as
yo u hold the lever -even if there are no
l ights turned on . The indicator light
El in
the instrument cluster illuminates when you
use the headlight flasher.
A WARNING
Do not use the hig h beam or headlight
flasher if you know that these could blind
oncoming traffic .
Interior lights
Front and rear interior lighting
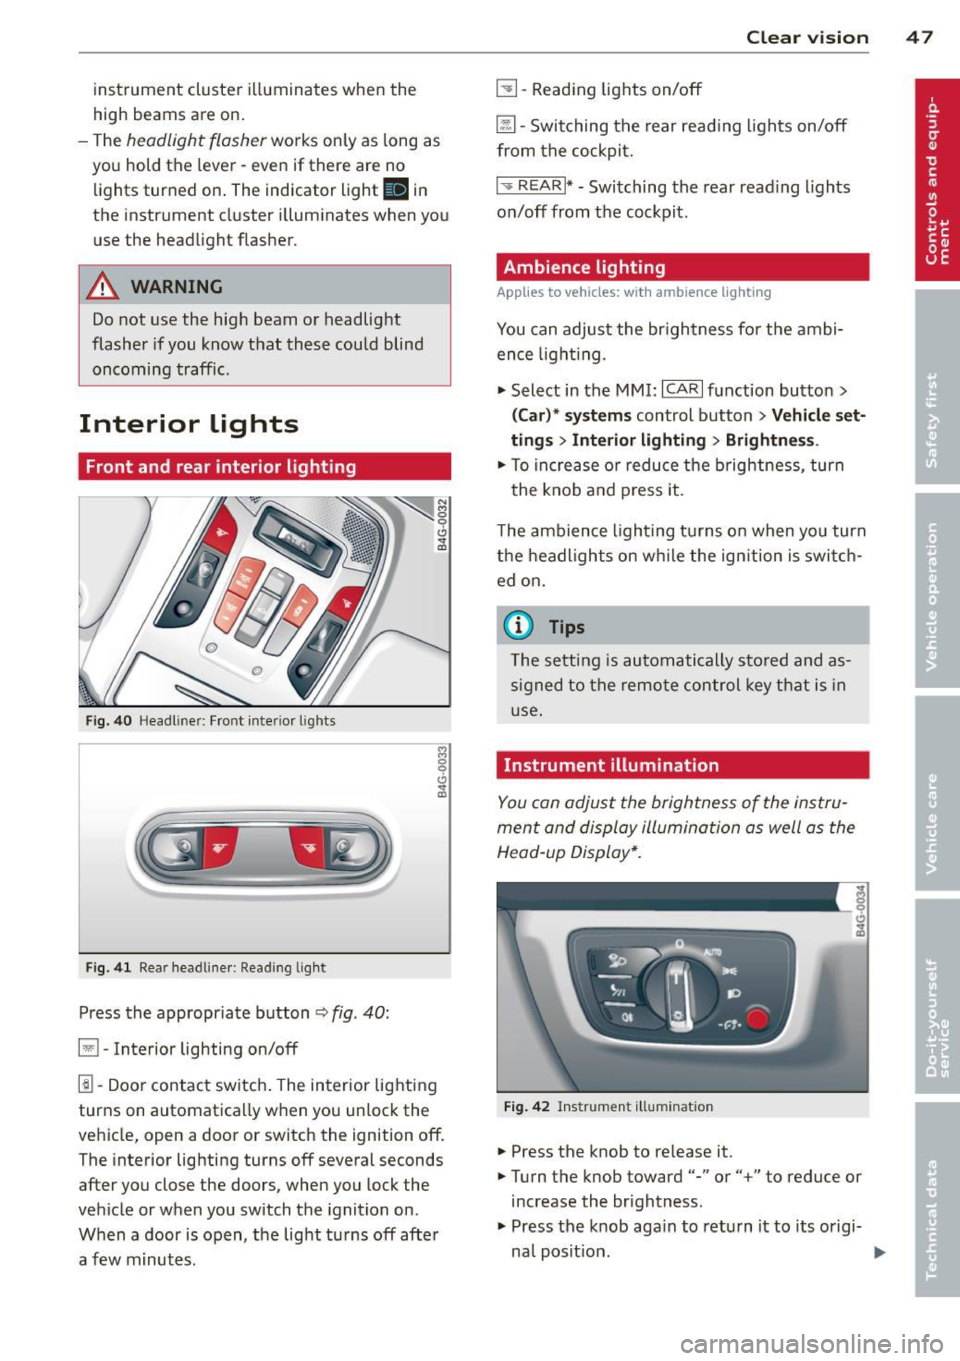
Fig. 40 Headl iner: Front interior l ights
F ig . 41 Rear headl iner: Read ing light
Press the appropriate button ¢ fig. 40:
§1 -Interior lighting on/off
1!1-Door contact switch . The interior lighting
turns on automatica lly when you unlock the
vehicle, open a door or switch the ignition off. The interior lighting turns off several seconds
after you close the doors, when you lock the
vehicle or when you switch the ignition on.
When a door is open, the light tu rns off afte r
a few minutes .
Clear vision 4 7
~ -Reading lights on/off
@ill-Switching the rear reading lights on/off
from the cockpit.
I ',; REARI* -Switching the rear read ing lights
on/off from the cockpit.
Ambience lighting
Applies to veh icles: w ith amb ience lighting
You can adjust the br ightness fo r the ambi
ence light ing.
.,. Select in the MMI:
ICARI function button >
(Car)* systems control button > Vehicle set
ting s
> Interior lighting > Brightnes s.
.,. To increase o r reduce the b rightness , turn
the knob and press it .
The ambience lighting turns on when yo u turn
the headlights on while the ign ition is swi tch
ed on.
(0 Tips
The setting is automatically stored and as
signed to the remote control key that is in
use.
Instrument illumination
You can adjust the brightness of the instru
ment and display illumination as well as the
Head-up Display*.
Fig. 42 Instrument illumina tion
.,. Press the knob to re lease it .
.,. Turn the knob toward"-" or"+" to reduce or
increase the br ightness.
.,. Press the knob aga in to return it to its origi-
na l posit ion .
~
Page 60 of 292
58 Seats and storage
Remote Memory button
control master
key
Driver Driver Front
passen- ger
Seat X X X
Stee ring X X
wheel*
Both exterior
X X
rearview mir-
rors*
Remote control key
Applies to vehicles: with memory function
To assign the driver's seat settings to the re
mote control key when locking the vehicle, the
function must be switched on .
• Se lect:
I CAR I funct ion button > (Ca r)* sys
tems
con trol button > Vehicle settings >
Seats > Driver seat > Remote control key >
On.
@ Tips
If you do not want another driver's set
tings to be assigned to the remote contro l
key, switch off the memory function using
the MMI or the
!OFF ! button c::> page 58.
Memory buttons
Applies to vehicles: with memory function
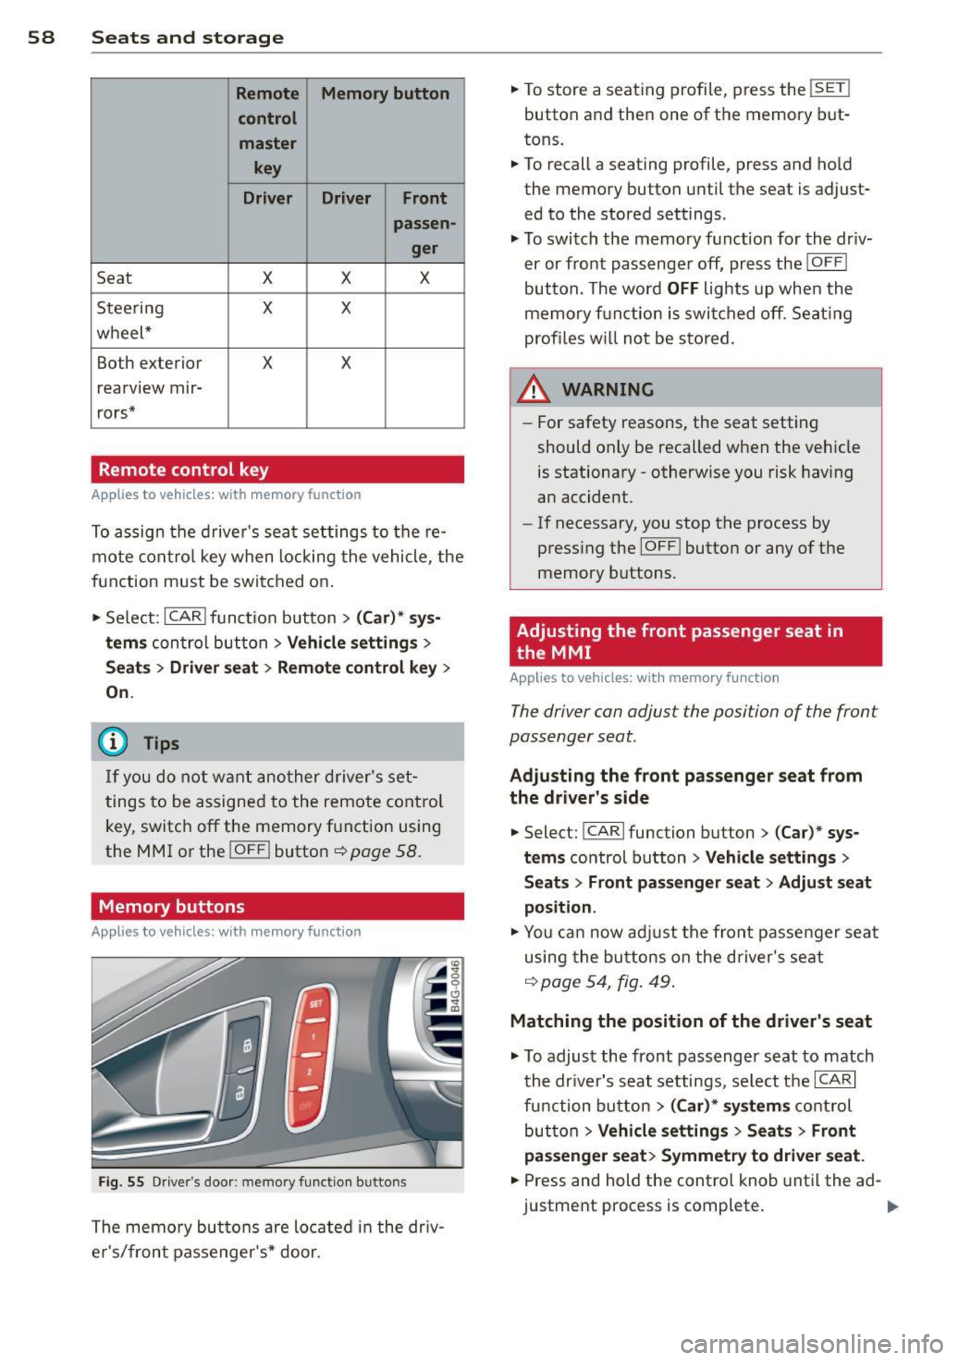
Fig. 55 Driver's door: memory function buttons
The memory buttons are located in the dr iv
e r's/front passenger's* door. •
To store a seat ing profile, press the
!SET !
button and then one of the memory but
tons .
• To recall a seating profile, press and hold
the memory button until the seat is adjust
ed to the stored settings.
• To switch the memory function for the driv
er or front passenge r off, press the
IOFF I
button. The word OFF lights up when the
memory fu nctio n is swi tched off. Seating
profi les wi ll not be stored.
.&, WARNING
- For safety reasons, the seat setting
should only be recalled when the vehicle
is stationary -otherwise you risk having
an accident.
- If necessary, you stop the process by
press ing the
I OF F! button or any of the
memory buttons.
Adjusting the front passenger seat in
. the MMI
Applies to vehicles: with memory function
The driver con adjust the position of the front
passenger seat.
Adjusting the front pas senger seat from
the driver's side
• Select: !CARI function button> (C ar) * sys
tems
control button > Vehicle settings >
Seats> Front passenger seat > Adjust seat
position .
• You can now adjust the front passenger seat
using the buttons on the d river's seat
q poge54 , fig. 49.
Matching the position of the driver's seat
• To adjust the front passenger seat to match
the dr iver's seat settings, select the
ICARI
function button > (Car)* systems control
button
> Vehicle settings > Seats> Front
passenger seat> Symmetry to driver seat.
• Press and hold the control knob until the ad
justment process is complete.
Page 71 of 292
Warm and cold Four-zone automatic
climate control
Description
Applies to vehicles: with four-zone automat ic climate co n
tro l
The climate control system warms, cools and
adds humidity to the a ir in the veh icle inter io r.
It is the most effect ive when the windows and
sunroof* are closed.
If the temperature inside
the parked vehicle becomes very warm, open ing the window briefly will speed up the cool
ing process.
I n all heating mode functions except
defrost,
the blower on ly switches to a higher speed
once the engine coolant has reached a certain
temperature.
Condensation from the cooling system can
drip and form a puddle of water under the ve
hicle. This is normal and does not mean there
is a leak.
Pollutant filt er
The po llutant filter removes pollutants such
as dust and pollen from the air.
The air pollutants filter must be changed at
the intervals spec ified in your Wa rranty
&
Maintenance book let, so that the air condi
tioner can properly work.
I f you d rive your vehicle in an area with h igh
air po llution, the fi lter may need to be
changed more frequent ly than specified in
your Audi Warranty
& Maintenance booklet. If
in doubt, ask your authorized Audi Service Ad·
visor for advice.
Key coded setting s
The clima te control sett ings are a utomat ica lly
stored and assigned to the remote contro l key
that is in use .
Warm and c old 69
A WARNING
-
Reduced visibi lity is dangerous and can
cause acc idents .
- For safe driving it is very important that
all windows be free of ice, snow and con
densat ion.
- Comp letely fam il iarize yourse lf with the
proper use and funct ion of the heat ing
a nd ventilation system and especially
how to defog and defrost the w indows.
- Never use the windshield wiper/washer system in freez ing weathe r unt il you
have warmed the windshie ld first, using
the heating and ventilation system. The
washer sol ution may freeze on the wind
shie ld and red uce visibi lity.
CJ) Note
- If you s uspect that the air conditioner
has been damaged, switch the system
off to avoid furt her damage and have it
inspected by a qualified dea lership .
- Repairs to the Audi air conditioner re
quire specia l technical know ledge and
special tools. Contact an authorized Audi
dealer fo r ass istance.
@ For the sake of the envi ronment
By reducing the amount of f uel you use,
you also red uce the amount of pollutants
emitted into the air.
(D Tips
- Keep the air intake s lo ts ( in front of the
w indshield) free from ice, snow and de
bris in order to maintain the proper func
tion of the climate control system.
- The energy ma nagement system may
switch the seat heating* or rear window defroster off temporar ily. These systems
are available again as soon as the energy
balance has been restored .
- Air escapes through vents under the rear window. When plac ing items of cloth ing
on the luggage compartment cover, en
sure that the openings are not covered.
Page 74 of 292
7 2 Warm and cold
(D Note
To avoid damage to the heating e lements
in the seats, do not kneel on the seats or
place heavy loads on a small area of the
seat .
Setup
Applies to vehicles: with four-zone a utomat ic clima te con·
tro l
The climate control system setup is accessed
through the MMI .
.,. Se lect : I CAR I func tion button> (Car )* sys·
terns
con trol but ton > AC .
Rear cabin settings*
When th is fu nction is selected, all sett ings for
the rear can be adjusted through the climate
control sys tem in the cockpit. The cl imate
con trol sys tem se tt ings cannot be adjusted in
the rea r seat at the same time. This func tion
switches
o ff after a certain period of time or
when one of the dia ls in the cockp it is press
ed .
Auto recirculation*
The sensit ivity level of the au tomatic rec ircu
lation mode can be set at vario us leve ls from
off to sensit ive. The recirculation mode is con
trolled a utomat ica lly. You must p ress the ~
button if fog forms on the windows.
Footwell temperature
You can adju st the footwell temperat ure so
that it is cooler or wa rme r.
Steering wheel heating
Applies to vehicles: wi th hea ted s tee rin g wheel
The steering wheel rim can be heated .
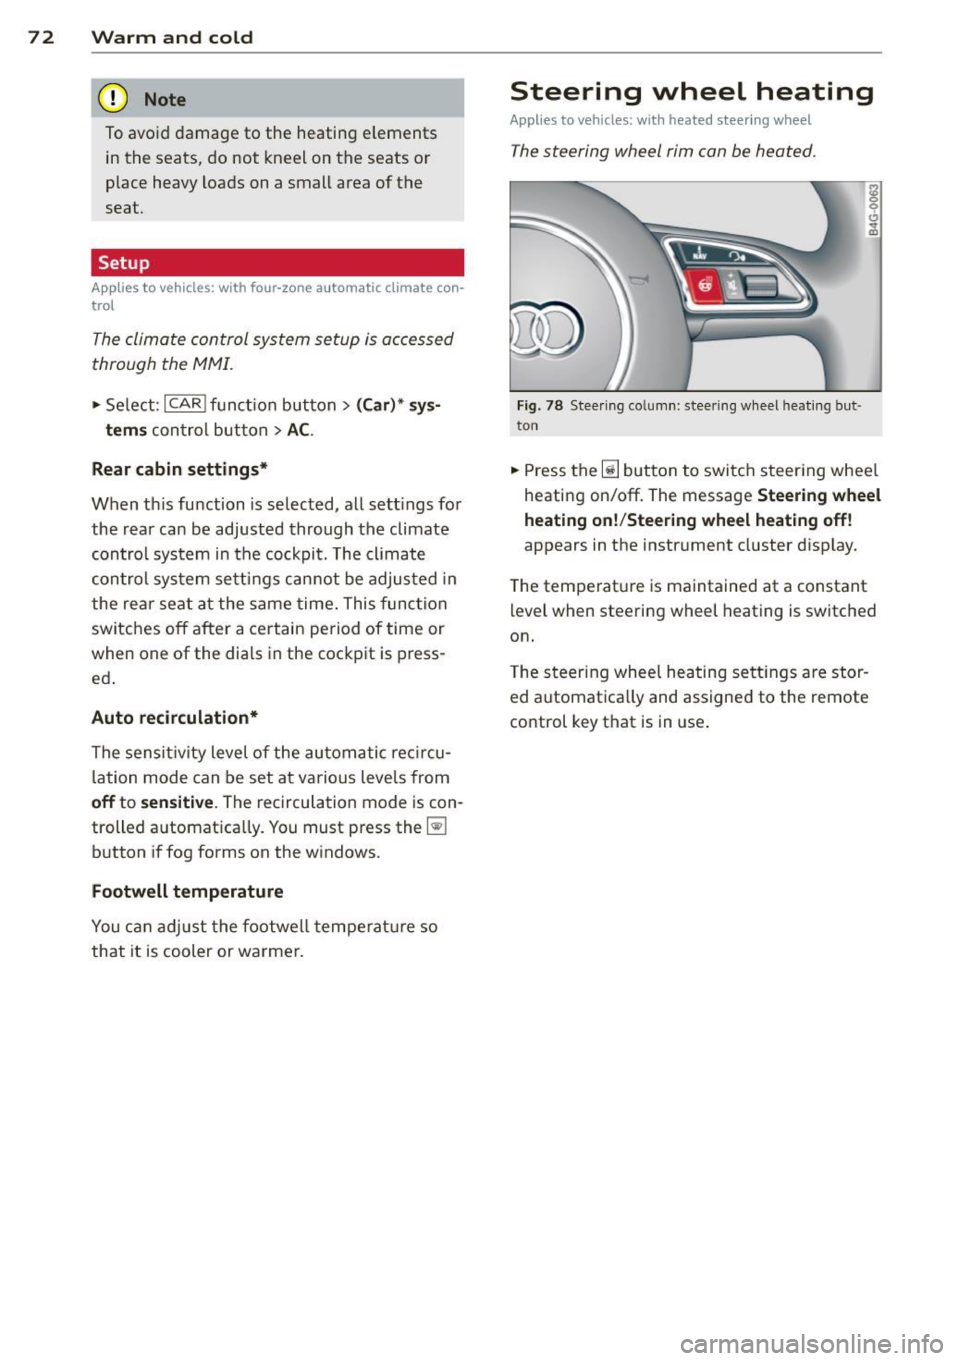
Fig. 78 Stee ring co lu mn : steeri ng w heel hea tin g but ·
ton
.,. Press the~ button to switch steering whee l
heating on/off. The message
Steering wheel
heating on !/Steering wheel heating off !
appears in the instrument cluster d isp lay.
T he temperat ure is maintained at a constant
l evel when steering wheel heating is switched
on.
T he steering wheel hea ting se tt ings are stor
ed automat ica lly and assigne d to the remote
control key that is in use .
Page 78 of 292
76 On the road
Driver message in the instrument
cluster display
Turn off ignition befor e le a v ing car
This message appears and a warning tone
sounds if yo u open the dr iver's door when the
ignition is switched on.
Press brake p edal to start engin e
This message appears if you press the
I STAR T ENGINE ST OP ! button to start the en
g ine and do not depress the brake pedal. The
engine can on ly be started if the brake pedal
is depressed.
!I I s ke y in th e vehicle?
If the indicator light turns on and the mes
sage appears, the remote control key was re
moved from the vehicle while the engine was
running. If the ignit ion key is not in the vehi
cle you w ill not be able to sw itch on the ign i
tion or resta rt the engine after it has been
switched off. You w ill also not be ab le to lock
the veh icle from the outside.
Shift to P , oth erwise vehicl e can roll away.
Doors do not lo ck if lever i s not in P .
This message appears for safety reasons
along w ith an audib le warn ing tone if the P
selecto r lever posit io n is not engaged when
stopping the engine with the
I STAR T ENGINE ST OP ! button. Select the P se
lector lever pos it ion. Othe rwise the veh icle
could ro ll and it cannot be locked.
(I Key is n ot recogn iz e d . Ho ld b ack o f key
ag ain st marked ar ea . Se e owner's manual.
If the indicator light tu rns on and th is mes
sage appears, there is a malfunction
c::>page 76. Starting the engine if there is a
malfunction
It may not be possible to start the engine un
der certain circumstances, for example if the
battery in the vehicle key
is drained, if inter
ference has affected the key or if there
is a
system malfunction .
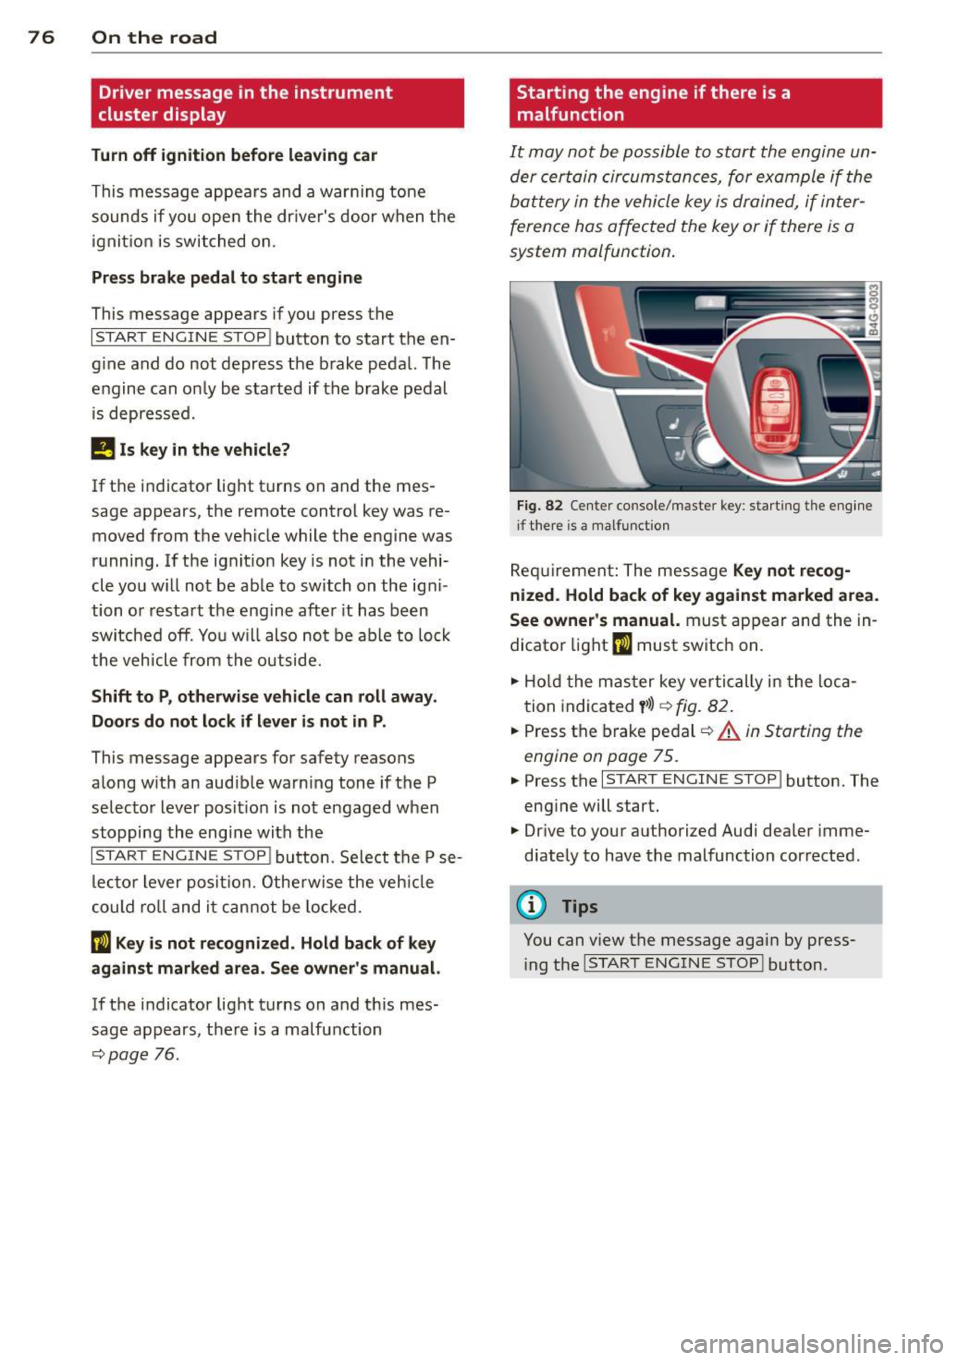
Fig . 82 Center console/master key: starting the eng ine
i f there is a malfunction
Req uirement: The message Ke y not r ecog
ni ze d. H old back of key aga inst ma rked are a.
Se e owne r's manual.
must appear and the in
dicator
light (I must switch on.
.,.. Ho ld the mas ter key vertically in the loca
tion indicated
y >l) r=:>fig. 82.
.,.. Press the brake pedal c::> A in Starting the
engine on page 75.
.,.. Press the I START ENGINE S T OP ! button. The
eng ine will start.
.,.. Dr ive to your authorized Audi dealer imme
diately to have the malfunction corrected.
(D Tips
You can v iew the message again by press
i ng the
I STAR T ENGINE STOP I button.
Page 88 of 292

86 Audi adaptive cruise control and braking guard
When approaching a moving vehicle up ahead,
the adaptive cruise control system automati
cally brakes to match that object's speed and
then maintains the stored distance. If the ve
h icle ahead accelerates, adaptive cruise con
trol will also accelerate up to the stored
speed.
The higher the speed , the greater the distance
in yards (meters)
c::> & . The Distance 3 setting
is recommended .
The distances prov ided are spec ified values .
Depending on the driving situation and the
how the vehicle ahead is driving, the actual
d istance may be more or less than these tar
get distances.
The various symbols for the time increments
appear briefly in the information line @
c::> page 83, fig . 91 when you change the set
tings .
~-~- --Distance 1 : This setting corre
sponds to a distance of 92 feet/28 meters
when traveling at 62 mph (100 km/h), or a
time interval of 1 second.
~--~- -Distance 2: This setting corre
sponds to a distance of 118 feet/36 meters
when traveling at 62 mph (100 km/h), or a
time inte rval of 1.3 seconds .
~--- ~-Distance 3: This setting corre
sponds to a distance of 164 feet/SO meters
when traveling at 62 mph (100 km/h), or a
time interval of 1.8 seconds .
~---- ~ Distance 4: This setting corre
sponds to a distance of 210 feet/64 meters
when traveling at 62 mph (100 km/h), or a
time interval of 2.3 seconds .
A WARNING ,. -
Following other vehicles too closely in
creases the risk of collisions and serious
personal inj ury.
- Setting short distances to the traffic
ahead reduces the time and distance
available to bring your vehicle to a safe
stop and makes it even more necessary
to pay close attention to traffic. -
Always obey applicable traffic laws, use
good judgment, and select a safe follow ing d istance for the traff ic, road and
weather conditions.
@ Tips
- Distance 3 is set automatically each time
you switch the ignition on.
- Your standard settings are automatically
stored and assigned to the remote con
trol key being used.
Selecting the driving mode
Applies to veh icles: w ith Audi adaptive cruise co ntrol
.,. Select the desired driving mode in drive se
lect
c::> page 96 .
(D Tips
Your settings are automatically stored and
ass igned to the remote control key being
used.
Prompt for dr iver intervention
Applies to veh icles: w ith Audi adaptive cruise co ntro l
Fig. 95 Instrume nt cluster: req uest fo r drive r inte rven
t ion
In certain situations, the system will prompt
yo u to take action . This could happen, for ex
amp le, if braking by the adap tive cruise con
tro l system is not enough to maintain enough
distance to the veh icle ahead .
T he indicator light
I and the symbol in the
display will war n you abo ut the situat ion
c::>fig. 95 . You wi ll also hear an acoustic signal.
- Press the brake pedal to slow yo ur vehicle
down.
Page 90 of 292

88 Audi adaptive cruise control and braking guard
stopped vehicle or stationary obstacle (end of a traffic jam or vehicle that has
broken down in traffic).
- Always remember that the radar sensor
for the braking guard works only within
defined detection and range limits that
may prevent the proper detection of oth
er vehicles.
- The radar sensor's function and range
can be reduced by rain, snow and heavy
spray . Moving vehicles up ahead may not
be promptly detected or may not be de
tected at all.
- Reflective surfaces including crash barri
ers or tunnel entrances may impair the
function of the radar sensor.
({) Tips
-You can cancel the braking with increas
ing force that is initiated by the system
by braking yourself, by accelerating no
ticeably or by swerving.
- Braking guard error messages
¢page 88.
- Keep in mind that braking guard can
brake unexpectedly . Always secure any
cargo or objects that you are transport
ing to reduce the risk of damage or in
jury.
Settings in the MMI
Applies to vehicles: with Audi adaptive cruise co ntrol
.. Select : I CARI function button > (Car)* sys
tems
control button > Driver assist > Audi
braking guard.
System -
Switch braking guard On and Off.
When you switch the ignition on, the message
Audi braking guard off appears if the system
is switched off.
Early warning -The distance and approach
warnings in the display can be switched
On/
Off.
(D Tips
- Your settings are automatically stored
and assigned to the remote control key being used at the time the settings are
made.
- If you restrict or switch off the ESC, the
braking guard also switches itself off
¢page 191.
- Switch braking guard off when you are
loading the vehicle onto a vehicle carrier,
train, ship or other type of transporta
tion. This can prevent undesired warn
ings from the braking guard system.
Messages
Applies to vehicles: with Aud i adapt ive cru ise contro l
Braking guard: off
This driver message appears if the system is
turned off via the infotainment. Otherwise , if
the system is turned off, the information ap
pears every time shortly after the start of the
trip.
The driver message also appears if the system
is not available due to a malfunction or if the
ESC is not switched on
¢ page 191. If this is
the case, the system will not provide warnings about a possible collision.
Braking guard: activated
This driver message appears if sharp brake
pressure was applied due to an acute warning.
ACC: Unavailable!
ACC and Audi braking guard: not available
The system cannot detect moving vehicles up
ahead correctly and is switched off. The sen
sors have been displaced or are not working
properly. The Audi pre sense functions may al
so be affected . Drive to your authorized Audi
dealer or authorized Audi service facility im
mediately to have the malfunction corrected.
ACC: currently unavailable. No sensor vision
ACC and braking guide: currently unavaila
ble. No sensor vision
This message appears if the sensor view is ob
structed, for example by leaves, snow, heavy
spray or dirt. Clean the sensors¢
page 81,
rg.86. ~
Page 122 of 292
120 Parking systems
Parking aid > Change to front/rear > Auto
or Manual.
Auto -
This view behind the vehicle (Rear
mode) is displayed automatically when you
shift into reverse . This view in front of the ve
hicle
( Front mode) is disp layed automatically
when you shift into the forward gears.
Manual -This view behind the vehicle (Rear
mode) is a lways disp layed when you turn on
the system.
Adjusting the display and the warning tones
Applies to vehicles: with parking system plus/rear view
camera/peripheral cameras
The display and warning tones can be adjust
ed in the Infotainment.
.. Se lect: I CAR ! function button > (Car)* sys
tems
control button > Driver assist > Park
ing aid.
Display
On* -
optical display is shown for the parking
system plus, rear view came ra image is shown
for parking system plus with rear view cam
era*.
Off -when the parking system is switched off,
on ly audib le signals are given.
Warning tones
Front volume -
Volume for the front area
Rear volume -Volume for the rear area
Front frequency -Frequency for the front area
Rear frequency -Frequency for the rear area
Music volume while parking -When the park
ing system is tu rned on, the volume of the au
dio/video source is lowered.
The newly adjusted value is briefly heard from
the signa l gene rator .
(D Tips
-The warning tones can a lso be adjusted
directly from the visual display or the rear v
iew camera* image. Simply press
the
Settings control button.
- Changed settings are activated when the
parking system is switched on again.
- The settings are automatically stored
and assigned to the remote cont rol key
that is in use .
Error messages
Applies to vehicles: with parking system plus/rear view
camera/peripheral cameras
T here is an error in the system if the LED in
the
p, q~ button is blinking and you hear a con
tinuous alarm for a few seconds after switch
ing on the parking system or when the park
ing system is already activated. If the error is
not corrected before you switc h
off the igni
tion, the LED in the
Pwi button will blink the
next t ime you sw itch on the parking system by
shifting into reverse.
Parking system plus
If a sensor is fa ulty, the~ symbol will appear
in front of/behind the vehicle in the Infotain
ment display. If a rear sensor is faulty, only
obstacles that are in areas @ and ® are
shown
Q page 111, fig. 121. If a front sensor
is faulty, only obstacles that are in areas ©
and @are shown.
Peripheral cameras*
There is also a system error if:
- the
i:80 ·• symbol appears in the display and
the corresponding display area is shown in
blue. The camera is not working in this area.
- all segments aro und the vehicles are red or
if no segments are displayed.
Drive to your authorized Audi dealer or au
thorized repa ir facility immed iately to have
the malfunction corrected.