Page 137 of 343

136
Changing Your Route
Taking a Detour
Navigation
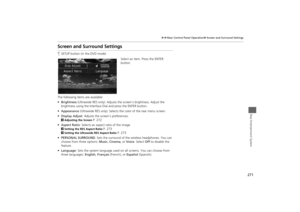
Taking a DetourHMENU button (when en route)
Detour
Calculate a detour route manu ally. The system attempts to calculate a new route by
avoiding the next 5 miles (while on a freeway ) or 1 mile (while on a surface street).
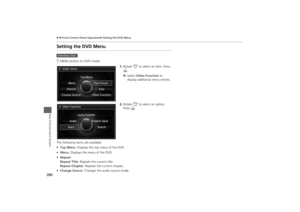
Avoiding StreetsHMENU button (when en route)
Avoid Streets
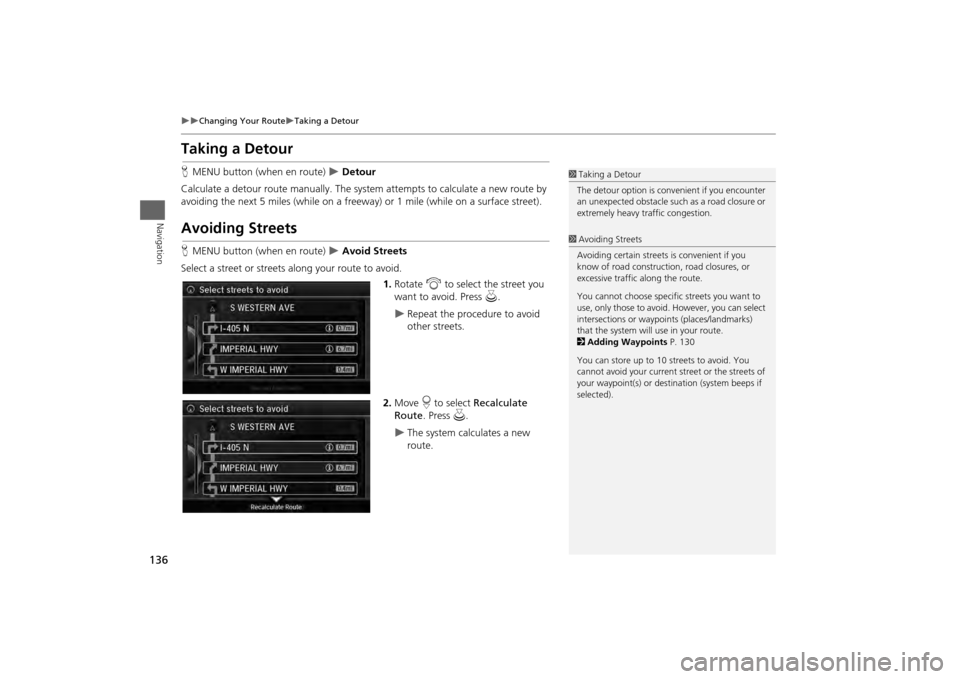
Select a street or streets along your route to avoid.
1.Rotate i to select the street you
want to avoid. Press u.
Repeat the procedure to avoid
other streets.
2. Move r to select Recalculate
Route . Press u.
The system calculates a new
route.
1Taking a Detour
The detour option is conv enient if you encounter
an unexpected obstacle such as a road closure or
extremely heavy tr affic congestion.1Avoiding Streets
Avoiding certain streets is convenient if you
know of road construction, road closures, or
excessive traffic along the route.
You cannot choose specific streets you want to
use, only those to avoid. However, you can select
intersections or waypoi nts (places/landmarks)
that the system will use in your route.
2 Adding Waypoints P. 130
You can store up to 10 streets to avoid. You
cannot avoid your current st reet or the streets of
your waypoint(s) or dest ination (system beeps if
selected).
Page 138 of 343
137Navigation
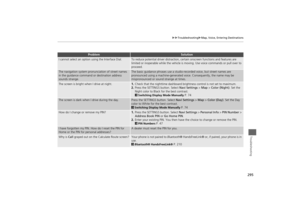
Changing Your DestinationThere are several methods you can use to change the route destination.Find Nearest PlaceHENTER button (on map)
Search Nearby
Search for the nearest place/landmark on the map screen and set it as your
destination. 1.Rotate i to select Search
Nearby . Press u.
2. Rotate i to select a category
type. Press u.
3. Rotate i to select a place. Press
u .
4. Rotate i to select Set as
Destination . Press u.
5. Move r to select Clear Current
Route . Press u.
The route is automatically
recalculated and displayed on
the map screen.
Rotate i to edit the order to
set the location as a new
waypoint. Press u.
1Find Nearest Place
d “Find Nearest…”
The Find Nearest voice command is the fastest
method of specifying a pl ace/landmark as your
destination. Many kinds of places can be found.
2 Find Place Commands P. 325
Page 139 of 343
138
Changing Your Destination
Selecting a Destination on the Map
Navigation
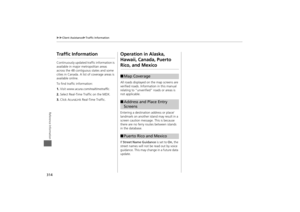
Selecting a Destination on the MapSelect a new destination when en route by selecting a location on the map.
1.Scroll the map to position the
cursor over your desired
destination, adjusting the map
scale as necessary. Press u.
If the address displayed is not
the desired location, press the
BACK button and repeat the
procedure.
2. Rotate i to select Set as
Destination . Press u.
2Calculating the Route
P. 114
3. Move r to select Clear Current
Route . Press u.
The route is automatically
recalculated and displayed on
the map screen.
Rotate i to edit the order to
set the location as a new
waypoint. Press u.
1Selecting a Destination on the Map
If there is more than one icon or street under the
map cursor, you are prompted to select the item
from a list.
Rotate i to select an item. Press u.
Page 140 of 343
139
Changing Your Destination
Entering a New Destination
Navigation
Entering a New DestinationHMENU button (when en route)
Destination
Enter a new destination using the Destinat ion Menu screen even when you are en
route.
1.Rotate i to select a method to
enter a new destination.
2 Entering a Destination
P. 88
After entering a new
destination, the address is
displayed on the Calculate
Route screen.
2. Rotate i to select Set as
Destination . Press u.
3. Move r to select Clear Current
Route . Press u.
The route is automatically
recalculated and displayed on
the map screen.
Rotate i to edit the order to
set the location as a new
waypoint. Press u.
1Entering a New Destination
d “Display Destination” , d “Display
Navigation”
Page 141 of 343

140Navigation
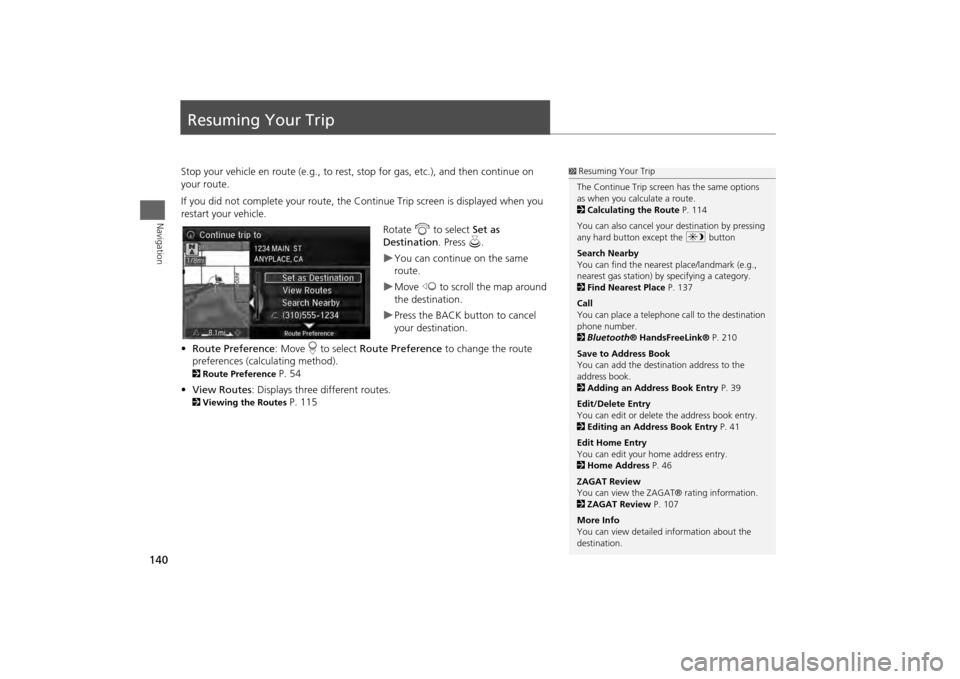
Resuming Your TripStop your vehicle en route (e.g., to rest, stop for gas, etc.), and then continue on
your route.
If you did not complete your route, the Continue Trip screen is displayed when you
restart your vehicle.
Rotate i to select Set as
Destination . Press u.
You can continue on the same
route.Move w to scroll the map around
the destination.Press the BACK button to cancel
your destination.
• Route Preference : Move r to select Route Preference to change the route
preferences (calculating method).
2 Route Preference
P. 54
• View Routes : Displays three different routes.
2Viewing the Routes
P. 115
1Resuming Your Trip
The Continue Trip screen has the same options
as when you calculate a route.
2 Calculating the Route P. 114
You can also cancel your destination by pressing
any hard button except the a button
Search Nearby
You can find the nearest place/landmark (e.g.,
nearest gas station) by specifying a category.
2 Find Nearest Place P. 137
Call
You can place a telephone ca ll to the destination
phone number.
2 Bluetooth ® HandsFreeLink® P. 210
Save to Address Book
You can add the destination address to the
address book.
2 Adding an Address Book Entry P. 39
Edit/Delete Entry
You can edit or delete the address book entry.
2 Editing an Address Book Entry P. 41
Edit Home Entry
You can edit your home address entry.
2 Home Address P. 46
ZAGAT Review
You can view the ZAGA T® rating information.
2 ZAGAT Review P. 107
More Info
You can view detailed information about the
destination.
Page 142 of 343

141
Audio
This section describes how to operate the audio system. You can play
music from a wide array of media s ources, and control the audio system
using the audio buttons, the Interface Dial, or voice control.
Audio System .................................................. 142
About Your Audio System .............................. 142
USB Port ........................................................ 143
Auxiliary Input Jack ......... .......................... ..... 144
Audio System Theft Protection ....................... 145
Setting Audio Shortcuts ................................. 146
Audio Remote Controls .................................. 148
Steering Wheel Controls ................................ 148
Audio Settings ................................................. 149
Adjusting the Sound ...................................... 151
Playing FM/AM Radio ..................................... 153
Selecting FM/AM Mode.................................. 153
Audio Screen Control ..................................... 153
Audio Menu .................................................. 155
Playing XM® Radio ......................................... 159
Selecting XM® Mode..................................... 159
Audio Screen Control ..................................... 159
Audio Menu .................................................. 161 XM® Radio Service......................................... 163
Playing a Disc ................................................... 164
Selecting Disc Mode ....................................... 164
Audio Screen Control ..................................... 165
Audio Menu ................................................... 166
Recommended CDs ........................................ 169
Playing Hard Disc Drive (HDD) Audio ............ 171
Selecting HDD Mode ...................................... 171
Recording a Music CD to HDD........................ 172
Audio Screen Control ..................................... 173
Audio Menu ................................................... 174
Playing an iPod® ............................................. 183
Selecting iPod® Mode .................................... 184
Audio Screen Control ..................................... 185
Audio Menu ................................................... 187
Song By Voice
TM (SBV) .................................... 190
Playing Internet Radio ..................................... 195
Selecting Internet Radio Mode........................ 195 Pandora® Menu ............................................ 196
Aha
TM Radio Menu ......................................... 197
Playing a USB Flash Drive ............................... 199
Selecting USB Mode....................................... 200
Audio Screen Control..................................... 201
Audio Menu .................................................. 202
Playing Bluetooth ® Audio............................. 205
Selecting Bluetooth ® Audio Mode ................ 205
Audio Screen Control..................................... 206
Page 143 of 343

142Audio
Audio SystemAbout Your Audio SystemThe audio system features AM/FM radio and the XM® Radio service. It can also play
audio CDs, WMA/MP3/AAC files, Hard Disc Drive (HDD) audio, USB flash drives, and
iPod®, iPhone® and Bluetooth® devices.
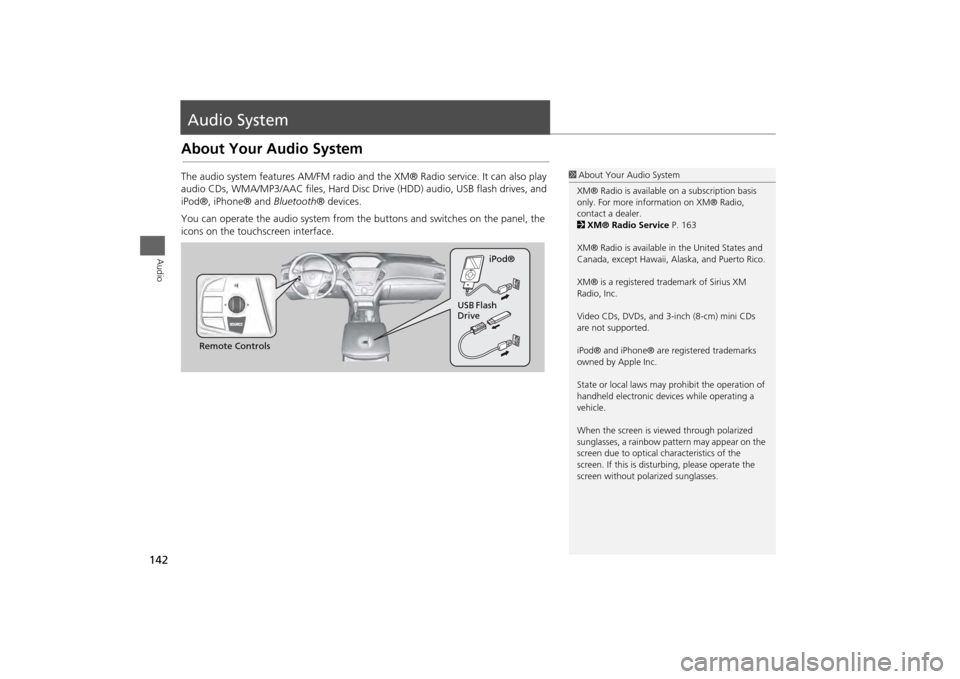
You can operate the audio system from the buttons and switches on the panel, the
icons on the touchscreen interface.
1 About Your Audio System
XM® Radio is available on a subscription basis
only. For more information on XM® Radio,
contact a dealer.
2 XM® Radio Service P. 163
XM® Radio is available in the United States and
Canada, except Ha waii, Alaska, and Puerto Rico.
XM® is a registered trademark of Sirius XM
Radio, Inc.
Video CDs, DVDs, and 3-inch (8-cm) mini CDs
are not supported.
iPod® and iPhone® are registered trademarks
owned by Apple Inc.
State or local laws may pr ohibit the operation of
handheld electronic devices while operating a
vehicle.
When the screen is vi ewed through polarized
sunglasses, a rainbow pattern may appear on the
screen due to optical characteristics of the
screen. If this is distur bing, please operate the
screen without polarized sunglasses.
Remote Controls iPod®
USB Flash
Drive
Page 144 of 343
143
Audio System
USB Port
Audio
USB Port
Install the iPod® or iPhone® dock
connector or the USB flash drive to
the USB port.
1 USB Port
• Do not leave the iPod® or USB flash drive in
the vehicle. Direct sunlight and high
temperatures may damage it.
• Do not connect the iPod® or USB flash drive
using a hub.
• Do not use a device such as a card reader or
hard disk drive, as the device or your files may
be damaged.
• We recommend backing up your data before
using the device in your vehicle.
• Displayed messages may vary depending on
the device model a nd software version.
If the audio system does not recognize the
iPod®, try reconnecting it a few times or reboot
the device. To reboot, fo llow the manufacturer’s
instructions provided wi th the iPod® or visit
www.apple.com/ipod.