Page 193 of 389
191
Engine compartment fuses
Access to the fuses
F unclip the cover and remove it completely.Fuse N°
Rating Functions
1 15 AFront foglamps.
4 10 AHorn.
5 7. 5 AAlternator.
6 20 AHeadlamp wash.
7 10 AAir conditioning.
9 20 AAlarm.
10 15 ADemisting, wipers.
11 -Not used.
12 -Not used.
th
e fusebox is placed in the engine
compartment (left-hand side).
7
Practical information
Page 194 of 389
192
Fuse N°Rating Functions
13 10 ADaytime running lamps.
14 10 ALeft-hand main beam headlamp.
15 10 ARight-hand main beam headlamp.
16 20 ALeft-hand dipped beam headlamp (xenon).
17 20 ARight-hand dipped beam headlamp (xenon).
18 10 ALeft-hand dipped beam headlamp (halogen), manual and
automatic headlamp adjustment.
19 10 ARight-hand dipped beam headlamp (halogen).
31 30 AAudio amplifier.
th
e maxi-fuses provide additional
protection for the electrical systems. All
work on the maxi-fuses must be carried
out by a P
e
uge
Ot
dealer or a qualified
workshop.
Carefully close the cover after replacing
a fuse so as to ensure the correct
sealing of the fusebox.
Spare fuses
the spare fuses are located under the
engine compartment fusebox cover.
Practical information
Page 196 of 389
194
12 V battery
the battery is located under the bonnet.to gain access to it:
F
o
pen the bonnet using the interior release
lever, then the exterior safety catch,
F
s
ecure the bonnet stay,
Access to the battery
Procedure for charging your battery when it is flat or for starting the engine using another battery and jump leads.
F
r
emove the retaining pins A,
F
r
emove the protective cover B,F
r
emove the retaining pins C,
F
r
emove the air duct D.
Practical information
Page 197 of 389
195
Check the electrolyte level and top up if
necessary (see "Checking levels").
Starting using another
battery
F Connect the red cable to the positive terminal (+) of the flat battery A , then to the
positive terminal (+) of the slave battery B. F
C onnect one end of the green or black
cable to the negative terminal (-) of the
slave battery B .
F
C
onnect the other end of the green or black
cable to the earth point C on your vehicle
(engine mounting).
F
O
perate the starter, let the engine run.
F
W
ait until the engine returns to idle and
disconnect the cables.
F
R
aise the protective cover on
the
(+)
terminal.
7
Practical information
Page 198 of 389

196
the batteries contain harmful substances
such as sulphuric acid and lead. th ey
must be disposed of in accordance
with regulations and must not, in any
circumstances, be discarded with household
waste.
ta
ke used remote control batteries and
vehicle batteries to a special collection point.
Do not reverse the polarity and use only a 12 V charger.
Do not disconnect the terminals while the engine is running.
Do not charge the batteries without disconnecting the terminals first.
Do not push the vehicle to start the engine if it is fitted with a CV
t
gearbox.
It is advisable to disconnect the battery
if the vehicle is to be left unused for
more than one month.
Before disconnecting the
battery
Wait 2 minutes after switching off the
ignition before disconnecting the battery.
Close the windows and the doors before
disconnecting the battery.
Following reconnection of the
battery
Following reconnection of the battery,
switch on the ignition and wait 1 minute
before starting to permit initialisation of the
electronic systems. However, if problems
remain following this operation, contact a
P
e
uge
Ot
dealer or a qualified workshop.
F
D
isconnect the battery from the vehicle, if
necessary.
F
F
ollow the instructions for use provided by
the manufacturer of the charger.
F
R
econnect starting with the negative
terminal (-).
F
C
heck that the terminals and connectors
are clean. If they are covered with sulphate
(whitish or greenish deposit), remove them
and clean them.
Charging the battery using
a battery charger
Some functions are not available if the battery is not sufficiently charged.
Practical information
Page 199 of 389
197
Removing a front or rear
wiper blade
F Raise the corresponding wiper arm.
F R emove the wiper blade, sliding it towards
the outside.
Changing a wiper
blade
Fitting a front or rear wiper
blade
F At the front, check the size of the wiper blade as the shorter blade is fitted on the
right-hand side of the vehicle.
F
P
ut the corresponding new wiper blade in
place and fix it.
F
F
old down the wiper arm carefully.
Automatic power cut-off to accessories
After the engine has stopped, when the
ignition switch is in the "ACC" position
(or the vehicle in "ACC" mode) you
can still use functions such as the audio
equipment, windscreen wipers, dipped beam
headlamps,
courtesy lamps, etc. for about
thirty
minutes.Cutting off
Once the thirty minutes have expired, the
power supply to the accessories will be
automatically cut off.
Restoring power
the power supply will be restored the next time
the ignition is switched on.
7
Practical information
Page 200 of 389

198
Recovering the vehicle
Recovery of your
vehicle
2 wheel drive (2WD) versions: towing
with the wheels on the ground
F Put the gear lever into neutral (position N for the CVt gearbox).
F
u
n
lock the steering by by turning the
ignition switch to the " ON" position (or
to " ON " mode for vehicle fitted with the
"Keyless
e
n
try and Starting" system).
F
R
elease the parking brake.
F
S
witch on the hazard warning lamps on
both vehicles.
F
M
ove off gently and travel slowly for a short
distance only.
General recommendations
Observe the legislation in force in
your country.
en
sure that the weight of the towing
vehicle is higher than that of the towed
vehicle.
th
e driver must remain at the wheel of
the towed vehicle and must have a valid
driving licence.
When towing a vehicle with all four
wheels on the ground, always use an
approved towing bar; rope and straps
are prohibited.
When towing a vehicle with the engine
off, there is no longer any power
assistance for braking or steering.
In the following cases, you must always
call on a professional recovery service:
-
v
ehicle broken down on a motor way
or fast road,
-
4 w
heel drive vehicle,
-
w
hen it is not possible to put the
gearbox into neutral, unlock the
steering, or release the parking
brake,
-
t
owing with only two wheels on the
ground,
-
w
here there is no approved towing
bar available...
to
wing with the wheels on the ground
is only possible on 2 wheel drive (2WD)
versions.
F
F
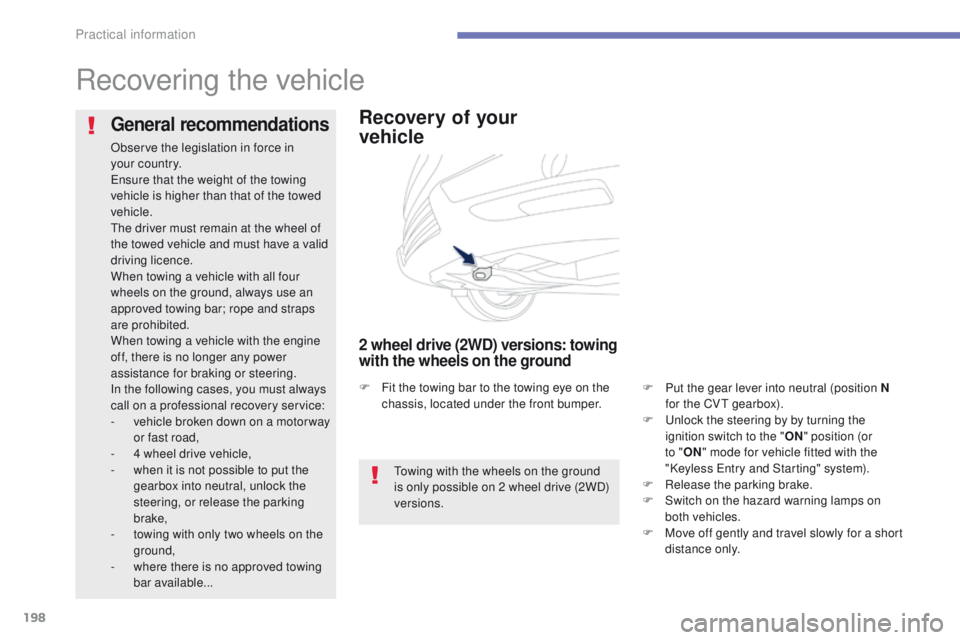
it the towing bar to the towing eye on the
chassis, located under the front bumper.
Practical information
Page 204 of 389

202
Driving advice
Distribution of loads
F Distribute the load in the trailer so that the heaviest items are as close as possible to
the axle and the nose weight approaches
the maximum permitted without
exceeding
it.
Air density decreases with altitude, thus
reducing engine performance. Above
1
000 metres, the maximum towing load must
be reduced by 10
% of the gt
W a
nd so on for
every 1
000 metres of altitude.
Refer to the "
te
chnical Data" section for details
of the weights and towing loads which apply to
your vehicle.
Side wind
F take into account the increased sensitivity to side wind.
Cooling
towing a trailer on a slope increases the
temperature of the coolant.
As the fan is electrically controlled, its cooling
capacity is not dependent on the engine speed.
F
t
o l
ower the engine speed, reduce your
speed.
th
e maximum towing load on a long slope
depends on the gradient and the outside
temperature.
In all cases, pay attention to the coolant
temperature.
F
I
f this message is displayed, stop your
vehicle as soon as it is safe to do so.
Braking
towing a trailer increases the braking distance.
Ty r e s
F Check the tyre pressures of the towing vehicle and of the trailer, observing the
recommended pressures.
Lighting
F Check the lighting and signalling on the t r a i l e r.
If the message flashes slowly, wait for the
engine to cool before topping up the level,
if
necessary.
If the message flashes rapidly, contact a
P
e
uge
Ot
dealer or a qualified workshop
without delay.
Practical information