Page 204 of 422

05 Comfort and driving pleasure
Menu source MY CAR
05
202
General information on MY CAR
Many of the car's functions are handled
in this menu source, such as setting the
clock, door mirrors and locks.
Navigation in the menus is carried out using
buttons on the centre console or with the steer-
ing wheel's right-hand keypad.
Certain functions are standard, others are
optional - the range also varies depending on
the market.
Operation
Centre console controls
Centre console controls for menu navigation.
Press MY CAR to open the menus underMY CAR.
Press OK MENU to select/tick in the high-
lighted menu option or to store the
selected function in the memory.
Turn the TUNE knob to scroll up/down
among the menu options.
EXIT
EXIT functionsDepending on the function the cursor is on
when EXIT is pressed, and on the menu level,
one of the following occurs:
•phone call is rejected
•current function is interrupted
•input characters are deleted
•most recent selections are undone
•leads up in the menu system
Short and long presses can also produce vary-
ing results.
A long press leads to the highest menu level
(Main source view), from where all of the car's
functions/menu sources can be accessed -
see also page 236.
ProCarManuals.com
Page 207 of 422
05 Comfort and driving pleasure
Menu source MY CAR
05
��
205
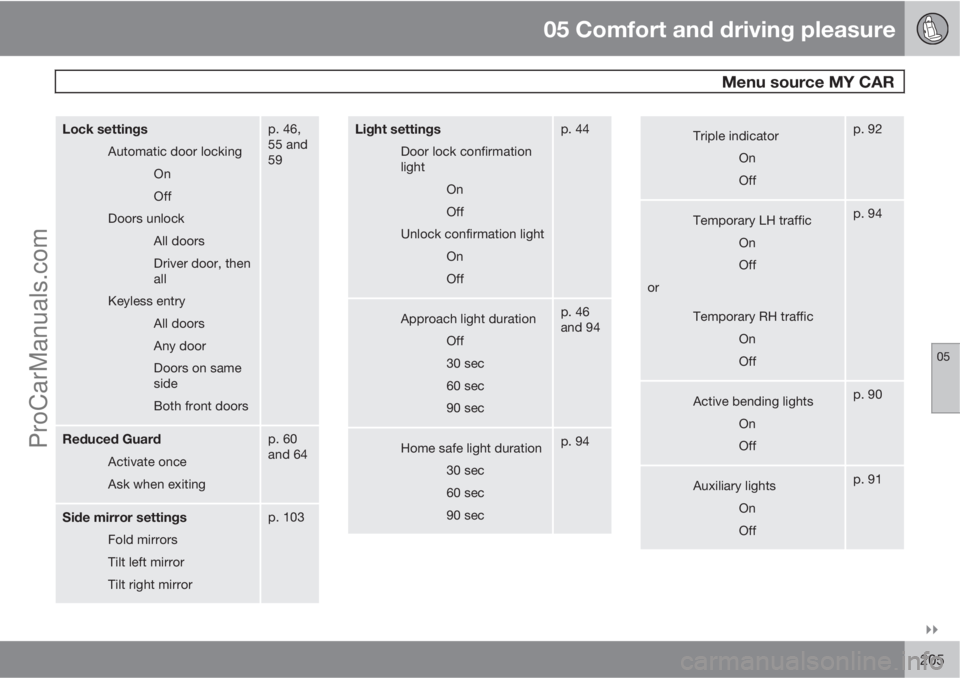
Lock settings
Automatic door locking
On
Off
Doors unlock
All doors
Driver door, then
all
Keyless entry
All doors
Any door
Doors on same
side
Both front doors
p. 46,
55 and
59
Reduced Guard
Activate once
Ask when exiting
p. 60
and 64
Side mirror settings
Fold mirrors
Tilt left mirror
Tilt right mirror
p. 103
Light settings
Door lock confirmation
light
On
Off
Unlock confirmation light
On
Off
p. 44
Approach light duration
Off
30 sec
60 sec
90 secp. 46
and 94
Home safe light duration
30 sec
60 sec
90 secp. 94
Triple indicator
On
Offp. 92
Temporary LH traffic
On
Off
or
Temporary RH traffic
On
Offp. 94
Active bending lights
On
Offp. 90
Auxiliary lights
On
Offp. 91
ProCarManuals.com
Page 212 of 422

05 Comfort and driving pleasure
Climate control
05
210* Option/accessory, for more information, see Introduction.
General
Climate controlThe car is equipped with electronic climate
control. The climate control system cools or
heats as well as dehumidifies the air in the pas-
senger compartment.
NOTE
The air conditioning system (AC) can be
switched off, but to ensure the best possible
climate comfort in the passenger compart-
ment and to prevent the windows from mist-
ing, it should always be on.
Actual temperatureThe temperature you select corresponds to the
physical experience with reference to factors
such as air speed, humidity and solar radiation
etc. in and around the car.
The system includes a sun sensor which
detects on which side the sun is shining into
the passenger compartment. This means
1 that
the temperature can differ between the right
and left-hand air vents despite the controls
being set for the same temperature on both
sides.
Sensor location
•The sun sensor is located on the top side
of the dashboard.
•The temperature sensor for the passenger
compartment is located below the climate
control panel.
•The outside temperature sensor is located
on the door mirror.
•The humidity sensor* is located by the inte-
rior rearview mirror.
NOTE
Do not cover or block the sensors with
clothing or other objects.
Side windows and sunroof*To ensure that the air conditioning works opti-
mally, the side windows, and sunroof* if speci-
fied, should be closed.
Misting windowsRemove misting on the insides of the windows
by primarily using the defroster function.
To reduce the risk of misting, keep the win-
dows clean and use window cleaner.
Temporary shut-off of the air
conditioning
When the engine requires full power, e.g. for full
acceleration or driving uphill with a trailer, the
air conditioning can be temporarily switched
off. There may then be a temporary increase in
temperature in the passenger compartment.
CondensationIn warm weather, condensation from the air
conditioning may drip under the car. This is
normal.
Ice and snowRemove ice and snow from the climate control
system air intake (the grille between the bonnet
and the windscreen).
Total airing functionThe function opens/closes all side windows
simultaneously and can be used for example to
quickly air the car during hot weather, see
page 58.
Passenger compartment filterAll air entering the car's passenger compart-
ment is cleaned with a filter. This must be
replaced at regular intervals. Follow the Volvo
Service Programme for the recommended
replacement intervals. If the car is used in a
1Only applies to ECC.
ProCarManuals.com
Page 215 of 422
05 Comfort and driving pleasure
Climate control
05
��
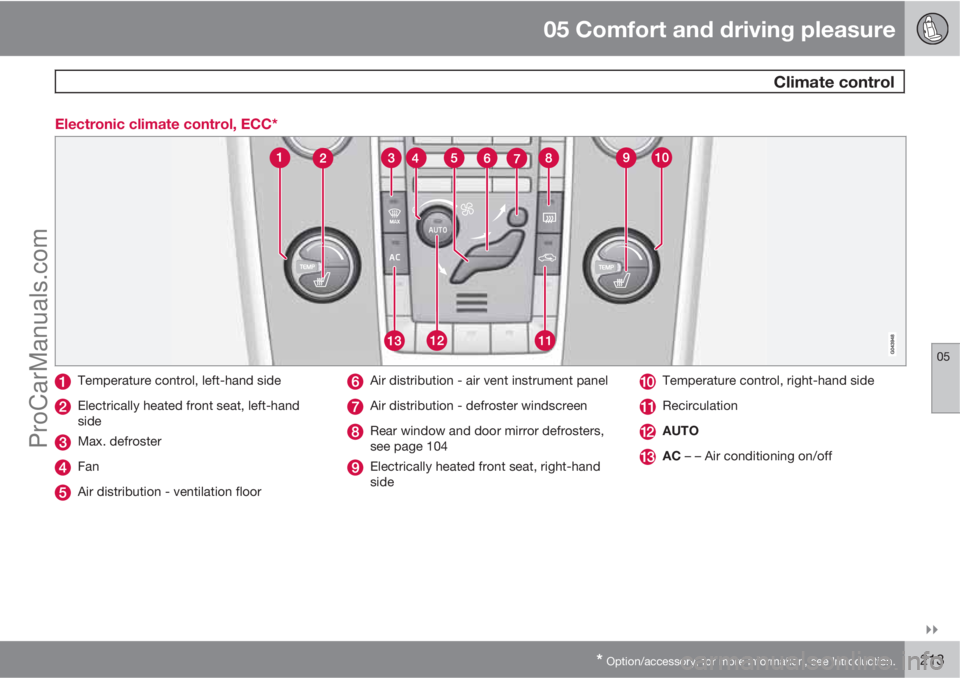
* Option/accessory, for more information, see Introduction.213 Electronic climate control, ECC*
Temperature control, left-hand side
Electrically heated front seat, left-hand
side
Max. defroster
Fan
Air distribution - ventilation floor
Air distribution - air vent instrument panel
Air distribution - defroster windscreen
Rear window and door mirror defrosters,
see page 104
Electrically heated front seat, right-hand
side
Temperature control, right-hand side
Recirculation
AUTO
AC – – Air conditioning on/off
ProCarManuals.com
Page 216 of 422
05 Comfort and driving pleasure
Climate control
05
214
Electronic Temperature Control, ETC
Fan
Electrically heated front seat, left-hand
side
AC – – Air conditioning on/off
Max. defroster
Air distribution - ventilation floor
Air distribution - air vent instrument panel
Air distribution - defroster windscreen
Rear window and door mirror defrosters,
see page 104
Recirculation
Electrically heated front seat, right-hand
side
Temperature control
ProCarManuals.com
Page 231 of 422

05 Comfort and driving pleasure
Comfort inside the passenger compartment
05
229 Vanity mirror
Vanity mirror with lighting.
The light illuminates automatically when the
cover is lifted.
12 V socket
12 V socket in tunnel console, front seat.
12 V socket in tunnel console, rear seat.
The electrical socket can be used for various
accessories designed for 12 V, e.g. TV screens,
music players and mobile phones. For thesocket to supply current, the remote control
key must be in at least key position I, see
page 78.
WARNING
Always leave the plug in the socket when
the socket is not in use.
NOTE
Optional equipment and accessories - e.g.
TV screens, music players and mobile
phones - which are connected to one of the
passenger compartment's 12V electrical
sockets, could be activated by the climate
control system, even when the remote con-
trol key has been removed or when the car
is locked, for example, when the parking
heater is activated at a preset time.
For this reason remove the plugs from the
electrical sockets for optional equipment or
accessories when not in use because the
battery could be drained in the event of such
an occurrence!
ProCarManuals.com
Page 337 of 422

09 Maintenance and service
Lamps09
335 General
All bulbs are specified, see page 339. The fol-
lowing list contains locations of bulbs and
other light sources that are specialised or
unsuitable for changing except at a workshop:
•Active Xenon headlamps - ABL (Xenon
lamps)
•Direction indicators, door mirrors
•Approach lighting, door mirrors
•Courtesy lighting
•Glovebox lighting
•General interior lighting in the roof
•Reading lamps
•Side position, position lamps rear
•Brake light
•LED lights, general
WARNING
On cars with Xenon headlamps, the
replacement of Xenon lamps must be car-
ried out at a workshop - an authorised Volvo
workshop is recommended. Working with
Xenon lamps demands extreme caution
because the headlamp is equipped with a
high voltage unit.
WARNING
The car’s electrical system must be in key
position 0 when replacing bulbs, see
page 78
IMPORTANT
Never touch the glass part of the bulbs with
your fingers. Grease and oils from your fin-
gers are vaporised by the heat, coating the
reflector and then causing damage.
Headlamps frontAll of the headlamp bulbs are replaced via the
engine compartment. Loosen and remove the
whole headlamp.
Removing the headlamp1. Set the car's electrical system in key posi-
tion 0, see page 78:
2. (First illustration)
Pull out the headlamp's locking pins.
Release the headlamp by alternately
tilting and pulling it out.
IMPORTANT
Do not pull the electrical cable, only the con-
nector.
ProCarManuals.com
Page 341 of 422

09 Maintenance and service
Lamps09
��
339 Lighting, cargo area
G031942
1. Insert a screwdriver and gently prize so
that the lamp housing comes loose.
2. Replace the bulb.
3. Check that the bulb illuminates and press
back the lamp housing.
Vanity mirror lighting
Removal of lamp lens
1. Insert a screwdriver under the lamp lens
and gently prize up the lug on the edge.
2. Carefully detach and lift aside the lamp
lens.
3. Use needle-nose pliers to pull the bulb
straight out to the side and replace with a
new one. Note! - Do not pinch hard with the
pliers. Otherwise the lamp lens could then
be crushed.
Attaching the lamp lens1. Refit the lamp lens.
2. Press it into place.
Specification, bulbs
LightingWAType
Dipped beam,
halogen55H7 LL
Main beam,
Halogen65H9
Extra main
beam, ABL65H9
Front direction
indicators21HY21W
Courtesy light-
ing front3T10 Socket
W2.1x9.5d
Glovebox light-
ing5Socket SV8.5
Length 43 mm
Vanity mirror
lighting1.2T5 Socket
W2x4.6d
Cargo area
lighting5Socket SV8.5
Length 43 mm
Number plate
lighting5C5W LL
Direction indi-
cators, rear21PY21W SV
---
ProCarManuals.com