2013 VOLKSWAGEN GOLF display
[x] Cancel search: displayPage 25 of 321

Convenience
menu Function
Driver
Manual unlocking: The driver window opens when the key is
held in the unlocking position.
Manual locking: All windows close when the key is held in the
locking position.
Keyless Access: All windows close when the locking sensor
on the door handle is pressed and held .
Back The display switches back to the Convenience menu.
Mirror adjust
IndividuallyBoth outside mirrors are adjusted separately.
Both mirrorsThe front passenger outside mirror is adjusted at the same
time as the driver outside mirror.
Back The display switches back to the Convenience menu.
Factory
setting Resets the features in the Convenience submenu back to the factory settings.
Back The display returns to the Settings menu.
Lights & Vision submenu
�
Page 43 of 321
Convenience features
To use the convenience closing feature to close all power windows, hold your finger on the lock sensor
surface on the outside of the door handle for a few seconds until the windows close.
Remove your finger from the lock sensor surface ⇒ fig. 27 (B) to stop the function. If you touch the
unlock sensor surface (A) on the inside of the door handle immediately after releasing the lock sensor
surface (B) (arrow), all of the windows will open (safety function).
Pinch protection is active during convenience closing of the windows.
The settings in the Settings – Convenience menu determine which doors open when the door
handle unlocking surface is grasped.
NOTICE
The door handle sensor surfaces can be activated by a strong stream of water or steam if a
valid vehicle key is within range of the vehicle.
�x All windows may open if you turn the spray of water or steam away from and then back onto
the door handle sensor surface in quick succession. If at least one power window is opened
and the sensor is continuously activated, convenience closing is started.
The door may not open if the outside and inside door handles are used at the same time.
If the vehicle battery or the battery in the remote control vehicle key is weak or dead, it might not
be possible to unlock and lock the vehicle using Keyless Access. The vehicle can still be manually
locked or unlocked with the key bit
The driver message Key not in range appears in the instrument cluster display if there is no
remote control vehicle key inside the vehicle or if the system does not recognize the remote control
vehicle key. The key may not be recognized, for example, if it is covered by something that interferes
with the signal (such as a briefcase), or if the remote control vehicle key battery is weak. Electronic
devices such as cell phones can also interfere with the signal.
Dirt on the door handles that contains a lot of salt (especially in winter) can affect the way the
door handle sensors work. Cleaning the door handles can help with this problem
If the automatic transmission is not in Park (P) position, the electronic steering column lock will
not lock and the vehicle will not lock via sensors in the front door handles or the remote control vehicle
key.
Anti-theft alarm system
�
Page 48 of 321
Lights up Possible cause Proper response
OR
icon
appears in
the display
When the ignition is switched on, several warning and indicator lights come on briefly for a function
check. They go out after a few seconds.
If the rear hatch is not closed properly, the red ² warning light comes on in the instrument cluster or
the vehicle icon appears in the instrument cluster display showing an open rear hatch.
Depending on your vehicle's equipment and options, the red warning light or icon may still be
displayed even after the ignition is switched off as long as the key has not been taken out of the
ignition. The icon in the instrument cluster display goes out about 15 seconds after the vehicle has
been locked.
WARNING
If the rear hatch is not closed properly, it may open suddenly when the vehicle is moving and
cause severe injuries.
�x Stop immediately and close the rear hatch.
�x Always make sure the rear hatch is securely latched after you close it.
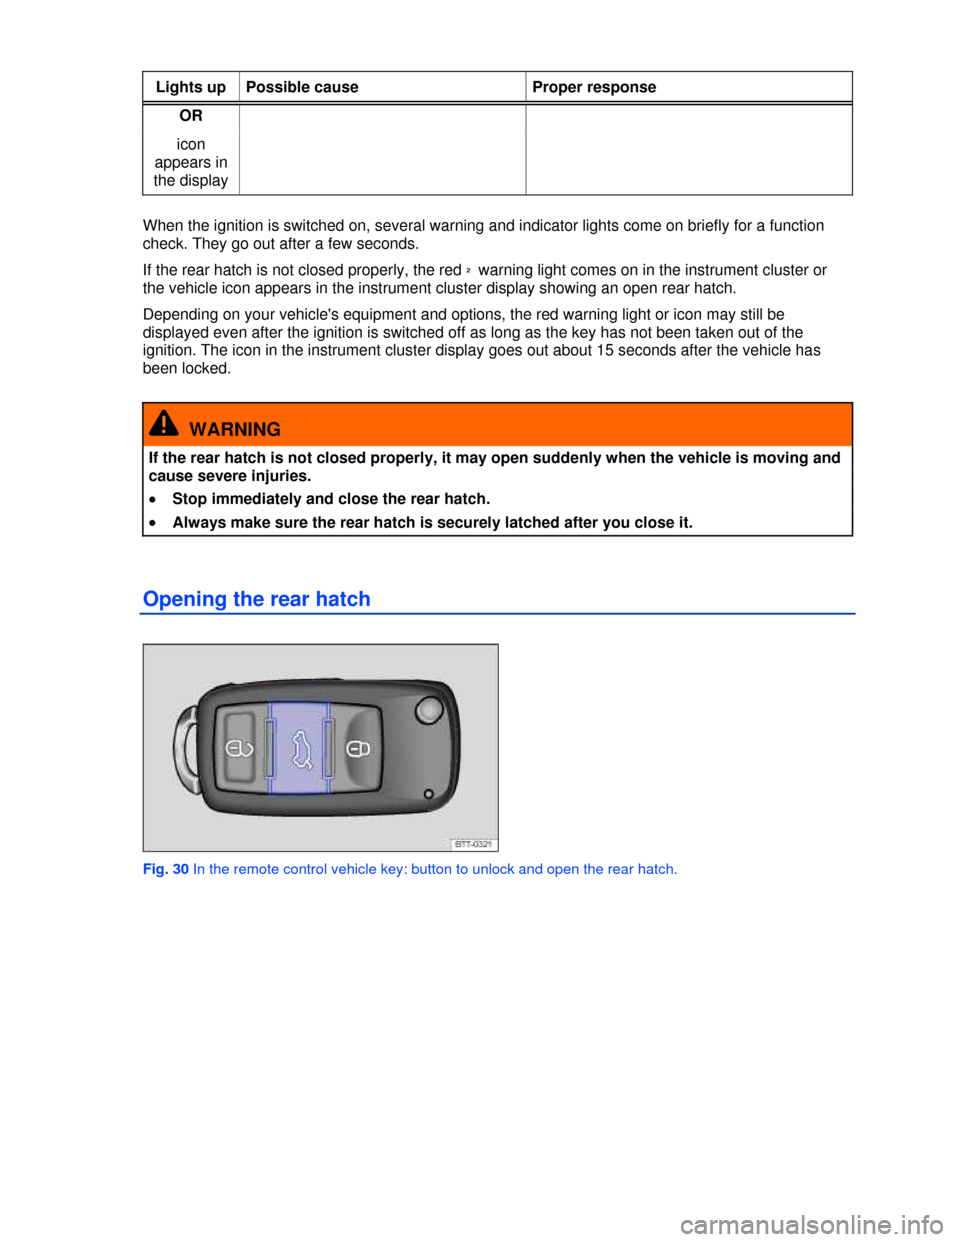
Opening the rear hatch
Fig. 30 In the remote control vehicle key: button to unlock and open the rear hatch.
Page 95 of 321
Static cornering lights
Your vehicle may have fog lights under the front bumper, which on some models are also static
cornering lights. On some models the static cornering lights may be integrated in the headlights. At
speeds below about 25 mph (40 km/h), the light on one side of the vehicle will come on automatically
when you turn a corner. If you turn to the right, the right fog light comes on; turn left and the left fog
light comes on. The light dims and goes out when the steering wheel is straightened out again.
When you move the selector lever to Reverse (R), the static cornering lights on both sides of the
vehicle may come on so that you can see the area around the vehicle better when backing up.
The static cornering lights work only when the headlights are on. The static cornering lights do not
come on when the headlight switch is in the O position or when the fog lights themselves have been
switched on 100.
Adaptive Front Lighting System (AFS)
The Adaptive Front Lighting System works only with the low beams switched on and only at speeds
above about 6 mph (10 km/h). The swivel-mounted lamps automatically improve road illumination
during cornering.
On vehicles equipped with the Adaptive Front Lighting System, the feature is switched on and off via
the Assistants menu in the instrument cluster display
WARNING
Crashes and other accidents can happen when you cannot see the road ahead and when you
cannot be seen by other motorists.
�x Never use daytime running lights (DRL) to see where you are going. DRL are not bright
enough to light up the roadway and be seen by other motorists. You will not be able to see far
enough ahead for safety, especially at dusk or when it is dark. Always switch on the low-
beam headlights at dusk or when it is dark.
�x The taillights do not come on when the daytime running lights are switched on. A vehicle
without taillights on cannot be seen by others in bad weather, at dusk, or when it is dark.
In cool or humid weather, the insides of the headlights, the taillights, and turn signals can
temporarily fog up. This is normal and does not affect the service life of the vehicle's lighting system.
Applicable only in Canada
Lights and vision features
�
Page 96 of 321
when you turn a corner. If you turn to the right, the right fog light comes on; turn left and the left fog
light comes on. The light dims and goes out when the steering wheel is straightened out again.
When you move the selector lever to Reverse (R), the static cornering lights on both sides of the
vehicle may come on so that you can see the area around the vehicle better when backing up.
The static cornering lights work only when the headlights are on. The static cornering lights do not
come on when the headlight switch is in the O position or when the fog lights themselves have been
switched on
Adaptive Front Lighting System (AFS)
The Adaptive Front Lighting System works only with the low beams switched on and only at speeds
above about 6 mph (10 km/h). The swivel-mounted lamps automatically improve road illumination
during cornering.
On vehicles equipped with the Adaptive Front Lighting System, the feature is switched on and off via
the Assistants menu in the instrument cluster display
WARNING
Crashes and other accidents can happen when you cannot see the road ahead and when you
cannot be seen by other motorists.
�x Never use daytime running lights (DRL) to see where you are going. DRL are not bright
enough to light up the roadway and be seen by other motorists. You will not be able to see far
enough ahead for safety, especially at dusk or when it is dark. Always switch on the low-
beam headlights at dusk or when it is dark.
�x The taillights do not come on when the daytime running lights are switched on. A vehicle
without taillights on cannot be seen by others in bad weather, at dusk, or when it is dark.
In cool or humid weather, the insides of the headlights, the taillights, and turn signals can
temporarily fog up. This is normal and does not affect the service life of the vehicle's lighting system.
Instrument panel lighting and headlight range adjustment
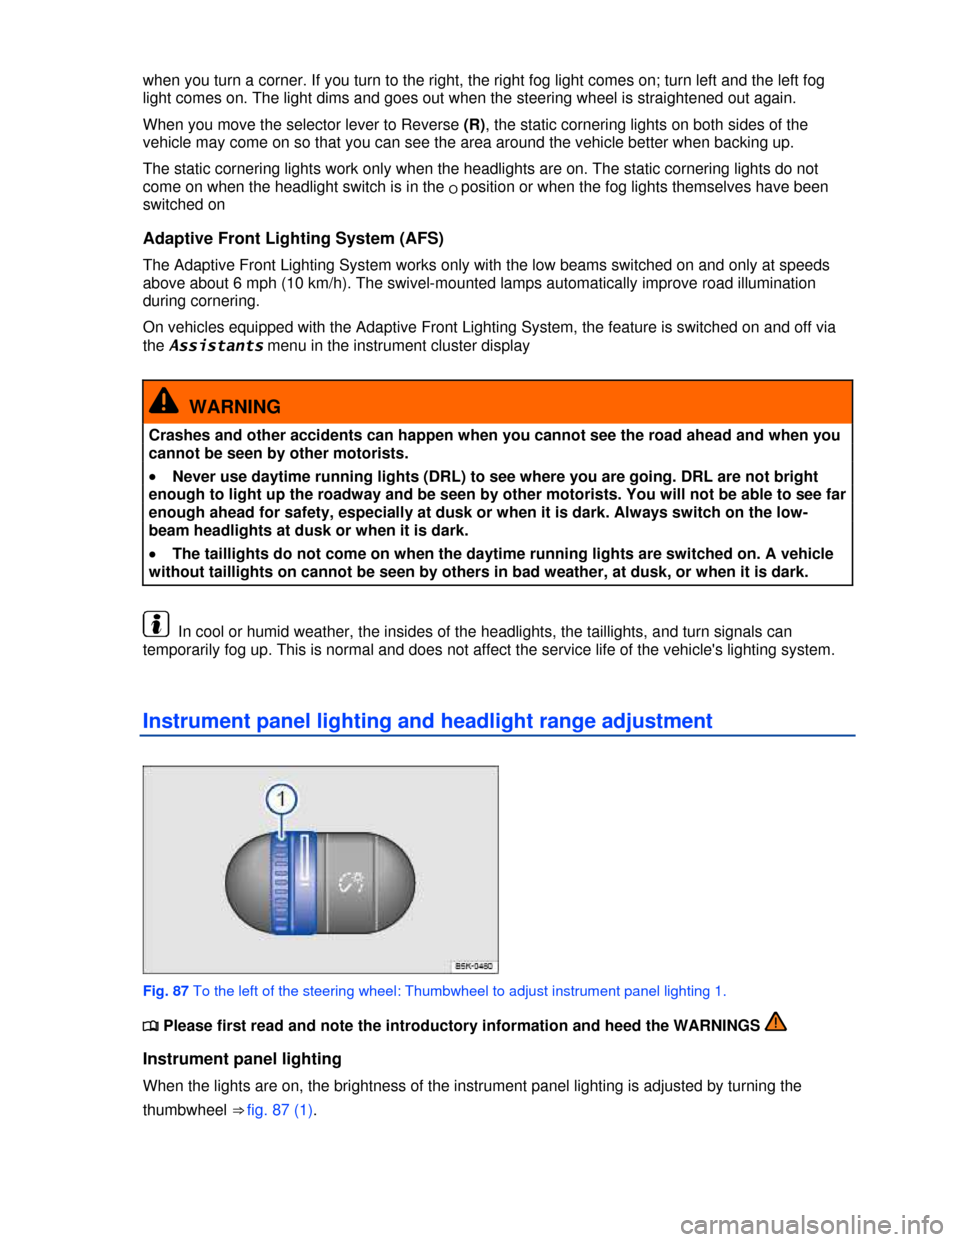
Fig. 87 To the left of the steering wheel: Thumbwheel to adjust instrument panel lighting 1.
�
Page 109 of 321
The auto-dimming feature can be switched on and off with the switch on the inside mirror (2) A or (2)
B. When auto-dimming is activated, the indicator light (1) is on.
If the ignition is switched on, the sensor (3) automatically darkens the inside mirror depending on the
amount of light shining into the vehicle from the rear.
The auto-dimming feature is deactivated when you shift the transmission into reverse or switch on the
interior lights or the reading light.
Do not attach external navigation devices to the windshield or in the vicinity of the auto-dimming inside
mirror ⇒ .
WARNING
The illuminated display on an external navigation device can cause the auto-dimming inside
mirror to malfunction, which can result in crashes and serious injuries.
�x Malfunctions in the auto-dimming function can result in the inside mirror being unable to
evaluate the exact distance of vehicles in the rear or other objects.
If the light striking the sensor is filtered or blocked (such as by a sunshade), the auto-dimming
inside mirror will not work properly or may not work at all.
Outside mirrors
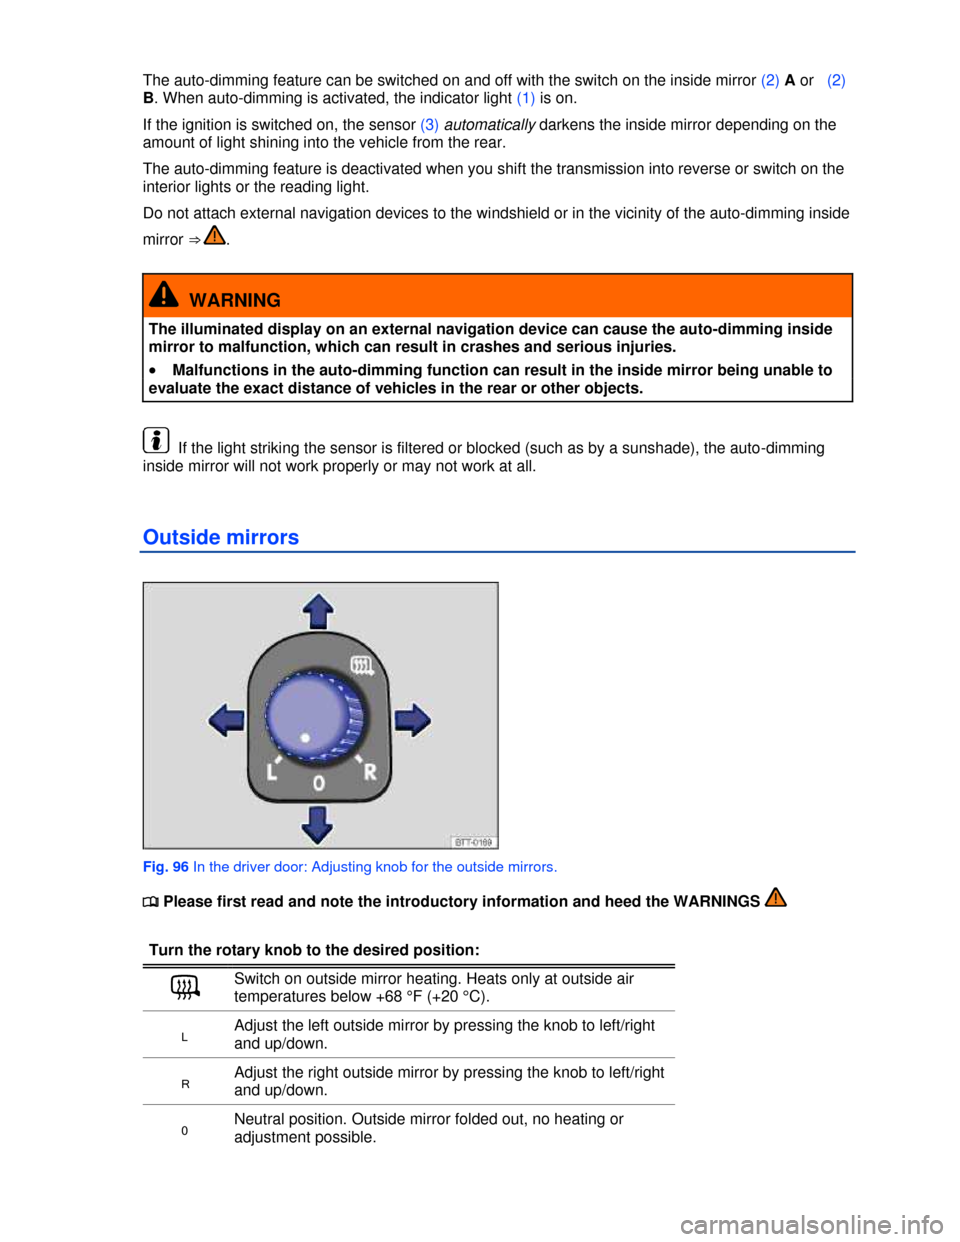
Fig. 96 In the driver door: Adjusting knob for the outside mirrors.
�
Page 170 of 321

Selector
lever
position
Designation Meaning ⇒
R Reverse The reverse gear is engaged.
Shift into Reverse only when the vehicle is not moving.
N Neutral Transmission is in Neutral position. No power is transmitted to
the wheels and no engine braking is available.
D Drive (standard
driving position)
All forward gears shift up and down automatically. The
transmission shifts as needed depending on engine load,
individual driving style, and vehicle speed.
S Sport Drive (Sport
driving position)
All forward gears automatically upshift later and downshift
earlier than in the D (Drive) position, to take full advantage of
the engine's power reserves. The transmission shifts as needed
depending on engine load, individual driving style, and vehicle
speed.
Automatic Shift Lock (ASL)
The Automatic Shift Lock (ASL) in Park (P) and Neutral (N) prevents drive positions from being
engaged inadvertently, which would cause the vehicle to move.
To release the ASL, depress and hold the brake pedal with the ignition switched on. Press the release
button on the selector lever at the same time.
The ASL is not engaged if the selector lever is moved quickly through Neutral (N) (e.g., when shifting
from Reverse (R) to Drive (D)). This makes it possible to “rock” the vehicle backwards and forwards if
it is stuck in snow or mud. The ASL engages automatically if the brake pedal is not depressed and the
lever is in Neutral (N) for more than about 1 second and the vehicle is traveling no faster than about
3 mph (5 km/h).
In rare cases, the ASL may not engage on vehicles with DSG® Direct Shift Gearbox. If this happens,
power to the drive wheels will be interrupted to prevent the vehicle from moving unexpectedly. The
green indicator light k will blink and a text message will be displayed. To engage the Automatic Shift
Lock (ASL):
�x On 6-speed transmissions: Depress and then release the brake pedal. Try to engage the ASL
again.
�x On 7-speed transmissions: First shift into Park (P) or Neutral (N), and then shift to a drive position.
WARNING
Moving the selector lever to the wrong position can cause loss of vehicle control, a collision,
and serious personal injury.
�x Never accelerate when moving the selector lever.
�x When the engine is running and a drive position is engaged, the vehicle will start to move
as soon as the brake pedal is released.
�x Never shift into Reverse or Park when the vehicle is moving.
Page 174 of 321

Emergency shift program
If all selector lever position indicators in the instrument cluster display are highlighted against a bright
background, there is a system malfunction. The automatic transmission and the DSG automatic
transmission will then operate in the emergency shift program. The emergency shift program lets you
drive the vehicle, but at a reduced speed and without being able to use all of the forward gears.
In some cases, vehicles with a DSG® Direct Shift Gearbox automatic transmission may not be able to
shift into reverse. It is then impossible to drive the vehicle backwards.
In any event, have the automatic transmission checked by an authorized Volkswagen dealer or
authorized Volkswagen Service Facility.
Overheating of Direct Shift Gearbox (DSG®) automatic transmission
The DSG® automatic transmission may overheat, for example, due to frequent starts, extended
“creeping,” or stop-and-go traffic. Overheating is indicated by the warning light Á and, if applicable, by
a text message in the instrument cluster. An additional warning chime may sound. Stop and let the
transmission cool down ⇒ .
The vehicle does not move forward or in reverse even though a drive position is selected
with the selector lever
If the vehicle does not move in the desired direction, the system may not have engaged the drive
position correctly. Press the brake pedal and select the drive position again.
If the vehicle still does not move in the desired direction, there is a system malfunction. See your
authorized Volkswagen dealer or authorized Volkswagen Service Facility for assistance to have the
system checked.
NOTICE
�x As soon as you get any of these warnings about transmission overheating, you must either
park the vehicle in a safe place or drive faster than 12 mph (20 km/h).
�x If the text message and acoustic warning repeat themselves every 10 seconds or so, you
must park the vehicle in a safe place as soon as you can safely do so and stop the engine. Let
the transmission cool down.
�x To help prevent damage to the transmission, do not drive the vehicle again until the
acoustic warning has stopped. As long as the engine is overheated, avoid stop and start
driving and avoid low speeds (“walking pace”).