2013 TOYOTA CAMRY bluetooth
[x] Cancel search: bluetoothPage 134 of 336

134
1. PHONE OPERATION
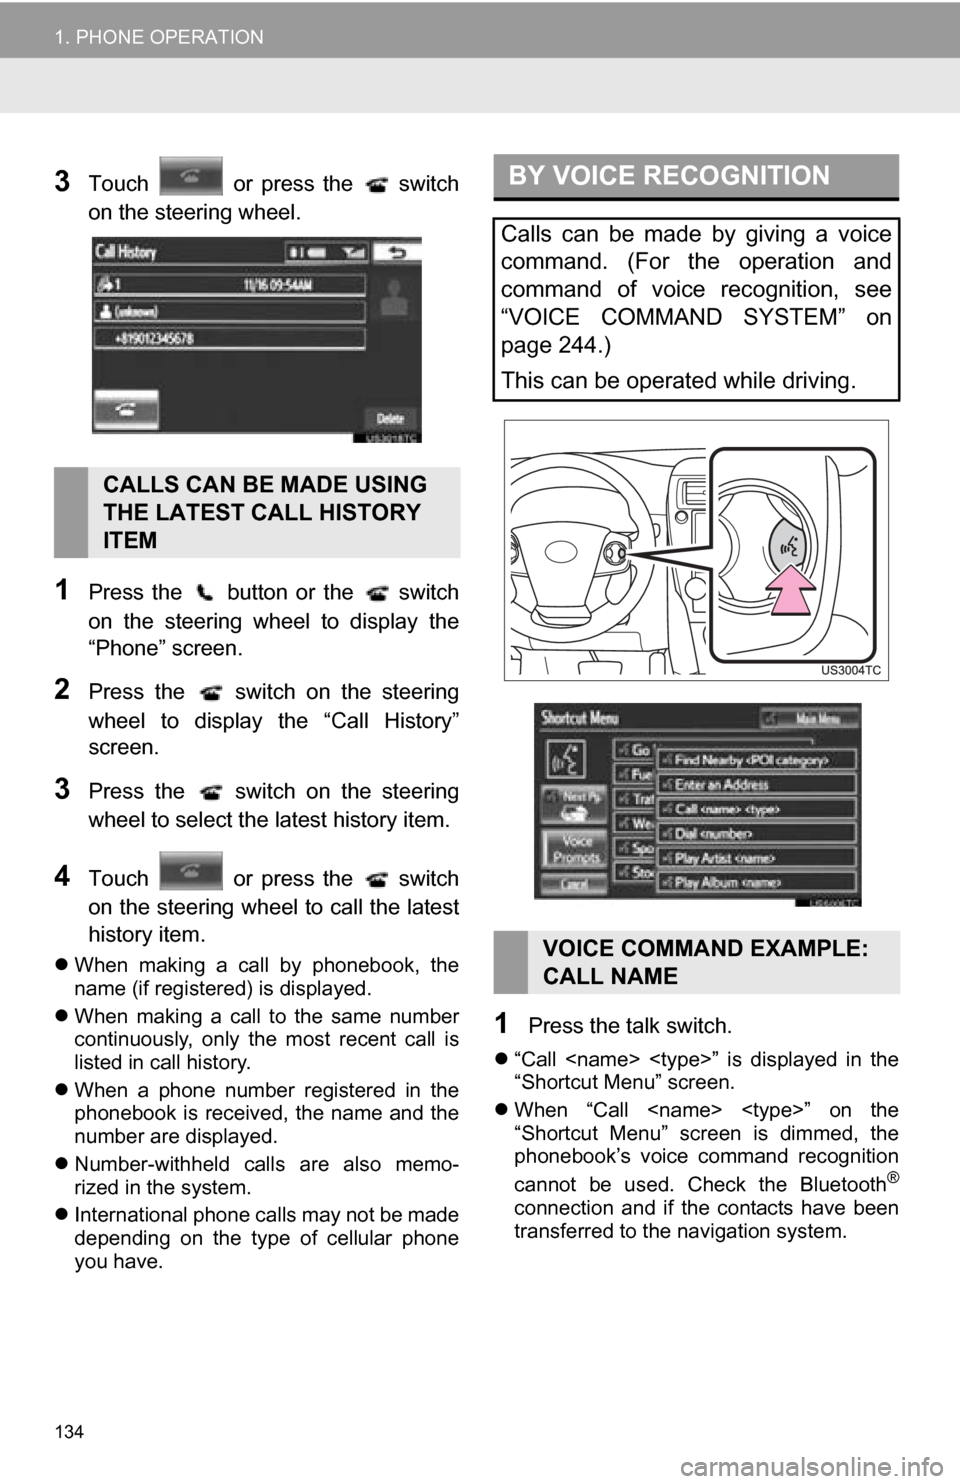
3Touch or press the switch
on the steering wheel.
1Press the button or the switch
on the steering wheel to display the
“Phone” screen.
2Press the switch on the steering
wheel to display the “Call History”
screen.
3Press the switch on the steering
wheel to select the latest history item.
4Touch or press the switch
on the steering wheel to call the latest
history item.
When making a call by phonebook, the
name (if registered) is displayed.
When making a call to the same number
continuously, only the most recent call is
listed in call history.
When a phone number registered in the
phonebook is received, the name and the
number are displayed.
Number-withheld calls are also memo-
rized in the system.
International phone calls may not be made
depending on the type of cellular phone
you have.
1Press the talk switch.
“Call
“Shortcut Menu” screen.
When “Call
“Shortcut Menu” screen is dimmed, the
phonebook’s voice command recognition
cannot be used. Check the Bluetooth
®
connection and if the contacts have been
transferred to t he navigation system.
CALLS CAN BE MADE USING
THE LATEST CALL HISTORY
ITEM
BY VOICE RECOGNITION
Calls can be made by giving a voice
command. (For the operation and
command of voice recognition, see
“VOICE COMMAND SYSTEM” on
page 244.)
This can be operated while driving.
VOICE COMMAND EXAMPLE:
CALL NAME
Page 135 of 336

135
1. PHONE OPERATION
4
PHONE
2Say the name, or the name and type of
phone, of a registered contact.
In the same manner as it is displayed on
the screen, “Call
saying “Call” say the name, or the name
and type of phone, of a contact.
For example: “Call”, “John Smith” or
“Call” , “Mary Davis”, “Mobile”
There are 4 types of phones: Home,
Mobile, Office and Other.
Short or abbreviated names in the phone-
book may not be recognized. Change
names in the phonebook to full names.
Sometimes a voice recognition result con-
firmation screen will be displayed. After
confirming the result, say “Yes” or “No” .
When the system recognizes multiple
names from the phonebook, a name can-
didate list will be displayed on the screen.
If the desired name is not displayed on the
top of the screen, say the number of the
name from the candidate list (number 1
and number 2) to select a name from the
candidate list.
When a contact has multiple phone num-
bers registered in the phonebook, a candi-
date list will be displayed. If the desired
phone number is not displayed on the top
of the screen, say the number of the
desired phone number from the candidate
list (number 1 and number 2) to select a
phone number from the candidate list.
3Say “Dial” to call the phone number.
1Press the talk switch.
“Dial
cut Menu” screen.
When “Dial
Menu” screen is dimmed, the phone num-
ber voice recognition cannot be used.
Check the Bluetooth
® phone connection.
2Say the phone number.
In the same manner as it is displayed on
the screen, “Dial
“Dial” say the phone number.
Say the phone number one digit at a time.
For example, if the phone number is
2345678:
Say “two three four five six seven
eight”
Do not say “twenty three forty five sixty
seven eight”
The system can recognize the following
types of phone numbers:
3 digit numbers (911, 411, 611)
7 digit numbers (Local phone numbers)
10 digit numbers (Area code + Local
phone number)
11 digit phone numbers (1 + Area code +
Local phone number)
As the system cannot recognize additional
numbers, say the complete number with-
out stopping.
When the system recognizes multiple
phone numbers, a phone number candi-
date list will be displayed on the screen. If
the desired phone number is not displayed
on the top of the screen, say the number
of the desired phone number from the
candidate list (number 1 and number 2) to
select a phone number from the candidate
list.
3Say “Dial” to call the phone number.
VOICE COMMAND EXAMPLE:
DIAL NUMBER
Page 138 of 336

138
1. PHONE OPERATION
5. RECEIVE ON THE Bluetooth® PHONE
1Touch or press the switch
on the steering wheel to talk on the
phone.
When a call is received, this screen is
displayed with a sound.
To refuse to receive the call: Touch
or press the switch on the
steering wheel.
To adjust the volume of a received
call : Touch “-” or “+”, turn the “PWR
VOL” knob, or use the volume switch on
the steering wheel.
INFORMATION
● During international phone calls, the
other party’s name or number may not
be displayed correctly depending on the
type of cellular phone you have.
● The incoming call display mode can be
set. (See “INCOMING CALL DISPLAY”
on page 162.)
Page 139 of 336

139
1. PHONE OPERATION
4
PHONE
6. TALK ON THE Bluetooth® PHONE
While talking on the phone, this screen
is displayed. The operations outlined
below can be performed on this
screen.
To adjust the volume of the other par-
ty’s voice: Touch “-” or “+”, turn the
“PWR VOL” knob, or use the volume
switch on the steering wheel.
To adjust your voice volume that the
other party hears from their speaker:
Touch “Transmit Volume” and touch
“-” or “+” to adjust the transmit vol-
ume.
Touch “OK”.
To hang up the phone : Touch
or press the switch on the steering
wheel.
To mute your voice : Touch “Mute”.
To input a key : Touch “0-9”.
To transfer the call : Touch “Handset
Mode” to change from hands-free call to
cellular phone call. Touch “Handsfree
Mode” to change from cellular phone
call to hands-free call.
INFORMATION
● Changing from hands-free call to cellular
phone call is not possible while driving.
● When cellular phone call is changed to
hands-free call, the hands-free screen
will be displayed and its functions can be
operated on the screen.
● Changing between cellular phone call
and hands-free call can be performed by
operating the cellular phone directly.
● Transferring methods and operations
will be different depending on the type of
cellular phone you have.
● For the operation of the cellular phone,
see the manual that comes with it.
Page 141 of 336

141
1. PHONE OPERATION
4
PHONE
1Touch or press the switch
on the steering wheel to start talking
with the other party.
INCOMING CALL WAITING
When a call is interrupted by a third
party while talking, this screen is dis-
played.
Touch or press the switch
on the steering wheel to refuse the call.
Each time is touched or the
switch on the steering wheel is pressed
during an interrupted call, the party who
is on hold will be switched.
INFORMATION
● If your cellular phone does not support
HFP Ver. 1.5, this function cannot be
used.
● The ring tone that has been set in the
“Phone Sound Settings” screen sounds
when there is an incoming call. Depend-
ing on the type of Bluetooth
® phone,
both the navigation system and
Bluetooth
® phone may sound simulta-
neously when there is an incoming call.
(See “RING TONE SETTING” on page
146.)
Page 142 of 336

142
1. PHONE OPERATION
7. Bluetooth® PHONE MESSAGE FUNCTION
1Press the button or the switch
on the steering wheel.
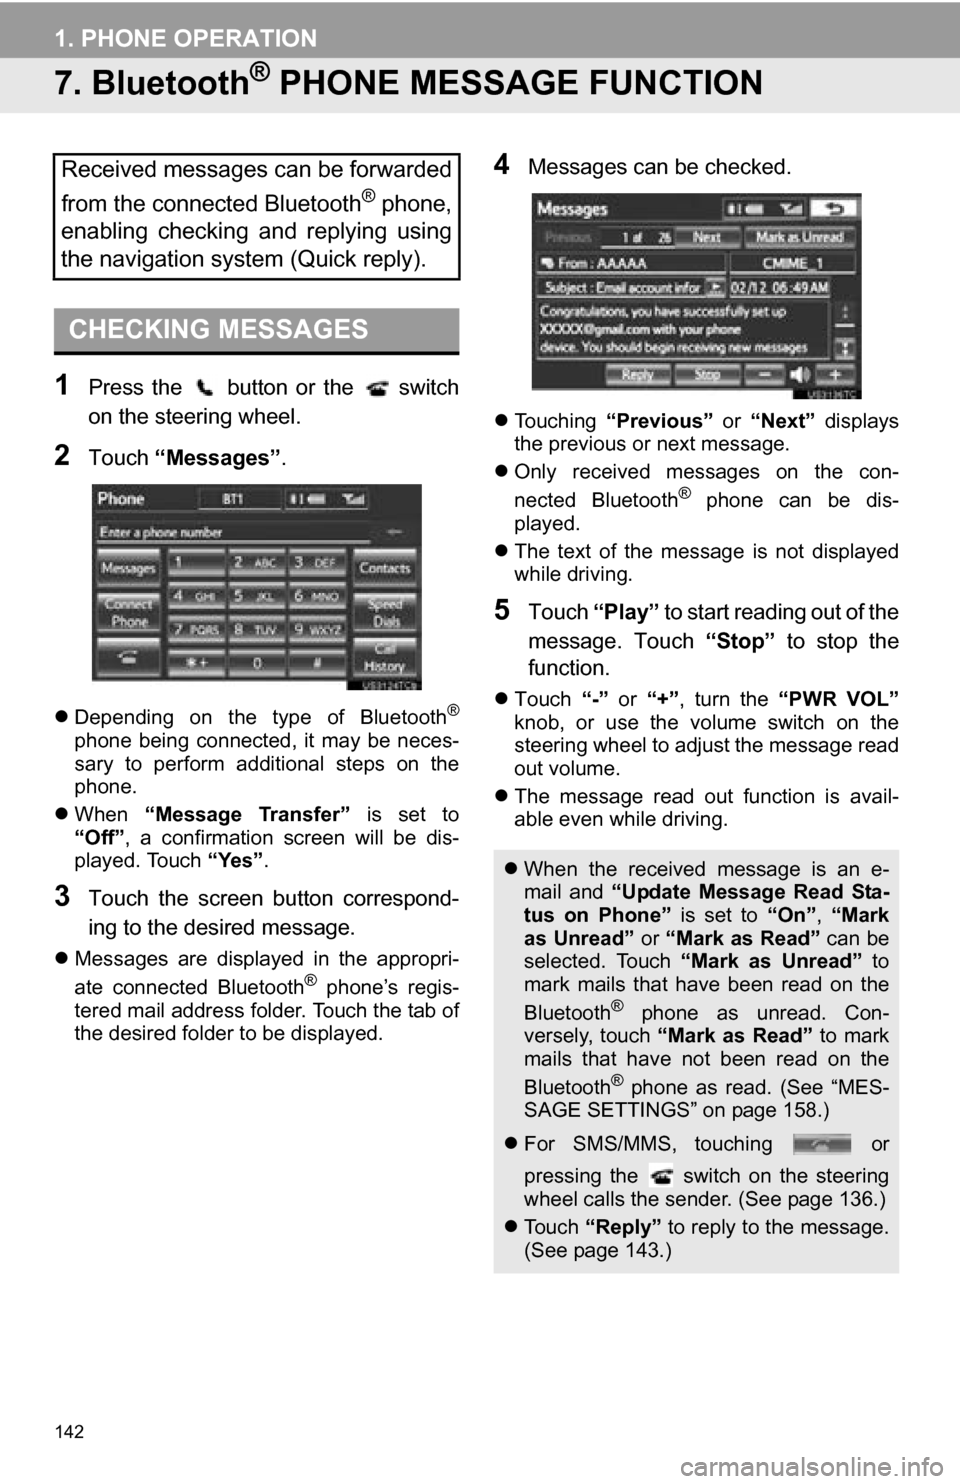
2Touch “Messages” .
Depending on the type of Bluetooth®
phone being connected, it may be neces-
sary to perform additional steps on the
phone.
When “Message Transfer” is set to
“Off”, a confirmation screen will be dis-
played. Touch “Yes”.
3Touch the screen button correspond-
ing to the desired message.
Messages are displayed in the appropri-
ate connected Bluetooth® phone’s regis-
tered mail address folder. Touch the tab of
the desired folder to be displayed.
4Messages can be checked.
Touching “Previous” or “Next” displays
the previous or next message.
Only received messages on the con-
nected Bluetooth
® phone can be dis-
played.
The text of the message is not displayed
while driving.
5Touch “Play” to start reading out of the
message. Touch “Stop” to stop the
function.
Touch “-” or “+”, turn the “PWR VOL”
knob, or use the volume switch on the
steering wheel to adjust the message read
out volume.
The message read out function is avail-
able even while driving.
Received messages can be forwarded
from the connected Bluetooth
® phone,
enabling checking and replying using
the navigation system (Quick reply).
CHECKING MESSAGES
When the received message is an e-
mail and “Update Message Read Sta-
tus on Phone” is set to “On”, “Mark
as Unread” or “Mark as Read” can be
selected. Touch “Mark as Unread” to
mark mails that have been read on the
Bluetooth
® phone as unread. Con-
versely, touch “Mark as Read” to mark
mails that have not been read on the
Bluetooth
® phone as read. (See “MES-
SAGE SETTINGS” on page 158.)
For SMS/MMS, touching or
pressing the switch on the steering
wheel calls the sender. (See page 136.)
Touch “Reply” to reply to the message.
(See page 143.)
Page 147 of 336

147
2. SETUP
4
PHONE
4Perform each setting according to the
procedures outlined on the following
pages.
1Press the “SETUP” button.
2Touch “Phone” on the “Setup” screen.
3Touch “Phonebook” on the “Phone
Settings” screen.
4Touch “Manage Contacts” .
5Perform each setting according to the
procedures outlined on the following
pages.
■THE “Contacts” SCREEN CAN
ALSO BE DISPLAYED
1Press the button or the switch
on the steering wheel.
2Touch “Contacts” on the “Phone”
screen.
3Touch “Options”.
4Touch “Manage Contacts” .
INFORMATION
●Phonebook data is managed indepen-
dently for every registered phone. When
one phone is connected, another
phone’s registered data cannot be read.
SETTING THE PHONEBOOK
The phonebook can be transferred
from a Bluetooth
® phone to the sys-
tem. The phonebook also can be add-
ed, edited and deleted.
Page 148 of 336

148
2. SETUP
■TRANSFERRING A PHONE NUM-
BER
For PBAP compatible Bluetooth®
phones
1Touch “Transfer Contacts” .
2Touch “Update Contacts” .
3Transfer the phonebook data to the
system using the Bluetooth
® phone.
This operation may be unnecessary
depending on the type of cellular phone.
Depending on the type of cellular phone,
OBEX authentication may be required
when transferring phonebook data. Enter
“1234” into the Bluetooth
® phone.
This screen appears while transferring. To
cancel this function, touch “Cancel”.
If another Bluetooth
® device is connected
when transferring phonebook data,
depending on the phone, the connected
Bluetooth
® device may need to be discon-
nected.
PBAP compatible models automatic
data transfer setting
1Touch “Transfer Contacts”.
The phone numbers in a Bluetooth®
phone can be transferred to the sys-
tem. The system can manage up to 5
phonebooks. Up to 1000 contacts
(maximum of 3 numbers per contact)
can be registered in each phonebook.
Operation methods differ between
PBAP compatible and PBAP incom-
patible but OPP compatible Bluetooth
®
phones.
If your cellular phone is neither PBAP
nor OPP compatible, the phonebook
cannot be transferred.
When a PBAP compatible phone is con-
nected, the phone’s phonebook data can
be automatically transferred.