2013 TOYOTA CAMRY brake
[x] Cancel search: brakePage 28 of 336
28
1. BASIC INFORMATION BEFORE OPERATION
1. INITIAL SCREEN
1When the “POWER” <“ENGINE
START STOP”> switch is in ACCES-
SORY or ON
the initial screen will be displayed and
the system will begin operating. (Vehi-
cles with a smart key system)
When the engine switch is in the “ACC”
or “ON” position, the initial screen will
be displayed and the system will begin
operating. (Vehicles without a smart
key system)
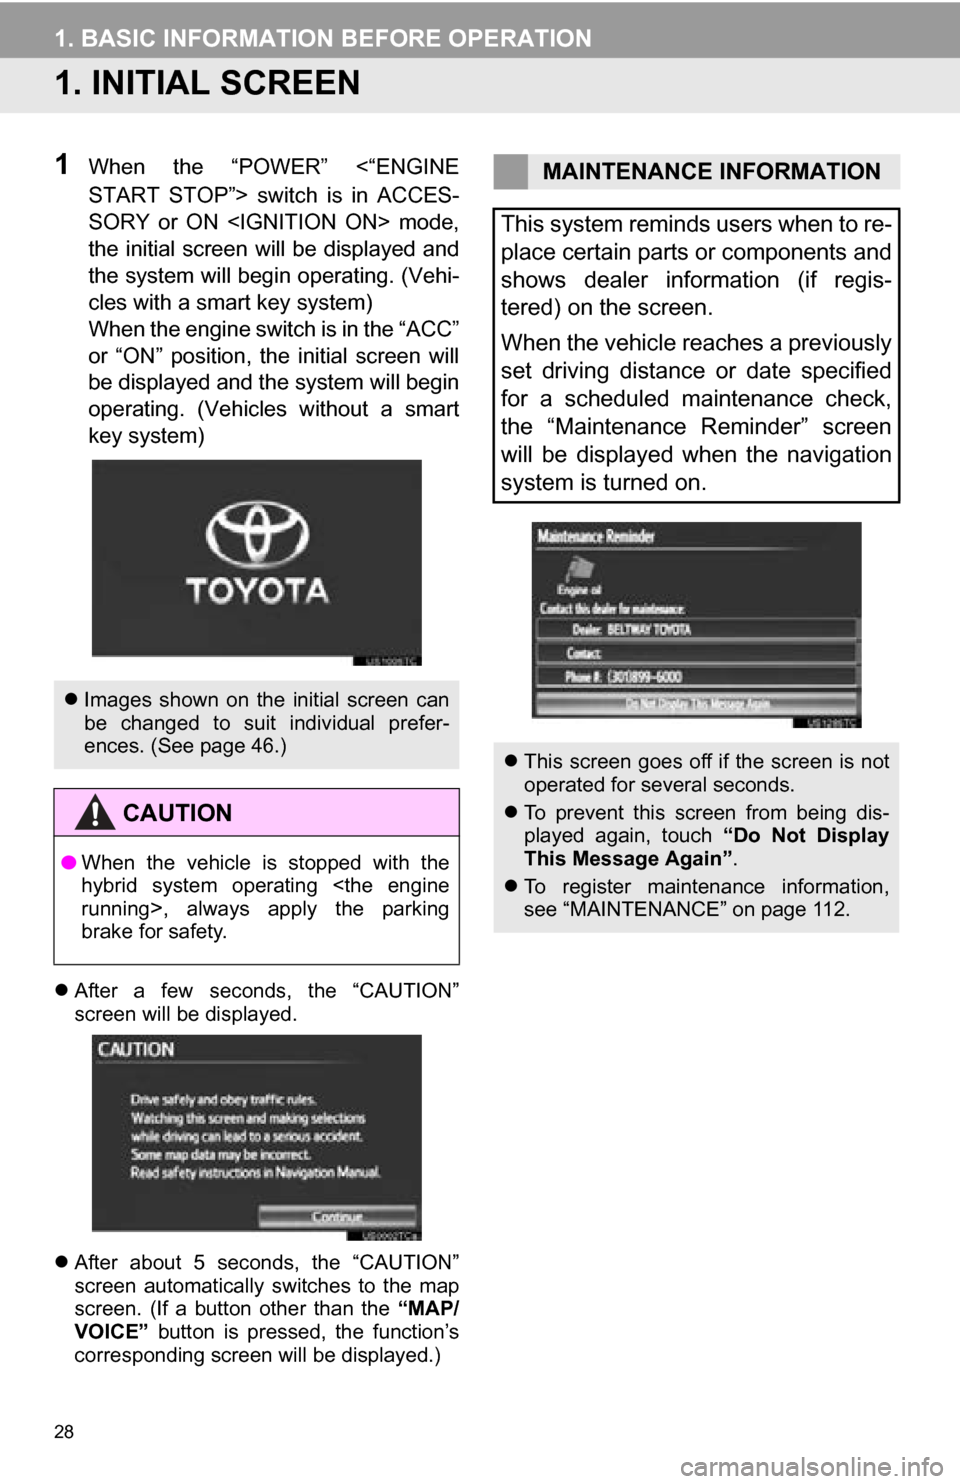
After a few seconds, the “CAUTION”
screen will be displayed.
After about 5 seconds, the “CAUTION”
screen automatically switches to the map
screen. (If a button other than the “MAP/
VOICE” button is pressed, the function’s
corresponding screen will be displayed.)
Images shown on the initial screen can
be changed to suit individual prefer-
ences. (See page 46.)
CAUTION
●When the vehicle is stopped with the
hybrid system operating
>, always apply the parking
brake for safety.
MAINTENANCE INFORMATION
This system reminds users when to re-
place certain parts or components and
shows dealer information (if regis-
tered) on the screen.
When the vehicle reaches a previously
set driving distance or date specified
for a scheduled maintenance check,
the “Maintenance Reminder” screen
will be displayed when the navigation
system is turned on.
This screen goes off if the screen is not
operated for several seconds.
To prevent this screen from being dis-
played again, touch “Do Not Display
This Message Again” .
To register maintenance information,
see “MAINTENANCE” on page 112.
Page 112 of 336

112
4. SETUP
2. VEHICLE SETTINGS
1Press the “SETUP” button.
2Touch “Vehicle” .
3Touch “Maintenance” .
4Touch the desired screen button.
Setting maintenance information. (See
page 112.)
Setting dealer. (See page 114.)
1Press the “SETUP” button.
2Touch “Vehicle” on the “Setup”
screen.
3Touch “Maintenance” on the “Vehicle
Settings” screen.
4Touch the desired screen button.
When the vehicle needs to be serviced,
the screen button color will change to
orange.
MAINTENANCE
When the navigation system is turned
on, the “Maintenance Reminder”
screen displays when it is time to re-
place a part or certain components.
(See page 28.)
MAINTENANCE INFORMATION
SETTING
Screen buttonFunction
“Engine oil”Replace engine oil
“Oil filter”Replace engine oil filter
“Rotation”Rotate tires
“Tires”Replace tires
“Battery”Replace 12-volt battery
“Brake pad”Replace brake pads
Page 113 of 336
113
4. SETUP
3
NAVIGATION SYSTEM
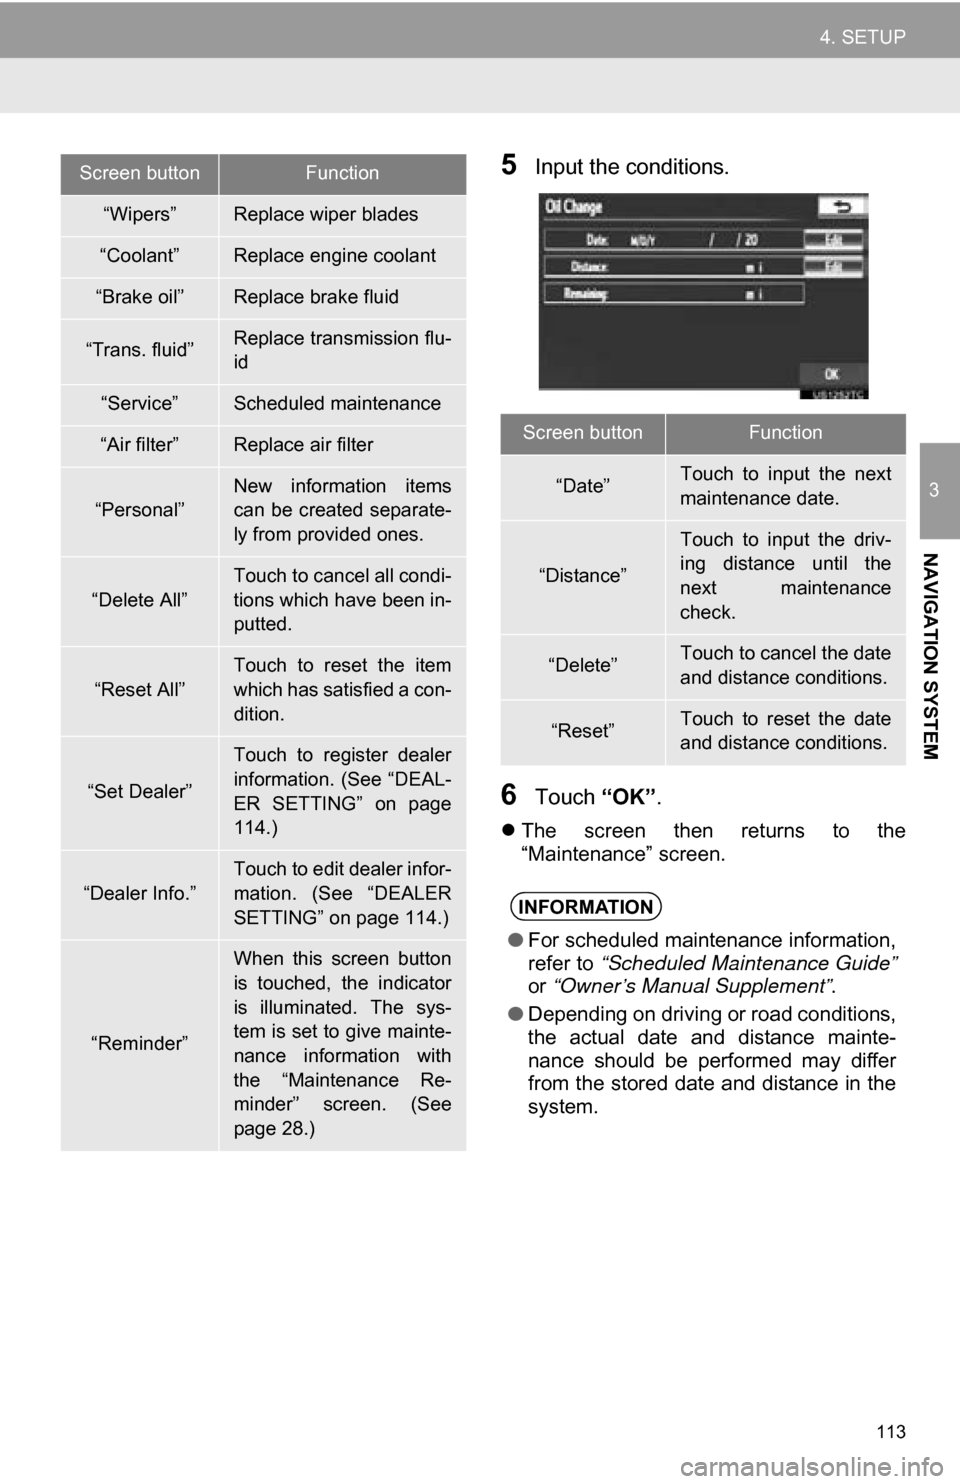
5Input the conditions.
6Touch “OK”.
The screen then returns to the
“Maintenance” screen.
“Wipers”Replace wiper blades
“Coolant”Replace engine coolant
“Brake oil”Replace brake fluid
“Trans. fluid”Replace transmission flu-
id
“Service”Scheduled maintenance
“Air filter”Replace air filter
“Personal”New information items
can be created separate-
ly from provided ones.
“Delete All”
Touch to cancel all condi-
tions which have been in-
putted.
“Reset All”
Touch to reset the item
which has satisfied a con-
dition.
“Set Dealer”
Touch to register dealer
information. (See “DEAL-
ER SETTING” on page
114.)
“Dealer Info.”
Touch to edit dealer infor-
mation. (See “DEALER
SETTING” on page 114.)
“Reminder”
When this screen button
is touched, the indicator
is illuminated. The sys-
tem is set to give mainte-
nance information with
the “Maintenance Re-
minder” screen. (See
page 28.)
Screen buttonFunction
Screen buttonFunction
“Date”Touch to input the next
maintenance date.
“Distance”
Touch to input the driv-
ing distance until the
next maintenance
check.
“Delete”Touch to cancel the date
and distance conditions.
“Reset”Touch to reset the date
and distance conditions.
INFORMATION
● For scheduled maintenance information,
refer to “Scheduled Maintenance Guide”
or “Owner’s Manual Supplement” .
● Depending on driving or road conditions,
the actual date and distance mainte-
nance should be performed may differ
from the stored date and distance in the
system.
Page 196 of 336
196
1. AUDIO/VIDEO SYSTEM OPERATION
7. DVD PLAYER OPERATION
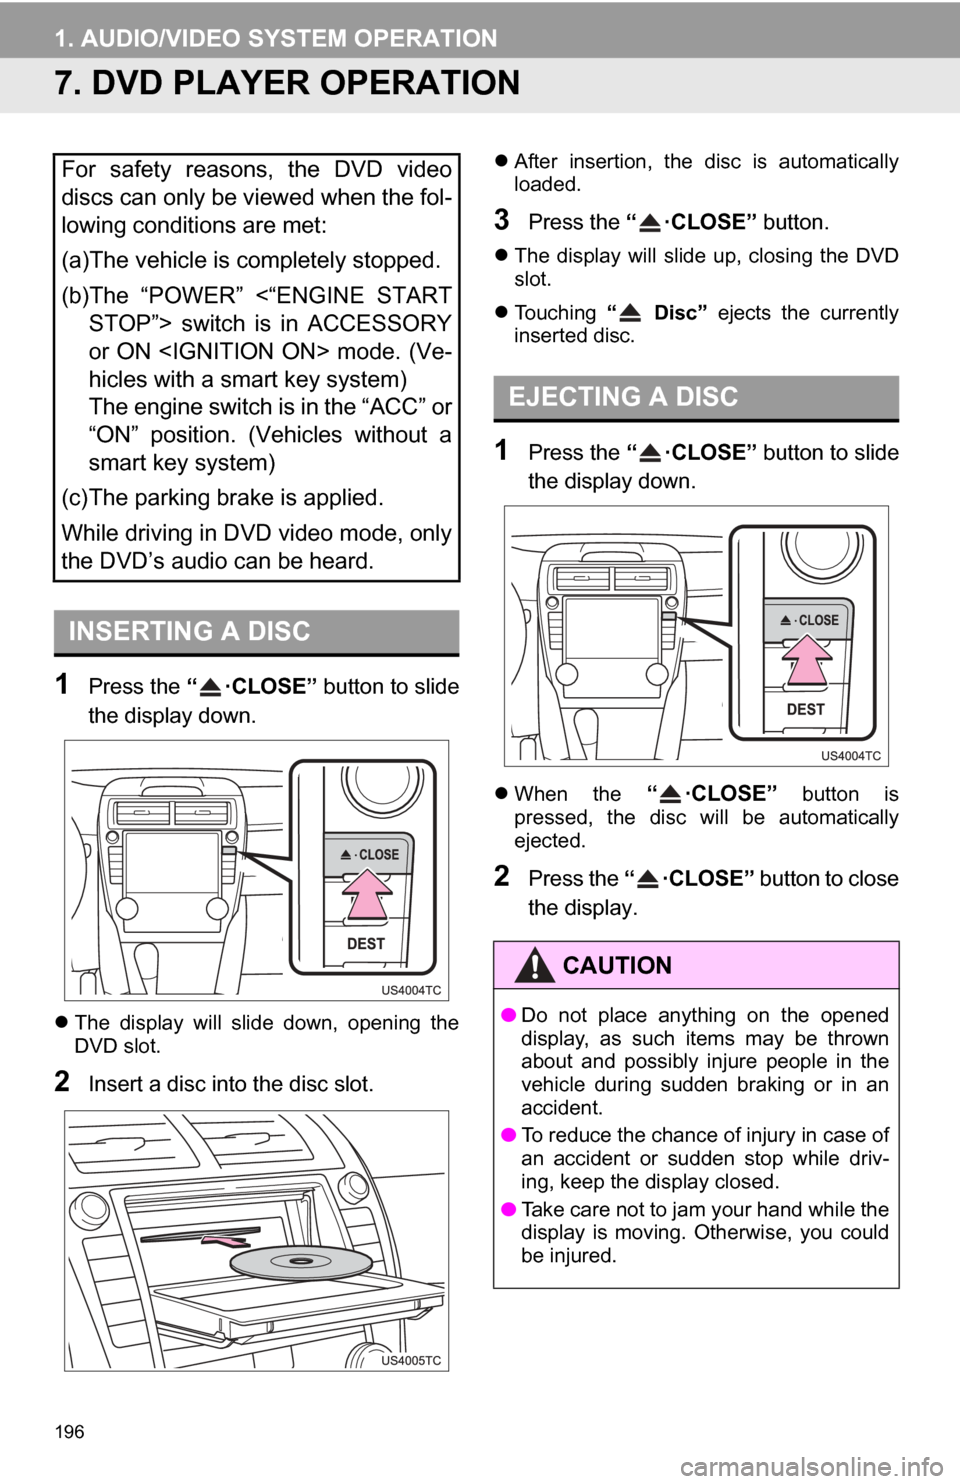
1Press the “ ·CLOSE” button to slide
the display down.
The display will slide down, opening the
DVD slot.
2Insert a disc into the disc slot.
After insertion, the disc is automatically
loaded.
3Press the “ ·CLOSE” button.
The display will slide up, closing the DVD
slot.
Touching “ Disc” ejects the currently
inserted disc.
1Press the “ ·CLOSE” button to slide
the display down.
When the “ ·CLOSE” button is
pressed, the disc will be automatically
ejected.
2Press the “ ·CLOSE” button to close
the display.
For safety reasons, the DVD video
discs can only be viewed when the fol-
lowing conditions are met:
(a)The vehicle is completely stopped.
(b)The “POWER” <“ENGINE START STOP”> switch is in ACCESSORY
or ON
hicles with a smart key system)
The engine switch is in the “ACC” or
“ON” position. (Vehicles without a
smart key system)
(c)The parking brake is applied.
While driving in DVD video mode, only
the DVD’s audio can be heard.
INSERTING A DISC
EJECTING A DISC
CAUTION
● Do not place anything on the opened
display, as such items may be thrown
about and possibly injure people in the
vehicle during sudden braking or in an
accident.
● To reduce the chance of injury in case of
an accident or sudden stop while driv-
ing, keep the display closed.
● Take care not to jam your hand while the
display is moving. Otherwise, you could
be injured.
Page 203 of 336
203
1. AUDIO/VIDEO SYSTEM OPERATION
5
AUDIO/VIDEO SYSTEM
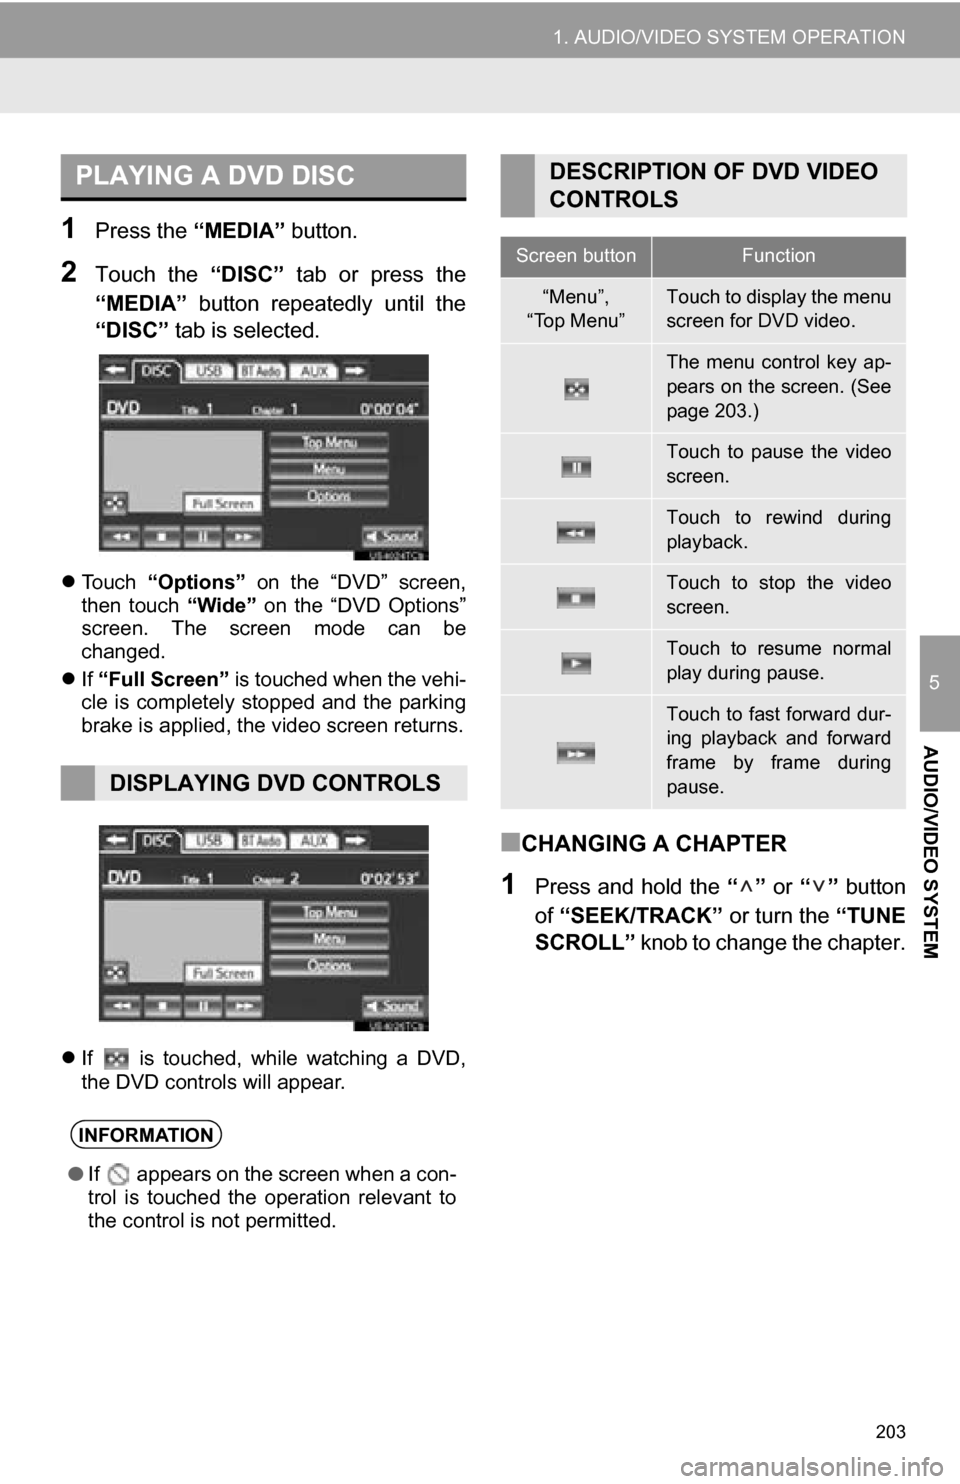
1Press the “MEDIA” button.
2Touch the “DISC” tab or press the
“MEDIA” button repeatedly until the
“DISC” tab is selected.
Touch “Options” on the “DVD” screen,
then touch “Wide” on the “DVD Options”
screen. The screen mode can be
changed.
If “Full Screen” is touched when the vehi-
cle is completely stopped and the parking
brake is applied, the video screen returns.
If is touched, while watching a DVD,
the DVD controls will appear.
■CHANGING A CHAPTER
1Press and hold the “” or “” button
of “SEEK/TRACK” or turn the “TUNE
SCROLL” knob to change the chapter.
PLAYING A DVD DISC
DISPLAYING DVD CONTROLS
INFORMATION
●If appears on the screen when a con-
trol is touched the operation relevant to
the control is not permitted.
DESCRIPTION OF DVD VIDEO
CONTROLS
Screen buttonFunction
“Menu”,
“Top Menu”Touch to display the menu
screen for DVD video.
The menu control key ap-
pears on the screen. (See
page 203.)
Touch to pause the video
screen.
Touch to rewind during
playback.
Touch to stop the video
screen.
Touch to resume normal
play during pause.
Touch to fast forward dur-
ing playback and forward
frame by frame during
pause.
Page 290 of 336
290
1. REAR VIEW MONITOR SYSTEM
1. REAR VIEW MONITOR SYSTEM
REAR VIEW MONITOR
SYSTEM
The rear view monitor system assists
the driver by displaying an image of the
view behind the vehicle with fixed
guide lines on the screen while backing
up, for example while parking.
INFORMATION
●The screen illustrations used in this text
are intended as examples, and may dif-
fer from the image that is actually dis-
played on the screen.
DRIVING PRECAUTIONS
When backing up, be sure to visually
check all around the vehicle both di-
rectly and using the mirrors before pro-
ceeding. If you do not, you may hit
another vehicle, and could possibly
cause an accident.
Pay attention to the following precau-
tions when using the rear view monitor
system.
CAUTION
●The rear view monitor system is a sup-
plemental device intended to assist the
driver when backing up. Never depend
on the rear view monitor system entirely
when backing up. Always make sure
your intended path is clear.
Use caution, just as you would when
backing up any vehicle.
● Never back up while looking only at the
screen.
The image shown on the screen may dif-
fer from the actual state, and you could
collide with another vehicle or obstacles
if backing up looking only at the screen,
possibly causing an accident. When
backing up, be sure to check in front of
and behind the vehicle, both directly and
with mirrors.
● Be sure to back up slowly, depressing
the brake pedal to control vehicle speed.
● The instructions given are only guide-
lines. When and how much to turn the
steering wheel will vary according to
traffic conditions, road surface condi-
tions, vehicle condition, etc. when park-
ing. It is necessary to be fully aware of
this before using the rear view monitor
system.
● When parking, be sure to check that the
parking space will accommodate your
vehicle before maneuvering into it.