Page 54 of 616

541-1. For safe use
Auris Touring Sports_EE (OM12G12E)
Key of letters inserted in the above table:
U: Suitable for “universal” category child restraint system approved
for the use in this mass group.
UF: Suitable for forward-facing “universal” category child restraint
system approved for the use in this mass group.
L1: Suitable for “TOYOTA G 0
+, BABY SAFE PLUS with SEAT BELT
FIXATION, BASE PLATFORM” (0 to 13 kg [0 to 28 lb.]) approved
for the use in this mass group.
L2: Suitable for “TOYOTA KIDFIX” (15 to 36 kg [34 to 79 lb.])
approved for the use in this mass group.
X: Not suitable seat position for children in this mass group.
*1: Adjust the front seatback to the most upright position. Move the front seat
cushion to the fully rearward.
Remove the head restraint if it interferes with your child restraint system.
Vehicles with a vertical height adjustment lever: Adjust the seat cushion to
the highest position.
Follow these procedures
• For installing a baby seat with support base
If the baby seat interferes with the seatback when latching the baby seat
into the support base, adjust the seatback rearward until there is no
interference.
• For installing a forward-facing child seat
If the seat belt shoulder anchor is ahead of the child seat belt guide,
move the seat cushion forward.
• For installing a junior seat
If the child in your child restraint system is in a very upright position,
adjust the seatback to the most comfortable position.
If the seat belt shoulder anchor is ahead of the child seat belt guide,
move the seat cushion forward.
*2: Remove the head restraint if it interferes with your child restraint system.
The child restraint system mentioned in the table may not be available
outside of the EU area.
Other child restraint system which is different from the system men-
tioned in the table can be used, but the suitability of the systems must
be carefully checked with the child restraint system manufacturer con-
cerned and the seller of those seats.
Page 56 of 616

561-1. For safe use
Auris Touring Sports_EE (OM12G12E)
(1) For the child restraint system which do not carry the ISO/XX size
class identification (A to G), for the applicable mass group, the
car manufacturer shall indicate the vehicle specific ISOFIX child
restraint system(s) recommended for each position.
Key of letters inserted in the above table:
IUF: Suitable for ISOFIX forward-facing child restraint systems of uni-
versal category approved for use in this mass group.
IL1: Toyota recommend to use “TOYOTA MINI” approved for the use
in this mass group.
IL2: Toyota recommend to use “TOYOTA MIDI” approved for the use
in this mass group.
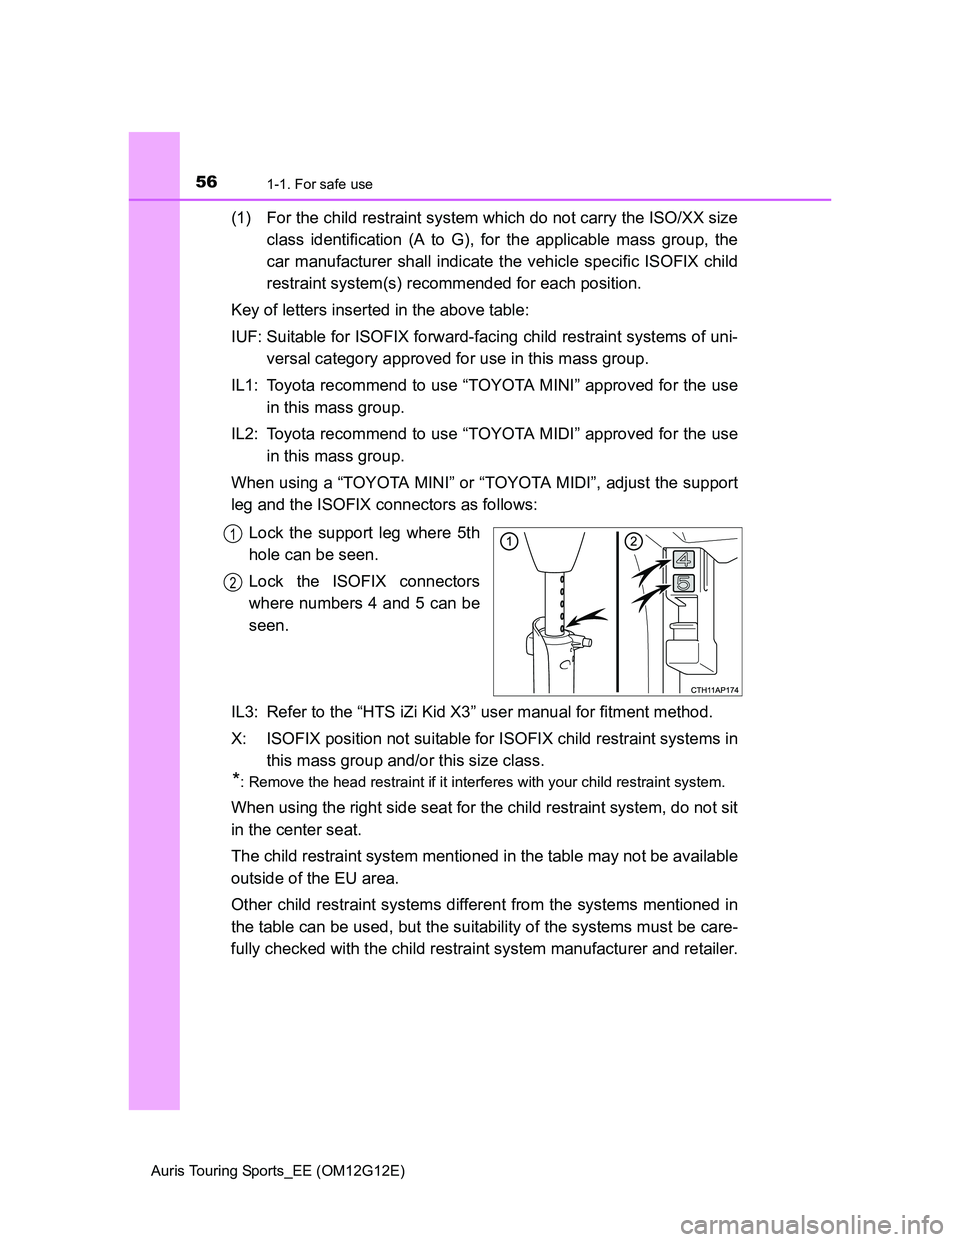
When using a “TOYOTA MINI” or “TOYOTA MIDI”, adjust the support
leg and the ISOFIX connectors as follows:
Lock the support leg where 5th
hole can be seen.
Lock the ISOFIX connectors
where numbers 4 and 5 can be
seen.
IL3: Refer to the “HTS iZi Kid X3” user manual for fitment method.
X: ISOFIX position not suitable for ISOFIX child restraint systems in
this mass group and/or this size class.
*: Remove the head restraint if it interferes with your child restraint system.
When using the right side seat for the child restraint system, do not sit
in the center seat.
The child restraint system mentioned in the table may not be available
outside of the EU area.
Other child restraint systems different from the systems mentioned in
the table can be used, but the suitability of the systems must be care-
fully checked with the child restraint system manufacturer and retailer.
1
2
Page 71 of 616

71
1
For safety and security
Auris Touring Sports_EE (OM12G12E)
1-2. Theft deterrent system
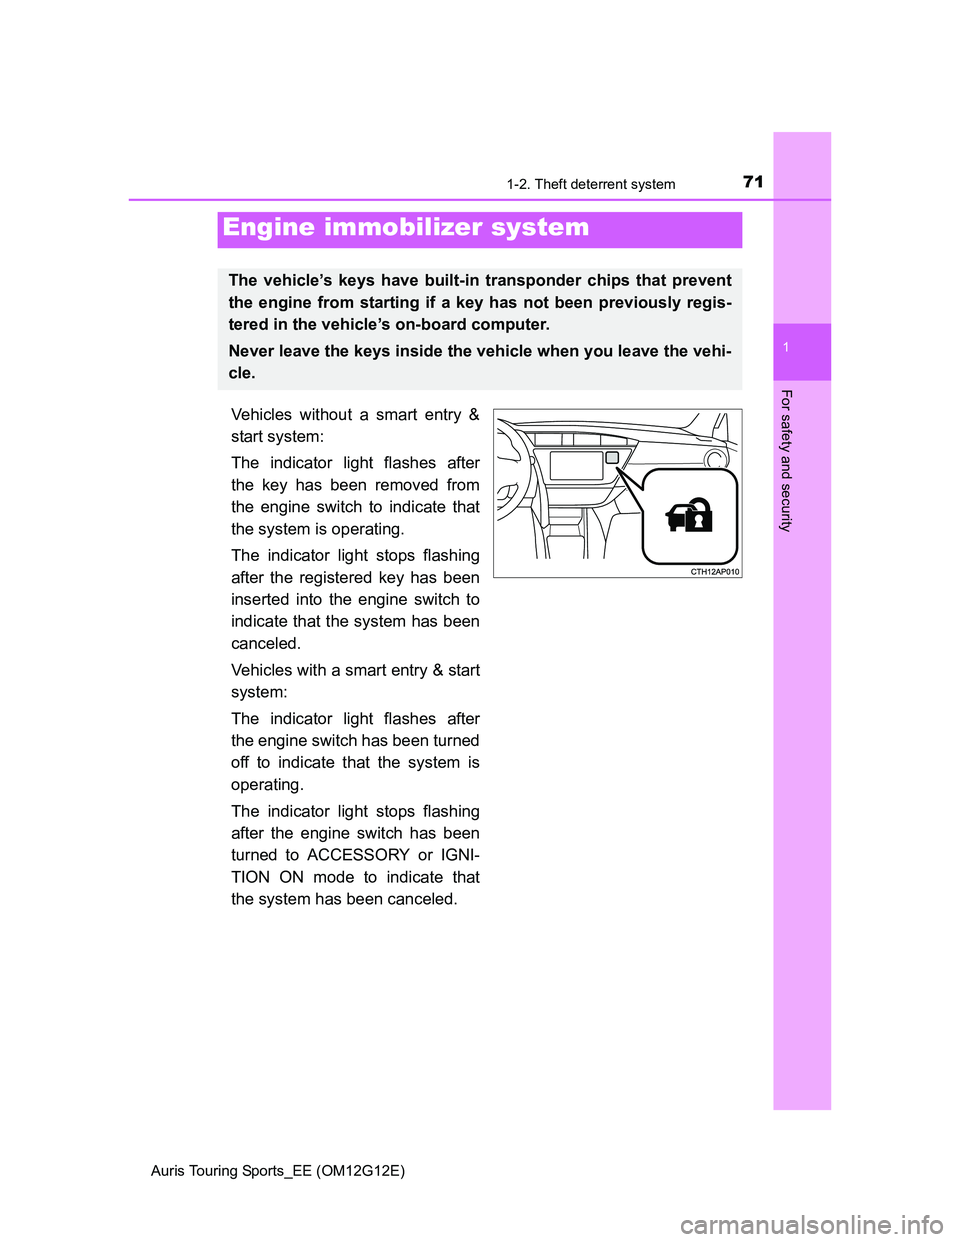
Vehicles without a smart entry &
start system:
The indicator light flashes after
the key has been removed from
the engine switch to indicate that
the system is operating.
The indicator light stops flashing
after the registered key has been
inserted into the engine switch to
indicate that the system has been
canceled.
Vehicles with a smart entry & start
system:
The indicator light flashes after
the engine switch has been turned
off to indicate that the system is
operating.
The indicator light stops flashing
after the engine switch has been
turned to ACCESSORY or IGNI-
TION ON mode to indicate that
the system has been canceled.
Engine immobilizer system
The vehicle’s keys have built-in transponder chips that prevent
the engine from starting if a key has not been previously regis-
tered in the vehicle’s on-board computer.
Never leave the keys inside the vehicle when you leave the vehi-
cle.
Page 72 of 616
721-2. Theft deterrent system
Auris Touring Sports_EE (OM12G12E)
System maintenance
The vehicle has a maintenance-free type engine immobilizer system.
Conditions that may cause the system to malfunction
If the grip portion of the key is in contact with a metallic object
If the key is in close proximity to or touching a key to the security system
(key with a built-in transponder chip) of another vehicle
Page 81 of 616
811-2. Theft deterrent system
1
For safety and security
Auris Touring Sports_EE (OM12G12E)Triggering of the alarm
The alarm may be triggered in the following situations:
(Stopping the alarm deactivates the alarm system.)
Alarm-operated door lock
When the alarm is operating, the doors are locked automatically to prevent
intruders.
Do not leave the key inside the vehicle when the alarm is operating, and
make sure the key is not inside the vehicle when recharging or replacing the
battery. The doors are unlocked using the key.
A person inside the vehicle opens a door
or the hood.
The battery is recharged or replaced
when the vehicle is locked. (P. 559)
NOTICE
To ensure the system operates correctly
Do not modify or remove the system. If modified or removed, the proper
operation of the system cannot be guaranteed.
Page 109 of 616
109
3
Operation of
each component
Auris Touring Sports_EE (OM12G12E)3-1. Key information
Keys ................................... 110
3-2. Opening, closing and
locking the doors
Smart entry & start
system ............................. 113
Wireless remote control ..... 132
Side doors.......................... 141
Back door........................... 144
3-3. Adjusting the seats
Front seats ......................... 148
Rear seats ......................... 150
Head restraints .................. 153
3-4. Adjusting the steering
wheel and mirrors
Steering wheel ................... 155
Inside rear view mirror ....... 156
Outside rear view
mirrors ............................. 158
3-5. Opening and closing the
windows
Power windows .................. 161
Page 110 of 616
110
Auris Touring Sports_EE (OM12G12E)
3-1. Key information
The following keys are provided with the vehicle.
Ty p e A
Keys
Operating the wireless remote con-
trol function (P. 132)
Key number plate
Ty p e B
Key (with a wireless remote
control function)
Operating the wireless remote con-
trol function (P. 132)
Key (without a wireless remote
control function)
Key number plate
Ty p e C
Electronic keys
• Operating the smart entry &
start system (P. 113)
• Operating the wireless remote
control function (P. 132)
Mechanical keys
Key number plate
Keys
The keys
1
2
1
2
3
1
2
3
Page 111 of 616

1113-1. Key information
Auris Touring Sports_EE (OM12G12E)
3
Operation of each component
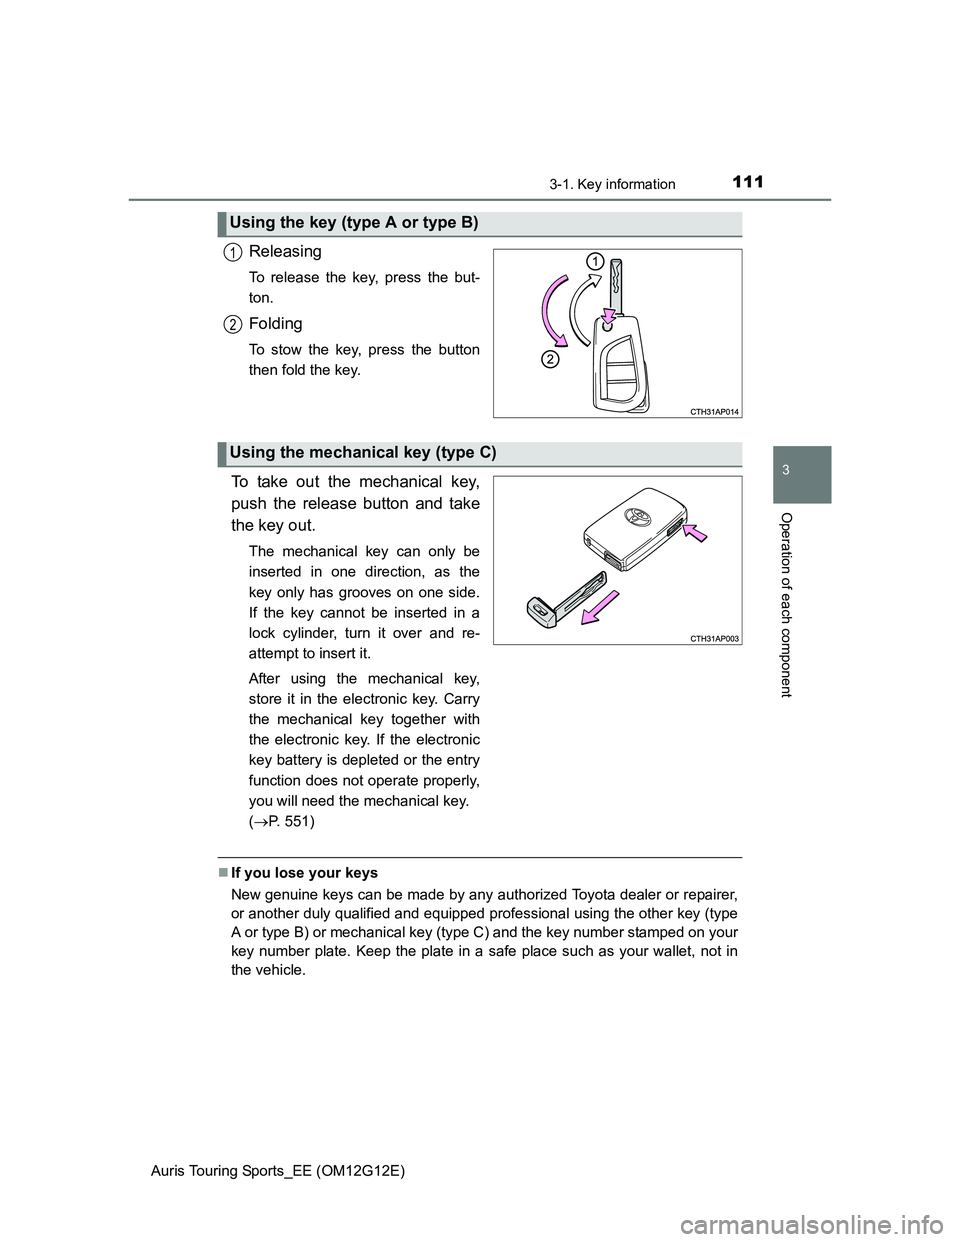
Releasing
To release the key, press the but-
ton.
Folding
To stow the key, press the button
then fold the key.
To take out the mechanical key,
push the release button and take
the key out.
The mechanical key can only be
inserted in one direction, as the
key only has grooves on one side.
If the key cannot be inserted in a
lock cylinder, turn it over and re-
attempt to insert it.
After using the mechanical key,
store it in the electronic key. Carry
the mechanical key together with
the electronic key. If the electronic
key battery is depleted or the entry
function does not operate properly,
you will need the mechanical key.
(P. 551)
If you lose your keys
New genuine keys can be made by any authorized Toyota dealer or repairer,
or another duly qualified and equipped professional using the other key (type
A or type B) or mechanical key (type C) and the key number stamped on your
key number plate. Keep the plate in a safe place such as your wallet, not in
the vehicle.
Using the key (type A or type B)
1
2
Using the mechanical key (type C)