2013 SUZUKI ERTIGA tow
[x] Cancel search: towPage 178 of 207
Downloaded from www.Manualslib.com manuals search engine 7-33INSPECTION AND MAINTENANCE
60MK0-14E
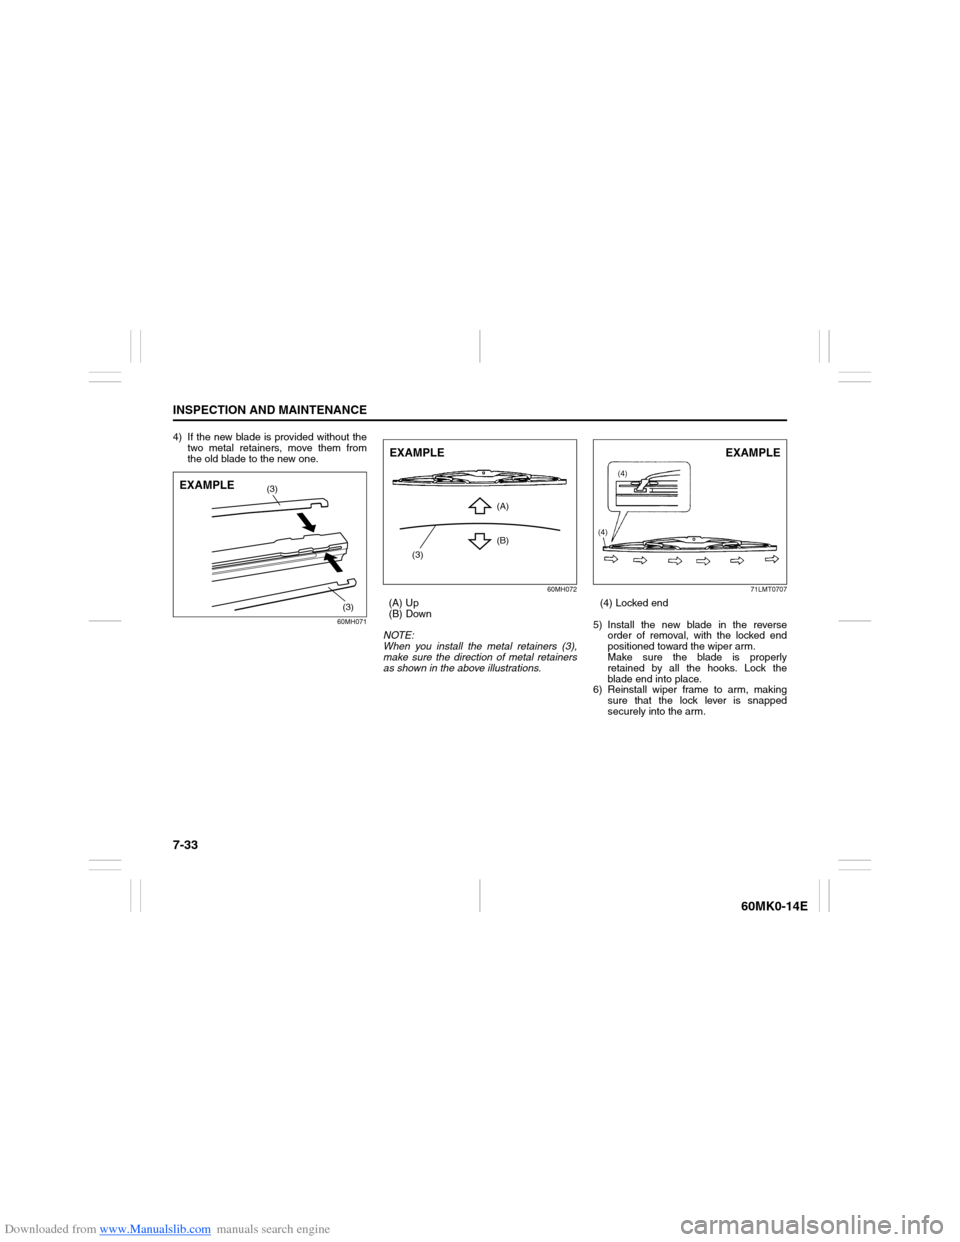
4) If the new blade is provided without the
two metal retainers, move them from
the old blade to the new one.
60MH07160MH072
(A) Up
(B) Down
NOTE:
When you install the metal retainers (3),
make sure the direction of metal retainers
as shown in the above illustrations.
71LMT0707
(4) Locked end
5) Install the new blade in the reverse
order of removal, with the locked end
positioned toward the wiper arm.
Make sure the blade is properly
retained by all the hooks. Lock the
blade end into place.
6) Reinstall wiper frame to arm, making
sure that the lock lever is snapped
securely into the arm.
(3)
(3)
EXAMPLE
(3)(A)
(B)
EXAMPLE
(4)(4)
EXAMPLE
Page 181 of 207
Downloaded from www.Manualslib.com manuals search engine EMERGENCY SERVICE
8
60MK0-14E
60G411
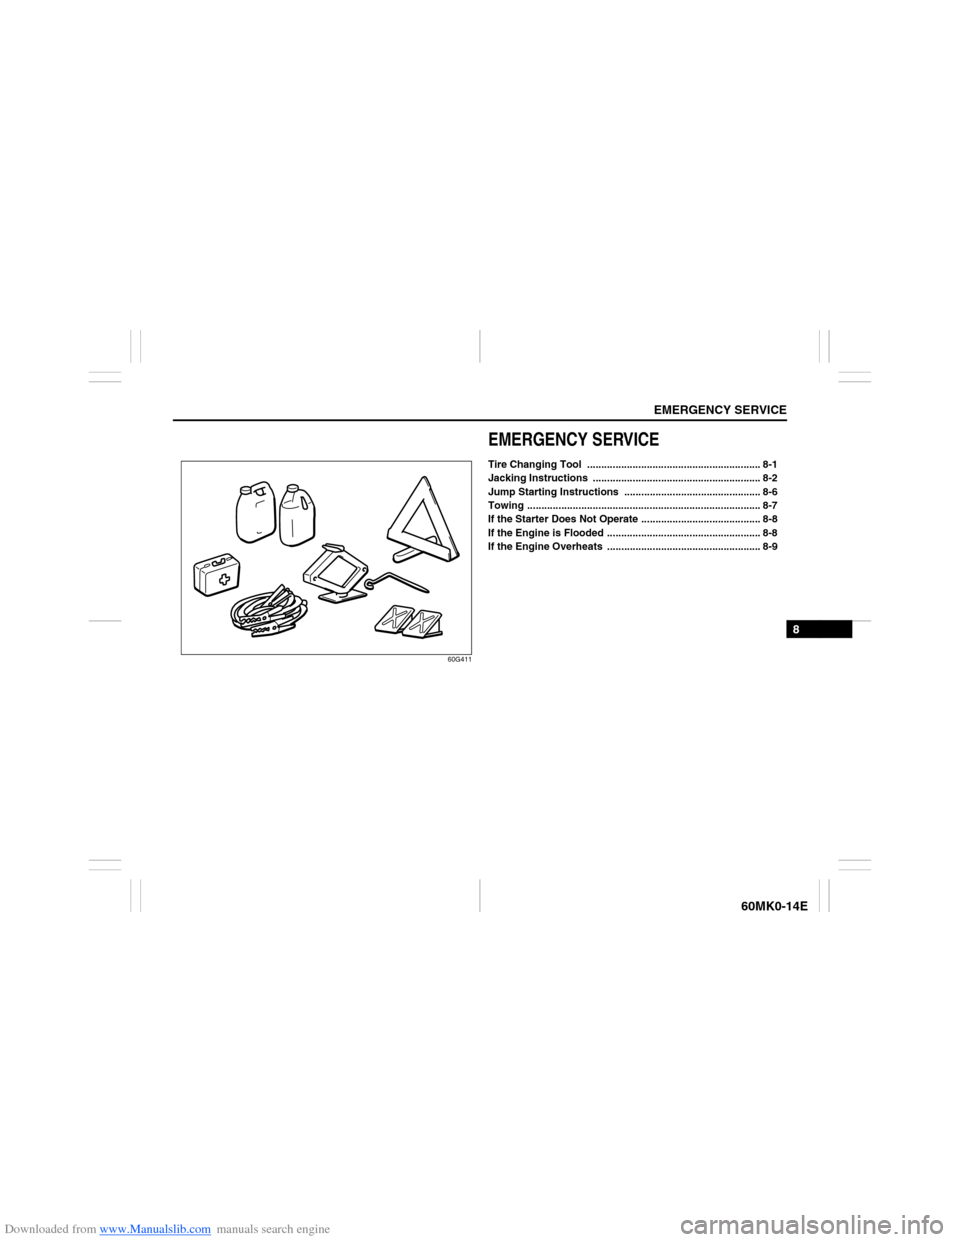
EMERGENCY SERVICETire Changing Tool ............................................................. 8-1
Jacking Instructions ........................................................... 8-2
Jump Starting Instructions ................................................ 8-6
Towing .................................................................................. 8-7
If the Starter Does Not Operate .......................................... 8-8
If the Engine is Flooded ...................................................... 8-8
If the Engine Overheats ...................................................... 8-9
Page 182 of 207
Downloaded from www.Manualslib.com manuals search engine 8-1EMERGENCY SERVICE
60MK0-14E
Tire Changing Tool
60MK031
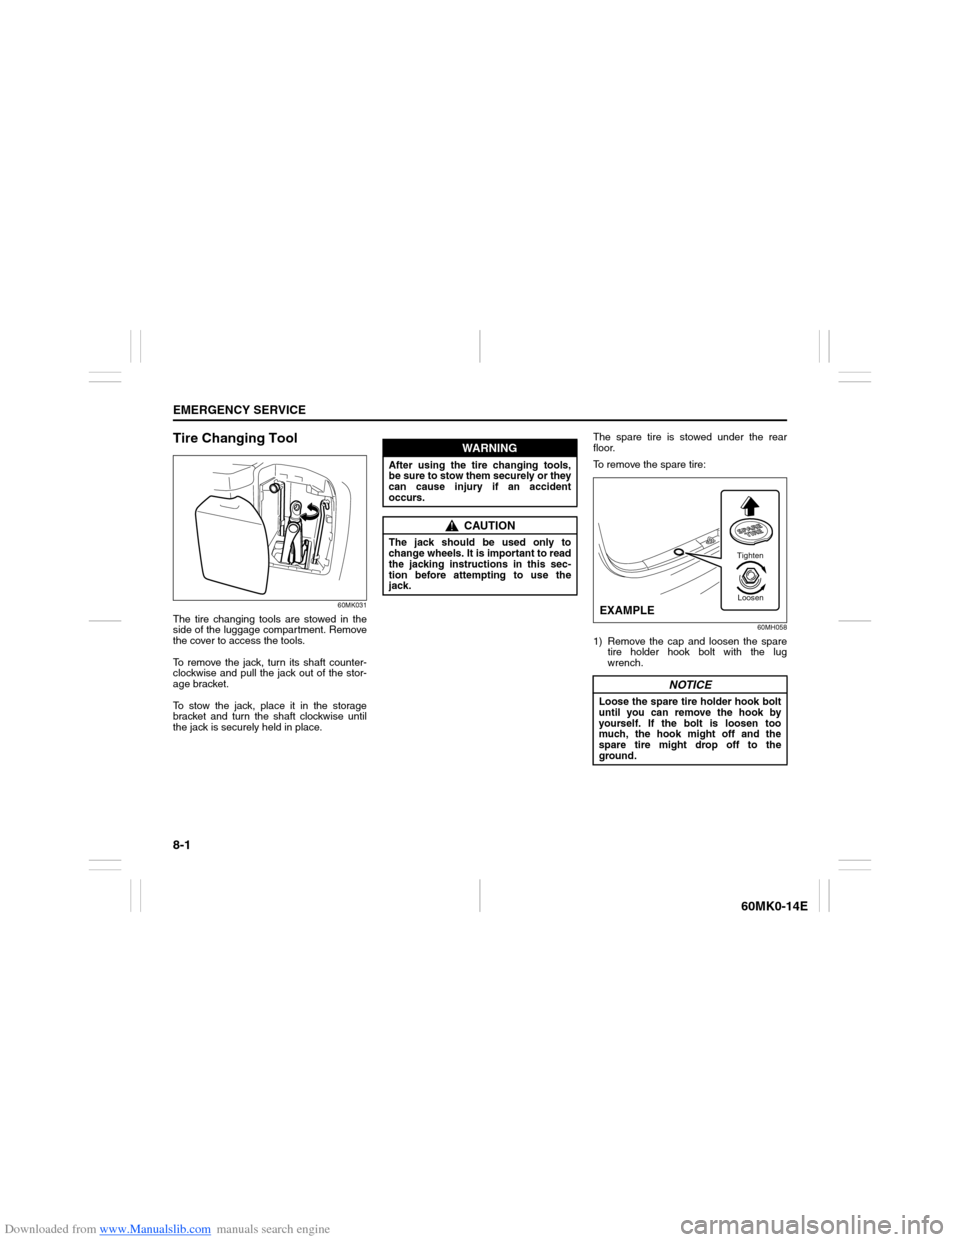
The tire changing tools are stowed in the
side of the luggage compartment. Remove
the cover to access the tools.
To remove the jack, turn its shaft counter-
clockwise and pull the jack out of the stor-
age bracket.
To stow the jack, place it in the storage
bracket and turn the shaft clockwise until
the jack is securely held in place.The spare tire is stowed under the rear
floor.
To remove the spare tire:
60MH058
1) Remove the cap and loosen the spare
tire holder hook bolt with the lug
wrench.
WARNING
After using the tire changing tools,
be sure to stow them securely or they
can cause injury if an accident
occurs.
CAUTION
The jack should be used only to
change wheels. It is important to read
the jacking instructions in this sec-
tion before attempting to use the
jack.
NOTICE
Loose the spare tire holder hook bolt
until you can remove the hook by
yourself. If the bolt is loosen too
much, the hook might off and the
spare tire might drop off to the
ground.
Tighten
Loosen
EXAMPLE
Page 187 of 207
Downloaded from www.Manualslib.com manuals search engine 8-6
EMERGENCY SERVICE
60MK0-14E
After Changing Wheels
Stow the tire changing tools (jack, jack
handle and lug wrench) in place. Also,
stow the flat tire in the spare tire stowed
position. Refer to “Tire Changing Tool” in
this section.
Jump Starting Instructions
When Jump Starting Your Vehicle,
Use the Following Procedure:1) Use only a 12-volt battery to jump start
your vehicle. Position the good 12-volt
battery close to your vehicle so that the
jump leads will reach both batteries.
When using a battery installed on
another vehicle, DO NOT LET THE
VEHICLES TOUCH. Set the parking
brakes fully on both vehicles.
2) Turn off all vehicle accessories, except
those necessary for safety reasons (for
example, headlights or hazard lights).
NOTICE
Repair or replace the flat tire immedi-
ately. If the flat tire is placed in the
spare tire stowed position for long
time, it can cause vehicle shakiness,
noise, or scratches.
WARNING
Never attempt to jump start your
vehicle if the battery appears to be
frozen. Batteries in this condition
may explode or rupture if jump
starting is attempted.
When making jump lead connec-
tions, be certain that your hands
and the jump leads remain clear
from pulleys, belts, or fans.
Batteries produce flammable
hydrogen gas. Keep flames and
sparks away from the battery or an
explosion may occur. Never smoke
when working in the vicinity of the
battery.
If the booster battery you use for
jump starting is installed in another
vehicle, make sure the two vehicles
are not touching each other.
If your battery discharges repeat-
edly, for no apparent reason, have
your vehicle inspected by an autho-
rized SUZUKI dealer.
To avoid harm to yourself or dam-
age to your vehicle or battery, fol-
low the jump starting instructions
below precisely and in order.
If you are in doubt, call for qualified
road service.
NOTICE
Your vehicle should not be started by
pushing or towing. This starting
method could result in permanent
damage to the catalytic converter.
Use jump leads to start a vehicle with
a weak or flat battery.
Page 188 of 207
Downloaded from www.Manualslib.com manuals search engine 8-7EMERGENCY SERVICE
60MK0-14E
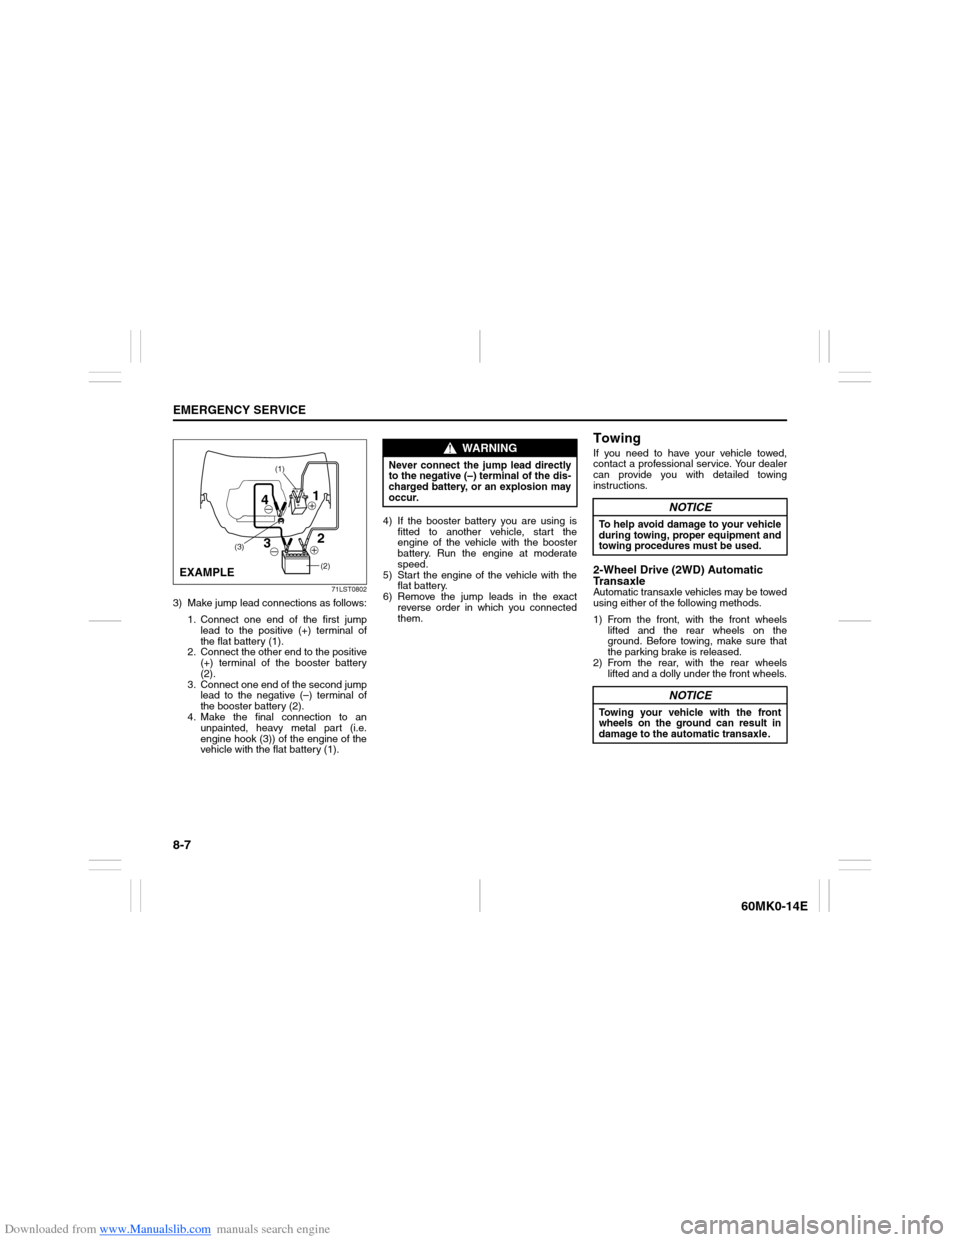
71LST0802
3) Make jump lead connections as follows:
1. Connect one end of the first jump
lead to the positive (+) terminal of
the flat battery (1).
2. Connect the other end to the positive
(+) terminal of the booster battery
(2).
3. Connect one end of the second jump
lead to the negative (–) terminal of
the booster battery (2).
4. Make the final connection to an
unpainted, heavy metal part (i.e.
engine hook (3)) of the engine of the
vehicle with the flat battery (1).4) If the booster battery you are using is
fitted to another vehicle, start the
engine of the vehicle with the booster
battery. Run the engine at moderate
speed.
5) Start the engine of the vehicle with the
flat battery.
6) Remove the jump leads in the exact
reverse order in which you connected
them.
TowingIf you need to have your vehicle towed,
contact a professional service. Your dealer
can provide you with detailed towing
instructions.2-Wheel Drive (2WD) Automatic
TransaxleAutomatic transaxle vehicles may be towed
using either of the following methods.
1) From the front, with the front wheels
lifted and the rear wheels on the
ground. Before towing, make sure that
the parking brake is released.
2) From the rear, with the rear wheels
lifted and a dolly under the front wheels.
(2)
(1)
(3)
1
2
3 4
EXAMPLE
WARNING
Never connect the jump lead directly
to the negative (–) terminal of the dis-
charged battery, or an explosion may
occur.
NOTICE
To help avoid damage to your vehicle
during towing, proper equipment and
towing procedures must be used.
NOTICE
Towing your vehicle with the front
wheels on the ground can result in
damage to the automatic transaxle.
Page 189 of 207

Downloaded from www.Manualslib.com manuals search engine 8-8
EMERGENCY SERVICE
60MK0-14E
2-Wheel Drive (2WD) Manual Tran-
saxleManual transaxle vehicles may be towed
using either of the following methods.
1) From the front, with the front wheels
lifted and the rear wheels on the
ground. Before towing, make sure that
the parking brake is released.
2) From the rear, with the rear wheels
lifted and the front wheels on the
ground, provided the steering and driv-
etrain are in operational condition.
Before towing, make sure that transaxle
is in neutral, the steering wheel is
unlocked (the ignition key should be in
the “ACC” position), and the steering
wheel is secured with a clamping
device designed for towing service.
If the Starter Does Not
Operate1) Try turning the ignition switch to the
“START” position with the headlights
turned on to determine the battery con-
dition. If the headlights go excessively
dim or go off, it usually means that
either the battery is flat or the battery
terminal contact is poor. Recharge the
battery or correct battery terminal con-
tact as necessary.
2) If the headlights remain bright, check
the fuses. If the reason for failure of the
starter is not obvious, there may be a
major electrical problem. Have the vehi-
cle inspected by your authorized
SUZUKI dealer.
If the Engine is FloodedIf the engine is flooded with gasoline, it
may be hard to start. If this happens, press
the accelerator pedal all the way to the
floor and hold it there while cranking the
engine. (Do not operate the starter motor
for more than 15 seconds).
NOTICE
The steering column is not strong
enough to withstand shocks trans-
mitted from the front wheels during
towing. Always unlock the steering
wheel before towing.
Page 206 of 207

Downloaded from www.Manualslib.com manuals search engine 12-4INDEX
60MK0-14E
Specified Oil ........................................................................... 7-7
Speedometer ........................................................................ 2-43
Starting a Cold and Warm Engine ........................................ 3-8
Starting the Engine ................................................................ 3-8
Steering ................................................................................ 7-19
Sun Visor .............................................................................. 5-39
Supplemental Restraint System (air bags)........................ 2-30TTachometer .......................................................................... 2-43
Tailgate ................................................................................... 2-4
Temperature Gauge ............................................................. 2-44
Theft Deterrent Alarm System .............................................. 2-7
Thermometer ........................................................................ 2-46
Tilt Steering Lock Lever...................................................... 2-55
Tire Chains ............................................................................. 4-4
Tire Changing Tool ................................................................ 8-1
Tire Inspection ..................................................................... 7-20
Tire Rotation......................................................................... 7-21
Tires ...................................................................................... 7-20
To Raise the Vehicle with a Garage Jack ............................ 8-3
Towing .................................................................................... 8-7
Trailer Towing ........................................................................ 6-1
Transaxle selector position indicator
(for automatic transaxle vehicles)...................................... 2-47
Transaxle Warning Light ..................................................... 2-41
Trip meter ............................................................................. 2-48
Turn Signal Control Lever................................................... 2-52
Turn Signal Indicators ......................................................... 2-42
Turn Signal Operation ......................................................... 2-52
UUniversal Serial Bus (USB) Socket..................................... 5-42
USB device ........................................................................... 5-23
Using the Transaxle ............................................................... 3-9VVehicle Cleaning .................................................................... 9-2
Vehicle Identification ........................................................... 10-1
Vehicle Loading...................................................................... 6-1WWalk-in Type Seats (for 2nd row seats) ............................. 2-17
Warning and Indicator Lights ............................................. 2-38
Washing .................................................................................. 9-4
Waxing .................................................................................... 9-5
Windows ............................................................................... 2-11
Windshield Washer .............................................................. 2-54
Windshield Washer Fluid .................................................... 7-35
Windshield Wiper and Washer Lever ................................. 2-53
Windshield Wipers ............................................................... 2-54
Wiper and Washer Operation .............................................. 2-54
Wiper Blades ........................................................................ 7-31