2013 SUZUKI ERTIGA parking brake
[x] Cancel search: parking brakePage 85 of 207
Downloaded from www.Manualslib.com manuals search engine 3-12
OPERATING YOUR VEHICLE
60MK0-14E
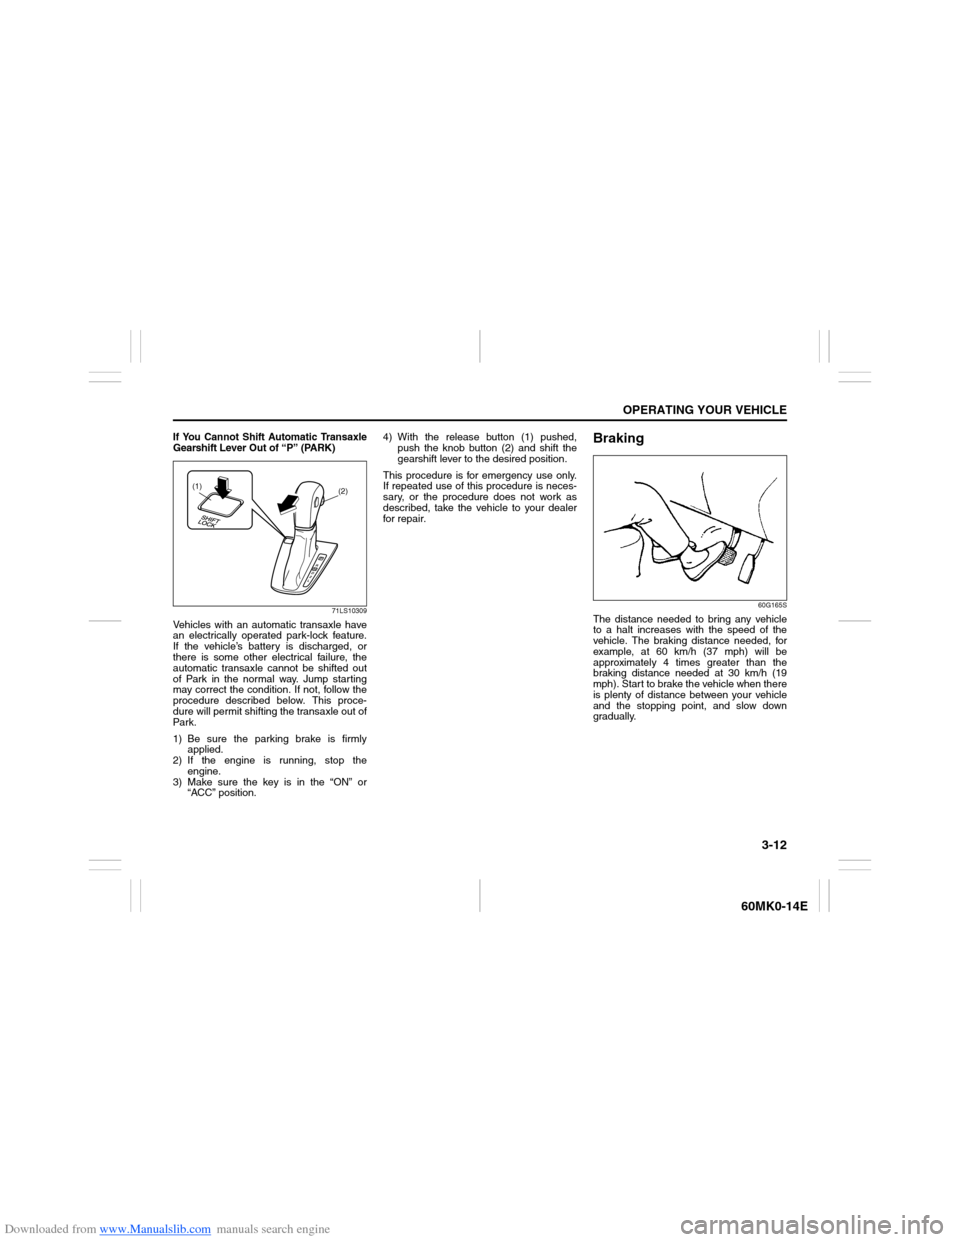
If You Cannot Shift Automatic Transaxle
Gearshift Lever Out of “P” (PARK)
71LS10309
Vehicles with an automatic transaxle have
an electrically operated park-lock feature.
If the vehicle’s battery is discharged, or
there is some other electrical failure, the
automatic transaxle cannot be shifted out
of Park in the normal way. Jump starting
may correct the condition. If not, follow the
procedure described below. This proce-
dure will permit shifting the transaxle out of
Par k.
1) Be sure the parking brake is firmly
applied.
2) If the engine is running, stop the
engine.
3) Make sure the key is in the “ON” or
“ACC” position.4) With the release button (1) pushed,
push the knob button (2) and shift the
gearshift lever to the desired position.
This procedure is for emergency use only.
If repeated use of this procedure is neces-
sary, or the procedure does not work as
described, take the vehicle to your dealer
for repair.
Braking
60G165S
The distance needed to bring any vehicle
to a halt increases with the speed of the
vehicle. The braking distance needed, for
example, at 60 km/h (37 mph) will be
approximately 4 times greater than the
braking distance needed at 30 km/h (19
mph). Start to brake the vehicle when there
is plenty of distance between your vehicle
and the stopping point, and slow down
gradually.
(2)
(1)
Page 146 of 207
Downloaded from www.Manualslib.com manuals search engine 7-1INSPECTION AND MAINTENANCE
60MK0-14E
60B128S
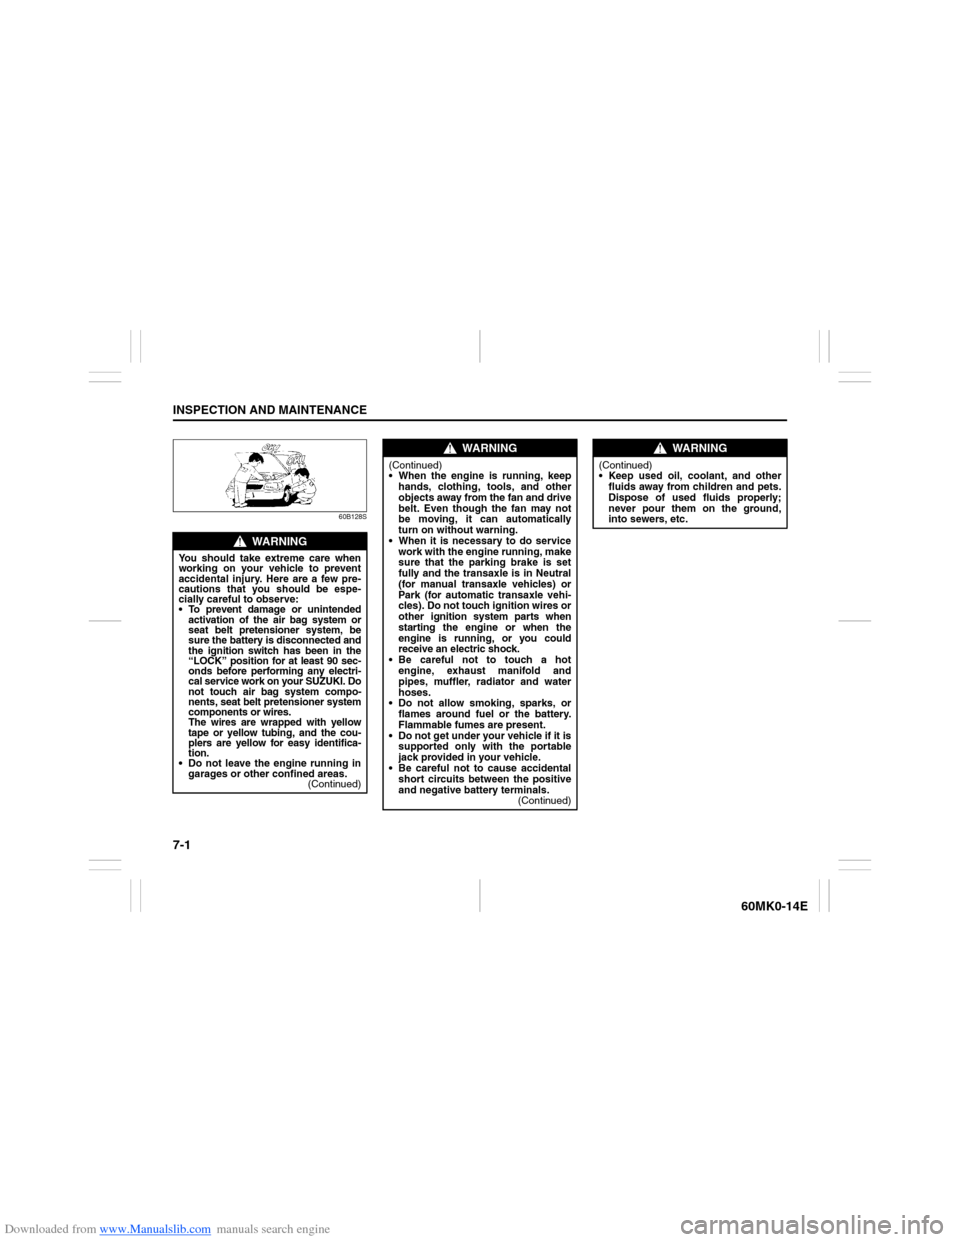
WARNING
You should take extreme care when
working on your vehicle to prevent
accidental injury. Here are a few pre-
cautions that you should be espe-
cially careful to observe:
To prevent damage or unintended
activation of the air bag system or
seat belt pretensioner system, be
sure the battery is disconnected and
the ignition switch has been in the
“LOCK” position for at least 90 sec-
onds before performing any electri-
cal service work on your SUZUKI. Do
not touch air bag system compo-
nents, seat belt pretensioner system
components or wires.
The wires are wrapped with yellow
tape or yellow tubing, and the cou-
plers are yellow for easy identifica-
tion.
Do not leave the engine running in
garages or other confined areas.
(Continued)
WARNING
(Continued)
When the engine is running, keep
hands, clothing, tools, and other
objects away from the fan and drive
belt. Even though the fan may not
be moving, it can automatically
turn on without warning.
When it is necessary to do service
work with the engine running, make
sure that the parking brake is set
fully and the transaxle is in Neutral
(for manual transaxle vehicles) or
Park (for automatic transaxle vehi-
cles). Do not touch ignition wires or
other ignition system parts when
starting the engine or when the
engine is running, or you could
receive an electric shock.
Be careful not to touch a hot
engine, exhaust manifold and
pipes, muffler, radiator and water
hoses.
Do not allow smoking, sparks, or
flames around fuel or the battery.
Flammable fumes are present.
Do not get under your vehicle if it is
supported only with the portable
jack provided in your vehicle.
Be careful not to cause accidental
short circuits between the positive
and negative battery terminals.
(Continued)
WARNING
(Continued)
Keep used oil, coolant, and other
fluids away from children and pets.
Dispose of used fluids properly;
never pour them on the ground,
into sewers, etc.
Page 160 of 207
Downloaded from www.Manualslib.com manuals search engine 7-15INSPECTION AND MAINTENANCE
60MK0-14E
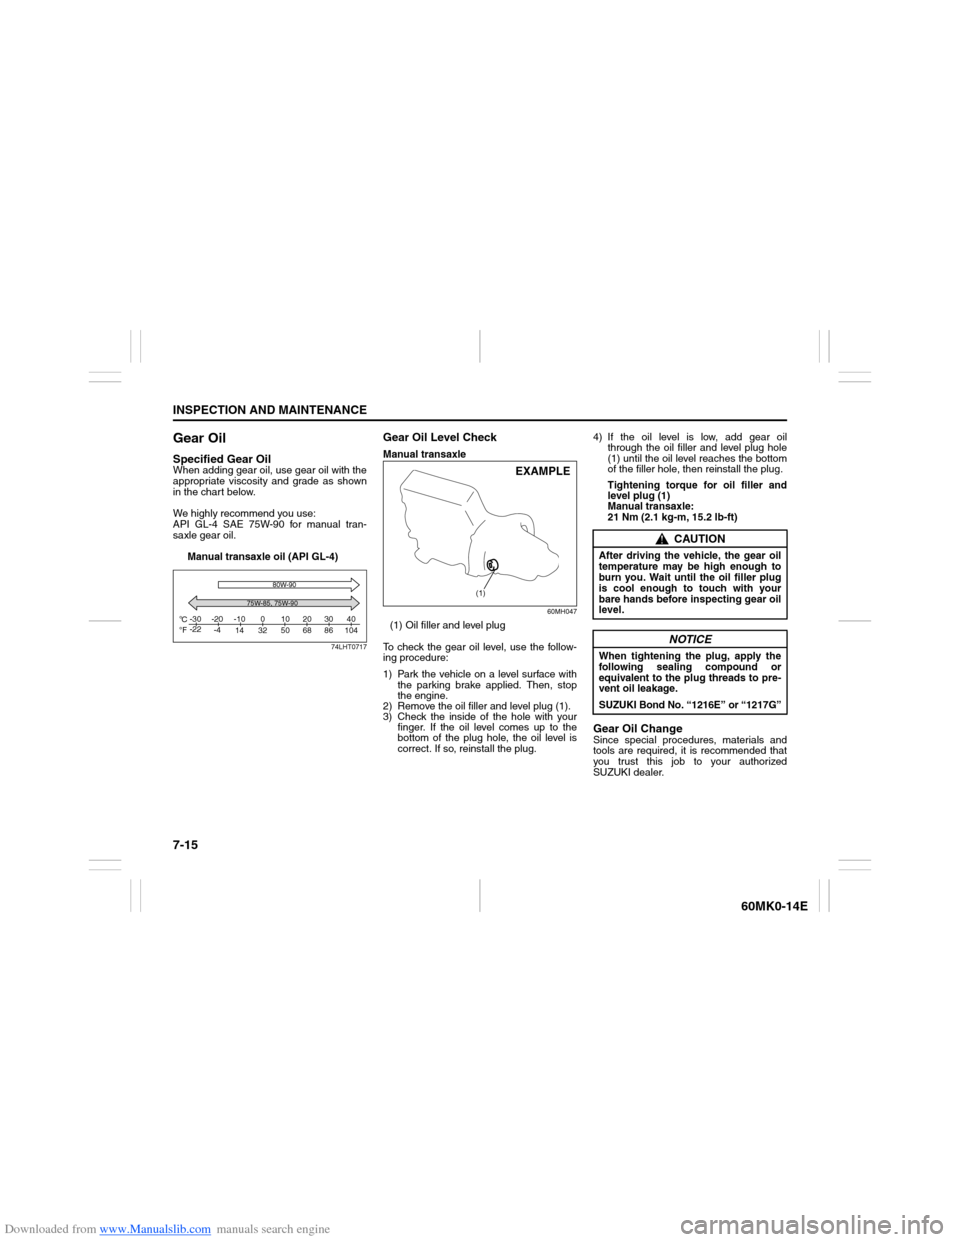
Gear OilSpecified Gear OilWhen adding gear oil, use gear oil with the
appropriate viscosity and grade as shown
in the chart below.
We highly recommend you use:
API GL-4 SAE 75W-90 for manual tran-
saxle gear oil.
Manual transaxle oil (API GL-4)
74LHT0717
Gear Oil Level CheckManual transaxle
60MH047
(1) Oil filler and level plug
To check the gear oil level, use the follow-
ing procedure:
1) Park the vehicle on a level surface with
the parking brake applied. Then, stop
the engine.
2) Remove the oil filler and level plug (1).
3) Check the inside of the hole with your
finger. If the oil level comes up to the
bottom of the plug hole, the oil level is
correct. If so, reinstall the plug.4) If the oil level is low, add gear oil
through the oil filler and level plug hole
(1) until the oil level reaches the bottom
of the filler hole, then reinstall the plug.
Tightening torque for oil filler and
level plug (1)
Manual transaxle:
21 Nm (2.1 kg-m, 15.2 lb-ft)
Gear Oil ChangeSince special procedures, materials and
tools are required, it is recommended that
you trust this job to your authorized
SUZUKI dealer.
C
Fo o-30
-22-20
-4-10
14 32 50 68 86 104010203040
75W-85, 75W-9080W-90
(1)
EXAMPLE
CAUTION
After driving the vehicle, the gear oil
temperature may be high enough to
burn you. Wait until the oil filler plug
is cool enough to touch with your
bare hands before inspecting gear oil
level.
NOTICE
When tightening the plug, apply the
following sealing compound or
equivalent to the plug threads to pre-
vent oil leakage.
SUZUKI Bond No. “1216E” or “1217G”
Page 161 of 207
Downloaded from www.Manualslib.com manuals search engine 7-16
INSPECTION AND MAINTENANCE
60MK0-14E
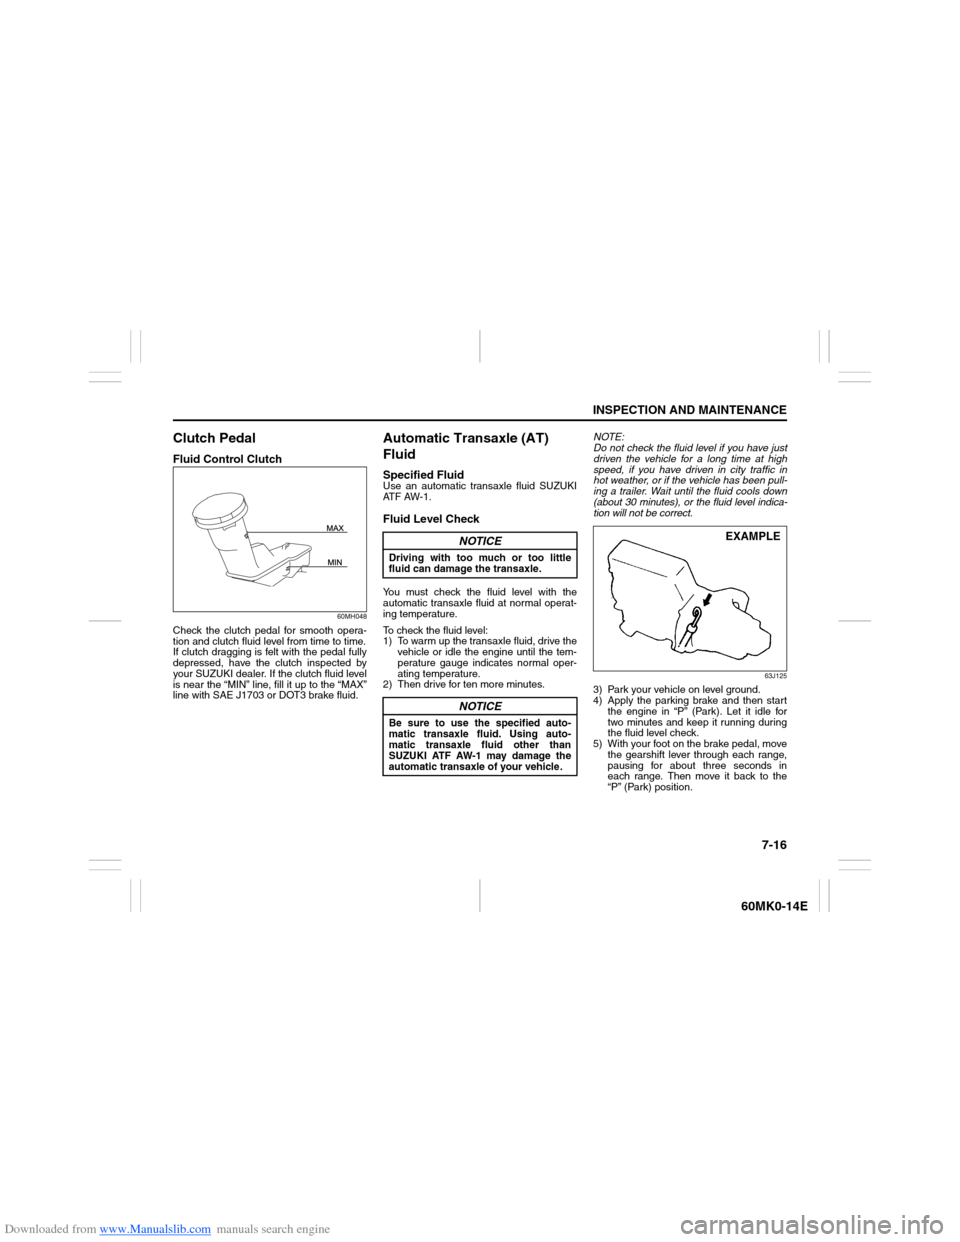
Clutch PedalFluid Control Clutch
60MH048
Check the clutch pedal for smooth opera-
tion and clutch fluid level from time to time.
If clutch dragging is felt with the pedal fully
depressed, have the clutch inspected by
your SUZUKI dealer. If the clutch fluid level
is near the “MIN” line, fill it up to the “MAX”
line with SAE J1703 or DOT3 brake fluid.
Automatic Transaxle (AT)
FluidSpecified FluidUse an automatic transaxle fluid SUZUKI
AT F A W - 1 .Fluid Level CheckYou must check the fluid level with the
automatic transaxle fluid at normal operat-
ing temperature.
To check the fluid level:
1) To warm up the transaxle fluid, drive the
vehicle or idle the engine until the tem-
perature gauge indicates normal oper-
ating temperature.
2) Then drive for ten more minutes.NOTE:
Do not check the fluid level if you have just
driven the vehicle for a long time at high
speed, if you have driven in city traffic in
hot weather, or if the vehicle has been pull-
ing a trailer. Wait until the fluid cools down
(about 30 minutes), or the fluid level indica-
tion will not be correct.
63J125
3) Park your vehicle on level ground.
4) Apply the parking brake and then start
the engine in “P” (Park). Let it idle for
two minutes and keep it running during
the fluid level check.
5) With your foot on the brake pedal, move
the gearshift lever through each range,
pausing for about three seconds in
each range. Then move it back to the
“P” (Park) position.
NOTICE
Driving with too much or too little
fluid can damage the transaxle.
NOTICE
Be sure to use the specified auto-
matic transaxle fluid. Using auto-
matic transaxle fluid other than
SUZUKI ATF AW-1 may damage the
automatic transaxle of your vehicle.
EXAMPLE
Page 163 of 207

Downloaded from www.Manualslib.com manuals search engine 7-18
INSPECTION AND MAINTENANCE
60MK0-14E
NOTE:
With disc brakes, the fluid level can be
expected to gradually fall as the brake
pads wear.Brake PedalCheck if the brake pedal stops at the regu-
lar height without “spongy” feeling when
you depress it. If not, have the brake sys-
tem inspected by your SUZUKI dealer. If
you doubt the brake pedal for the regular
height, check it as follows:
54G108
Pedal to floor carpet minimum dis-
tance “a”: 59 mm (2.3 in.)
With the engine running, measure the dis-
tance between the brake pedal and floor
carpet when the pedal is depressed with
approximately 30 kg (66 lbs) of force. The
minimum distance required is as specified.
Since your vehicle’s brake system is self-
adjusting, there is no need for pedal
adjustment.
If the pedal to floor carpet distance as
measured above is less than the minimum
distance required, have your vehicle
inspected by your SUZUKI dealer.
NOTE:
When measuring the distance between the
brake pedal and floor wall, be sure not to
include the floor mat or rubber on the floor
wall in your measurement.
WARNING
Failure to follow the guidelines below
can result in personal injury or seri-
ous damage to the brake system.
If the brake fluid in the reservoir
drops below a certain level, the
brake warning light on the instru-
ment panel will come on (the
engine must be running with the
parking brake fully disengaged).
Should the light come on, immedi-
ately ask your SUZUKI dealer to
inspect the brake system.
A rapid fluid loss indicates a leak in
the brake system which should be
inspected by your SUZUKI dealer
immediately.
Do not use any fluid other than SAE
J1703 or DOT3 brake fluid. Do not
use reclaimed fluid or fluid that has
been stored in old or open contain-
ers. It is essential that foreign parti-
cles and other liquids are kept out
of the brake fluid reservoir.
CAUTION
Brake fluid can harm your eyes and
damage painted surfaces. Use cau-
tion when refilling the reservoir.
WARNING
Brake fluid is harmful or fatal if swal-
lowed, and harmful if it comes in con-
tact with skin or eyes. If swallowed,
do not induce vomiting. Immediately
contact a poison control center or a
physician. If brake fluid gets in eyes,
flush eyes with water and seek medi-
cal attention. Wash thoroughly after
handling. Solution can be poisonous
to animals. Keep out of the reach of
children and animals.
Page 164 of 207

Downloaded from www.Manualslib.com manuals search engine 7-19INSPECTION AND MAINTENANCE
60MK0-14E
60G104S
Parking Brake
54G109
Ratchet tooth specification “b”:
4th – 9th
Lever pull force (1):
200 N (20 kg, 44 lbs)
Check the parking brake for proper adjust-
ment by counting the number of clicks
made by the ratchet teeth as you slowly
pull up on the parking brake lever to the
point of full engagement. The parking
brake lever should stop between the speci-
fied ratchet teeth and the rear wheels
should be securely locked. If the parking
brake is not properly adjusted or the
brakes drag after the lever has been fully
released, have the parking brake inspected
and/or adjusted by your SUZUKI dealer.
Steering
68LM708
Steering wheel play “c”:
0 – 30 mm (0.0 – 1.2 in.)
Check the play of the steering wheel by
gently turning it from left to right and mea-
suring the distance that it moves before
you feel slight resistance. The play should
be between the specified values.
Check that the steering wheel turns easily
and smoothly without rattling by turning it
all the way to the right and to the left while
driving very slowly in an open area. If the
amount of free play is outside the specifi-
cation or you find anything else to be
wrong, an inspection must be performed
by your SUZUKI dealer.
WARNING
If you experience any of the following
problems with your vehicle’s brake
system, have the vehicle inspected
immediately by your SUZUKI dealer.
Poor braking performance
Uneven braking (brakes not work-
ing uniformly on all wheels.)
Excessive pedal travel
Brake dragging
Excessive noise
EXAMPLE
“c”
EXAMPLE
Page 183 of 207
Downloaded from www.Manualslib.com manuals search engine 8-2
EMERGENCY SERVICE
60MK0-14E
60MK010
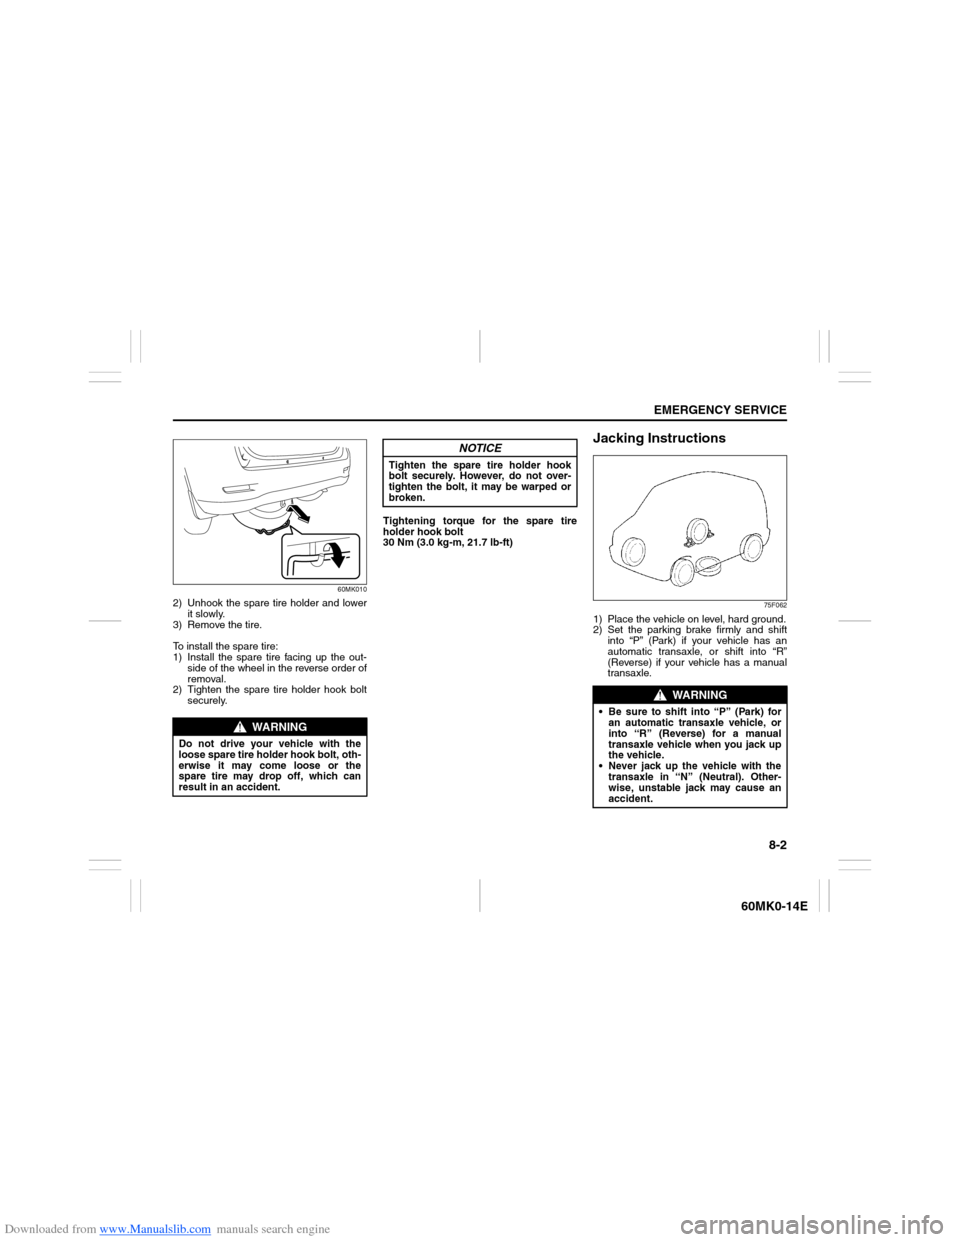
2) Unhook the spare tire holder and lower
it slowly.
3) Remove the tire.
To install the spare tire:
1) Install the spare tire facing up the out-
side of the wheel in the reverse order of
removal.
2) Tighten the spare tire holder hook bolt
securely.Tightening torque for the spare tire
holder hook bolt
30 Nm (3.0 kg-m, 21.7 lb-ft)
Jacking Instructions
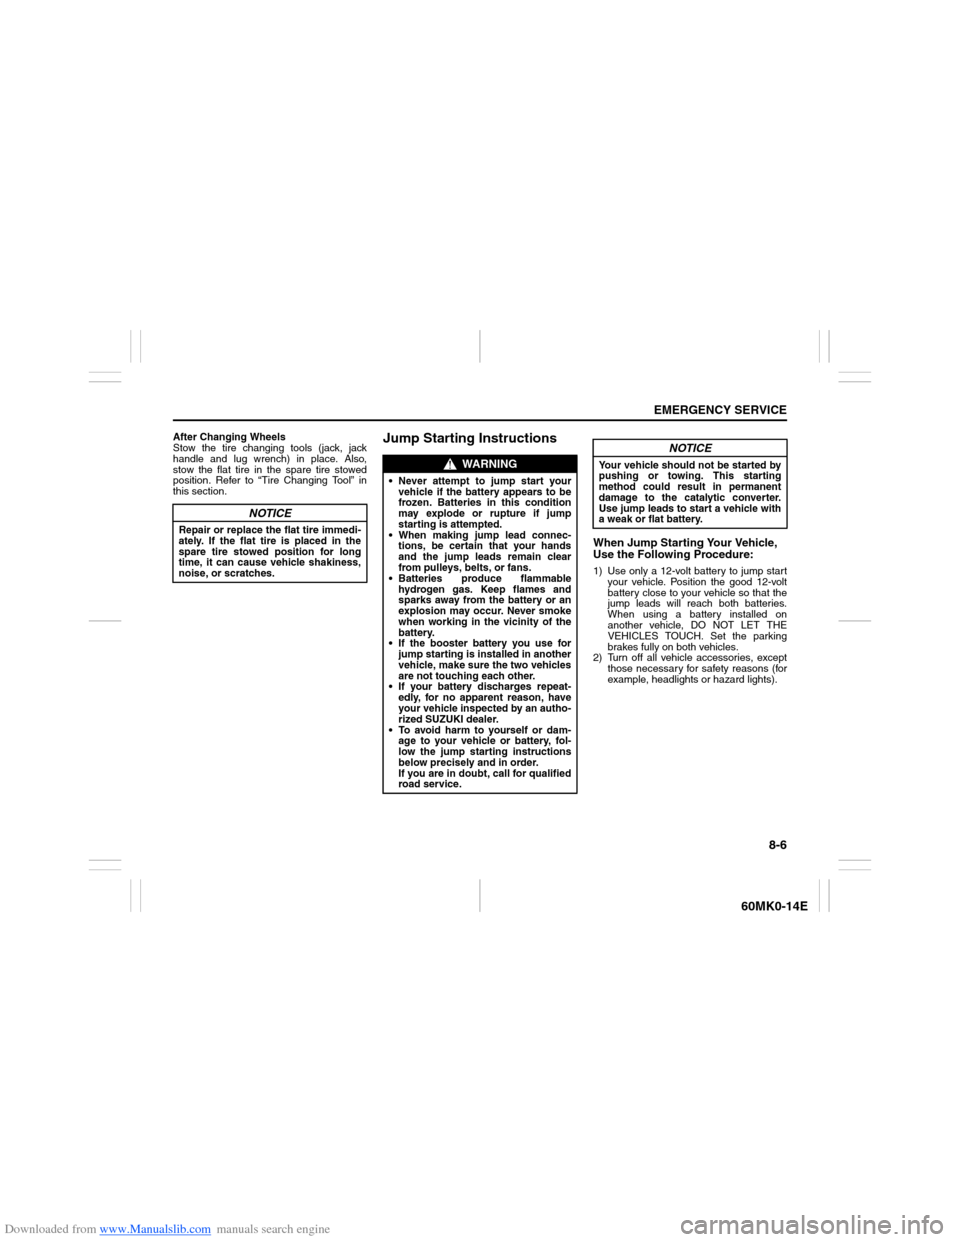
75F062
1) Place the vehicle on level, hard ground.
2) Set the parking brake firmly and shift
into “P” (Park) if your vehicle has an
automatic transaxle, or shift into “R”
(Reverse) if your vehicle has a manual
transaxle.
WARNING
Do not drive your vehicle with the
loose spare tire holder hook bolt, oth-
erwise it may come loose or the
spare tire may drop off, which can
result in an accident.
NOTICE
Tighten the spare tire holder hook
bolt securely. However, do not over-
tighten the bolt, it may be warped or
broken.
WARNING
Be sure to shift into “P” (Park) for
an automatic transaxle vehicle, or
into “R” (Reverse) for a manual
transaxle vehicle when you jack up
the vehicle.
Never jack up the vehicle with the
transaxle in “N” (Neutral). Other-
wise, unstable jack may cause an
accident.
Page 187 of 207
Downloaded from www.Manualslib.com manuals search engine 8-6
EMERGENCY SERVICE
60MK0-14E
After Changing Wheels
Stow the tire changing tools (jack, jack
handle and lug wrench) in place. Also,
stow the flat tire in the spare tire stowed
position. Refer to “Tire Changing Tool” in
this section.
Jump Starting Instructions
When Jump Starting Your Vehicle,
Use the Following Procedure:1) Use only a 12-volt battery to jump start
your vehicle. Position the good 12-volt
battery close to your vehicle so that the
jump leads will reach both batteries.
When using a battery installed on
another vehicle, DO NOT LET THE
VEHICLES TOUCH. Set the parking
brakes fully on both vehicles.
2) Turn off all vehicle accessories, except
those necessary for safety reasons (for
example, headlights or hazard lights).
NOTICE
Repair or replace the flat tire immedi-
ately. If the flat tire is placed in the
spare tire stowed position for long
time, it can cause vehicle shakiness,
noise, or scratches.
WARNING
Never attempt to jump start your
vehicle if the battery appears to be
frozen. Batteries in this condition
may explode or rupture if jump
starting is attempted.
When making jump lead connec-
tions, be certain that your hands
and the jump leads remain clear
from pulleys, belts, or fans.
Batteries produce flammable
hydrogen gas. Keep flames and
sparks away from the battery or an
explosion may occur. Never smoke
when working in the vicinity of the
battery.
If the booster battery you use for
jump starting is installed in another
vehicle, make sure the two vehicles
are not touching each other.
If your battery discharges repeat-
edly, for no apparent reason, have
your vehicle inspected by an autho-
rized SUZUKI dealer.
To avoid harm to yourself or dam-
age to your vehicle or battery, fol-
low the jump starting instructions
below precisely and in order.
If you are in doubt, call for qualified
road service.
NOTICE
Your vehicle should not be started by
pushing or towing. This starting
method could result in permanent
damage to the catalytic converter.
Use jump leads to start a vehicle with
a weak or flat battery.