2013 SUBARU TRIBECA ESP
[x] Cancel search: ESPPage 148 of 420
warning light illuminate simultaneously,
take the following steps.
1. Stop the vehicle in the nearest safe,
flat place.
2. Shut down the engine, apply the
parking brake, and then restart it.
3. Release the parking brake. If both
warning lights turn off, the EBD system
may be malfunctioning.
Drive carefully to the nearest SUBARU
dealer and have the system inspected.
4. If both warning lights illuminate again
and remain illuminated after the engine
has been restarted, shut down the engine
again, apply the parking brake, and check
the brake fluid level.
5. If the brake fluid level is not below the “MIN ”mark, the EBD system may be
malfunctioning. Drive carefully to the
nearest SUBARU dealer and have the
system inspected.
6. If the brake fluid level is below the “ MIN ”mark, DO NOT drive the vehicle.
Instead, have the vehicle towed to the
nearest SUBARU dealer for repair. &
Low fuel warning light
CAUTION
Immediately put fuel in the tank
whenever the low fuel warning light
illuminates. Engine misfires as a
result of an empty tank could cause
damage to the engine.
The low fuel warning light illuminates
when the tank is nearly empty approxi-
mately 2.6 US gal (10 liters, 2.2 Imp gal). It
only operates when the ignition switch is
in the “ON ”position. When this light
illuminates, fill the fuel tank immediately. NOTE
This light does not turn off unless the
tank is replenished up to an internal
fuel quantity of approximately 4.0 US
gal (15 liters, 3.3 Imp gal). &
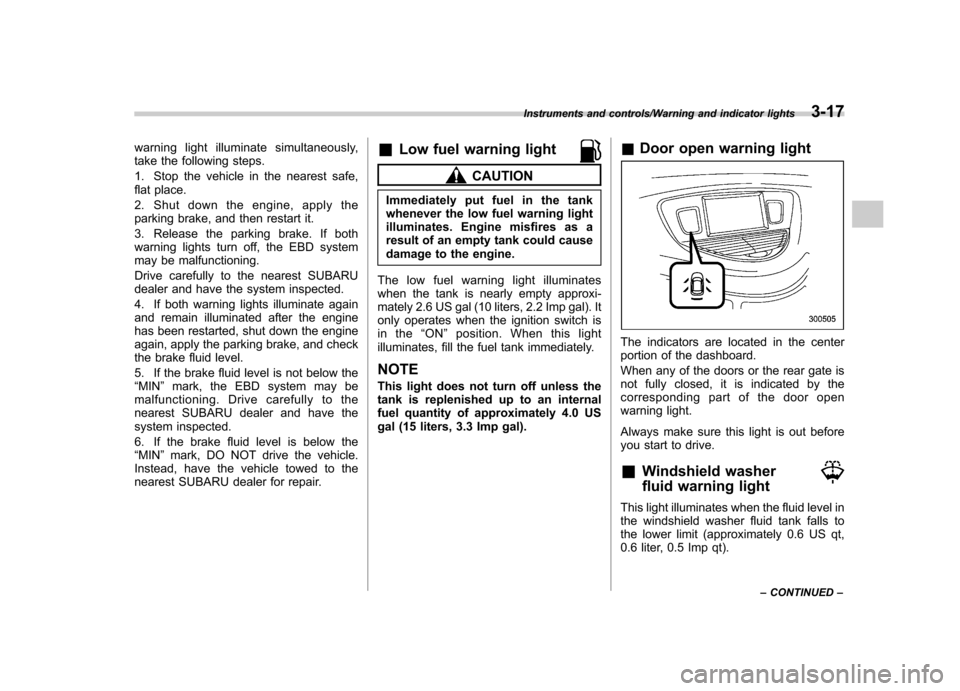
Door open warning light
The indicators are located in the center
portion of the dashboard.
When any of the doors or the rear gate is
not fully closed, it is indicated by the
corresponding part of the door open
warning light.
Always make sure this light is out before
you start to drive. & Windshield washer
fluid warning light
This light illuminates when the fluid level in
the windshield washer fluid tank falls to
the lower limit (approximately 0.6 US qt,
0.6 liter, 0.5 Imp qt).
Instruments and controls/Warning and indicator lights3-17
– CONTINUED –
Page 150 of 420
after the engine is started but turns off
immediately, remaining off..The warning light illuminates after
the engine has started and turns off
while the vehicle is subsequently beingdriven.. The warning light illuminates during
driving, but it turns off immediately and
remains off. ! Vehicle Dynamics Control opera-
tion indicator light
U.S.-spec. models and Canada-spec.models:
The indicator light flashes during activa-
tion of the skid suppression function and
during activation of the traction controlfunction. NOTE . The light may remain illuminated for
a short period of time after the engine
has been started, especially in cold
weather. This does not indicate the
existence of a problem. The light
should turn off as soon as the engine
has warmed up.. The indicator light illuminates when
the engine has developed a problem
and the CHECK ENGINE warning light/
malfunction indicator light is on. Latin America-spec. models:
The indicator light flashes when the skid
suppression function is activated. It illumi-
nates when only the traction control
function is operating.
The Vehicle Dynamics Control system is
probably malfunctioning under any of the
following conditions. Have your vehicle
checked at a SUBARU dealer as soon as
possible . .
The light does not illuminate when the
ignition switch is turned to the “ON ”
position.. The light does not turn off even after
the lapse of several minutes (the engine
has warmed up) after the engine has
started (U.S.-spec. models and Canada-
spec. models)/even after a period of
approximately 2 seconds after the ignition
switch has been turned to the “ON ”
position (Latin America-spec. models).
& Traction Control sys-
tem OFF indicator light
(U.S.-spec models and
Canada-spec. models)
This light illuminates when the Traction
Control system OFF switch is pressed to
deactivate the Traction Control system.
The Vehicle Dynamics Control system is probably malfunctioning under any of the
following conditions. Have your vehicle
checked at a SUBARU dealer immedi-
ately. .
The light does not illuminate when the
ignition switch is turned to the “ON ”
position.. The light does not turn off even after a
period of approximately 2 seconds after
the ignition switch has been turned to the“ ON ”position.
& Vehicle Dynamics
Control warning light
(Latin America-spec.
models)/Traction Con-
trol OFF indicator light
(Latin America-spec.models)
This warning light functions to indicate
malfunctions in the Vehicle Dynamics
Control system as well as to indicate that
the Traction Control system has beendeactivated.
It illuminates in the event of a malfunction
in the system and is on when the system
is not operating.
Instruments and controls/Warning and indicator lights3-19
– CONTINUED –
Page 151 of 420
3-20Instruments and controls/Warning and indicator lights
!Vehicle Dynamics Control warning light
CAUTION
The Vehicle Dynamics Control sys-
tem provides its ABS control
through the electrical circuit of the
ABS system. Accordingly, if the ABS
is inoperative, the Vehicle Dynamics
Control system becomes unable to
provide ABS control. As a result, the
Vehicle Dynamics Control system
also becomes inoperative, causing
the warning light to illuminate.
Though both the Vehicle Dynamics
Control and ABS systems are inop-
erative in this case, the ordinary
functions of the brake system are
still available. You will be safe while
driving with this condition, but drive
carefully and have your vehicle
checked at a SUBARU dealer as
soon as possible.
NOTE . If the electrical circuit of the Vehicle
Dynamics Control system itself mal-
functions, only the warning light illumi-
nates. At this time, the ABS (Anti-lock
Brake System) remains fully opera-tional. .
The warning light illuminates when
the electronic control system of the
ABS/Vehicle Dynamics Control systemmalfunctions.
The Vehicle Dynamics Control system is
probably inoperative under any of the
following conditions. Have your vehicle
checked at a SUBARU dealer immedi-
ately. . The warning light does not illuminate
when the ignition switch is turned to the “ ON ”position.
. The warning light illuminates while the
vehicle is running.
NOTE
If the warning light behavior is as
described in the following conditions,
the Vehicle Dynamics Control system
may be considered normal. . The warning light illuminates right
after the engine is started but turns off
immediately, remaining off.. The warning light illuminates after
engine startup and turns off while the
vehicle is subsequently being driven.. The warning light illuminates during
driving, but it turns off immediately and
remains off. !
Traction Control OFF indicator light
. It illuminates when the Traction Control
OFF switch is pressed. . It also illuminates when the Traction
Control system is deactivated. NOTE . The light may remain illuminated for
a while after the engine has been
started, especially in cold weather. This
does not indicate the existence of a
problem. The light should turn off as
soon as the engine has warmed up.. The indicator light illuminates when
the engine has developed a problem
and the CHECK ENGINE warning light/
Malfunction indicator light illuminates.
The Vehicle Dynamics Control system is
probably malfunctioning under the listed
condition. Have your vehicle checked at a
SUBARU dealer as soon as possible. . The light does not turn off even after
the lapse of several minutes (the engine
has warmed up) after the engine hasstarted.
Page 156 of 420
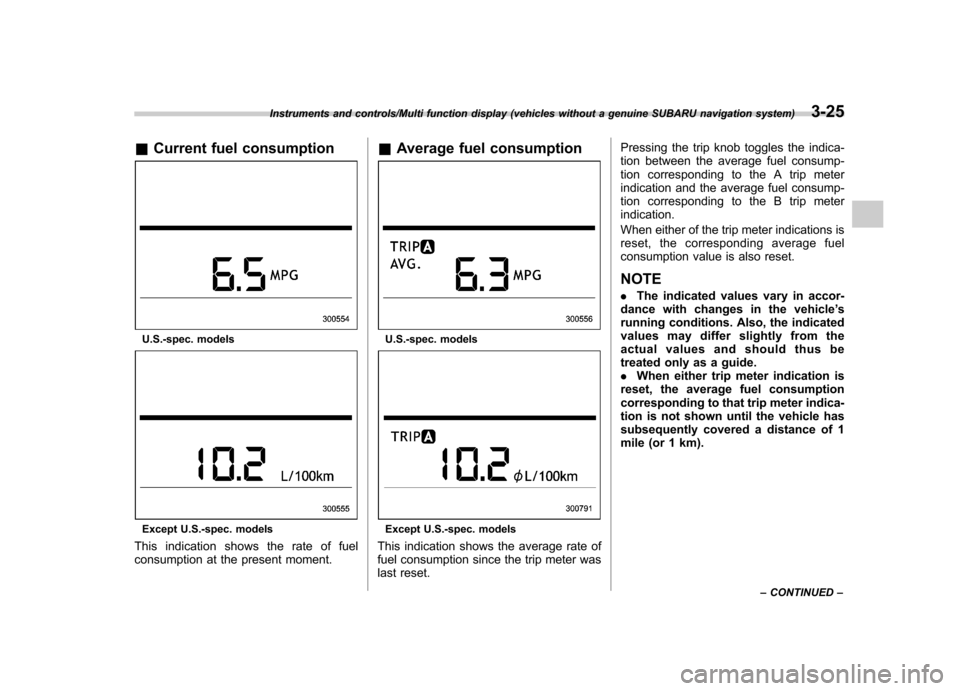
&Current fuel consumption
U.S.-spec. models
Except U.S.-spec. models
This indication shows the rate of fuel
consumption at the present moment. &
Average fuel consumption
U.S.-spec. models
Except U.S.-spec. models
This indication shows the average rate of
fuel consumption since the trip meter was
last reset. Pressing the trip knob toggles the indica-
tion between the average fuel consump-
tion corresponding to the A trip meter
indication and the average fuel consump-
tion corresponding to the B trip meterindication.
When either of the trip meter indications is
reset, the corresponding average fuel
consumption value is also reset. NOTE .
The indicated values vary in accor-
dance with changes in the vehicle ’s
running conditions. Also, the indicated
values may differ slightly from the
actual values and should thus be
treated only as a guide.. When either trip meter indication is
reset, the average fuel consumption
corresponding to that trip meter indica-
tion is not shown until the vehicle has
subsequently covered a distance of 1
mile (or 1 km).
Instruments and controls/Multi function display (vehicles without a genuine SUBARU navigation system)3-25
– CONTINUED –
Page 166 of 420
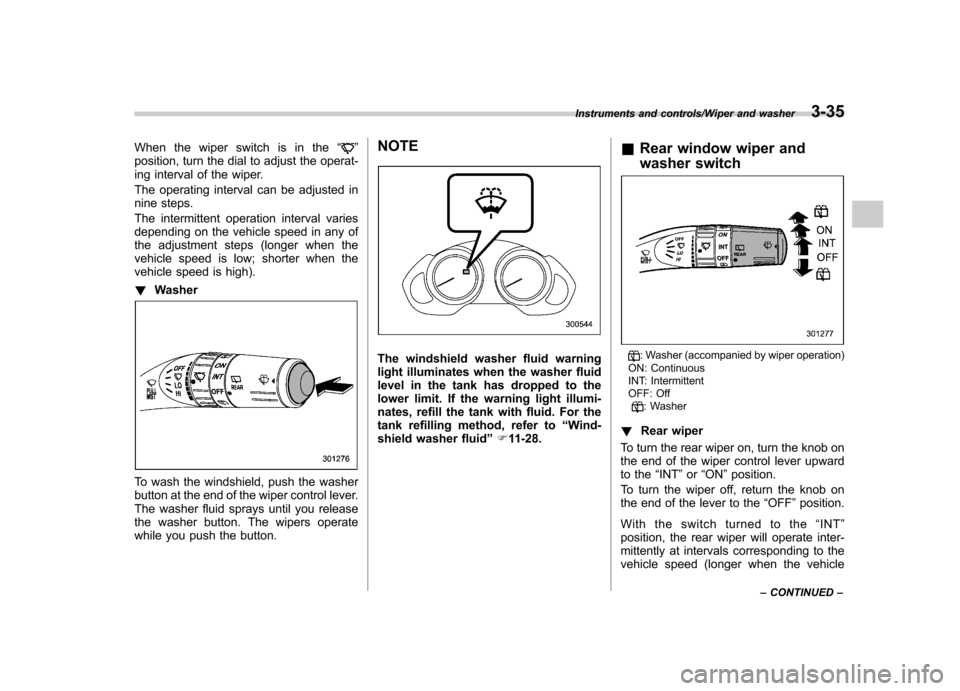
When the wiper switch is in the“”
position, turn the dial to adjust the operat-
ing interval of the wiper.
The operating interval can be adjusted in
nine steps.
The intermittent operation interval varies
depending on the vehicle speed in any of
the adjustment steps (longer when the
vehicle speed is low; shorter when the
vehicle speed is high). ! Washer
To wash the windshield, push the washer
button at the end of the wiper control lever.
The washer fluid sprays until you release
the washer button. The wipers operate
while you push the button. NOTE
The windshield washer fluid warning
light illuminates when the washer fluid
level in the tank has dropped to the
lower limit. If the warning light illumi-
nates, refill the tank with fluid. For the
tank refilling method, refer to
“Wind-
shield washer fluid ”F 11-28. &
Rear window wiper and
washer switch: Washer (accompanied by wiper operation)
ON: Continuous
INT: Intermittent
OFF: Off
: Washer
! Rear wiper
To turn the rear wiper on, turn the knob on
the end of the wiper control lever upward
to the “INT ”or “ON ”position.
To turn the wiper off, return the knob on
the end of the lever to the “OFF ”position.
With the switch turned to the “INT ”
position, the rear wiper will operate inter-
mittently at intervals corresponding to the
vehicle speed (longer when the vehicle
Instruments and controls/Wiper and washer3-35
– CONTINUED –
Page 182 of 420
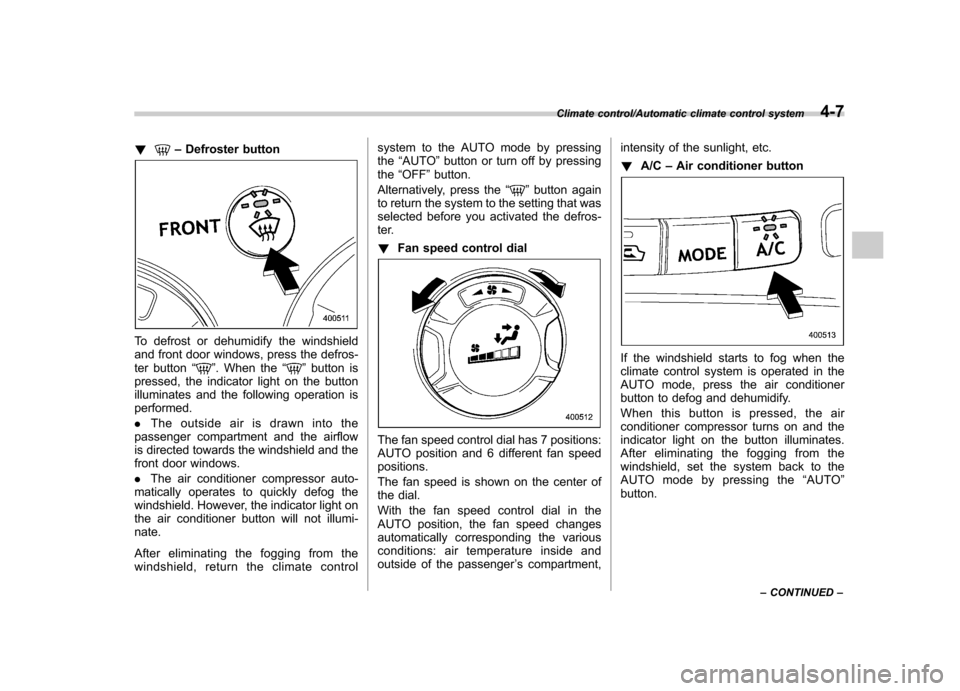
!–Defroster button
To defrost or dehumidify the windshield
and front door windows, press the defros-
ter button “
”. When the “”button is
pressed, the indicator light on the button
illuminates and the following operation isperformed. . The outside air is drawn into the
passenger compartment and the airflow
is directed towards the windshield and the
front door windows. . The air conditioner compressor auto-
matically operates to quickly defog the
windshield. However, the indicator light on
the air conditioner button will not illumi-nate.
After eliminating the fogging from the
windshield, return the climate control system to the AUTO mode by pressingthe
“AUTO ”button or turn off by pressing
the “OFF ”button.
Alternatively, press the “
”button again
to return the system to the setting that was
selected before you activated the defros-
ter. ! Fan speed control dial
The fan speed control dial has 7 positions:
AUTO position and 6 different fan speedpositions.
The fan speed is shown on the center of
the dial.
With the fan speed control dial in the
AUTO position, the fan speed changes
automatically corresponding the various
conditions: air temperature inside and
outside of the passenger ’s compartment, intensity of the sunlight, etc. !
A/C –Air conditioner button
If the windshield starts to fog when the
climate control system is operated in the
AUTO mode, press the air conditioner
button to defog and dehumidify.
When this button is pressed, the air
conditioner compressor turns on and the
indicator light on the button illuminates.
After eliminating the fogging from the
windshield, set the system back to the
AUTO mode by pressing the “AUTO ”
button.
Climate control/Automatic climate control system4-7
– CONTINUED –
Page 211 of 420
5-22Audio/Type B audio set
!How to insert a CD(s)
! Inserting a CD
1. Briefly press the “LOAD ”button (10). If
the magazine in the player has an idle
position where you can insert a disc, the
disc number indicator associated with the
idle position will blink.
If no indicator blinks, it means that there is
no idle position in the magazine.
2. After the disc number indicator has
started to flash, insert the disc when“ LOAD ”flashes on the display. The disc
will then be automatically drawn in, and
the player will begin to play back the first
track of the disc. . To insert more discs in succession,
repeat Steps 1 and 2. The magazine will
be loaded with discs in the ascending
order of position number.
If you do not insert any disc in 15 seconds
after you have pressed the “LOAD ”button,
the player will begin to play back the first
track of the last disc you have inserted. . The disc indicator steadily lights up if a
disc is already inserted in the correspond-
ing position of the magazine. . While the player is in the loading mode,
if you press “FM AM ”button, the player will
enter the standby mode. Press the “CD ”
button (1) to start playback. !
Inserting a disc in a desired position
1. Briefly press the “LOAD ”button (10). If
the magazine in the player has an idle
position where you can insert a disc, the
disc number indicator associated with the
idle position will blink.
The positions in the magazine the indica-
tor of which steadily lights up are already
loaded with discs.
2. Press the disc select button (9) at the
position where you want to insert a disc.
3. Insert the disc when “LOAD ”flashes
on the display. The disc will then be
automatically drawn in, and the player will
begin to play the first track on the disc. . If you wish to insert another disc,
repeat the procedure beginning with step 1.
If you do not insert any disc in 15 seconds
after you have pressed the “LOAD ”button,
the player will begin to play back the first
track of the last disc you have inserted. . While the player is in the loading mode,
if you press “FM AM ”button, the player will
enter standby mode. Press the “CD ”
button (1) to start playback. !
Loading all the magazine (full
disc loading mode)
1. If you press and hold the “LOAD ”
button (10), the player will produce a beep
sound and will enter the full disc loadingmode.
2. A “disc number ”indicator will blink,
and “ALL LOAD ”will be on display for a
period of 15 seconds. If a disc is success-
fully loaded during this period, the disc
number indicator will stop blinking and will
steadily light.
3. When the loading of a disc is com-
plete, the next disc number indicator will
blink. Then repeat Step 2.
4. When the magazine is filled with discs
by repeating Steps 2 and 3, the player will
start playback of the discs, beginning with
the one inserted first.
If you fail to insert any disc during each 15
seconds interval, the full disc loading
mode will be canceled, and the player will
start playback of the disc inserted first. ! How to play back a CD or make a pause
! When there is no CD inserted:
Properly insert a CD. Refer to “How to
insert a CD(s) ”F 5-22.
When a CD is loaded, the player will start
playback of the CD, beginning with the
Page 229 of 420
6-10Interior equipment/Accessory power outlets
trim can be used to hold beverage bottles
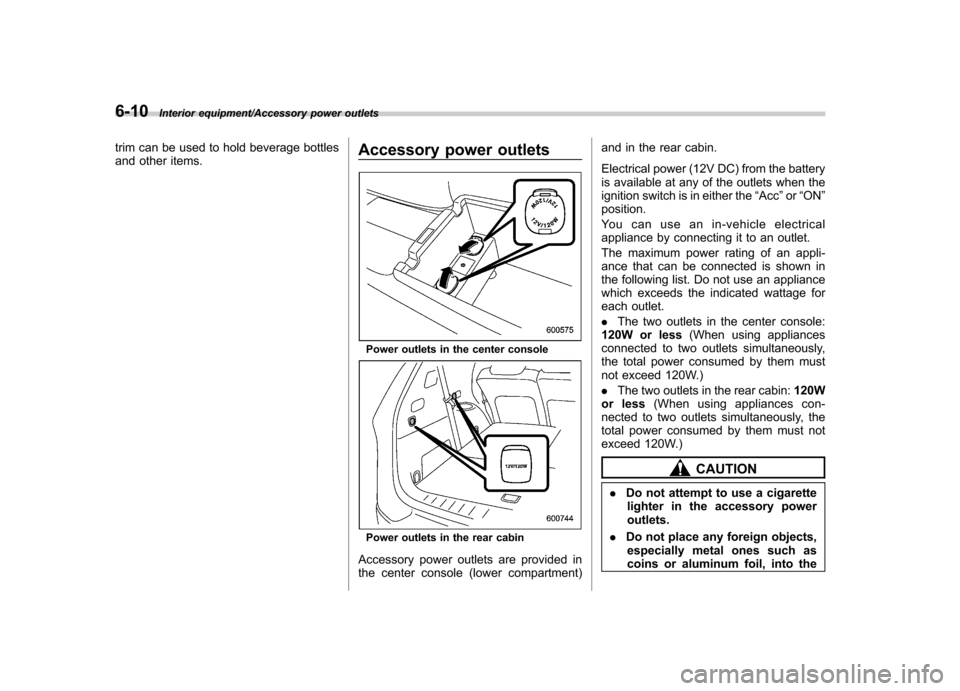
and other items.Accessory power outlets
Power outlets in the center console
Power outlets in the rear cabin
Accessory power outlets are provided in
the center console (lower compartment) and in the rear cabin.
Electrical power (12V DC) from the battery
is available at any of the outlets when the
ignition switch is in either the
“Acc ”or “ON ”
position.
You can use an in-vehicle electrical
appliance by connecting it to an outlet.
The maximum power rating of an appli-
ance that can be connected is shown in
the following list. Do not use an appliance
which exceeds the indicated wattage for
each outlet. . The two outlets in the center console:
120W or less (When using appliances
connected to two outlets simultaneously,
the total power consumed by them must
not exceed 120W.) . The two outlets in the rear cabin: 120W
or less (When using appliances con-
nected to two outlets simultaneously, the
total power consumed by them must not
exceed 120W.)
CAUTION
. Do not attempt to use a cigarette
lighter in the accessory power outlets.
. Do not place any foreign objects,
especially metal ones such as
coins or aluminum foil, into the