2013 SUBARU TRIBECA ESP
[x] Cancel search: ESPPage 83 of 420

1-54Seat, seatbelt and SRS airbags/*SRS airbag (Supplemental Restraint System airbag)
the child restraint system. Turn the ignition
switch to the“ON ”position and make sure
that the front passenger ’s frontal airbag
ON indicator turns off and the OFF
indicator illuminates.
If the ON indicator still remains illuminated
while the OFF indicator turns off, take the
following actions. . Ensure that no article is placed on the
seat other than the child restraint system
and the child occupant. . Ensure that there is no article left in the
seatback pocket.
If the ON indicator still remains illuminated
while the OFF indicator turns off after
taking relevant corre ctive actions de-
scribed above, relocate the child restraint
system to one of the rear seating positions
recommended in this Owner ’s Manual and
immediately contact your SUBARU dealer
for an inspection. NOTE
When a child who has outgrown a child
restraint system or a small adult is
seated in the front passenger ’s seat,
the SUBARU advanced frontal airbag
system may or may not activate the
front passenger ’s SRS frontal airbag
depending on the occupant ’s seating
posture. If the front passenger ’s SRS frontal airbag is activated (the ON
indicator remains illuminated while
the OFF indicator turns off), take the
following actions. .
Ensure that no article is placed on
the seat other than the occupant. . Ensure that there is no article left in
the seatback pocket.
If the ON indicator still remains illumi-
nated while the OFF indicator turns off
despite the fact that the actions noted
above have been taken, seat the child/
small adult in the rear seat and im-
mediately contact your SUBARU dealer
for an inspection. Even if the system
has passed the dealer inspection, it is
recommended that on subsequent trips
the child/small adult always take the
rear seat.
Children who have outgrown a child
restraint system should always wear the
seatbelt irrespective of whether the airbag
is deactivated or activated. ! Conditions in which front passen- ger’s SRS frontal airbag is activated
The front passenger ’s SRS frontal airbag
will be activated for deployment upon
impact when any of the following condi-
tions is met regarding the front passen-ger ’s seat.
. When the seat is occupied by an adult. .
When a heavy article is placed on the
seat.
When the front passenger ’s seat is occu-
pied by an adult, observe the following
precautions. Failure to do so may lessen
the load on the front passenger ’s seat,
deactivating the front passenger ’s SRS
frontal airbag despite the fact that the seat
is occupied by an adult. . Do not allow the second-row seat
occupant to lift the front passenger ’s seat
cushion using his/her feet.. Do not place any article under the front
passenger ’s seat, or squeeze any article
from behind and under the seat. This may
lift the seat cushion. . Do not squeeze any article between
the front passenger ’s seat and side trim/
pillar, door or center console box. This
may lift the seat cushion.
!If the passenger ’s frontal airbag
OFF indicator illuminates and
the ON indicator turns off even
when the front passenger ’s seat
is occupied by an adult
This can be caused by the adult incor-
rectly sitting in the front passenger ’s seat.
Turn the ignition switch to the “LOCK ”
position. Ask the front passenger to set
the seatback to the upright position, sit up
Page 108 of 420

Door locks &Locking and unlocking from
the outside
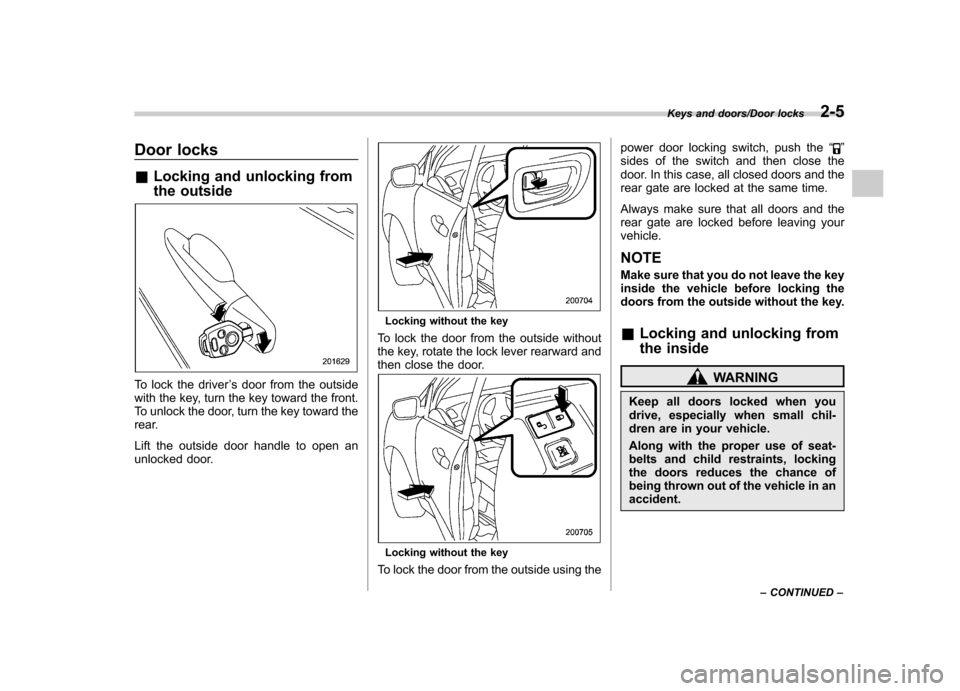
To lock the driver ’s door from the outside
with the key, turn the key toward the front.
To unlock the door, turn the key toward the
rear.
Lift the outside door handle to open an
unlocked door.
Locking without the key
To lock the door from the outside without
the key, rotate the lock lever rearward and
then close the door.
Locking without the key
To lock the door from the outside using the power door locking switch, push the
“
”
sides of the switch and then close the
door. In this case, all closed doors and the
rear gate are locked at the same time.
Always make sure that all doors and the
rear gate are locked before leaving your vehicle.
NOTE
Make sure that you do not leave the key
inside the vehicle before locking the
doors from the outside without the key. & Locking and unlocking from
the inside
WARNING
Keep all doors locked when you
drive, especially when small chil-
dren are in your vehicle.
Along with the proper use of seat-
belts and child restraints, locking
the doors reduces the chance of
being thrown out of the vehicle in anaccident.
Keys and doors/Door locks2-5
– CONTINUED –
Page 112 of 420

to the following two conditions: (1) This
device may not cause harmful inter-
ference, and (2) this device must
accept any interference received, in-
cluding interference that may cause
undesired operation.
Changes or modifications not ex-
pressly approved by the party respon-
sible for compliance could void theuser’s authority to operate the equip-
ment.
The transmitter for the remote keyless
entry system is located inside the keyhead.
The remote keyless entry system has the
following functions. . Locking and unlocking the doors and
rear gate without a key. Unlocking the rear gate without key
. Sounding a panic alarm
. Arming and disarming the alarm sys-
tem. For detailed information, refer to “ Alarm system ”F 2-16.
The operable distance of the remote
keyless entry system is approximately 30
feet (10 meters). However, this distance
will vary depending on environmental conditions.
The system ’s operable distance will be
shorter in areas near a facility or electronic equipment emitting strong radio waves
such as a power plant, broadcast station,
TV tower, or remote controller of home
electronic appliances.
NOTE
The remote keyless entry system does
not operate when the ignition key is
inserted in the ignition switch or when
any of the doors or the rear gate is not
fully closed.
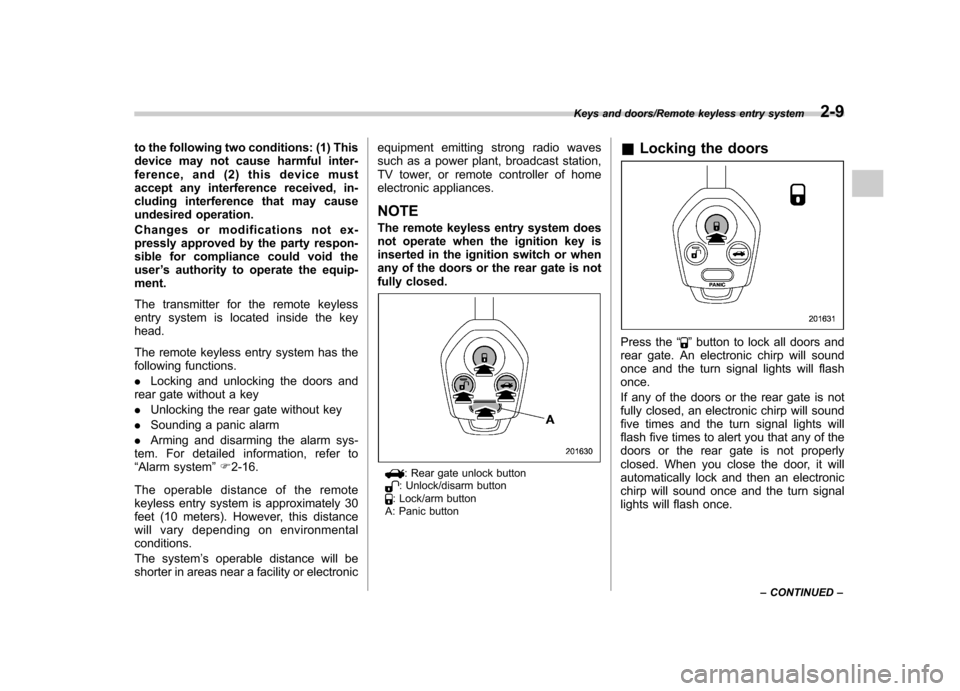
: Rear gate unlock button: Unlock/disarm button: Lock/arm button
A: Panic button &
Locking the doors
Press the “”button to lock all doors and
rear gate. An electronic chirp will sound
once and the turn signal lights will flashonce.
If any of the doors or the rear gate is not
fully closed, an electronic chirp will sound
five times and the turn signal lights will
flash five times to alert you that any of the
doors or the rear gate is not properly
closed. When you close the door, it will
automatically lock and then an electronic
chirp will sound once and the turn signal
lights will flash once.
Keys and doors/Remote keyless entry system2-9
– CONTINUED –
Page 113 of 420

2-10Keys and doors/Remote keyless entry system
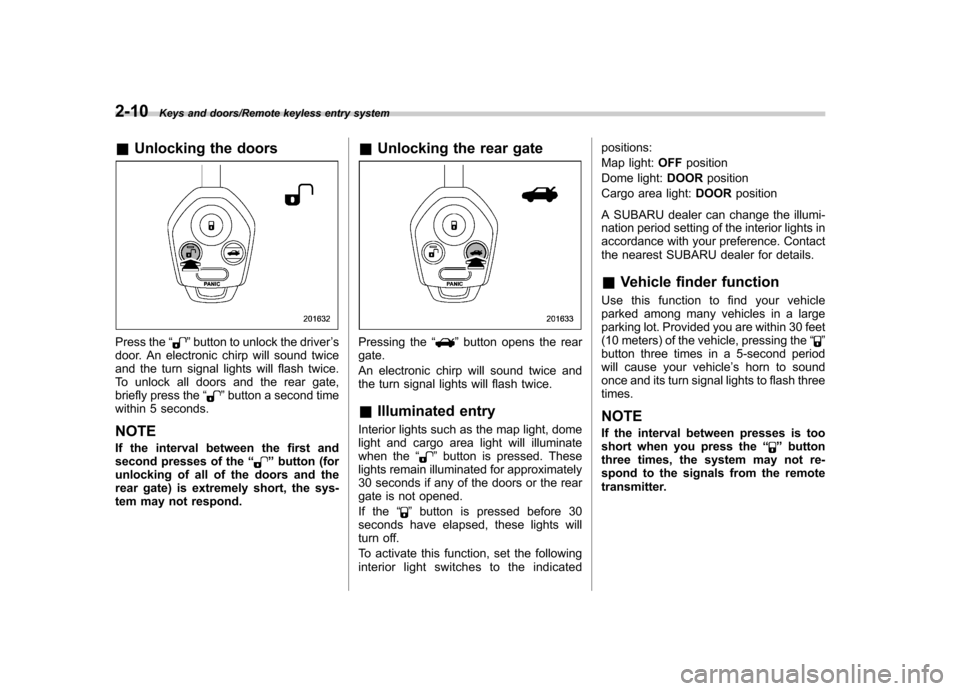
&Unlocking the doors
Press the “”button to unlock the driver ’s
door. An electronic chirp will sound twice
and the turn signal lights will flash twice.
To unlock all doors and the rear gate,
briefly press the “
”button a second time
within 5 seconds. NOTE
If the interval between the first and
second presses of the “
”button (for
unlocking of all of the doors and the
rear gate) is extremely short, the sys-
tem may not respond. &
Unlocking the rear gate
Pressing the “”button opens the rear
gate.
An electronic chirp will sound twice and
the turn signal lights will flash twice.
& Illuminated entry
Interior lights such as the map light, dome
light and cargo area light will illuminate
when the “
”button is pressed. These
lights remain illuminated for approximately
30 seconds if any of the doors or the rear
gate is not opened.
If the “
”button is pressed before 30
seconds have elapsed, these lights will
turn off.
To activate this function, set the following
interior light switches to the indicated positions:
Map light:
OFFposition
Dome light: DOORposition
Cargo area light: DOORposition
A SUBARU dealer can change the illumi-
nation period setting of the interior lights in
accordance with your preference. Contact
the nearest SUBARU dealer for details.
& Vehicle finder function
Use this function to find your vehicle
parked among many vehicles in a large
parking lot. Provided you are within 30 feet
(10 meters) of the vehicle, pressing the “
”
button three times in a 5-second period
will cause your vehicle ’s horn to sound
once and its turn signal lights to flash three times. NOTE
If the interval between presses is too
short when you press the “
”button
three times, the system may not re-
spond to the signals from the remote
transmitter.
Page 121 of 420

2-18Keys and doors/Alarm system
6. Push the front side (“LOCK ”side) of
the power door locking switch to set the
door locks.
7. Close the door. An electronic chirp will
sound once, the turn signal lights will flash
once and the indicator lights will start
flashing rapidly. After rapid flashing for 30
seconds (standby time), the indicator
lights will then flash slowly (twice approxi-
mately every 2 seconds), indicating that
the system has been armed for surveil-lance. NOTE . The system can be armed even if the
engine hood, the windows and/or
moonroof are opened. Always make
sure that they are fully closed before
arming the system. .
The 30-second standby time can be
eliminated if you prefer. Have it per-
formed by your SUBARU dealer.. The system is in the standby mode
for a 30-second period after locking the
doors with the remote transmitter. The
security indicator light will flash at
short intervals during this period.. If any of the following actions is
done during the standby period, the
system will not switch to the surveil-
lance state.
–Doors are unlocked using the
remote transmitter. – Any of the doors or the rear gate
is opened. – Ignition switch is turned to the
“ ON ”position.
& Disarming the system
Briefly press the “
”button (for less than
2 seconds) on the remote transmitter. The driver ’s door will unlock, an electronic
chirp will sound twice and the turn signal
lights will flash twice. The flashing of the
security indicator light will then change
slowly (once approximately every 3 sec-
onds from twice approximately every 2
seconds), indicating that the alarm system
has been disarmed.
To unlock all other doors and the rear
gate, briefly press the “
”button a second time within 5 seconds. NOTE
If the interval between the first and
second presses of the
“
”button (for
unlocking of all of the doors and the
rear gate) is extremely short, the sys-
tem may not respond. ! Emergency disarming
If you cannot disarm the system using the
transmitter (i.e. the transmitter is lost,
broken or the transmitter battery is too
weak), you can disarm the system without
using the transmitter.
The system can be disarmed if you turn
the ignition switch from the “LOCK ”to the
“ ON ”position with a registered key.
& Valet mode
When you choose the valet mode, the
alarm system does not operate. In valet
mode, the remote transmitter is used only
for locking and unlocking the doors and
rear gate and panic activation.
To enter the valet mode, change the
setting of your vehicle ’s alarm system for
deactivation mode. Refer to “Activating
and deactivating the alarm system ”F 2-
16. The security indicator light will con-
tinue to flash once every 3 seconds
indicating that the system is in the valet
Page 137 of 420

3-6Instruments and controls/Meters and gauges
ignition switch is turned to the“ON ”
position. To change the current setting,
press the trip knob for at least 2 seconds.
: Activated
: Deactivated
With the function deactivated, the combi-
nation meter illuminates as follows.
1. Warning lights, indicator lights, meter
rims, meter needles, odometer, trip meter,
and gauge back lights illuminate.
2. Meter and gauge dials illuminate.
3. Regular illumination (for driving) be- gins.
Briefly press the trip knob again. You can
now establish the activated/deactivated
setting for sequential illumination of the
combination meter when the ignition switch is turned to the
“ON ”position. To
change the current setting, press the trip
knob for at least 2 seconds.
: Activated
: Deactivated
Briefly press the knob to return to the A trip
meter indication.
If you turn the ignition switch to the “ LOCK ”position, turn the ignition switch
to the “ON ”position, or open and close the
driver ’s door during the setting procedure,
the new setting will be canceled.
Also, if you do not press the trip knob for a
period of 10 seconds, the new setting will
be canceled. NOTE . It is not possible to cancel sequen-
tial illumination of the combination
meter while sequential illumination is
actually taking place. Cancel sequen-
tial illumination when regular illumina-
tion (for driving) has begun.. When you open the driver ’s door
with the ignition switch in the “LOCK ”
position, the meters ’needles and rims
are lit. The illumination stops working
when you shut the driver ’s door or
automatically after 30 seconds. &
Speedometer
The speedometer shows the vehiclespeed. & Odometer
This meter displays the odometer when
the ignition switch is in the “LOCK ”, “Acc ”
or “ON ”position.
The odometer shows the total distance
that the vehicle has been driven.
If you press the trip knob when the ignition
switch is in the “LOCK ”or “Acc ”position,
the odometer/trip meter will light up. If you
do not press the trip knob within 10
seconds of illumination of the odometer/
trip meter, the odometer/trip meter will turnoff.
Page 141 of 420

3-10Instruments and controls/Warning and indicator lights
: Windshield washer fluid warning light
: Door open warning light
If any lights do not illuminate, it indicates a
burned-out bulb or a malfunction of the
corresponding system.
Consult your authorized SUBARU dealer
for repair. & Seatbelt warning light
and chime
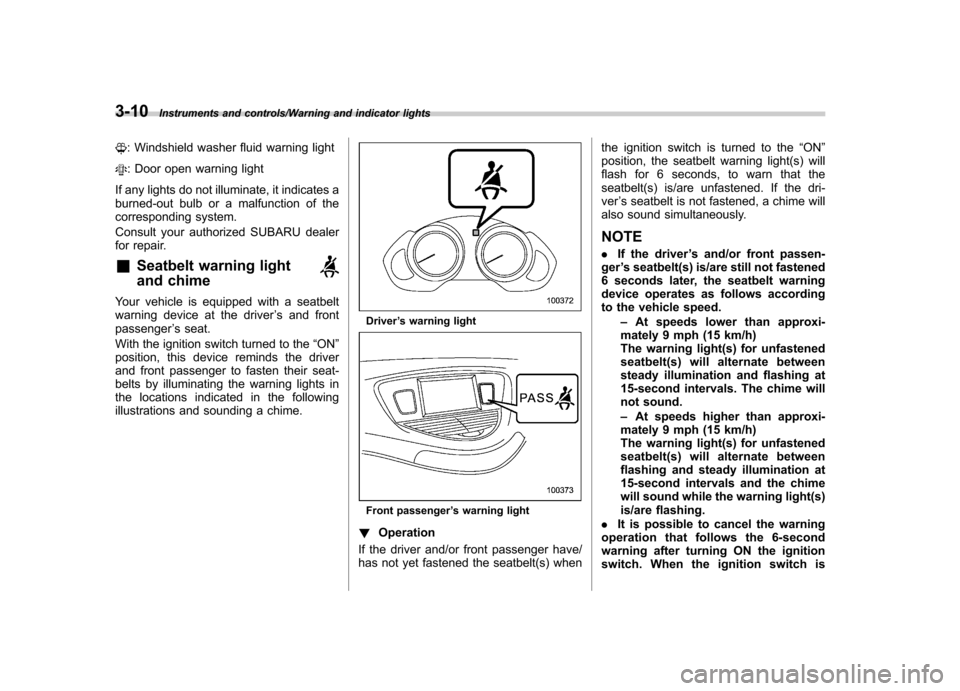
Your vehicle is equipped with a seatbelt
warning device at the driver ’s and front
passenger ’s seat.
With the ignition switch turned to the “ON ”
position, this device reminds the driver
and front passenger to fasten their seat-
belts by illuminating the warning lights in
the locations indicated in the following
illustrations and sounding a chime.
Driver ’s warning light
Front passenger ’s warning light
! Operation
If the driver and/or front passenger have/
has not yet fastened the seatbelt(s) when the ignition switch is turned to the
“ON ”
position, the seatbelt warning light(s) will
flash for 6 seconds, to warn that the
seatbelt(s) is/are unfastened. If the dri-ver ’s seatbelt is not fastened, a chime will
also sound simultaneously. NOTE . If the driver ’s and/or front passen-
ger ’s seatbelt(s) is/are still not fastened
6 seconds later, the seatbelt warning
device operates as follows according
to the vehicle speed.
–At speeds lower than approxi-
mately 9 mph (15 km/h)
The warning light(s) for unfastened
seatbelt(s) will alternate between
steady illumination and flashing at
15-second intervals. The chime will
not sound. – At speeds higher than approxi-
mately 9 mph (15 km/h)
The warning light(s) for unfastened
seatbelt(s) will alternate between
flashing and steady illumination at
15-second intervals and the chime
will sound while the warning light(s)
is/are flashing.
. It is possible to cancel the warning
operation that follows the 6-second
warning after turning ON the ignition
switch. When the ignition switch is
Page 145 of 420

3-14Instruments and controls/Warning and indicator lights
vehicle speed and stop the vehicle at the
nearest safe place.
Park the vehicle for several minutes. After
the light turns off, you can start driving.
If the light does not turn off, contact the
nearest SUBARU dealer for service. NOTE .If the tire pressures are not correct
and/or the tires are not all the same
size and brand, the rear differential will
be heavily loaded when the vehicle is
driven, resulting in an abnormally high
oil temperature.. The rear differential oil will deterio-
rate if its temperature increases en-
ough for the rear differential oil tem-
perature warning light to illuminate. It is
advisable to have the rear differential
oil replaced as soon as possible. & Low tire pressure
warning light
When the ignition switch is turned to the “ON ”position, the low tire pressure warn-
ing light will illuminate for approximately 2
seconds to check that the tire pressure
monitoring system (TPMS) is functioning
properly. If there is no problem and all tires
are properly inflated, the light will turn off.
Each tire, including the spare (if provided), should be checked monthly when cold
and inflated to the inflation pressure
recommended by the vehicle manufac-
turer on the vehicle placard or tire inflation
pressure label. (If your vehicle has tires of
a different size than the size indicated on
the vehicle placard or tire inflation pres-
sure label, you should determine the
proper tire inflation pressure for thosetires.)
As an added safety feature, your vehicle
has been equipped with a tire pressure
monitoring system (TPMS) that illuminates
a low tire pressure telltale when one or
more of your tires is significantly under-
inflated. Accordingly, when the low tire
pressure telltale illuminates, you should
stop and check your tires as soon as
possible, and inflate them to the proper
pressure. Driving on a significantly under-
inflated tire causes the tire to overheat and
can lead to tire failure. Under-inflation also
reduces fuel efficiency and tire tread life,
and may affect the vehicle
’s handling and
stopping ability.
Please note that the TPMS is not a
substitute for proper tire maintenance,
and it is the driver ’s responsibility to
maintain correct tire pressure, even if
under-inflation has not reached the level
to trigger illumination of the TPMS low tire
pressure telltale. Your vehicle has also been equipped with
a TPMS malfunction indicator to indicate
when the system is not operating properly.
The TPMS malfunction indicator is com-
bined with the low tire pressure telltale.
When the system detects a malfunction,
the telltale will flash for approximately one
minute and then remain continuously
illuminated. This sequence will continue
upon subsequent vehicle start-ups as long
as the malfunction exists. When the
malfunction indicator is illuminated, the
system may not be able to detect or signal
low tire pressure as intended. TPMS
malfunctions may occur for a variety of
reasons, including the installation of re-
placement or alternate tires or wheels on
the vehicle that prevent the TPMS from
functioning properly. Always check the
TPMS malfunction telltale after replacing
one or more tires or wheels on your
vehicle to ensure that the replacement or
alternate tires and wheels allow the TPMS
to continue to function properly.
Should the warning light illuminate stea-
dily after blinking for approximately one
minute, have the system inspected by
your nearest SUBARU dealer as soon aspossible.