2013 SUBARU TRIBECA mirror
[x] Cancel search: mirrorPage 173 of 420
3-42Instruments and controls/Mirrors
!Compass zone adjustment
1. The zone setting is factory preset to
Zone 8. Refer to the “Compass calibration
zone ”map attached to the end of this
manual to verify that the compass zone
setting is correct for your geographical location.
2. Press and hold the right button for 3
seconds then release, and the word“ ZONE ”will briefly appear and then the
zone number will be displayed.
3. Press the right-hand button repeatedly
to cycle the display through all possible
zone settings. Stop cycling when the
correct zone setting for your location isdisplayed.
4. Releasing the button for 3 seconds will
exit the zone setting mode. &
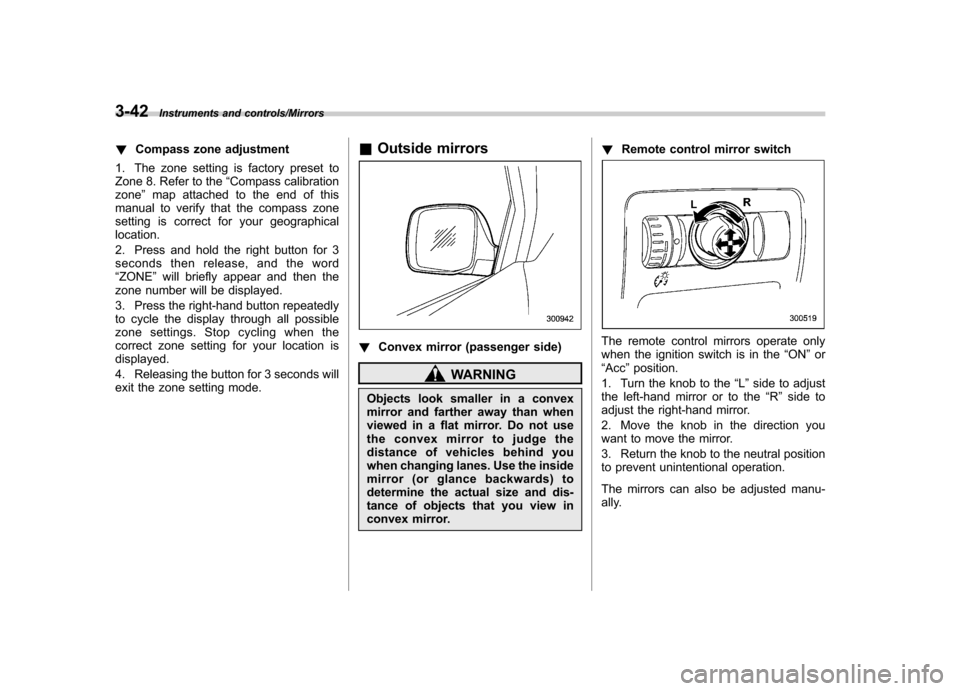
Outside mirrors
! Convex mirror (passenger side)
WARNING
Objects look smaller in a convex
mirror and farther away than when
viewed in a flat mirror. Do not use
the convex mirror to judge the
distance of vehicles behind you
when changing lanes. Use the inside
mirror (or glance backwards) to
determine the actual size and dis-
tance of objects that you view in
convex mirror. !
Remote control mirror switch
The remote control mirrors operate only
when the ignition switch is in the “ON ”or
“ Acc ”position.
1. Turn the knob to the “L ” side to adjust
the left-hand mirror or to the “R ” side to
adjust the right-hand mirror.
2. Move the knob in the direction you
want to move the mirror.
3. Return the knob to the neutral position
to prevent unintentional operation.
The mirrors can also be adjusted manu-
ally.
Page 174 of 420
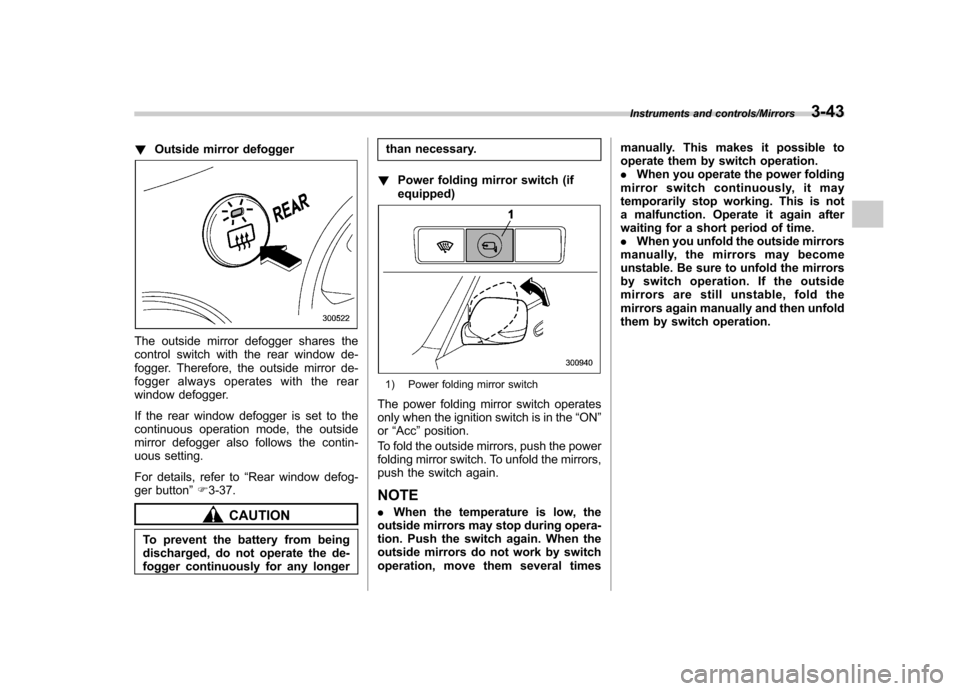
!Outside mirror defogger
The outside mirror defogger shares the
control switch with the rear window de-
fogger. Therefore, the outside mirror de-
fogger always operates with the rear
window defogger.
If the rear window defogger is set to the
continuous operation mode, the outside
mirror defogger also follows the contin-
uous setting.
For details, refer to “Rear window defog-
ger button ”F 3-37.
CAUTION
To prevent the battery from being
discharged, do not operate the de-
fogger continuously for any longer than necessary.
! Power folding mirror switch (ifequipped)
1) Power folding mirror switch
The power folding mirror switch operates
only when the ignition switch is in the “ON ”
or “Acc ”position.
To fold the outside mirrors, push the power
folding mirror switch. To unfold the mirrors,
push the switch again.
NOTE . When the temperature is low, the
outside mirrors may stop during opera-
tion. Push the switch again. When the
outside mirrors do not work by switch
operation, move them several times manually. This makes it possible to
operate them by switch operation..
When you operate the power folding
mirror switch continuously, it may
temporarily stop working. This is not
a malfunction. Operate it again after
waiting for a short period of time.. When you unfold the outside mirrors
manually, the mirrors may become
unstable. Be sure to unfold the mirrors
by switch operation. If the outside
mirrors are still unstable, fold the
mirrors again manually and then unfold
them by switch operation.
Instruments and controls/Mirrors3-43
Page 220 of 420
Interior light......................................................... 6-2
Dome light .......................................................... 6-2
Cargo area light .................................................. 6-3
Rear gate light .................................................... 6-3
Map light ............................................................. 6-3
Automatic ambient light for center console area (if equipped) ...................................................... 6-4
Sun visors ........................................................... 6-4
Sun visor extension plate .................................... 6-5
Vanity mirror with light ........................................ 6-5
Storage compartment ......................................... 6-6
Glove box ........................................................... 6-6
Center console box ............................................. 6-6
Rear console ....................................................... 6-7
Overhead console ............................................... 6-8
Cup holder ........................................................... 6-8
Front passenger ’s cup holder .............................. 6-8
Second-row seat cup holders .............................. 6-9
Third-row seat cup holders .................................. 6-9
Bottle holders ...................................................... 6-9
Accessory power outlets ................................... 6-10
Coat hook ........................................................... 6-12
Shopping bag hook ............................................ 6-13 Floor mat
............................................................ 6-13
Cargo area cover (if equipped) ......................... 6-14
Using the cover ................................................. 6-14
To remove the cover .......................................... 6-15
To install the cover housing ............................... 6-15
Convenient tie-down hooks .............................. 6-16
Under-floor storage compartment .................... 6-16
HomeLink
®Wireless Control System (if
equipped) ........................................................ 6-17
Garage door opener programming in the U.S.A. .............................................................. 6-18
Programming rolling-code-protected garage door openers in the U.S.A. ....................................... 6-19
Programming for entrance gates and garage door openers in Canada ........................................... 6-20
Programming other devices ............................... 6-21
Operating the HomeLink
®Wireless Control
System ............................................................ 6-21
Erasing HomeLink
®button memory .................... 6-21
In case a problem occurs ................................... 6-21
Rear view camera (if equipped) ........................ 6-21
How to use the rear view camera ....................... 6-22
Viewing range on the screen .............................. 6-23
Help line ............................................................ 6-24 Interior equipment
6
Page 224 of 420
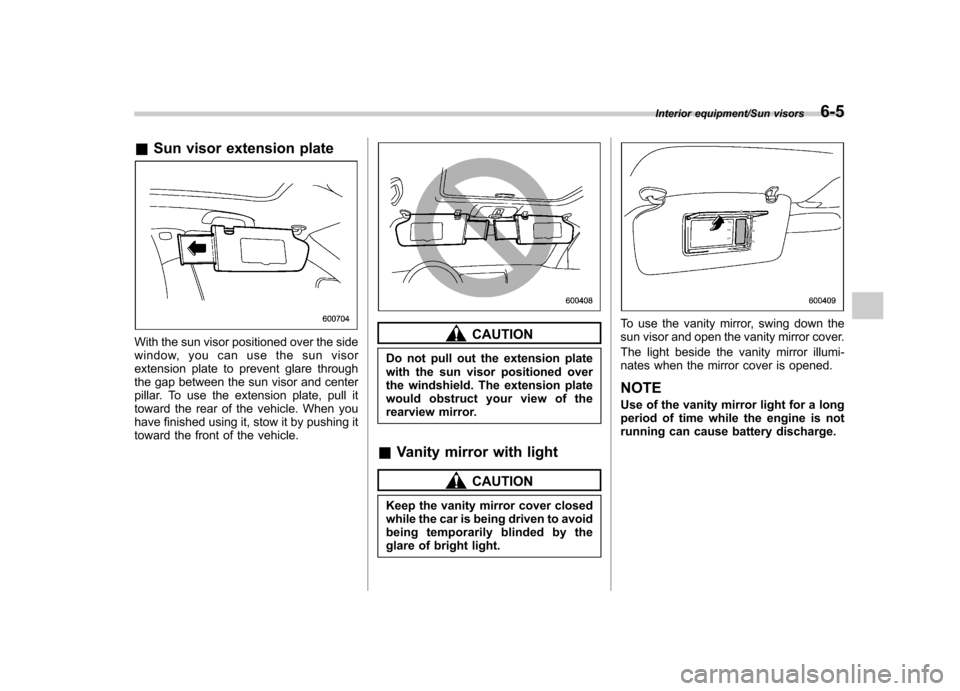
&Sun visor extension plate
With the sun visor positioned over the side
window, you can use the sun visor
extension plate to prevent glare through
the gap between the sun visor and center
pillar. To use the extension plate, pull it
toward the rear of the vehicle. When you
have finished using it, stow it by pushing it
toward the front of the vehicle.CAUTION
Do not pull out the extension plate
with the sun visor positioned over
the windshield. The extension plate
would obstruct your view of the
rearview mirror.
& Vanity mirror with light
CAUTION
Keep the vanity mirror cover closed
while the car is being driven to avoid
being temporarily blinded by the
glare of bright light.
To use the vanity mirror, swing down the
sun visor and open the vanity mirror cover.
The light beside the vanity mirror illumi-
nates when the mirror cover is opened. NOTE
Use of the vanity mirror light for a long
period of time while the engine is not
running can cause battery discharge.
Interior equipment/Sun visors6-5
Page 240 of 420
opener by pressing the programmed HomeLink®button.
& Programming other devices
To program other devices such as door
locks, home lighting and security systems,
contact HomeLink at www.homelink.com
or call 1-800-355-3515. & Operating the HomeLink
®
Wireless Control System
Once programmed, the HomeLink
®Wire-
less Control System can be used to
remote-control the devices to which its
buttons are programmed. To activate a
device, simply press the appropriate but-
ton. The indicator light illuminates, indicat-
ing that the signal is being transmitted.
& Erasing HomeLink
®button
memory
NOTE . Performing this procedure erases
the memory of all the preprogrammed
buttons simultaneously. The memory
of individual buttons cannot be erased. . It is recommended that upon the
sale of the vehicle, the memory of all
programmed HomeLink
®buttons be
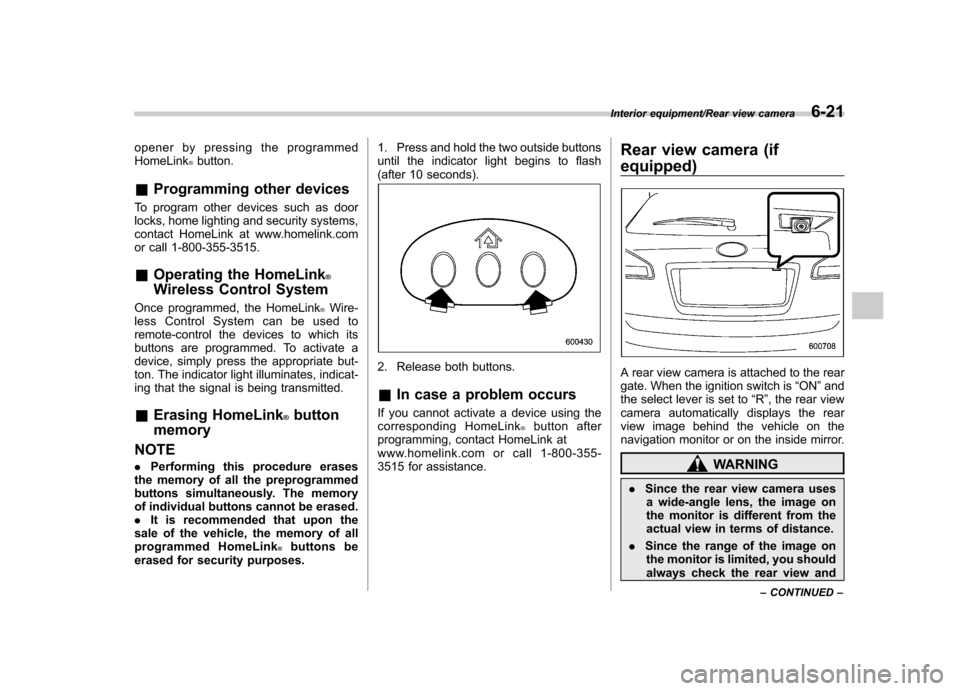
erased for security purposes. 1. Press and hold the two outside buttons
until the indicator light begins to flash
(after 10 seconds).
2. Release both buttons. &
In case a problem occurs
If you cannot activate a device using the
corresponding HomeLink
®button after
programming, contact HomeLink at
www.homelink.com or call 1-800-355-
3515 for assistance. Rear view camera (if
equipped)
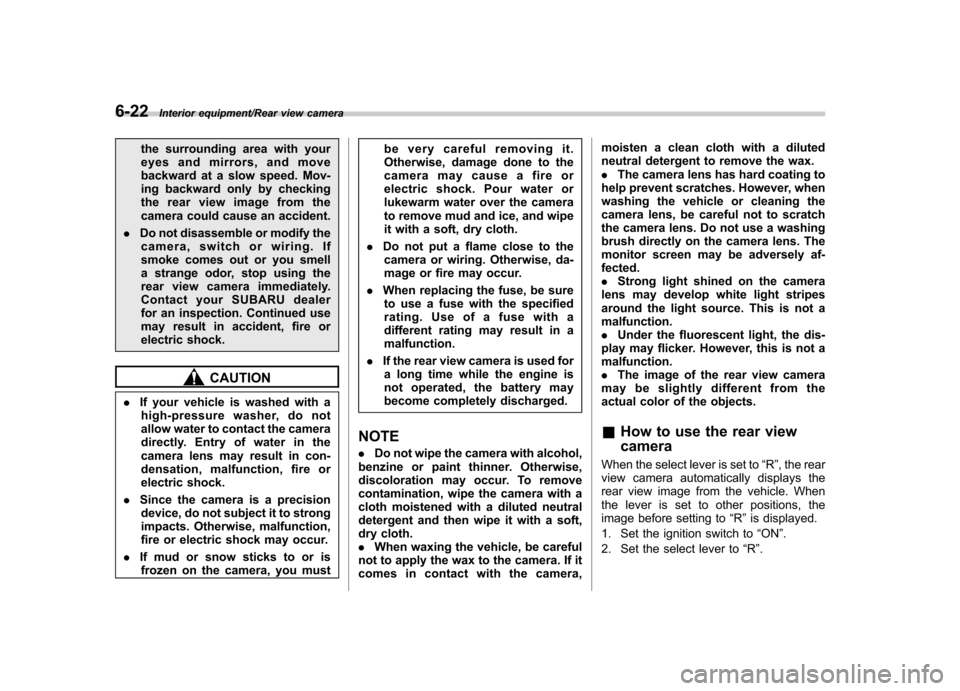
A rear view camera is attached to the rear
gate. When the ignition switch is
“ON ”and
the select lever is set to “R ”, the rear view
camera automatically displays the rear
view image behind the vehicle on the
navigation monitor or on the inside mirror.
WARNING
. Since the rear view camera uses
a wide-angle lens, the image on
the monitor is different from the
actual view in terms of distance.
. Since the range of the image on
the monitor is limited, you should
always check the rear view and
Interior equipment/Rear view camera6-21
– CONTINUED –
Page 241 of 420
6-22Interior equipment/Rear view camera
the surrounding area with your
eyes and mirrors, and move
backward at a slow speed. Mov-
ing backward only by checking
the rear view image from the
camera could cause an accident.
. Do not disassemble or modify the
camera, switch or wiring. If
smoke comes out or you smell
a strange odor, stop using the
rear view camera immediately.
Contact your SUBARU dealer
for an inspection. Continued use
may result in accident, fire or
electric shock.
CAUTION
. If your vehicle is washed with a
high-pressure washer, do not
allow water to contact the camera
directly. Entry of water in the
camera lens may result in con-
densation, malfunction, fire or
electric shock.
. Since the camera is a precision
device, do not subject it to strong
impacts. Otherwise, malfunction,
fire or electric shock may occur.
. If mud or snow sticks to or is
frozen on the camera, you must be very careful removing it.
Otherwise, damage done to the
camera may cause a fire or
electric shock. Pour water or
lukewarm water over the camera
to remove mud and ice, and wipe
it with a soft, dry cloth.
. Do not put a flame close to the
camera or wiring. Otherwise, da-
mage or fire may occur.
. When replacing the fuse, be sure
to use a fuse with the specified
rating. Use of a fuse with a
different rating may result in amalfunction.
. If the rear view camera is used for
a long time while the engine is
not operated, the battery may
become completely discharged.
NOTE . Do not wipe the camera with alcohol,
benzine or paint thinner. Otherwise,
discoloration may occur. To remove
contamination, wipe the camera with a
cloth moistened with a diluted neutral
detergent and then wipe it with a soft,
dry cloth.. When waxing the vehicle, be careful
not to apply the wax to the camera. If it
comes in contact with the camera, moisten a clean cloth with a diluted
neutral detergent to remove the wax..
The camera lens has hard coating to
help prevent scratches. However, when
washing the vehicle or cleaning the
camera lens, be careful not to scratch
the camera lens. Do not use a washing
brush directly on the camera lens. The
monitor screen may be adversely af-fected.. Strong light shined on the camera
lens may develop white light stripes
around the light source. This is not amalfunction.. Under the fluorescent light, the dis-
play may flicker. However, this is not a malfunction. . The image of the rear view camera
may be slightly different from the
actual color of the objects. & How to use the rear view camera
When the select lever is set to “R ”, the rear
view camera automatically displays the
rear view image from the vehicle. When
the lever is set to other positions, the
image before setting to “R ”is displayed.
1. Set the ignition switch to “ON ”.
2. Set the select lever to “R ”.
Page 242 of 420
NOTE .The image of the rear view camera
has priority over other screen displays. . The image of the rear view camera is
horizontally reversed as is the case
with the vehicle rearview mirror or the
side view mirror.. It may be difficult to see the image of
the rearview camera in the following
cases. This is not a malfunction of thecamera.
–The vehicle is in a dark place (at
night, in a tunnel, etc.). – The vehicle is in an extremely hot
or cold place.– An object (such as raindrops,
snow, dirt, etc.) that disturbs the
view of the rear view camera sticks
to the lens of the camera. – Strong light shined directly on
the camera lens (occasionally, there
are vertical lines on the screen). &
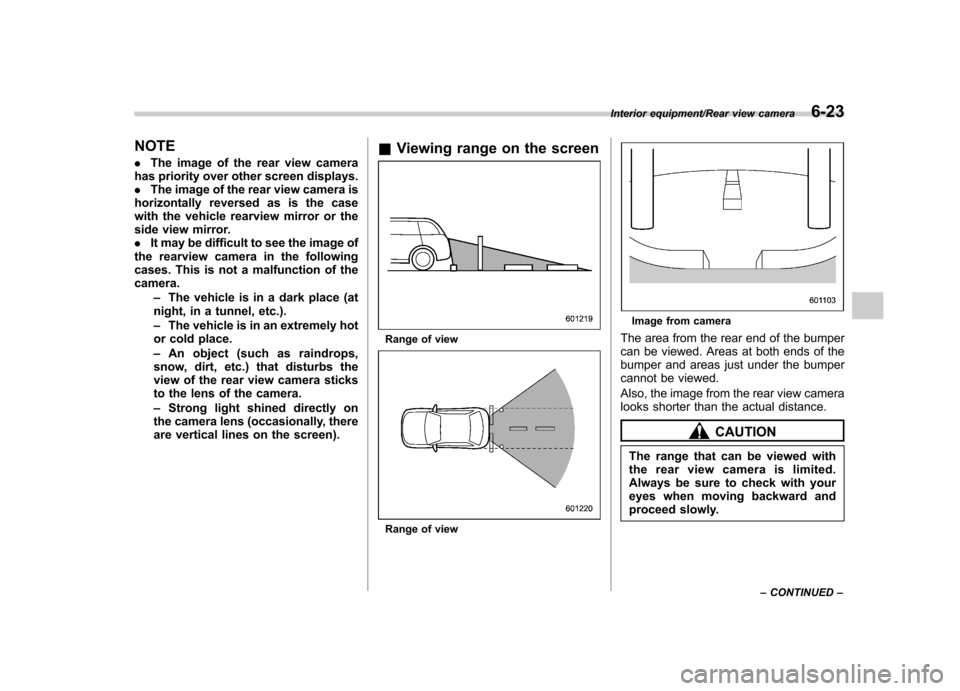
Viewing range on the screen
Range of view
Range of view
Image from camera
The area from the rear end of the bumper
can be viewed. Areas at both ends of the
bumper and areas just under the bumper
cannot be viewed.
Also, the image from the rear view camera
looks shorter than the actual distance.
CAUTION
The range that can be viewed with
the rear view camera is limited.
Always be sure to check with your
eyes when moving backward and
proceed slowly.
Interior equipment/Rear view camera6-23
– CONTINUED –
Page 243 of 420
6-24Interior equipment/Rear view camera
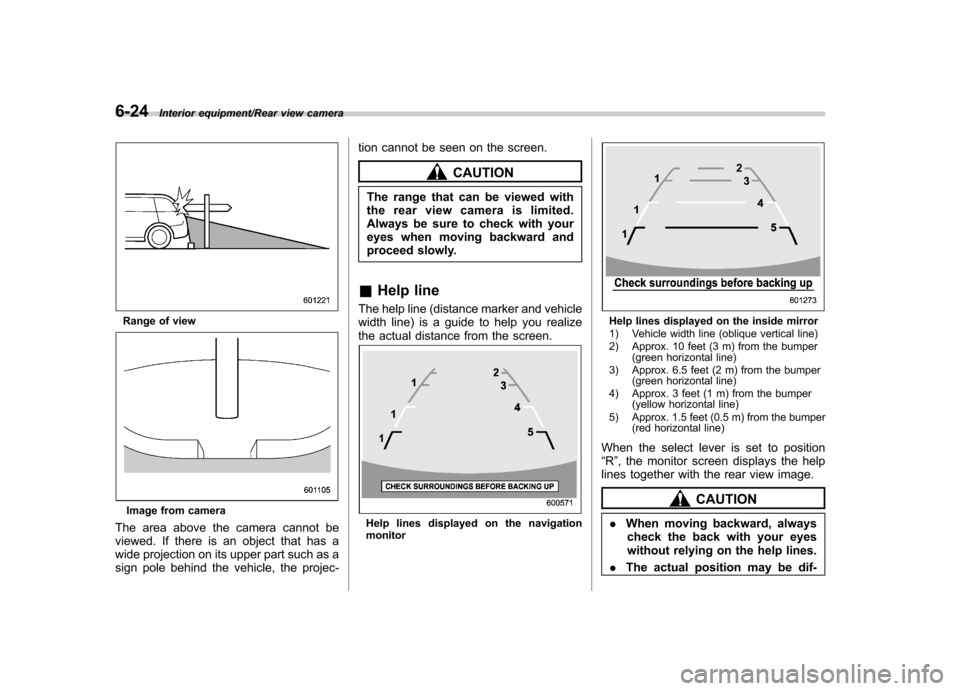
Range of view
Image from camera
The area above the camera cannot be
viewed. If there is an object that has a
wide projection on its upper part such as a
sign pole behind the vehicle, the projec- tion cannot be seen on the screen.
CAUTION
The range that can be viewed with
the rear view camera is limited.
Always be sure to check with your
eyes when moving backward and
proceed slowly.
& Help line
The help line (distance marker and vehicle
width line) is a guide to help you realize
the actual distance from the screen.
Help lines displayed on the navigation monitor
Help lines displayed on the inside mirror
1) Vehicle width line (oblique vertical line)
2) Approx. 10 feet (3 m) from the bumper (green horizontal line)
3) Approx. 6.5 feet (2 m) from the bumper (green horizontal line)
4) Approx. 3 feet (1 m) from the bumper (yellow horizontal line)
5) Approx. 1.5 feet (0.5 m) from the bumper (red horizontal line)
When the select lever is set to position “ R ”, the monitor screen displays the help
lines together with the rear view image.
CAUTION
. When moving backward, always
check the back with your eyes
without relying on the help lines.
. The actual position may be dif-