2013 SUBARU IMPREZA WRX ECO mode
[x] Cancel search: ECO modePage 202 of 414
resumed. To cancel the scan mode, press the“SCAN ”button again.
NOTE
The scan mode will be cancelled if you
perform any of the following steps. . Press the “RPT/RDM ”button
. Turn the “TUNE/TRACK/CH ”dial
. Press the “
”or “”side of the
“ FOLDER/PTY/CAT ”button
. Press the “
”button
. Press the disc select button (type A
audio) . Select the radio or AUX mode
. Press the “LOAD ”button when
there is free space in the CD magazine
(type A audio). Press the “PTY/CAT ”button
. Turn off the power of the audio
equipment. Turn the ignition switch to the
“ LOCK ”position
& Display selection
Type A audio
Type B audio
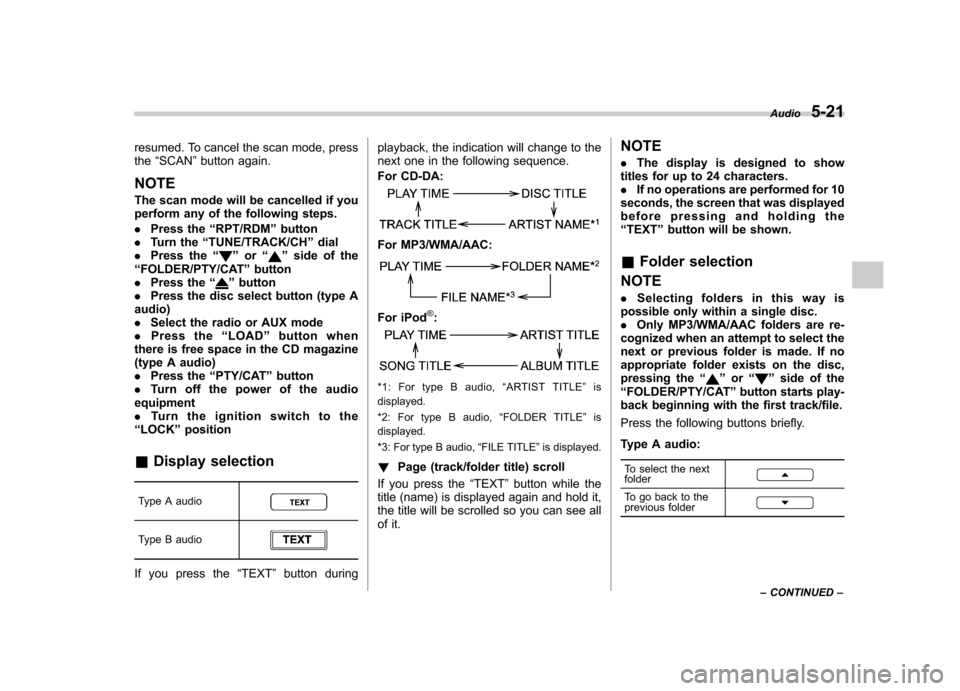
If you press the “TEXT ”button during playback, the indication will change to the
next one in the following sequence.
For CD-DA:
For MP3/WMA/AAC:
For iPod®:
*1: For type B audio,
“ARTIST TITLE ”is
displayed.
*2: For type B audio, “FOLDER TITLE ”is
displayed.
*3: For type B audio, “FILE TITLE ”is displayed.
! Page (track/folder title) scroll
If you press the “TEXT ”button while the
title (name) is displayed again and hold it,
the title will be scrolled so you can see all
of it. NOTE .
The display is designed to show
titles for up to 24 characters. . If no operations are performed for 10
seconds, the screen that was displayed
before pressing and holding the“ TEXT ”button will be shown.
& Folder selection
NOTE . Selecting folders in this way is
possible only within a single disc. . Only MP3/WMA/AAC folders are re-
cognized when an attempt to select the
next or previous folder is made. If no
appropriate folder exists on the disc,
pressing the “”or “”side of the
“ FOLDER/PTY/CAT ”button starts play-
back beginning with the first track/file.
Press the following buttons briefly.
Type A audio:
To select the next folder
To go back to the
previous folder
Audio 5-21
– CONTINUED –
Page 203 of 414
5-22Audio
Type B audio:
To select the next folder
To go back to the
previous folder
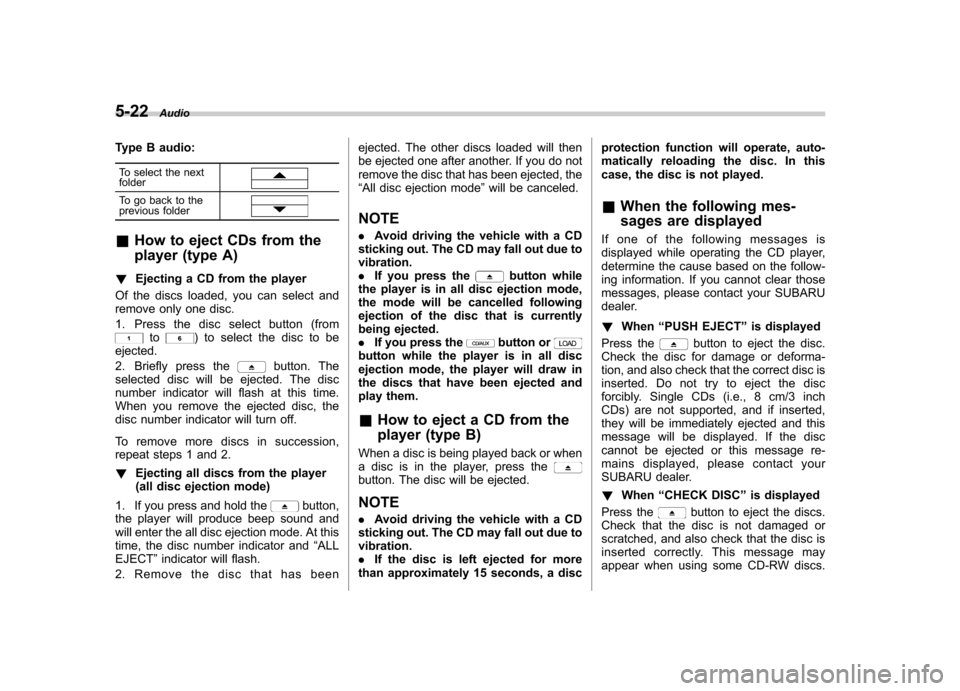
& How to eject CDs from the
player (type A)
! Ejecting a CD from the player
Of the discs loaded, you can select and
remove only one disc.
1. Press the disc select button (from
to) to select the disc to be
ejected.
2. Briefly press the
button. The
selected disc will be ejected. The disc
number indicator will flash at this time.
When you remove the ejected disc, the
disc number indicator will turn off.
To remove more discs in succession,
repeat steps 1 and 2. ! Ejecting all discs from the player
(all disc ejection mode)
1. If you press and hold the
button,
the player will produce beep sound and
will enter the all disc ejection mode. At this
time, the disc number indicator and “ALL
EJECT ”indicator will flash.
2. Remove the disc that has been ejected. The other discs loaded will then
be ejected one after another. If you do not
remove the disc that has been ejected, the“
All disc ejection mode ”will be canceled.
NOTE . Avoid driving the vehicle with a CD
sticking out. The CD may fall out due to vibration.. If you press the
button while
the player is in all disc ejection mode,
the mode will be cancelled following
ejection of the disc that is currently
being ejected.. If you press the
button orbutton while the player is in all disc
ejection mode, the player will draw in
the discs that have been ejected and
play them. & How to eject a CD from the
player (type B)
When a disc is being played back or when
a disc is in the player, press the
button. The disc will be ejected. NOTE . Avoid driving the vehicle with a CD
sticking out. The CD may fall out due to vibration.. If the disc is left ejected for more
than approximately 15 seconds, a disc protection function will operate, auto-
matically reloading the disc. In this
case, the disc is not played. &
When the following mes-
sages are displayed
If one of the following messages is
displayed while operating the CD player,
determine the cause based on the follow-
ing information. If you cannot clear those
messages, please contact your SUBARU
dealer. ! When “PUSH EJECT ”is displayed
Press the
button to eject the disc.
Check the disc for damage or deforma-
tion, and also check that the correct disc is
inserted. Do not try to eject the disc
forcibly. Single CDs (i.e., 8 cm/3 inch
CDs) are not supported, and if inserted,
they will be immediately ejected and this
message will be displayed. If the disc
cannot be ejected or this message re-
mains displayed, please contact your
SUBARU dealer. ! When “CHECK DISC ”is displayed
Press the
button to eject the discs.
Check that the disc is not damaged or
scratched, and also check that the disc is
inserted correctly. This message may
appear when using some CD-RW discs.
Page 205 of 414
5-24Audio
in the center console. A stereo mini pin
plug (3.5ø) can be inserted in this jack.
The connection cable is available at
electrical appliance or similar stores.
To use the AUX input jack :
1. Connect a portable audio player to the
AUX input jack.
Type A audio
Type B audio
2. Press the AUX input selection button “ CD/AUX ”on the audio control panel to
turn on the auxiliary audio input.
3. Play back the portable audio player.
Refer to the Owner ’s Manual of the
portable audio player. NOTE . The AUX jacks of the models with
the genuine SUBARU navigation sys-
tem are the RCA type. For detailed
information, refer to the Owner ’s Man-
ual supplement for the navigation sys-tem.. The output sound of the portable
audio player is not loud, and the sound
via the vehicle ’s speakers that are connected to the vehicle audio set
may be very low. If you turn up the
volume of the audio set, the volume
becomes louder. However, when you
change from one portable audio player
to another one, the volume levels via
the vehicle
’s speakers may be signifi-
cantly louder compared to the prior
device. To avoid a large volume differ-
ence, turn down the volume when you
change between portable audioplayers.. In some cases, when the sound
volume of the portable audio player is
low, sound quality may become im-
paired when you turn up the volume of
the vehicle audio system. In this case,
adjust the sound volume of the porta-
ble audio player.. In some cases, noise occurs be-
cause of a bad connection between the
portable player and the audio system.
Try cleaning the stereo jack and audioplug.. If the noise is not reduced, check for
disconnection of the cord or a malfunc-
tion of the portable player. Precautions to observe when
handling a compact disc
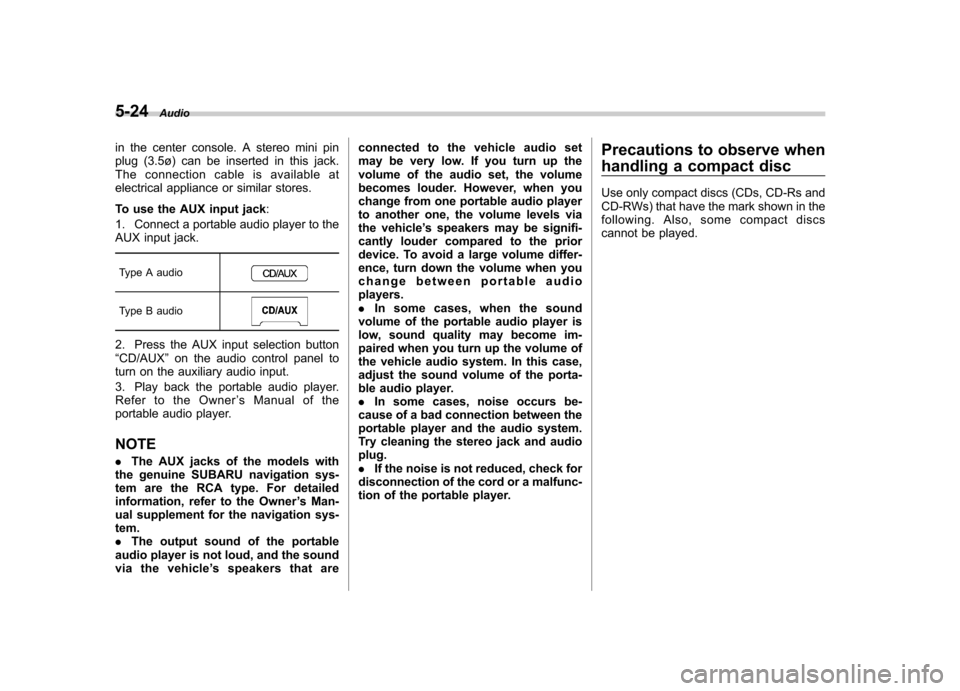
Use only compact discs (CDs, CD-Rs and
CD-RWs) that have the mark shown in the
following. Also, some compact discs
cannot be played.
Page 208 of 414
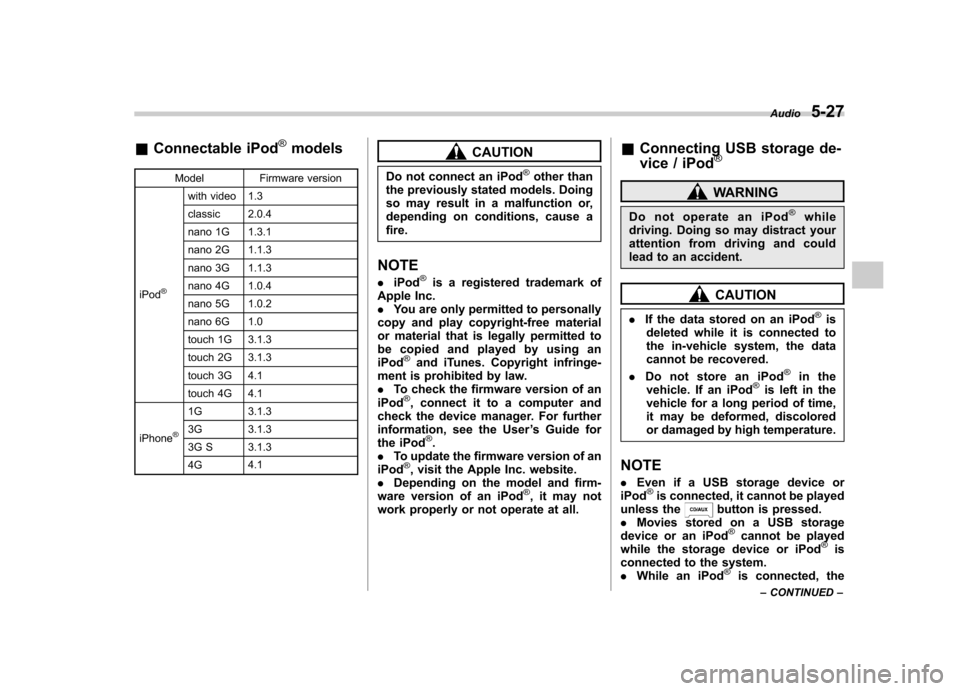
&Connectable iPod®models
Model Firmware version
iPod
®
with video 1.3
classic 2.0.4
nano 1G 1.3.1
nano 2G 1.1.3
nano 3G 1.1.3
nano 4G 1.0.4
nano 5G 1.0.2
nano 6G 1.0
touch 1G 3.1.3
touch 2G 3.1.3
touch 3G 4.1
touch 4G 4.1
iPhone
®
1G 3.1.3
3G 3.1.3
3G S 3.1.3 4G 4.1
CAUTION
Do not connect an iPod
®other than
the previously stated models. Doing
so may result in a malfunction or,
depending on conditions, cause afire.
NOTE . iPod
®is a registered trademark of
Apple Inc. . You are only permitted to personally
copy and play copyright-free material
or material that is legally permitted to
be copied and played by using aniPod
®and iTunes. Copyright infringe-
ment is prohibited by law.. To check the firmware version of an
iPod
®, connect it to a computer and
check the device manager. For further
information, see the User ’s Guide for
the iPod
®.
. To update the firmware version of an
iPod
®, visit the Apple Inc. website.
. Depending on the model and firm-
ware version of an iPod
®, it may not
work properly or not operate at all. &
Connecting USB storage de-
vice / iPod
®
WARNING
Do not operate an iPod
®while
driving. Doing so may distract your
attention from driving and could
lead to an accident.
CAUTION
. If the data stored on an iPod
®is
deleted while it is connected to
the in-vehicle system, the data
cannot be recovered.
. Do not store an iPod
®in the
vehicle. If an iPod®is left in the
vehicle for a long period of time,
it may be deformed, discolored
or damaged by high temperature.
NOTE . Even if a USB storage device or
iPod
®is connected, it cannot be played
unless thebutton is pressed.
. Movies stored on a USB storage
device or an iPod
®cannot be played
while the storage device or iPod®is
connected to the system. . While an iPod
®is connected, the Audio
5-27
– CONTINUED –
Page 209 of 414
5-28Audio
iPod
®cannot be operated using the
click wheel on the iPod®(except some
models). . When using an iPod
®by connecting
it to in-vehicle equipment, the order of
the list items displayed on the in-
vehicle equipment may be different
from that on the iPod
®. However, this
does not indicate a malfunction.. An iPod
®battery that is connected
to in-vehicle equipment will be charged
when the ignition switch is in the “ON ”
or “Acc ”position. However, activation
of the iPod
®may be delayed if the
battery charge of the iPod®is low.
. If an iPod®does not activate after
operation, disconnect the connection
cable from the iPod
®and reset it. For
the resetting procedure, see the User ’s
Guide of the iPod
®.
. If an iPod®and the connection cable
are connected improperly, the iPod®
cannot be powered on or will not be
recognized by in-vehicle equipment. In
this case, disconnect the connection
cable from the iPod
®, and then connect
it again.
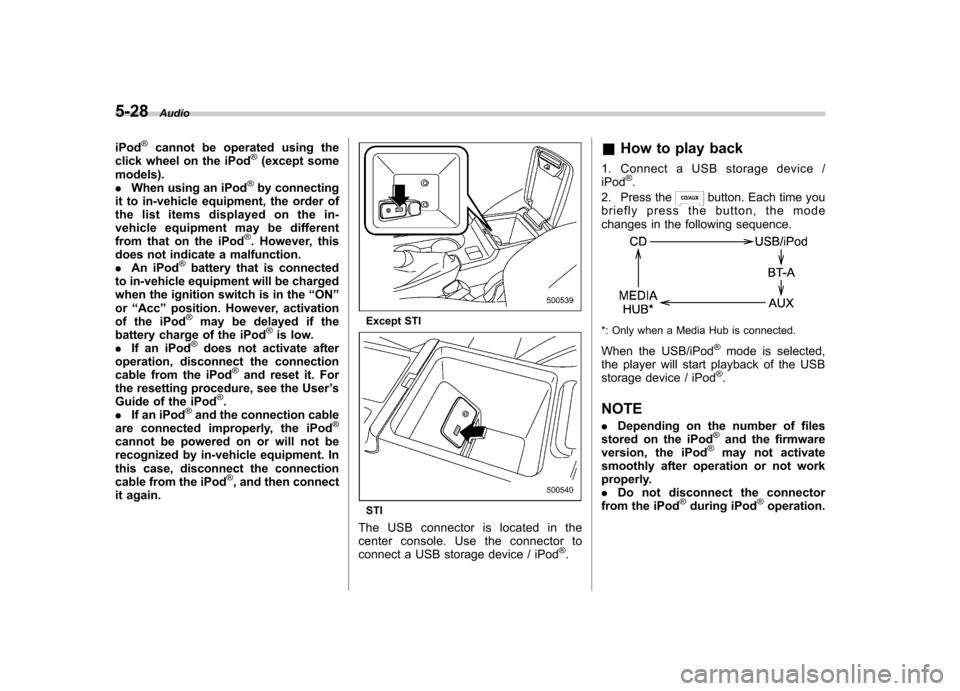
Except STI
STI
The USB connector is located in the
center console. Use the connector to
connect a USB storage device / iPod
®. &
How to play back
1. Connect a USB storage device /iPod
®.
2. Press the
button. Each time you
briefly press the button, the mode
changes in the following sequence.
*: Only when a Media Hub is connected.
When the USB/iPod
®mode is selected,
the player will start playback of the USB
storage device / iPod
®.
NOTE . Depending on the number of files
stored on the iPod
®and the firmware
version, the iPod®may not activate
smoothly after operation or not work
properly.. Do not disconnect the connector
from the iPod
®during iPod®operation.
Page 214 of 414
&MUTE button (models with-
out Hands-free system)
Press the “”button if you wish to
immediately cut the volume to zero.
The audio display will show “MUTE ”.
If you press the button again, the original
sound volume will return and “MUTE ”
turns off. Bluetooth
®audio (type B
audio) NOTE
For models with the genuine SUBARU
navigation system, refer to the Owner ’s
Manual supplement for the navigationsystem.
NOTE
The Bluetooth word mark and logo are
registered tradem arks of Bluetooth
SIG, Inc.
This function enables you to play back
audio sources recorded in Bluetooth
®
audio devices. You need to register theBluetooth®audio device in the system
before using it. &
Media format
Bluetooth
®audio devices cannot be
connected if they are not compatible with
the following Bluetooth
®profiles.
. A2DP (Advanced Audio Distribution
Profile) . AVRCP (Audio/Video Remote Control
Profile) & Setting Bluetooth
®audio
1. Select the “BT-A SETUP ”menu by
pressing the “MENU ”button. For details,
refer to “Other sound setting controls ”F 5-
7.
2. Perform the following procedure by
operating the “TUNE/TRACK/CH ”dial
while “BT-A ”is displayed.
NOTE
You cannot set a Bluetooth
®audio
while driving. ! Registering (pairing) device
1. Select the “PAIR AUDIO ”menu.
– If a device is already registered,
“ MEMORY FULL ”is displayed and the
mode changes to the Bluetooth
®
audio setting mode.
2. After the passkey is shown on the
display, input the passkey into the cell Audio
5-33
– CONTINUED –
Page 219 of 414
5-38Audio
used by a movable body identifi-
cation device.
& Using the Hands-free system
! Turning on/off the Hands-free mode
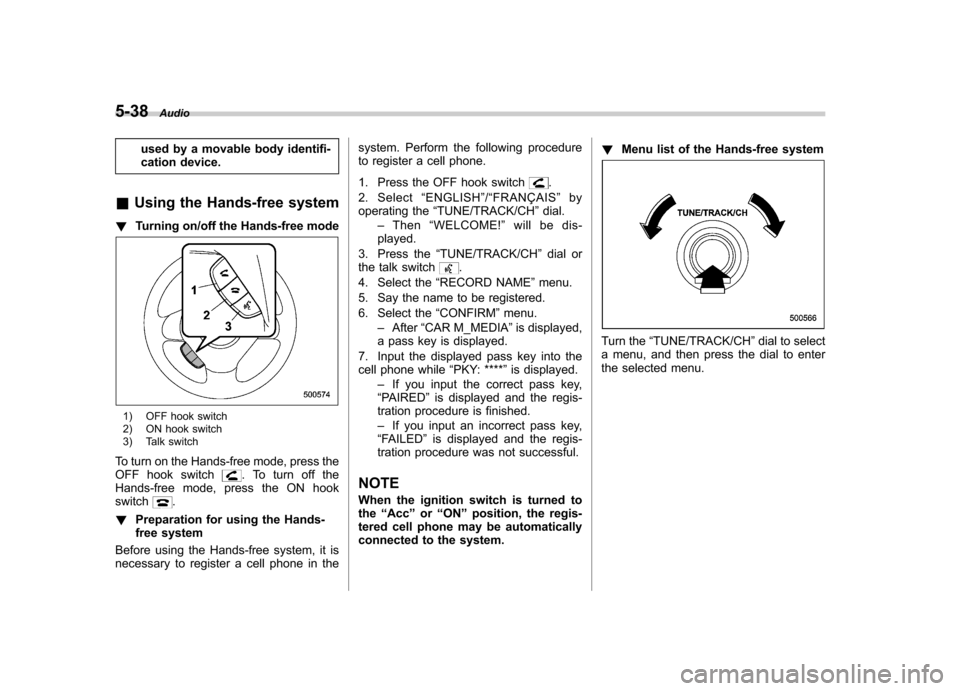
1) OFF hook switch
2) ON hook switch
3) Talk switch
To turn on the Hands-free mode, press the
OFF hook switch
. To turn off the
Hands-free mode, press the ON hook switch
.
! Preparation for using the Hands-
free system
Before using the Hands-free system, it is
necessary to register a cell phone in the system. Perform the following procedure
to register a cell phone.
1. Press the OFF hook switch
.
2. Select “ENGLISH ”/“ FRANÇAIS ”by
operating the “TUNE/TRACK/CH ”dial.
– Then “WELCOME! ”will be dis-
played.
3. Press the “TUNE/TRACK/CH ”dial or
the talk switch
.
4. Select the “RECORD NAME ”menu.
5. Say the name to be registered.
6. Select the “CONFIRM ”menu.
– After “CAR M_MEDIA ”is displayed,
a pass key is displayed.
7. Input the displayed pass key into the
cell phone while “PKY: **** ”is displayed.
– If you input the correct pass key,
“ PAIRED ”is displayed and the regis-
tration procedure is finished. – If you input an incorrect pass key,
“ FAILED ”is displayed and the regis-
tration procedure was not successful.
NOTE
When the ignition switch is turned to the “Acc ”or “ON ”position, the regis-
tered cell phone may be automatically
connected to the system. !
Menu list of the Hands-free system
Turn the “TUNE/TRACK/CH ”dial to select
a menu, and then press the dial to enter
the selected menu.
Page 223 of 414
5-42Audio
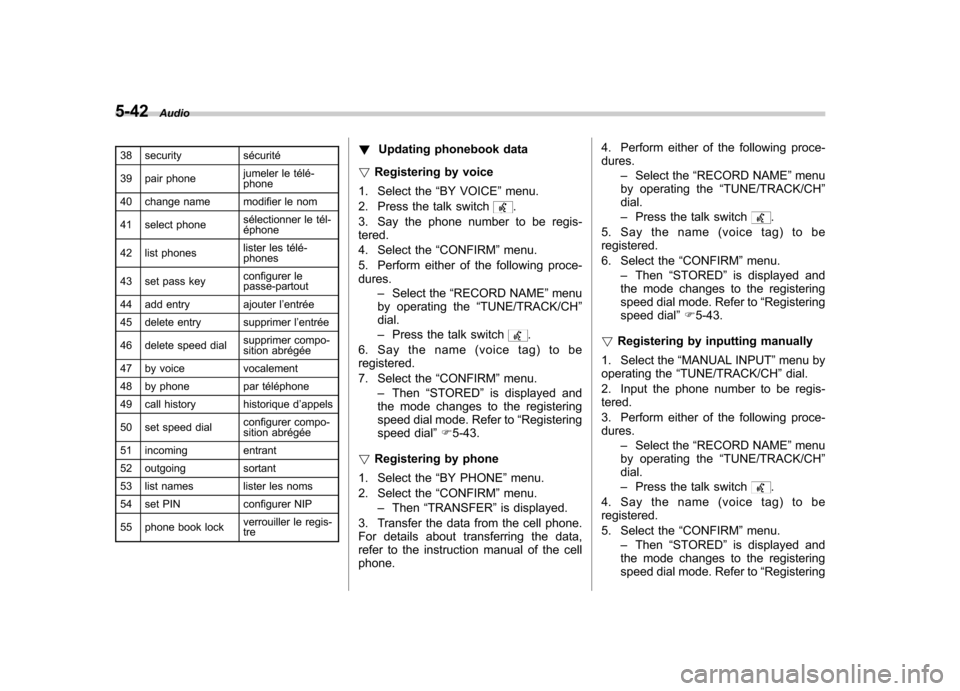
38 security sécurité
39 pair phone jumeler le télé- phone
40 change name modifier le nom
41 select phone sélectionner le tél- éphone
42 list phones lister les télé-phones
43 set pass key configurer le
passe-partout
44 add entry ajouter l ’entrée
45 delete entry supprimer l ’entrée
46 delete speed dial supprimer compo-
sition abrégée
47 by voice vocalement
48 by phone par téléphone
49 call history historique d ’appels
50 set speed dial configurer compo-
sition abrégée
51 incoming entrant
52 outgoing sortant
53 list names lister les noms
54 set PIN configurer NIP
55 phone book lock verrouiller le regis- tre!
Updating phonebook data
! Registering by voice
1. Select the “BY VOICE ”menu.
2. Press the talk switch
.
3. Say the phone number to be regis- tered.
4. Select the “CONFIRM ”menu.
5. Perform either of the following proce- dures. –Select the “RECORD NAME ”menu
by operating the “TUNE/TRACK/CH ”
dial. – Press the talk switch
.
6. Say the name (voice tag) to be registered.
7. Select the “CONFIRM ”menu.
– Then “STORED ”is displayed and
the mode changes to the registering
speed dial mode. Refer to “Registering
speed dial ”F 5-43.
! Registering by phone
1. Select the “BY PHONE ”menu.
2. Select the “CONFIRM ”menu.
– Then “TRANSFER ”is displayed.
3. Transfer the data from the cell phone.
For details about transferring the data,
refer to the instruction manual of the cellphone. 4. Perform either of the following proce-dures.
–Select the “RECORD NAME ”menu
by operating the “TUNE/TRACK/CH ”
dial. – Press the talk switch
.
5. Say the name (voice tag) to be registered.
6. Select the “CONFIRM ”menu.
– Then “STORED ”is displayed and
the mode changes to the registering
speed dial mode. Refer to “Registering
speed dial ”F 5-43.
! Registering by inputting manually
1. Select the “MANUAL INPUT ”menu by
operating the “TUNE/TRACK/CH ”dial.
2. Input the phone number to be regis-tered.
3. Perform either of the following proce- dures. –Select the “RECORD NAME ”menu
by operating the “TUNE/TRACK/CH ”
dial. – Press the talk switch
.
4. Say the name (voice tag) to be registered.
5. Select the “CONFIRM ”menu.
– Then “STORED ”is displayed and
the mode changes to the registering
speed dial mode. Refer to “Registering