2013 SUBARU FORESTER display
[x] Cancel search: displayPage 187 of 436
5-14Audio
This function may not be available when
radio signals are weak. When this hap-
pens, perform manual tuning to select the
desired station. !Scan tuning (SCAN)
Type A and B audio*
1
Type C audio*1
Type D audio*2
*1: Press the button briefly.
*2: Press and hold the button.
If you press the “SCAN ”button, the radio
will switch to the scan mode. In this mode,
the radio scans through the radio band
until a receivable station is found. The
radio will stop at the station for 5 seconds
(type A, B and C audio)/10 seconds (type
D audio) while displaying the frequency,
after which scanning will continue until the
entire band has been scanned.
Press the “SCAN ”button again to cancel
the SCAN mode and to stop at any
displayed channel.
Automatic tuning may not function prop-
erly if the station reception is weakened by
distance from the station or proximity to tall buildings and hills. !
PTY (Program type) group tuning
(only FM reception)
Type A and B audio
Type C audio
Type D audio
Press the indicated button to change to
the PTY selection mode. At this time, the
PTY group that you are currently listening
to (type A, B and C audio)/that you
selected the last time (type D audio) will
be displayed for 10 seconds. In the PTY
selection mode, “PTY ”is displayed on the
screen. ! PTY (Program type) group selection
In the PTY selection mode, press the
following button to change the PTY group
by one step at a time. Type A and B audio:
PTY group up by
one step
PTY group down by
one step
Type C audio:
PTY group up by
one step
PTY group down by
one step
This operation only changes the display. It
does not change the station that is
currently being received. ! Seek in PTY (Program type) group
(type A, B and C audio)
Type A and B audio:
Seek up
Seek down
Page 189 of 436
5-16Audio
.The “LIVE ”indicator illuminates while
the “Ballgame ”is received.
. The “STEREO ”indicator illuminates
while the FM stereo broadcast is received. . The “PTY ”indicator illuminates during
the PTY selection mode. ! About HD Radio
NOTE . HD Radio Technology is a hybrid
broadcasting system that employs di-
gital and analog signals. . When the vehicle moves outside the
digital broadcasting area (that is nar-
rower than the analog broadcasting
area due to the FCC output require-
ments), the radio reception automati-
cally changes from the digital signal to
the analog signal. When the vehicle
reenters the digital broadcasting area
again, the radio reception automatically
changes from the analog signal to the
digital signal. When in a digital modethe
Logo will be in orange on the
radio display. . Depending on the broadcasting sta-
tion, a condition such as a sound delay,
echo effect or skipping sound may
occur. However, this does not indicate
a malfunction.. Depending on the broadcasting
area, the digital signal may not be received in an area where the analog
signal can be properly received, or the
system frequently switches the chan-
nels between the digital and analog
signals. However, this does not indi-
cate a malfunction. If this frequent
switching between digital and analog
causes annoyance, set the radio to the
analog mode (HD Radio off mode) that
provides the same radio broadcasting
quality as a conventional radio.
& Displaying radio PS (Pro-
gram Service Name) and RT
(Radio Text)
Type A and B audio
Type C and D audio
! Type A, B and C audio
If the PS (Program Service Name) and/or
RT (Radio Text) are available, pressingthe “TEXT ”button changes the display
among PS, RT and frequency. The default
setting is “PS ”. NOTE .
The maximum number of characters
that can be displayed for PS is 8. . The maximum number of characters
that can be displayed for RT is 64.. If RT is 13 characters or longer,
press and hold the “TEXT ”button for
0.5 second or longer in order to change
the page. ! Type D audio
Push the “TEXT ”button to show the next
page when the text is not fully displayed
while the PSD (Program Service Data) or
RT (Radio Text) service is received.
NOTE . When the HD Radio function is
turned on, PSD provides additional
information about the broadcast. Text
data such as “Title ”and “Artist ”is
displayed on the screen. . When the HD Radio function is
turned off (HD Radio off mode), the
radio text is displayed on the screen
while receiving the broadcasting sta-
tion with RBDS (Radio Broadcast DataSystem).
Page 190 of 436
&Station preset
! How to preset stations
1. Press the “FM/AM ”button to select the
preferred reception mode.
2. Select the preferred station.
3. Press and hold one of the preset
buttons (from
to) for more
than 1.5 seconds to store the frequency. If
the button is pressed and held for less
than 1.5 seconds, the preceding selection
will remain in memory. NOTE . Up to six stations for each reception
mode may be preset. . If the connection between the radio
and battery is broken for any reason
such as vehicle maintenance or radio
removal, all stations stored in the
preset buttons are cleared. If this
occurs, it is necessary to reset the
preset buttons.. If a cell phone is placed near the
radio, it may cause the radio to emit
noise when it receives calls. This noise
does not indicate a radio malfunction. ! Selecting preset stations
1. Press the “FM/AM ”button to select the
preferred reception mode. 2. Press the preferred preset button (from
to) briefly.
! Auto-store (type D audio)
Using the Auto-store function, you can
automatically store 6 stations on the
current waveband (FM-AS or AM-AS) by
pressing and holding the
button for
1.5 seconds or longer. Use Auto-store to
quickly find the strongest stations, for
example when traveling through different
reception areas. NOTE . When the HD Radio function is
turned on, Auto-store cannot be used
while receiving the broadcasting sta-
tion with SPS (Supplemental ProgramService).. When you use Auto-store, the new
stations replace any stations pre-
viously stored.. Interrupting Auto-store: If you acci-
dentally press the
(Auto-store)
button, you can cancel the Auto-store
function before it has been completed
as follows.
–Switching to the other source
mode – Pressing the
button
– Switching to the other band
– Turning the “TUNE/TRACK/CH ”dial –
Pressing the “SCAN ”button
! Displaying and selecting preset
stations (type D audio)
1. Press and hold the
button for 1.5
seconds or longer during AM/FM recep-
tion to display the radio screen.
2. Operate the “TUNE/TRACK/CH ”dial
to select the stations. Audio
5-17
Page 192 of 436
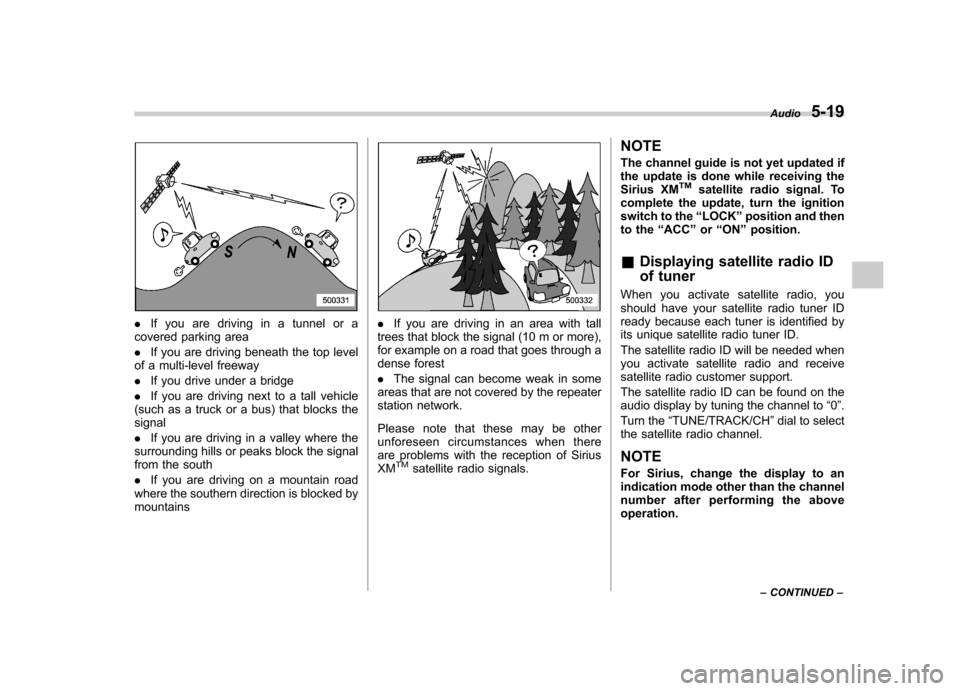
.If you are driving in a tunnel or a
covered parking area . If you are driving beneath the top level
of a multi-level freeway. If you drive under a bridge
. If you are driving next to a tall vehicle
(such as a truck or a bus) that blocks the signal . If you are driving in a valley where the
surrounding hills or peaks block the signal
from the south . If you are driving on a mountain road
where the southern direction is blocked by mountains. If you are driving in an area with tall
trees that block the signal (10 m or more),
for example on a road that goes through a
dense forest . The signal can become weak in some
areas that are not covered by the repeater
station network.
Please note that these may be other
unforeseen circumstances when there
are problems with the reception of SiriusXM
TMsatellite radio signals. NOTE
The channel guide is not yet updated if
the update is done while receiving the
Sirius XM
TMsatellite radio signal. To
complete the update, turn the ignition
switch to the “LOCK ”position and then
to the “ACC ”or “ON ”position.
& Displaying satellite radio ID
of tuner
When you activate satellite radio, you
should have your satellite radio tuner ID
ready because each tuner is identified by
its unique satellite radio tuner ID.
The satellite radio ID will be needed when
you activate satellite radio and receive
satellite radio customer support.
The satellite radio ID can be found on the
audio display by tuning the channel to “0 ”.
Turn the “TUNE/TRACK/CH ”dial to select
the satellite radio channel.
NOTE
For Sirius, change the display to an
indication mode other than the channel
number after performing the aboveoperation. Audio
5-19
– CONTINUED –
Page 194 of 436
Type A and B audio:Category up by one step
Category down by
one step
Type C audio:Category up by one step
Category down by
one step
When a category is selected, turning the “ TUNE/TRACK/CH ”dial selects channels
only within the selected category.
The control function returns to the normal
mode after approximately 10 seconds. ! Type D audio
When in the SAT mode, press the
button to change the category search mode.
When in the category search mode, press
the following button to change the cate-
gory up or down. Category up by one step
Category down by
one step
When a category is selected, turning the “
TUNE/TRACK/CH ”dial selects channels
only within the selected category. The
control function returns to the normal
mode after approximately 10 seconds. ! Channel scan
Type A and B audio*
1
Type C audio*1
Type D audio*2
*1: Press the button briefly.
*2: Press and hold the button.
Press the “SCAN ”button to change the
radio to the SCAN mode. In this mode,
under the selected category, the radio
scans through the channel until a station
is found. The radio will stop at the station
for 5 seconds while displaying the channel
number, after which scanning will continue until the entire channel has been scanned
from the low end to the high end.
Press the
“SCAN ”button again to cancel
the SCAN mode and to stop on any
displayed channel. & Channel preset
! How to preset channels
1. Press the “SAT ”button to select SAT1,
SAT2 or SAT3 reception mode.
2. Select the desired channel.
3. Press and hold one of the preset
buttons (from
to) for more
than 1.5 seconds to store the channel. If
the button is pressed and held for less
than 1.5 seconds, the preceding selection
will remain in memory. NOTE . Up to six SAT1, SAT2 and SAT3
channels each may be preset. . If the connection between the radio
and battery is broken for any reason
such as vehicle maintenance or radio
removal, all channels stored in the
preset buttons are cleared. If this
occurs, it is necessary to reset the
preset buttons. Audio
5-21
– CONTINUED –
Page 195 of 436
5-22Audio
!Selecting preset channels
1. Press the “SAT ”button to select SAT1,
SAT2 or SAT3 reception mode.
2. Press the preferred preset button (from
to) briefly.
! Displaying and selecting preset
stations (type D audio)
1. Press and hold the
button for 1.5
seconds or longer during satellite radio
reception to display the radio screen.
2. Operate the “TUNE/TRACK/CH ”dial
to select the stations.
& Display selection (type A, B
and C audio)
Type A and B audio
Type C audio
Press the “TEXT ”button while receiving
the satellite radio to change the display as follows.
CD player operation NOTE . Make sure to always insert a disc
with the label side up. If a disc is
inserted with the label side down, the
player displays “CHECK DISC ”. Refer
to “When the following messages are
displayed ”F 5-29.
. If a disc is inserted during a radio
broadcast, the disc will interrupt thebroadcast.. After the last song finishes, the disc
will automatically return to track 1 (the
first track on the disc) and will auto-
matically play back. . The player is designed to be able to
play music CD-Rs and music CD-RWs,
but it may not be able to play certainones.. Mini CDs (i.e., 8 cm/3 inch CDs) are
not supported, and if inserted, they will
be immediately ejected.. CDs that can be played back are
accompanied by the following restric-tions.
–Maximum number of folders: 255
– Maximum number of tracks in a
folder: 255 –
Maximum number of files on a
CD: 510 (type A, B and C audio)/999
(type D audio)
& Play file
NOTE . Copyright protected MP3/WMA/AAC
files will not be played by the system.
The player will automatically skip to the
next file (track).. WMA9 Lossless, WMA9 Profes-
sional and WMA9 voice cannot beplayed. MP3: . Based on MPEG1, 2 and 2.5 Layer3
. Sampling rate (kHz): 48, 44.1, 32, 24,
22.05, 16, 12, 11.025, 8. Bit rate (kbps): 8 to 320
. Supports variable bit rates
WMA (type A, B and C audio):. Based on Windows Media Audio 9
. Sampling rate (kHz): 48, 44.1, 32
. Bit rate (kbps): 32 to 192
WMA (type D audio):. Based on Windows Media Audio 7, 8
and 9. Sampling rate (kHz): 48, 44.1, 32
. Bit rate (kbps): 32 to 192
Page 197 of 436
5-24Audio
!Loading all the magazine (full disc
loading mode)
1. If you continue to press the
button for more than 1.5 seconds, the
player will produce beep sound and will
enter the full disc loading mode.
2. When the disc number indicator
flashes and “ALL LOAD ”indicator illumi-
nates, insert a disc within 15 seconds. If a
disc is successfully loaded during this
period, the disc number indicator will stop
blinking and will steadily light.
3. When the loading of a disc is com-
plete, the next disc number indicator will
blink. Then repeat step 2.
4. When the magazine is filled with discs
by repeating steps 2 and 3, the player will
start playback of the discs, beginning with
the one inserted first.
If you fail to insert any disc during each 15
seconds interval, the full disc loading
mode will be canceled, and the player will
start playback of the disc inserted first. & How to play back a CD
! When there is no CD inserted
Properly insert a CD. Refer to “How to
insert a CD (type A, C and D) ”F 5-23 /
“ How to insert a CD(s) (type B) ”F 5-23.
When a CD is loaded, the player will start
playback of the CD, beginning with the first track. !
When CD is in the player (type A)
When thebutton is pressed, the
player will start playback. ! When there are CDs loaded (type B)
Press a desired one of the disc select
buttons (from
to) the disc
number indicator of which steadily lights
up. The player will then start playback of
the selected CD, beginning with the firsttrack.
If a disc that the player cannot read has
been loaded, the player will display themessage “CHECK DISC ”.
! When CD is in the player (type C
and D)
Each brief press of the
button
changes the modes in the following sequence.
*: For type C audio, “BT-A ”is displayed.
When the CD mode is selected, the player
will start playback. &
To select a track from the beginning
Type A and B audio
Type C and D audio
Turn the “TUNE/TRACK/CH ”dial clock-
wise to skip to the beginning of the next
track. Each time the dial is turned, the
indicated track number will increase.
Turn the “TUNE/TRACK/CH ”dial counter-
clockwise to skip to the beginning of the
current track. Each time the dial is turned,
the indicated track number will decrease.
NOTE
With an MP3, WMA or AAC (type C and
D audio): . Skipping past the last track will take
you back to the first track in the folder. . Skipping past the first track will take
you to the last track in the folder.
Page 200 of 436
&Scan (type A, B and C audio)
Type A and B audio
Type C audio
The scan mode lets you listen to the first
10 seconds of each track in succession.
Press the “SCAN ”button to start scanning
upward beginning with the track following
the currently selected one.
After all tracks on the disc/in the folder
have been scanned, normal playback will
be resumed. To cancel the scan mode,
press the “SCAN ”button again.
NOTE
The scan mode will be cancelled if you
perform any of the following steps. . Press the “RPT ”button.
. Turn the “TUNE/TRACK/CH ”dial.
. Press the “
”or “”side of the
“ FOLDER/PTY/CAT ”button.
. Press the “
”button.
. Press the disc select button (type B
audio). . Select the mode other than CD
mode.. Press the “LOAD ”button when
there is free space in the CD magazine (type B audio)..
Turn off the power of the audio
equipment.. Turn the ignition switch to the
“ LOCK ”position.
& Display selection (type A, B
and C audio)
Type A and B audio
Type C audio
If you press the “TEXT ”button during
playback, the display will change as
shown in the following sequence.
For CD-DA:
For MP3/WMA/AAC:
For iPod®:
! Page (track/folder title) scroll
If you press and hold the “TEXT ”button
again for at least 0.5 second, the title will
be scrolled so you can see all of it. NOTE . For type A and B audio, the display
is designed to show titles for up to 24 characters.. For type C audio, the display is
designed to show titles as shown in
the following items.
–When playing a CD-DA: 256 char-
acters – When playing an MP3/WMA/AAC:
64 characters– When playing an iPod
®:255
characters
. If no operations are performed for 10
seconds, the screen that was displayed
before pressing and holding the“ TEXT ”button will be shown. Audio
5-27
– CONTINUED –