2013 SUBARU FORESTER warning lights
[x] Cancel search: warning lightsPage 6 of 436

&Abbreviation list
You may find several abbreviations in this
manual. The meanings of the abbrevia-
tions are shown in the following list.
Abbreviation Meaning
A/C Air conditioner A/ELR Automatic/Emergency locking retractor
ABS Anti-lock brake system
AKI Anti knock index
ALR Automatic locking retractor
AT Automatic transmission
ATF Automatic transmission fluid
AWD All-wheel drive
DRL Daytime running light EBD Electronic brake force distri- bution
ELR Emergency locking retractor
FWD Front-wheel drive
GAW Gross axle weight
GAWR Gross axle weight rating
GVW Gross vehicle weight
GVWR Gross vehicle weight rating
HID High intensity discharge
INT Intermittent Abbreviation Meaning
LATCH Lower anchors and tethers for
children
LED Light emitting diode
LSD Limited slip differential
MIL Malfunction indicator light MMT Methylcyclopentadienyl man-
ganese tricarbonyl
MT Manual transmission
OBD On-board diagnostics
RON Research octane number SRS Supplemental restraint sys- tem
TIN Tire identification number TPMS Tire pressure monitoring sys- tem Vehicle symbols
There are some of the symbols you may
see on your vehicle.
For warning and indicator lights, refer to “
Warning and indicator lights ”F 21.
Mark Name
WARNING
CAUTION
Power door lock
Power door unlock
Power window with automatic
open (all models) and close (if
equipped) function
Passengers ’windows lock
and unlock
Fuel
Front fog lights 3
– CONTINUED –
Page 7 of 436

4
Mark Name
Hazard warning flasher
Engine hood
Seat heater
Child restraint top tether an- chorages
Child restraint lower an- chorages
Horn
Wiper intermittent
Windshield washer
Windshield wiper mist (for
single wipe)
Rear window wiper
Rear window washerMark Name
Lights
Tail lights, license plate light
and instrument panel illumi- nation
Headlights
Turn signal
Illumination brightness
Fan speed
Instrument panel outlets
Instrument panel outlets and
foot outlets
Foot outlets
Windshield defroster and foot outlets
Windshield defrosterMark Name
Rear window defogger/Out-
side mirror defogger
Air recirculation
Engine oil
Washer
Door lock (Transmitter)
Door unlock (Transmitter)
Rear gate (Transmitter)
Page 24 of 436

&Warning and indicator lights
Mark Name Page
Seatbelt warning light 3-13
Front passenger ’s seat-
belt warning light 3-13
SRS airbag system
warning light3-14
/Front passenger
’s fron-
tal airbag ON indicator 3-15
/Front passenger
’s fron-
tal airbag OFF indicator 3-15
CHECK ENGINE
warning light/Malfunction
indicator light3-15
Coolant temperature low
indicator light (if
equipped)/Coolant tem-
perature high warning
light (if equipped)3-16
Charge warning light 3-17
Oil pressure warning light
3-17
AT OIL TEMP warning
light (AT models)3-17Mark Name Page
/ABS warning light 3-19
/Brake system warning light
3-20
Door open warning light 3-21
AWD warning light
(AT models)
3-21
Hill start assist warning
light (MT models)
3-21
Vehicle Dynamics Con-
trol warning light/Vehicle
Dynamics Control op-
eration indicator light3-22
Vehicle Dynamics Con-
trol OFF indicator light
3-23
Turn signal indicator lights
3-24
High beam indicator light 3-24
Automatic headlight
beam leveler warning
light (models with HID headlights)3-21Mark Name Page
Front fog light indicator
light (if equipped)
3-25
Security indicator light 3-23
Headlight indicator light 3-25
Cruise control indicator light3-24
Cruise control set indi-
cator light
3-25
Low fuel warning light 3-21
Low tire pressure warn-
ing light
(U.S.-spec. models)3-18
SPORT mode indicator
light (AT models)
3-2421
Page 25 of 436

22
Function settings
A SUBARU dealer can change the settings of the functions shown in the following table to meet your personal requirements. Contact
the nearest SUBARU dealer for details. If your vehicle is equipped with the genuine SUBARU DVD navigation system, the settings for
some of these functions can be changed using the navigation monitor. For details, please refer to the Owner’s Manual supplement for
the navigation system.
Item Function Possible settings Default setting
Alarm system Alarm system Operation/Non-operation Operation
Monitoring start delay time (after closure of doors) 0 second/30 seconds 30 seconds
Impact sensor operation (only models with
shock sensors [dealer option]) Operation/Non-operation Non-operation
Passive arming Operation/Non-operation Non-operation
Dome light/map lights illumination ON/OFF OFF
Remote keyless entry system Hazard warning flasher Operation/Non-operation Operation
Audible signal Operation/Non-operation Operation
Key lock-in prevention Key lock-in prevention Operation/Non-operation Operation
Remote engine start system
(dealer option) Horn chirp confirmation ON/OFF ON
Defogger and deicer system for
models with the automatic cli-
mate control system Rear window defogger, outside mirror de-
fogger and windshield wiper deicer
Operation for 15 minutes/
Continuous operationOperation for 15 minutes
Map light/Dome light Operation of map light/dome light OFF delay timer OFF/Short/Normal/Long Long
Battery drainage prevention function Battery drainage prevention function* Operation/Non-operation Operation
Seatbelt warning Sounds a chime while driving Operation/Non-operation Operation
*: The setting can only be changed at a SUBARU dealer.
Page 90 of 436

1) Rotate the lock lever rearward.
2) Close the door.
To lock the door from the outside without
the key, rotate the lock lever rearward and
then close the door.
To lock the door from the outside using the
power door locking switch, push the front
side of the switch ( “LOCK ”side) and then
close the door. In this case, all closed
doors and the rear gate are locked at the
same time.
Always make sure that all doors and the
rear gate are locked before leaving yourvehicle. NOTE
Make sure that you do not leave the key
inside the vehicle when locking the doors from the outside without the key.
& Locking and unlocking from
the inside
1) Lock
2) Unlock
To lock the door from the inside, rotate the
lock lever rearward. To unlock the door
from the inside, rotate the lock leverforward.
The red mark on the lock lever appears
when the door is unlocked.
Pull the inside door handle to open an
unlocked door.
Always make sure that all doors and the
rear gate are closed before starting todrive.
WARNING
Keep all doors locked when you
drive, especially when small chil-
dren are in your vehicle.
Along with the proper use of seat-
belts and child restraints, locking
the doors reduces the chance of
being thrown out of the vehicle in anaccident.
It also helps prevent passengers
from falling out if a door is acciden-
tally opened, and intruders from
unexpectedly opening doors and
entering your vehicle.
& Battery drainage prevention function
If a door or the rear gate is not completely
closed, the interior lights will remain
illuminated as a result. However, several
lights are automatically turned off by the
battery drainage prevention function to
prevent the battery from discharging. The
following interior lights are affected by thisfunction. Keys and doors
2-5
– CONTINUED –
Page 104 of 436

&Shock sensors (dealer op- tion)
The shock sensors trigger the alarm
system when they sense impacts applied
to the vehicle and when any of their
electric wires are cut. The alarm system
causes the horn to sound and the turn
signal lights to flash for a short time when
the sensed impact is weak, but it warns of
a strong impact or multiple impacts by
sounding the horn and flashing the turn
signal lights, both lasting approximately 30seconds.
If you desire, your SUBARU dealer can
connect them and set them for activation
or deactivation. NOTE . The shock sensors are not always
able to sense impacts caused by break-
ing in, and cannot sense an impact that
does not cause vibration (such as
breaking the glass using a rescuehammer).. The shock sensors may sense vi-
bration as indicated in the following
examples and trigger the alarm system.
Select the settings of the alarm system
and shock sensors appropriately de-
pending on where you usually park
your vehicle. Examples:
Vibration from a construction site
Vibration in a multistory car park
Vibration from trains
. You can have the sensitivity of the
shock sensors adjusted to your pre-
ference by your SUBARU dealer. Child safety locks
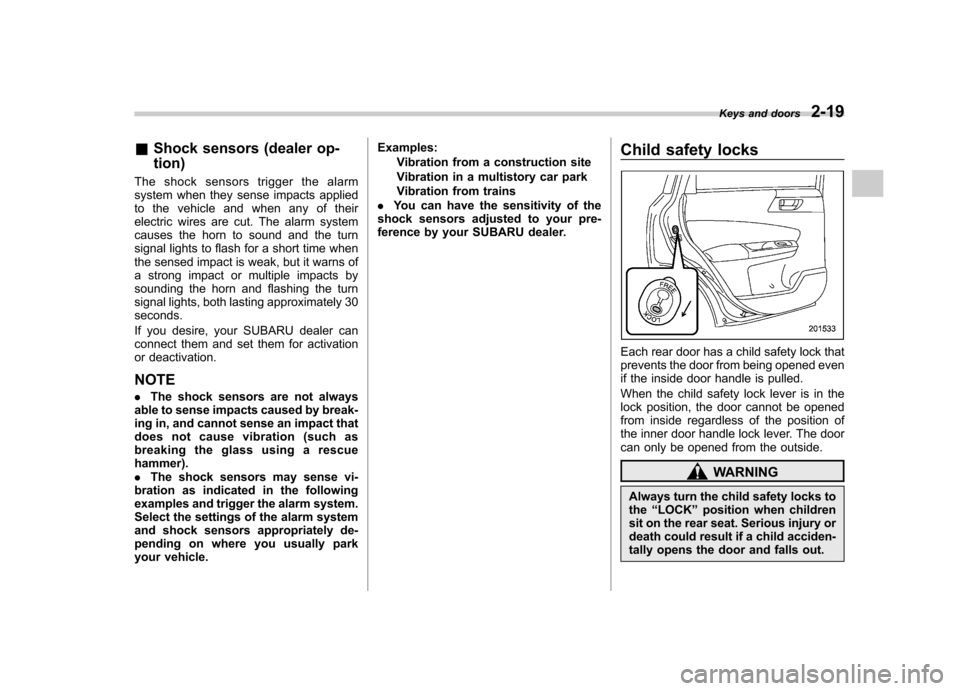
Each rear door has a child safety lock that
prevents the door from being opened even
if the inside door handle is pulled.
When the child safety lock lever is in the
lock position, the door cannot be opened
from inside regardless of the position of
the inner door handle lock lever. The door
can only be opened from the outside.
WARNING
Always turn the child safety locks to the “LOCK ”position when children
sit on the rear seat. Serious injury or
death could result if a child acciden-
tally opens the door and falls out. Keys and doors
2-19
Page 112 of 436

Ignition switch..................................................... 3-3
LOCK .................................................................. 3-3
Acc..................................................................... 3-4
ON...................................................................... 3-4
START ................................................................ 3-4
Key reminder chime ............................................ 3-5
Ignition switch light ............................................. 3-5
Hazard warning flasher ....................................... 3-5
Meters and gauges. ............................................. 3-6
Combination meter illumination ........................... 3-6
Canceling the function for meter/gauge needle movement upon turning on the ignition switch ............................................................... 3-6
Meter needles/gauge illumination setting (models with type A combination meter) ......................... 3-7
Speedometer ....................................................... 3-8
Odometer/Trip meter ............................................ 3-8
Tachometer ........................................................ 3-10
Fuel gauge ......................................................... 3-10
Temperature gauge (models with type A combination meter) .......................................... 3-11
ECO gauge (models with type A combination meter) .............................................................. 3-11
Warning and indicator lights ............................. 3-12
Seatbelt warning light and chime ........................ 3-13
SRS airbag system warning light ........................ 3-14
Front passenger ’s frontal airbag ON and OFF
indicators ......................................................... 3-15
CHECK ENGINE warning light/Malfunction indicator light ................................................... 3-15 Coolant temperature low indicator light (if
equipped)/Coolant temperature high warning
light (if equipped). ............................................ 3-16
Charge warning light .......................................... 3-17
Oil pressure warning light .................................. 3-17
AT OIL TEMP warning light (AT models) .............. 3-17
Low tire pressure warning light (U.S.-spec. models) ........................................................... 3-18
ABS warning light .............................................. 3-19
Brake system warning light ................................ 3-20
Low fuel warning light ....................................... 3-21
Hill start assist warning light (MT models) ..... ..... 3-21
Door open warning light .................................... 3-21
All-Wheel Drive warning light (AT models) ..... ..... 3-21
Automatic headlight beam leveler warning light (models with HID headlights).. .......................... 3-21
Vehicle Dynamics Control warning light/Vehicle Dynamics Control operation indicator light .. ..... 3-22
Vehicle Dynamics Control OFF indicator light ..... 3-23
Security indicator light ....................................... 3-23
SPORT mode indicator light (AT models) ............ 3-24
Select lever and gear position indicator (AT models) ........................................................... 3-24
Turn signal indicator lights ................................. 3-24
High beam indicator light ................................... 3-24
Cruise control indicator light .............................. 3-24
Cruise control set indicator light ........................ 3-25
Front fog light indicator light (if equipped) ..... ..... 3-25
Headlight indicator light ..................................... 3-25
Clock .................................................................. 3-25Instruments and controls
3
Page 117 of 436

3-6Instruments and controls
Meters and gauges NOTE
Liquid crystal displays are used in
some of the meters and gauges on
the combination meter. You will find
their indications hard to see if you wear
polarized glasses. &Combination meter illumina- tion
When the ignition switch is turned to the “ ON ”position, the various parts of the
combination meter are illuminated in the
following sequence:
1. Warning lights, indicator lights, meter
needles, gauge needles, odometer and
trip meter back light illuminate.
2. Meters and gauges each show MAX position.
3. Meters and gauges each show MIN position.
4. Dials and indicators in meters and
gauges light up.
5. Regular illumination (for driving) be- gins. &
Canceling the function for
meter/gauge needle move-
ment upon turning on the
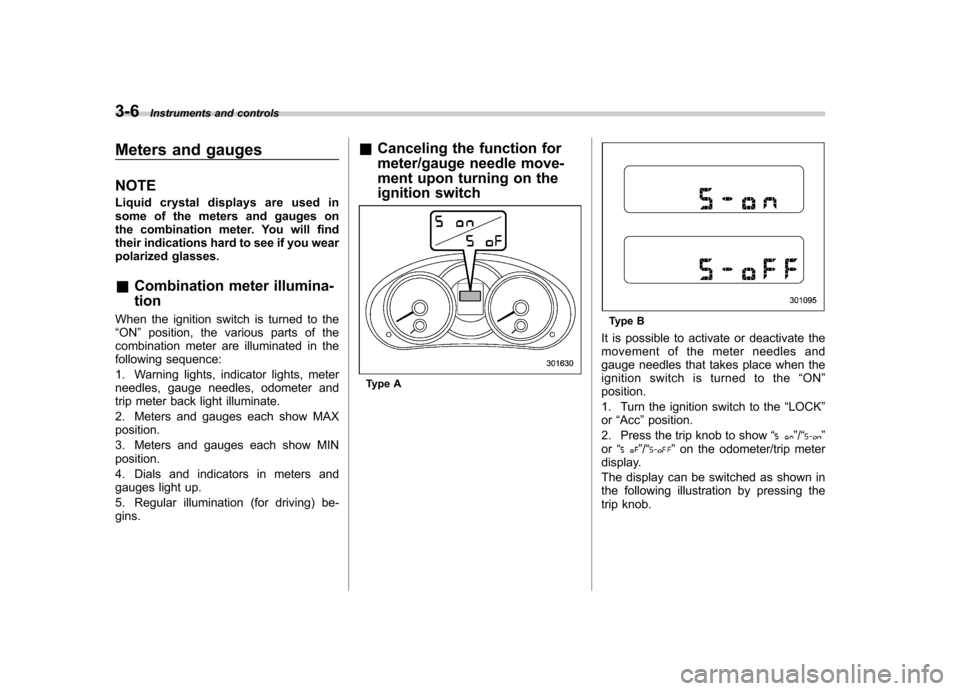
ignition switch
Type A
Type B
It is possible to activate or deactivate the
movement of the meter needles and
gauge needles that takes place when the
ignition switch is turned to the “ON ”
position.
1. Turn the ignition switch to the “LOCK ”
or “Acc ”position.
2. Press the trip knob to show “
”/“”
or “”/“” on the odometer/trip meter
display.
The display can be switched as shown in
the following illustration by pressing the
trip knob.