2013 SKODA OCTAVIA reset
[x] Cancel search: resetPage 13 of 57
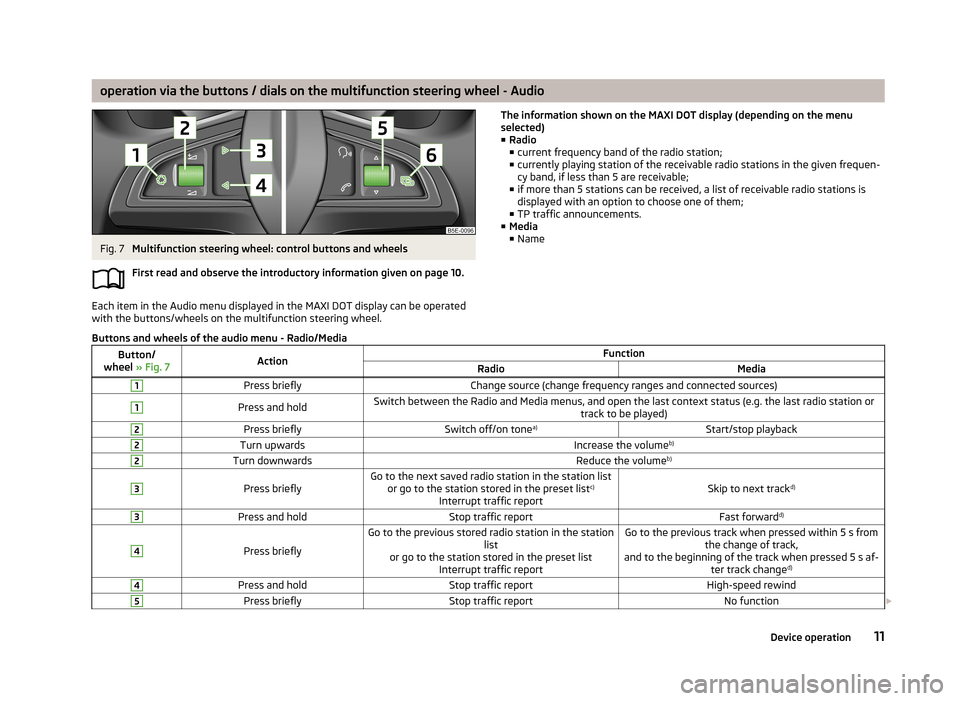
operation via the buttons / dials on the multifunction steering wheel - AudioFig. 7
Multifunction steering wheel: control buttons and wheels
First read and observe the introductory information given on page 10.
Each item in the Audio menu displayed in the MAXI DOT display can be operated
with the buttons/wheels on the multifunction steering wheel.
The information shown on the MAXI DOT display (depending on the menu
selected) ■ Radio
■ current frequency band of the radio station;
■ currently playing station of the receivable radio stations in the given frequen-
cy band, if less than 5 are receivable;
■ if more than 5 stations can be received, a list of receivable radio stations is
displayed with an option to choose one of them;
■ TP traffic announcements.
■ Media
■ NameButtons and wheels of the audio menu - Radio/MediaButton/
wheel » Fig. 7ActionFunctionRadioMedia1Press brieflyChange source (change frequency ranges and connected sources)1Press and holdSwitch between the Radio and Media menus, and open the last context status (e.g. the last radio station or
track to be played)2Press brieflySwitch off/on tonea)Start/stop playback2Turn upwardsIncrease the volume b)2Turn downwardsReduce the volumeb)3
Press brieflyGo to the next saved radio station in the station list
or go to the station stored in the preset list c)
Interrupt traffic reportSkip to next track d)
3Press and holdStop traffic reportFast forwardd)4
Press briefly
Go to the previous stored radio station in the station
list
or go to the station stored in the preset list Interrupt traffic reportGo to the previous track when pressed within 5 s from the change of track,
and to the beginning of the track when pressed 5 s af- ter track changed)4Press and holdStop traffic reportHigh-speed rewind5Press brieflyStop traffic reportNo function
11Device operation
Page 22 of 57
■Temperature: - Temperature units
■ °C - Degrees Celsius
■ °F - Degrees Fahrenheit
■ Volume: - Volume units
■ l - Litres
■ gal (US) - Gallons (US)
■ gal (UK) - Gallons (UK)
■ Consumption: - Consumption units
■ l/100km - Litres per 100 kilometres
■ km/l - Kilometres per litre
■ mpg (US) - Miles per gallon (US)
■ mpg (UK) - Miles per gallon (UK)
■ Gas consumption: - Gas consumption units
■ kg/100km - Kilograms per 100 km
■ km/kg - Kilometres per kilogram
■ m³/100 km - Cubic metres per 100 kilometres
■ km/m³ - Kilometres per cubic metre
■ Pressure: - Pressure units for tyre pressure
■ kPa - Kilopascal
■ bar - bar
■ psi - Pounds per square inch
Voice control settings
First read and observe the introductory information given on page 17.
›
Press the button SETUP
→ Voice control .
■ Dialogue style: Setting the dialogue style
■ Long - Long dialogue (the system plays complete acoustic messages)
■ Short - Short dialogue (the system shortens some acoustic messages or sub-
stitutes them with an acoustic signal)
■ Display available commands - Switch on/off the menus containing basic voice
commands when voice control is activated
■ Voice control session start tone - Switch on/off the audible signal that is out-
put when voice control is activated
■ Voice control session end tone - Switch on/off the audible signal that is output
when voice control is ended
■ Input tone in voice dialogue - Switch on/off the audible signal that is output to
signal that voice control is waiting for a command
restore factory settings
First read and observe the introductory information given on page 17.›
Press the button SETUP
→ Factory settings .
■ Restore factory settings - Reset all factory settings
■ Sound - Restore default settings for sound
■ Radio - Restore default settings for radio
■ Vehicle - Restore default settings for the vehicle systems
■ Telephone - Restore default settings for phone
■ Media - Restore default settings for media
■ Voice control - Restore default settings for voice control
■ Bluetooth - Restore default settings for the Bluetooth ®
function
■ System - Restore the system default settings
Bluetooth ®
-settings
First read and observe the introductory information given on page 17.
›
Press the button SETUP
→ Bluetooth .
■ Bluetooth - Bluetooth ®
function on/off
■ Visibility: - Switch on/off the visibility of the Bluetooth ®
device for other devices
■ Visible - Visibility is always on
■ Hidden - Visibility is off
■ At start-up - Turns on visibility for 5 minutes after switching on the ignition or
until the driving speed has exceeded 5 km/h
■ Name: - Open the input screen with keyboard - change the device name
■ Paired devices - Display the list of paired Bluetooth ®
devices; connect or delete
a paired device; delete the list of paired devices
■ Delete all - Delete all paired Bluetooth ®
devices
■ - Delete the paired Bluetooth ®
device
■ Find devices - Searches for available external devices with enabled Bluetooth ®
functions and activated visibility
■ Bluetooth audio (A2DP/AVRCP) - Switch on/off the connection option for Blue-
tooth ®
profiles A2DP and AVRCP 1)
20device settings
Page 23 of 57
Radio
Operation
Introduction
This chapter contains information on the following subjects:
Main menu
21
List of available stations
22
Search and store radio station
22
Search the available stations (Scan)
23
Station logos
23
Traffic programme
23
Station information (DAB)
24
First and foremost, pay attention to the safety instructions » page 4 , Important
notes .
The device allows analogue radio reception of FM and AM frequency ranges as
well as DAB digital radio reception.
The radio reception DAB allows multiple stations to be transmitted in a single fre-
quency in the form of a so-called ensemble. It also allows for the transmission of additional data and information (e.g. messages, sport, weather, warnings, etc.).
Note
■ Car parks, tunnels, tall buildings or mountains can disrupt the radio signal even
causing it to fail completely.■
For vehicles with window antennas; if the windows are covered in foil or with
metallic film stickers, reception interference may be experienced.
■
In countries where the RDS function is not supported sufficiently, we recom-
mend turning off the RDS and AF functions. Otherwise, these settings can affect the functionality of the radio.
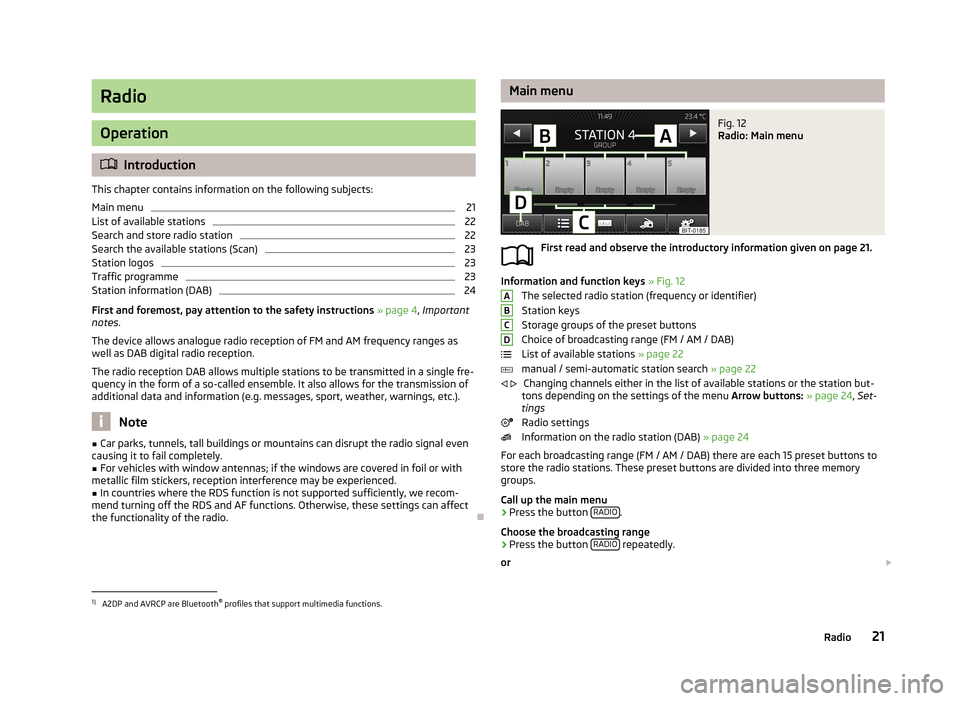
Main menuFig. 12
Radio: Main menu
First read and observe the introductory information given on page 21.
Information and function keys » Fig. 12
The selected radio station (frequency or identifier) Station keys
Storage groups of the preset buttons
Choice of broadcasting range (FM / AM / DAB)
List of available stations » page 22
manual / semi-automatic station search » page 22
Changing channels either in the list of available stations or the station but-
tons depending on the settings of the menu Arrow buttons: » page 24 , Set-
tings
Radio settings
Information on the radio station (DAB) » page 24
For each broadcasting range (FM / AM / DAB) there are each 15 preset buttons to
store the radio stations. These preset buttons are divided into three memory
groups.
Call up the main menu
›
Press the button RADIO.
Choose the broadcasting range
›
Press the button RADIO repeatedly.
or
ABCD
1)
A2DP and AVRCP are Bluetooth ®
profiles that support multimedia functions.
21Radio
Page 24 of 57
›Press the function button D
» Fig. 12 and select the desired range.
Information symbols in the displaySymbolMeaningTraffic information station Traffic signals are not available or the selected station is not a traf-
fic information station RDS function is switched off (FM) AF Alternative frequency is off (FM)
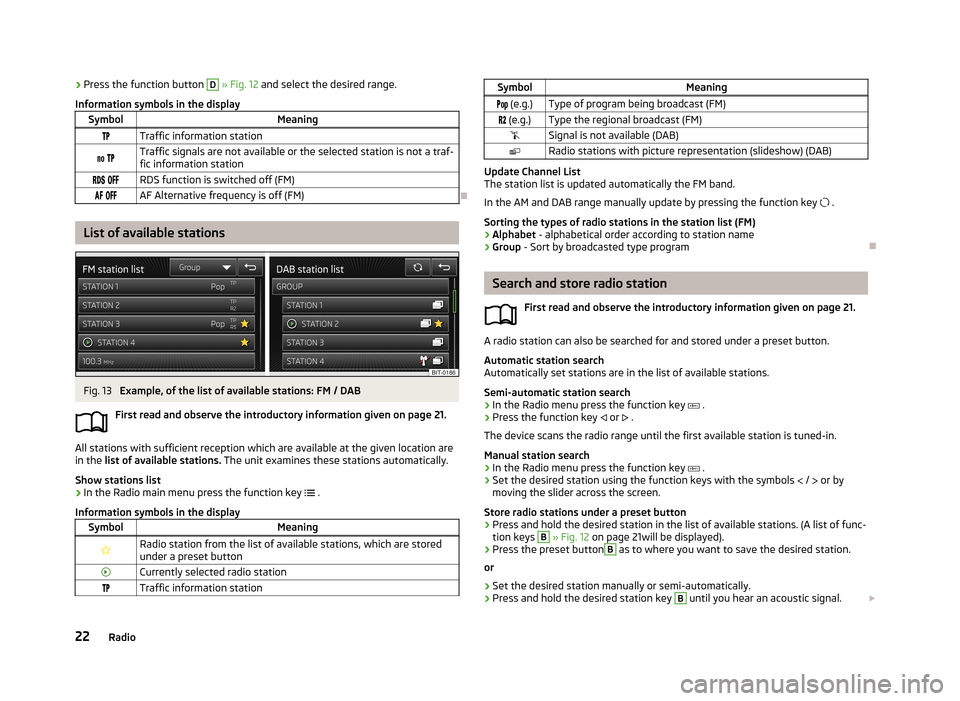
List of available stations
Fig. 13
Example, of the list of available stations: FM / DAB
First read and observe the introductory information given on page 21.
All stations with sufficient reception which are available at the given location are in the list of available stations. The unit examines these stations automatically.
Show stations list
›
In the Radio main menu press the function key
.
Information symbols in the display
SymbolMeaningRadio station from the list of available stations, which are stored under a preset buttonCurrently selected radio stationTraffic information stationSymbolMeaning (e.g.)Type of program being broadcast (FM) (e.g.)Type the regional broadcast (FM)Signal is not available (DAB)Radio stations with picture representation (slideshow) (DAB)
Update Channel List
The station list is updated automatically the FM band.
In the AM and DAB range manually update by pressing the function key .
Sorting the types of radio stations in the station list (FM) › Alphabet
- alphabetical order according to station name
› Group
- Sort by broadcasted type program
Search and store radio station
First read and observe the introductory information given on page 21.
A radio station can also be searched for and stored under a preset button.Automatic station search
Automatically set stations are in the list of available stations.
Semi-automatic station search
›
In the Radio menu press the function key
.
›
Press the function key
or
.
The device scans the radio range until the first available station is tuned-in.
Manual station search
›
In the Radio menu press the function key
.
›
Set the desired station using the function keys with the symbols
/
or by
moving the slider across the screen.
Store radio stations under a preset button
›
Press and hold the desired station in the list of available stations. (A list of func-
tion keys
B
» Fig. 12 on page 21will be displayed).
›
Press the preset button
B
as to where you want to save the desired station.
or
›
Set the desired station manually or semi-automatically.
›
Press and hold the desired station key
B
until you hear an acoustic signal.
22Radio
Page 25 of 57
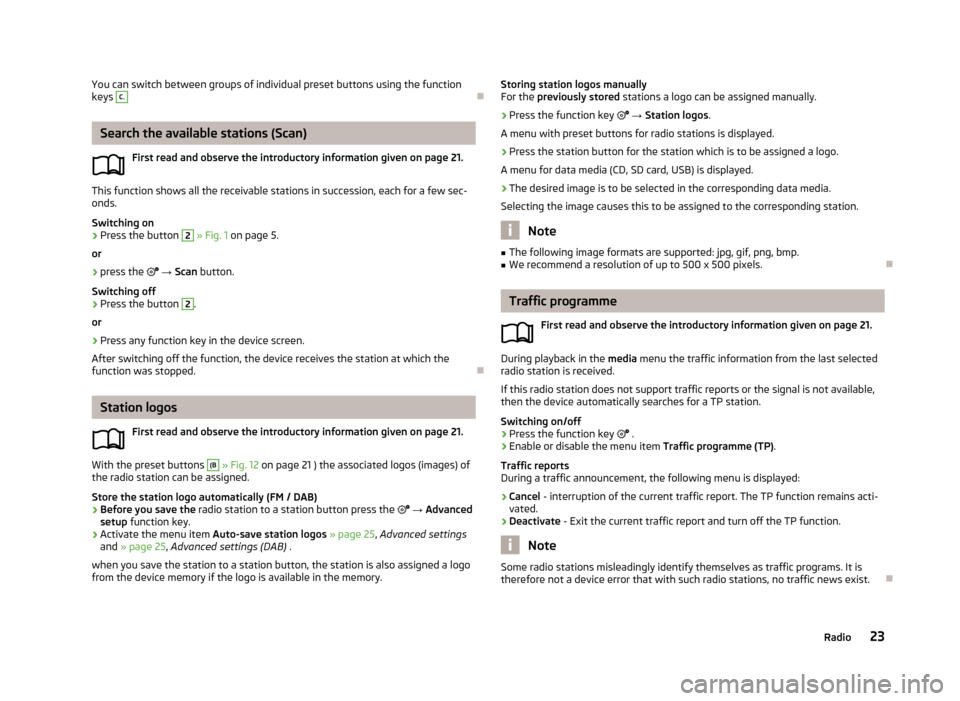
You can switch between groups of individual preset buttons using the function
keys C.
Search the available stations (Scan)
First read and observe the introductory information given on page 21.
This function shows all the receivable stations in succession, each for a few sec-onds.
Switching on
›
Press the button
2
» Fig. 1 on page 5.
or
›
press the
→ Scan button.
Switching off
›
Press the button
2
.
or
›
Press any function key in the device screen.
After switching off the function, the device receives the station at which the function was stopped.
Station logos
First read and observe the introductory information given on page 21.
With the preset buttons
(B
» Fig. 12 on page 21 ) the associated logos (images) of
the radio station can be assigned.
Store the station logo automatically (FM / DAB)
›
Before you save the radio station to a station button press the
→ Advanced
setup function key.
›
Activate the menu item Auto-save station logos » page 25 , Advanced settings
and » page 25 , Advanced settings (DAB) .
when you save the station to a station button, the station is also assigned a logo from the device memory if the logo is available in the memory.
Storing station logos manually
For the previously stored stations a logo can be assigned manually.›
Press the function key → Station logos .
A menu with preset buttons for radio stations is displayed.
›
Press the station button for the station which is to be assigned a logo.
A menu for data media (CD, SD card, USB) is displayed.
›
The desired image is to be selected in the corresponding data media.
Selecting the image causes this to be assigned to the corresponding station.
Note
■ The following image formats are supported: jpg, gif, png, bmp.■We recommend a resolution of up to 500 x 500 pixels.
Traffic programme
First read and observe the introductory information given on page 21.
During playback in the media menu the traffic information from the last selected
radio station is received.
If this radio station does not support traffic reports or the signal is not available,
then the device automatically searches for a TP station.
Switching on/off
›
Press the function key
.
›
Enable or disable the menu item Traffic programme (TP).
Traffic reports
During a traffic announcement, the following menu is displayed:
›
Cancel - interruption of the current traffic report. The TP function remains acti-
vated.
›
Deactivate - Exit the current traffic report and turn off the TP function.
Note
Some radio stations misleadingly identify themselves as traffic programs. It is
therefore not a device error that with such radio stations, no traffic news exist.
23Radio
Page 26 of 57
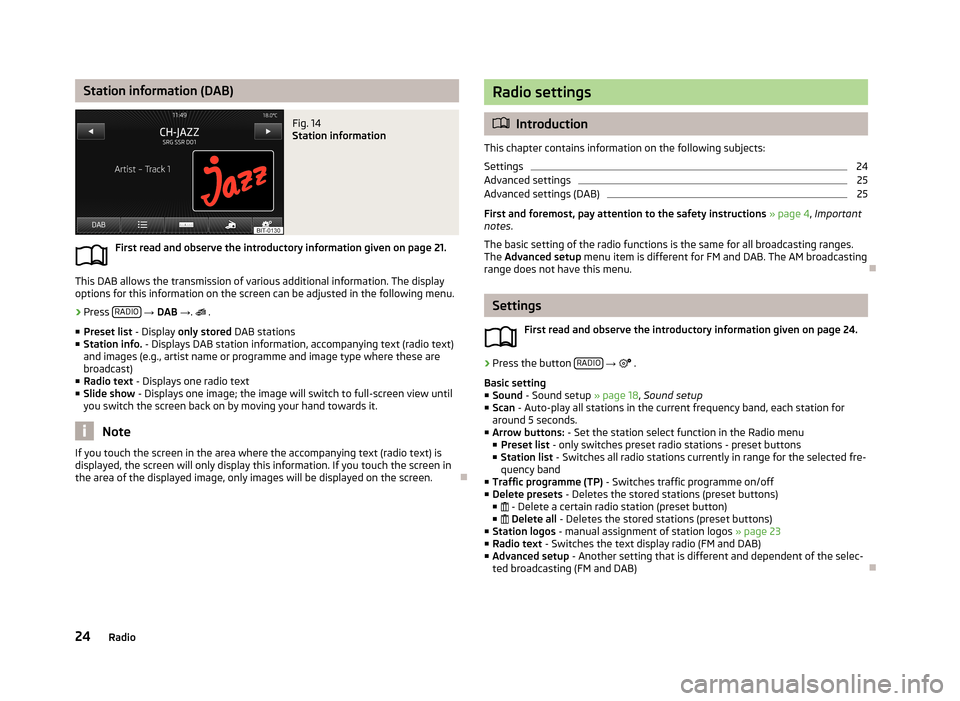
Station information (DAB)Fig. 14
Station information
First read and observe the introductory information given on page 21.
This DAB allows the transmission of various additional information. The display
options for this information on the screen can be adjusted in the following menu.
›
Press RADIO
→ DAB → .
.
■ Preset list - Display only stored DAB stations
■ Station info. - Displays DAB station information, accompanying text (radio text)
and images (e.g., artist name or programme and image type where these are
broadcast)
■ Radio text - Displays one radio text
■ Slide show - Displays one image; the image will switch to full-screen view until
you switch the screen back on by moving your hand towards it.
Note
If you touch the screen in the area where the accompanying text (radio text) is
displayed, the screen will only display this information. If you touch the screen in
the area of the displayed image, only images will be displayed on the screen.
Radio settings
Introduction
This chapter contains information on the following subjects:
Settings
24
Advanced settings
25
Advanced settings (DAB)
25
First and foremost, pay attention to the safety instructions » page 4 , Important
notes .
The basic setting of the radio functions is the same for all broadcasting ranges.
The Advanced setup menu item is different for FM and DAB. The AM broadcasting
range does not have this menu.
Settings
First read and observe the introductory information given on page 24.
›
Press the button RADIO
→
.
Basic setting ■ Sound - Sound setup » page 18, Sound setup
■ Scan - Auto-play all stations in the current frequency band, each station for
around 5 seconds.
■ Arrow buttons: - Set the station select function in the Radio menu
■ Preset list - only switches preset radio stations - preset buttons
■ Station list - Switches all radio stations currently in range for the selected fre-
quency band
■ Traffic programme (TP) - Switches traffic programme on/off
■ Delete presets - Deletes the stored stations (preset buttons)
■ - Delete a certain radio station (preset button)
■ Delete all - Deletes the stored stations (preset buttons)
■ Station logos - manual assignment of station logos » page 23
■ Radio text - Switches the text display radio (FM and DAB)
■ Advanced setup - Another setting that is different and dependent of the selec-
ted broadcasting (FM and DAB)
24Radio
Page 46 of 57
Vehicle systems
Vehicle settings
Introduction
This chapter contains information on the following subjects:
Selecting driving mode
44
Vehicle data
45
Auxiliary heater and ventilation
46
ESC system
47
Tyre
47
Driver assistance
47
Parking and manoeuvring
47
Light
48
mirrors and wiper
48
Opening and closing
49
Seats
49
Multifunction display
49
Service
49
Restore factory settings
50
Climatronic settings
50
First and foremost, pay attention to the safety instructions » page 4 , Important
notes .
Settings relating to the vehicle systems can only be made when the ignition is
switched on.
Note
■ The individual systems are described in the » Vehicle Owner's Manual .■For safety reasons, if any system functions are disabled, then some functions,
such as parts of the ESC system, are automatically enabled again after switching
the ignition off and on.■
When you press the button CAR, the system displays the last displayed menu
.
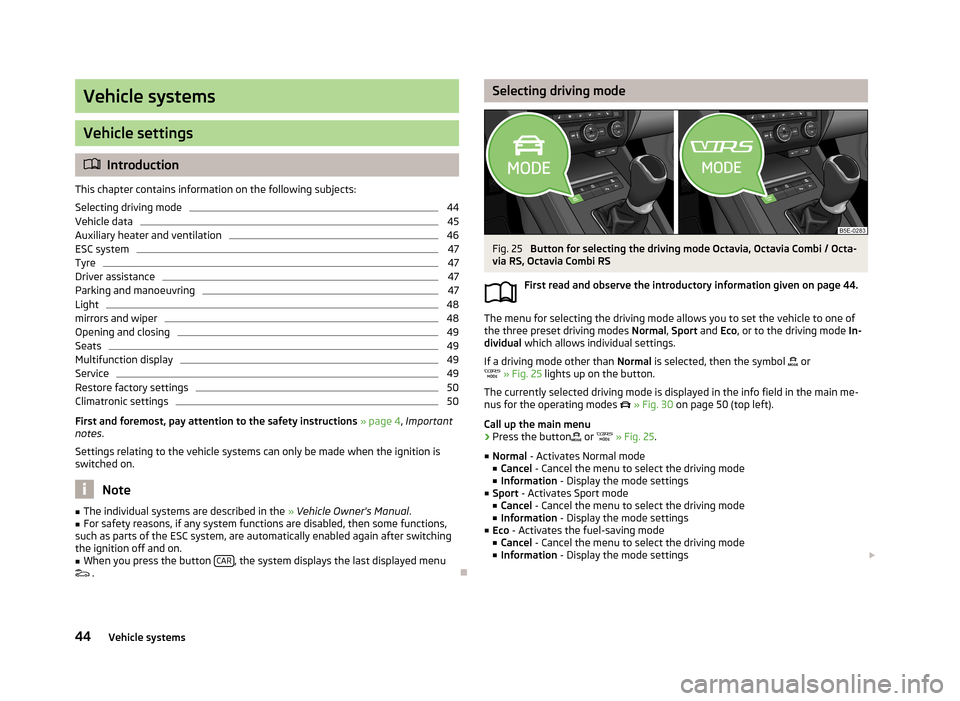
Selecting driving modeFig. 25
Button for selecting the driving mode Octavia, Octavia Combi / Octa-
via RS, Octavia Combi RS
First read and observe the introductory information given on page 44.
The menu for selecting the driving mode allows you to set the vehicle to one of
the three preset driving modes Normal, Sport and Eco, or to the driving mode In-
dividual which allows individual settings.
If a driving mode other than Normal is selected, then the symbol
or
» Fig. 25 lights up on the button.
The currently selected driving mode is displayed in the info field in the main me- nus for the operating modes
» Fig. 30 on page 50 (top left).
Call up the main menu
›
Press the button
or
» Fig. 25 .
■ Normal - Activates Normal mode
■ Cancel - Cancel the menu to select the driving mode
■ Information - Display the mode settings
■ Sport - Activates Sport mode
■ Cancel - Cancel the menu to select the driving mode
■ Information - Display the mode settings
■ Eco - Activates the fuel-saving mode
■ Cancel - Cancel the menu to select the driving mode
■ Information - Display the mode settings
44Vehicle systems
Page 47 of 57
■Individual - Activates the Individual mode
■ Cancel - Cancel the menu to select the driving mode
■ Setup - Individual setting
■ Steering: - Set the power steering characteristics
■ Normal - Normal
■ Sport - Sports
■ Engine: - Set the engine (drive) characteristics
■ Normal - Normal
■ Sport - Sports
■ Eco - Economical
■ ACC: - Set the vehicle acceleration when adaptive cruise control is activated
■ Normal - Normal
■ Sport - Sports
■ Eco - Economical
■ Dynamic bend light.: - Set the characteristics of the adaptive headlights
■ Normal - Normal
■ Sport - Sports
■ Eco - Economical
■ Air conditioning: - Sets the Climatronic characteristics
■ Normal - Normal
■ Eco - Economical
■ Reset mode - Sets the profile Normal
Note
If you do not operate the unit for longer than approx. 10 seconds in the "Select
driving mode" menu, it will switch to the last selected menu or switch itself off.
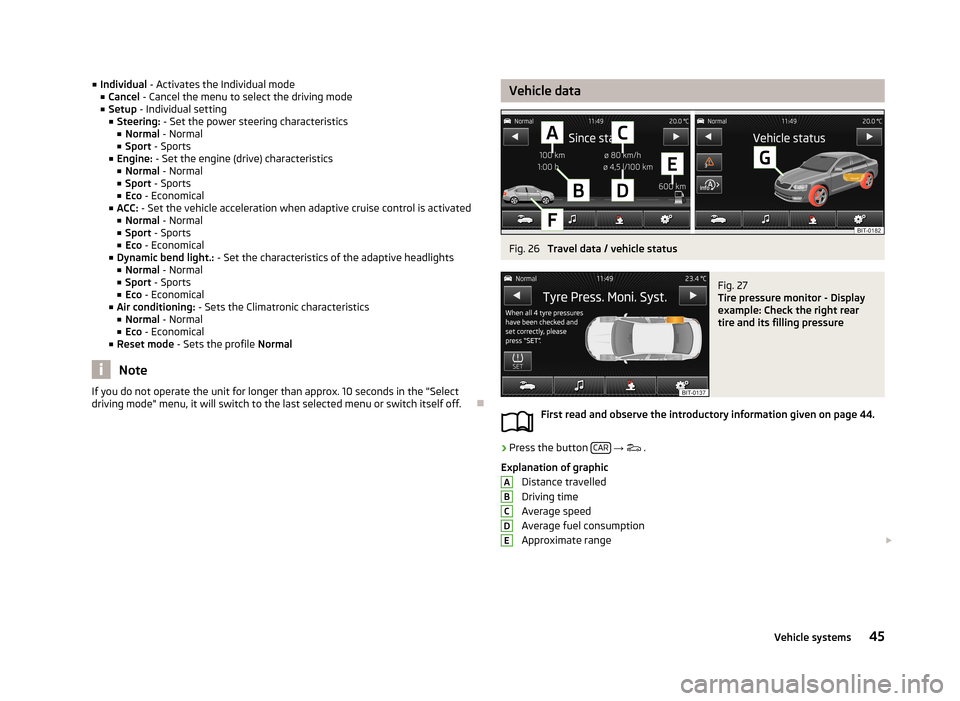
Vehicle dataFig. 26
Travel data / vehicle status
Fig. 27
Tire pressure monitor - Display
example: Check the right rear
tire and its filling pressure
First read and observe the introductory information given on page 44.
›
Press the button CAR
→
.
Explanation of graphic Distance travelled
Driving time
Average speed
Average fuel consumption
Approximate range
ABCDE45Vehicle systems