2013 SKODA OCTAVIA ESP
[x] Cancel search: ESPPage 5 of 83

AbbreviationsAbbreviationDefinitionA2DPAdvanced Audio Distribution Profile - a software profile for da-ta transfer via Bluetooth ®
, designed for one-way transfer of
audio dataACCAdaptive cruise controlAFThe AF function ensures that the best receivable frequency of
the selected station is automatically and precisely set.AMAmplitude modulation - Identification of the radio frequency
rangeTCSTraction control for the drive wheelsAVRCPA software profile for data transfer via Bluetooth ®
, which sup-
ports multimedia functionsAVAudio / visual source signal - typical for DVD player or TV tunerBTBluetooth ®
- wireless communication for reception and trans-
mission of voice and data informationDABDigital Audio Broadcasting - digital radio receptionDRMDigital Rights Management - technical methods to monitor or restrict the use of digital media contentESCElectronic Stability ControlFMFrequency modulation - Identification of the radio frequency
rangeHFPHands-free profile - a software profile for data transfer via
Bluetooth ®
, which enables communication between a mobile
phone and the hands-free equipment in the vehicleGPSGlobal Positioning System - Satellite system for position de-
tectionGSMGroupe Spécial Mobile - Global system for mobile communica-
tion. The most popular standard for mobile phonesID3 tagAn additional feature of a music file that allows for the display
of artist, title, album name etc.KESSYKey-less unlocking, starting and lockingAbbreviationDefinitionNTSCNational Television System Committee - Audiovisual encoding
standard in North and Central America and in some countries in Southeast AsiaPALPhase Alternating Line - Audiovisual encoding standard in
most European countriesPIProgram identification - Station identification by means of
unique RDS codeRDSRadio Data System - system for the transfer of additional in- formation for FM radio receptionTMCTraffic Message Channel - Way of transferring traffic informa- tion to the driverTPTraffic Program identification - Program identifier for the
transmission of traffic informationvCard. File format - vcf for contact data exchange, especially elec-
tronic business cards, can include first and last names, ad-
dresses, phone numbers, URLs, logos, photos and audio clipsVINVehicle identification numberWMAWindows Media Audio - compressed audio format
3Abbreviations
Page 16 of 83
Button/
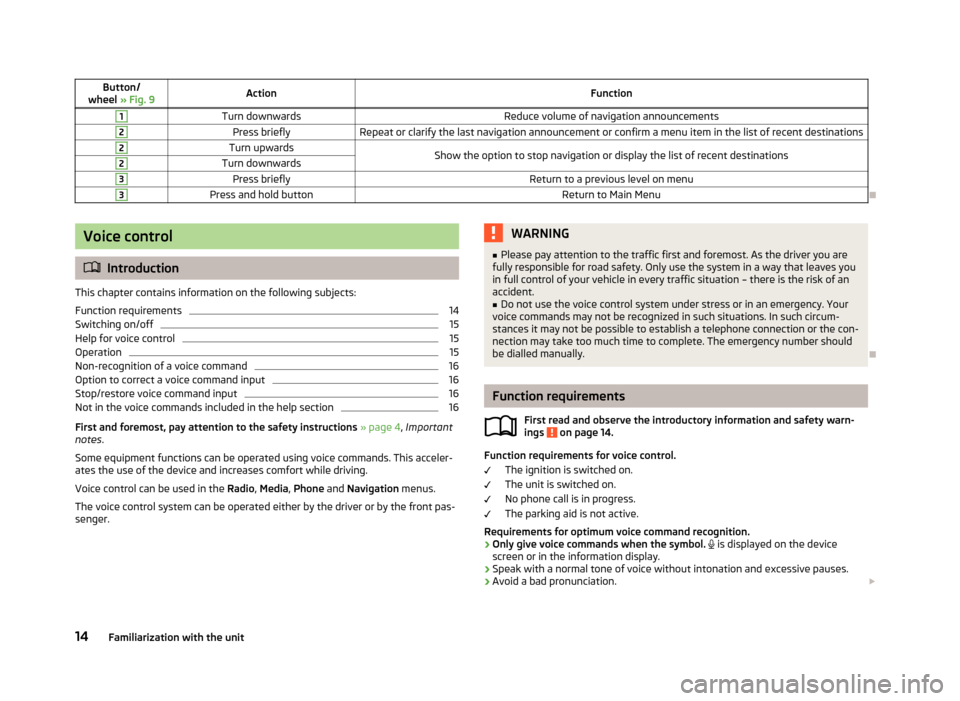
wheel » Fig. 9ActionFunction1Turn downwardsReduce volume of navigation announcements2Press brieflyRepeat or clarify the last navigation announcement or confirm a menu item in the list of recent destinations2Turn upwardsShow the option to stop navigation or display the list of recent destinations2Turn downwards3Press brieflyReturn to a previous level on menu3Press and hold buttonReturn to Main Menu
Voice control
Introduction
This chapter contains information on the following subjects:
Function requirements
14
Switching on/off
15
Help for voice control
15
Operation
15
Non-recognition of a voice command
16
Option to correct a voice command input
16
Stop/restore voice command input
16
Not in the voice commands included in the help section
16
First and foremost, pay attention to the safety instructions » page 4 , Important
notes .
Some equipment functions can be operated using voice commands. This acceler- ates the use of the device and increases comfort while driving.
Voice control can be used in the Radio, Media , Phone and Navigation menus.
The voice control system can be operated either by the driver or by the front pas-
senger.
WARNING■ Please pay attention to the traffic first and foremost. As the driver you are
fully responsible for road safety. Only use the system in a way that leaves you in full control of your vehicle in every traffic situation – there is the risk of an
accident.■
Do not use the voice control system under stress or in an emergency. Your
voice commands may not be recognized in such situations. In such circum-
stances it may not be possible to establish a telephone connection or the con-
nection may take too much time to complete. The emergency number should
be dialled manually.
Function requirements
First read and observe the introductory information and safety warn-ings
on page 14.
Function requirements for voice control.
The ignition is switched on.
The unit is switched on.
No phone call is in progress.
The parking aid is not active.
Requirements for optimum voice command recognition.
› Only give voice commands when the symbol.
is displayed on the device
screen or in the information display.
› Speak with a normal tone of voice without intonation and excessive pauses.
› Avoid a bad pronunciation.
14Familiarization with the unit
Page 26 of 83
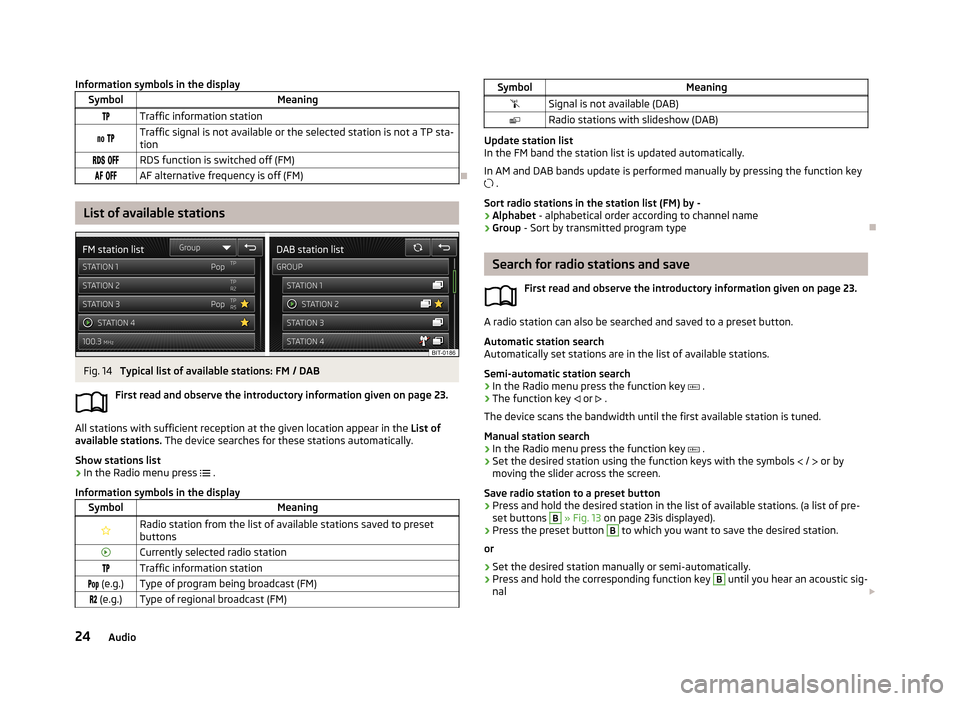
Information symbols in the displaySymbolMeaningTraffic information station Traffic signal is not available or the selected station is not a TP sta-
tion RDS function is switched off (FM) AF alternative frequency is off (FM)
List of available stations
Fig. 14
Typical list of available stations: FM / DAB
First read and observe the introductory information given on page 23.
All stations with sufficient reception at the given location appear in the List of
available stations. The device searches for these stations automatically.
Show stations list
›
In the Radio menu press
.
Information symbols in the display
SymbolMeaningRadio station from the list of available stations saved to preset buttonsCurrently selected radio stationTraffic information station (e.g.)Type of program being broadcast (FM) (e.g.)Type of regional broadcast (FM)SymbolMeaningSignal is not available (DAB)Radio stations with slideshow (DAB)
Update station list
In the FM band the station list is updated automatically.
In AM and DAB bands update is performed manually by pressing the function key .
Sort radio stations in the station list (FM) by -
› Alphabet
- alphabetical order according to channel name
› Group
- Sort by transmitted program type
Search for radio stations and save
First read and observe the introductory information given on page 23.
A radio station can also be searched and saved to a preset button.Automatic station search
Automatically set stations are in the list of available stations.
Semi-automatic station search
›
In the Radio menu press the function key
.
›
The function key
or
.
The device scans the bandwidth until the first available station is tuned.
Manual station search
›
In the Radio menu press the function key
.
›
Set the desired station using the function keys with the symbols
/
or by
moving the slider across the screen.
Save radio station to a preset button
›
Press and hold the desired station in the list of available stations. (a list of pre- set buttons
B
» Fig. 13 on page 23is displayed).
›
Press the preset button
B
to which you want to save the desired station.
or
›
Set the desired station manually or semi-automatically.
›
Press and hold the corresponding function key
B
until you hear an acoustic sig-
nal
24Audio
Page 27 of 83
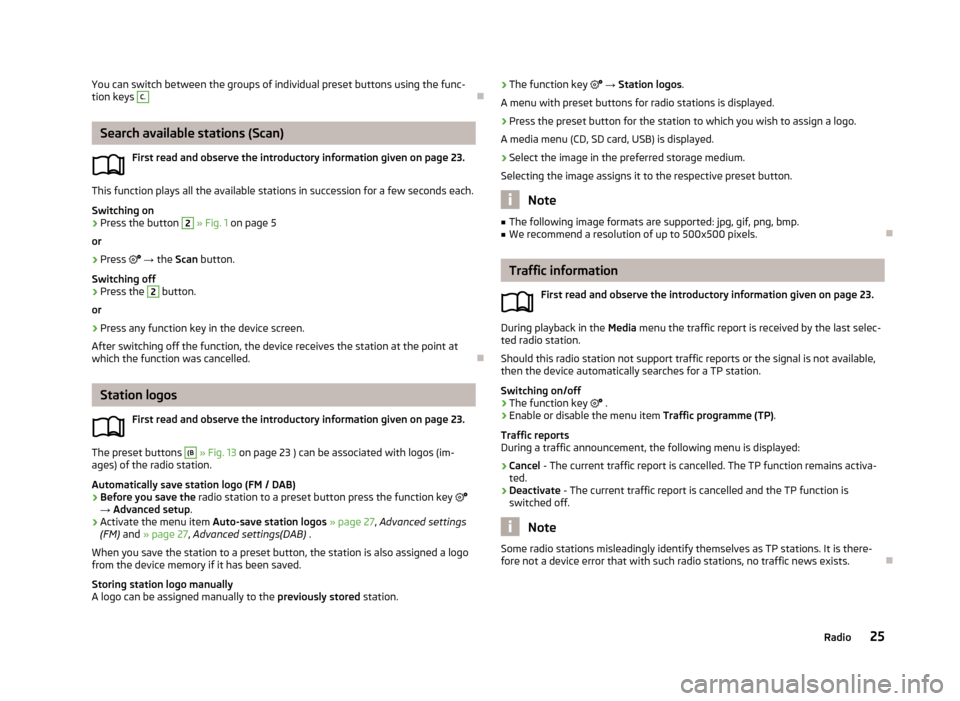
You can switch between the groups of individual preset buttons using the func-
tion keys C.
Search available stations (Scan)
First read and observe the introductory information given on page 23.
This function plays all the available stations in succession for a few seconds each.Switching on
›
Press the button
2
» Fig. 1 on page 5
or
›
Press
→ the Scan button.
Switching off
›
Press the
2
button.
or
›
Press any function key in the device screen.
After switching off the function, the device receives the station at the point at which the function was cancelled.
Station logos
First read and observe the introductory information given on page 23.
The preset buttons
(B
» Fig. 13 on page 23 ) can be associated with logos (im-
ages) of the radio station.
Automatically save station logo (FM / DAB)
›
Before you save the radio station to a preset button press the function key
→ Advanced setup .
›
Activate the menu item Auto-save station logos » page 27 , Advanced settings
(FM) and » page 27 , Advanced settings(DAB) .
When you save the station to a preset button, the station is also assigned a logo from the device memory if it has been saved.
Storing station logo manually
A logo can be assigned manually to the previously stored station.
›The function key
→ Station logos .
A menu with preset buttons for radio stations is displayed.›
Press the preset button for the station to which you wish to assign a logo.
A media menu (CD, SD card, USB) is displayed.
›
Select the image in the preferred storage medium.
Selecting the image assigns it to the respective preset button.
Note
■ The following image formats are supported: jpg, gif, png, bmp.■We recommend a resolution of up to 500x500 pixels.
Traffic information
First read and observe the introductory information given on page 23.
During playback in the Media menu the traffic report is received by the last selec-
ted radio station.
Should this radio station not support traffic reports or the signal is not available,
then the device automatically searches for a TP station.
Switching on/off
›
The function key
.
›
Enable or disable the menu item Traffic programme (TP).
Traffic reports
During a traffic announcement, the following menu is displayed:
›
Cancel - The current traffic report is cancelled. The TP function remains activa-
ted.
›
Deactivate - The current traffic report is cancelled and the TP function is
switched off.
Note
Some radio stations misleadingly identify themselves as TP stations. It is there-
fore not a device error that with such radio stations, no traffic news exists.
25Radio
Page 29 of 83
Advanced settings (FM)First read and observe the introductory information given on page 26.
Advanced Settings for the FM waveband■ Advanced setup
■ Alternative frequency (AF) - Switching on/off the search for alternative fre-
quencies of the station currently being played. AF off is displayed on the de-
vice screen when you switch off.
■ Radio Data System (RDS) - Switch the RDS function on/off
■ RDS Regional: - Switch the automatic tracking of related regional stations on/
off ■ Fixed - The selected regional station is retained indefinitely. When the sig-
nal is lost, another regional station must be set manually.
■ Automatic - Auto-selects the station with the best reception at the mo-
ment. If you lose reception the region, the unit will automatically set anoth- er available region.
■ Auto-save station logos - Auto-saves the station logo according to the PI
code of the radio station » page 25
Advanced settings(DAB)
First read and observe the introductory information given on page 26.
Advanced settings for DAB broadcasts■ Advanced setup
■ DAB traffic announcements - Switch on/off DAB announcements
■ Other DAB announcements - Switch on/off other announcements (e.g., re-
ports, regional weather, sports reports, financial news)
■ DAB - DAB station tracking - Switch on/off automatic DAB station tracking in
other station groups
■ Automatic DAB - FM switching - Switch on/off auto-switching from DAB to
the FM frequency band if the DAB signal is lost
■ L-band - Switch on/off the automatic DAB station search in L-band
■ Auto-save station logos - Automatic association of the logo with station de-
tected » page 25
DAB programme tracking
If a DAB station is a member of several station groups, when the signal is poor,
the same station is searched in a different station group.
Auto-change DAB -FM
If the DAB signal is poor, the unit will try to find a corresponding FM station for
the DAB station you are currently listening to.
For auto-change to work, the DAB and FM stations must send a sender ID.
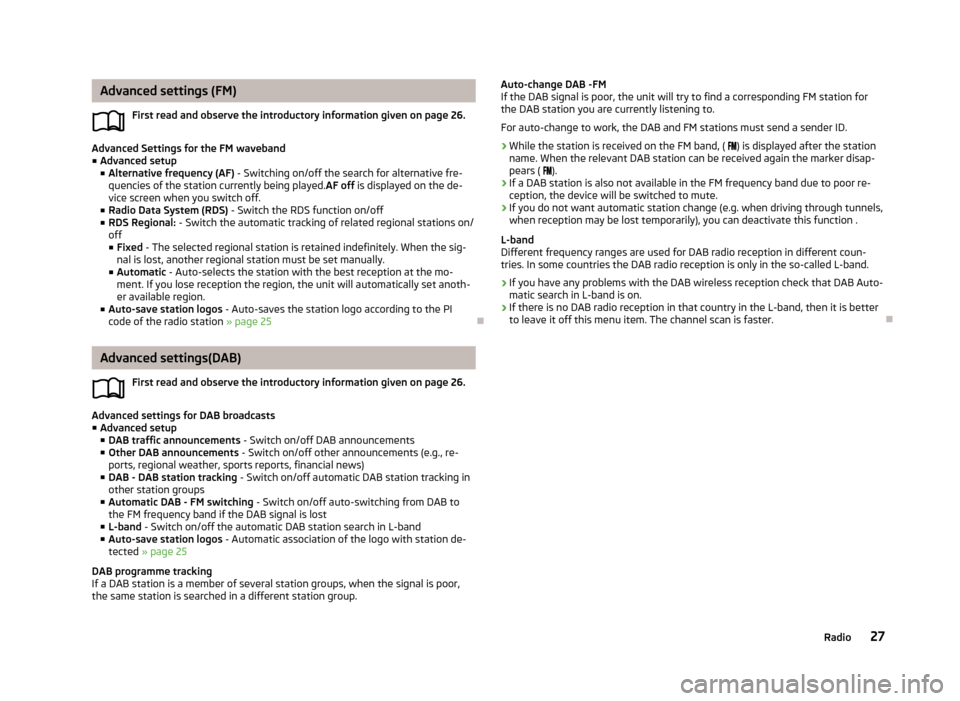
› While the station is received on the FM band, (
) is displayed after the station
name. When the relevant DAB station can be received again the marker disap- pears ( ).
› If a DAB station is also not available in the FM frequency band due to poor re-
ception, the device will be switched to mute.
› If you do not want automatic station change (e.g. when driving through tunnels,
when reception may be lost temporarily), you can deactivate this function .
L-band
Different frequency ranges are used for DAB radio reception in different coun-
tries. In some countries the DAB radio reception is only in the so-called L-band.
› If you have any problems with the DAB wireless reception check that DAB Auto-
matic search in L-band is on.
› If there is no DAB radio reception in that country in the L-band, then it is better
to leave it off this menu item. The channel scan is faster.
27Radio
Page 32 of 83
■Bluetooth - Settings for the Bluetooth ®
function » page 21
■ Video (iPod) - Parameter settings for a video played by an Apple device (bright-
ness, colour, contrast, format, standard) » page 34
■ Traffic programme (TP) - Switches traffic programme on/off
■ External AUX device - Activate/deactivate the input of the external AUX audio
source
■ Remove safely - Safe removal / disconnection of SD memory card / USB device
■ SD card 1
■ SD card 2
■ USB 1
Signal sources
Introduction
This chapter contains information on the following subjects:
Supported sources and file formats
30
Requirements and restrictions
31
Bluetooth ®
player
31
CD
31
SD memory card
32
USB-, AUX-inputs
33
MEDIA IN input
34
First and foremost, pay attention to the safety instructions » page 4 , Important
notes .
WARNING■
Never place signal sources close to airbags. Loose objects could hit a de-
ployed airbag and injure occupants – danger of death!■
Never place signal sources on the dashboard. Loose objects can be thrown
forward during a sudden manoeuvre or in case of an accident and can injure
the occupants or other road users.
■
Do not have signal sources in your hand or on your knees while driving.
Loose objects can be thrown forward during a sudden manoeuvre or in case of an accident and can injure the occupants or other road users.
■
Always route the connection cable of the external signal source such that
does not restrict you when driving.
CAUTIONWe recommend that you do not save any important data on CD media, Bluetooth ® players, to a SD memory card or connected external signal sources. The ŠKODA
Partner is not responsible for losses resulting from the loss of data stored on
these media.
Note
In some signal sources you can change the output level.
Supported sources and file formats
First read and observe the introductory information and safety warn-
ings
on page 30.
Supported audio signal sources
SD memory cardSD, SDHC, SDXCCD driveAudio CD (up to 80 min), CD-R and CD-RW (with a capacity
of up to 700 MB)USB devicesUSB stick, USB MP3 player, HDD (without special software)Specifications for USB devices:USB 1.x and 2.x or higher, supported by USB 2.x (the speed
of data transmission then corresponds to the maximum speed of USB 2.x)
Max. speed of 480 Mb/sSpecification Bluetooth ®
playerBluetooth protocolsA2DPand AVRCP (1.0 - 1.3)Other external sourcesPortable player (e.g., iPod ®
, iPad ®
, iPhone ®
, MTP player
(MSC))
Formats of audio files
File system
SD memory cardFAT16, VFAT, FAT32, exFAT, NTFSUSB stick:FAT16, VFAT, FAT32, exFatCDISO9660, Joliet (Level 1,2,3), UDF 1.x, UDF 2.x 30Audio
Page 33 of 83

Codec type
(File formats)MPEG-1/2 (Layer-3)Windows
Media Audio
7, 8, 9 and 10MPEG-2/4FLAC, WAW, OGGFile suffixmp3wmaasfm4a
m4b aacflac
wav oggPlaylistsm3u, pls, wpl, m3u8; asxFile
propertiesBitratemax. 320 kb/sSampling ratemax. 48 kHzAlbum covers
(Pictures on the album covers)Image resolution up to 500x500 pixels (200 kb) (jpg, jpeg,png, bmp, gif), depending on the availability of album coversare displayed on the respective media
Note
At the time of publication, the device has been tested with most products and
media available in the various markets. However, it is possible that some devices, media or files will be unreadable or unplayable.
Requirements and restrictions
First read and observe the introductory information and safety warn-
ings
on page 30.
› The name of the artist, the album and the title of the file being played can be
displayed if the information is available as an ID3 tag. If no ID3 tag is available,
only the folder name is displayed.
› To ensure good playback, we recommend you use compressed MP3 files with a
bit rate of at least 160 kb / s.
› For audio files with variable bitrates, the indicated remaining playback time
does not correspond to the actual remaining playback time.
› Files that are protected by Digital Rights Management (DRM) technology cannot
be played back by the device.
Bluetooth ®
player
First read and observe the introductory information and safety warn- ings
on page 30.
The device makes a wireless connection (coupling) to the Bluetooth ®
player pos-
sible.
› Follow the same instructions as for the coupling of the device with a
phone » page 38 .
Note
■
We recommend adjusting the volume on the portable player to the maximum
level.■
The volume can also be adjusted by setting the input sensitivity of the device
for the Bluetooth ®
player » page 19 , Sound settings .
■
The media functions supported depend on the Bluetooth ®
player concerned.
CD
Fig. 18
CD slot
First read and observe the introductory information and safety warn- ings
on page 30.
The CD slot is located in the glove box on the front passenger side.
Inserting/ejecting a CD
›
Insert a CD into the CD slot with the label facing up until it is automatically
drawn in. Playback starts automatically.
›
Press the symbol button
– the CD is ejected.
31Media
Page 44 of 83

There are five function keys available.
Assign telephone number to a contact›
Press a speed dial function key
C
» Fig. 22 on page 36 that is not assigned.
The unit displays the phone book.
›
Tap one of the contact numbers for the desired telephone contact.
It is also possible to assign the telephone number of a contact to a function key
for speed dialing in the phone menu settings » page 37.
Select assigned telephone number for a contact
›
Press the desired function key to speed dial the phone number of a contact
C
» Fig. 22 on page 36.
Change assigned telephone number of a contact
›
Press and hold down the desired speed dial function key
C
» Fig. 22 on
page 36.
The unit displays the phone book.
›
Tap one of the contact numbers for the desired telephone contact.
The telephone number of a contact is assigned to the selected function key for
speed dialling.
You can also make the change in the phone menu » page 37.
Remove phone number of a contact
›
Press the symbol button
→ User profile → Manage favourites .
›
Press the function key for the speed dial. Confirm the Deletemenu item to re-
move the telephone number of a contact from the selected quick-dial function
key.
Direct entry of a phone numberFig. 24
Direct entry of a phone number
First read and observe the introductory information given on page 41.
›
Press .
A screen appears to enter the phone number » Fig. 24.
You can select the following functions: Delete the digit
Dial the entered number 1)
Add a prefix 2)
if this option has been set in the phone settings » page 37
Entering a number using the voice control » page 14
Select mailbox if its number is entered in the phone set-
tings » page 37 or enter the number directly
The input screen also functions as an alphanumeric keypad that you can use to
search for contacts in the phonebook.
For example, if you enter 32, the unit will display contacts with the letter se-
quence DA, FA, EB, etc.
Select the desired contact by pressing the corresponding function key.
Mailbox1)
If not number is entered, the last dialled number will be displayed after you press the symbol key.
2)
If the add-prefix option is switched on but the prefix is not entered in the phone settings, the last
dialled number will be displayed in the input field after you press the symbol button. The last num-
ber dialed is displayed. If the prefix defined and a number is entered in the input line, press the sym-
bol key to add the prefix before the phone number and start the connection.
42Phone