2013 Seat Mii child
[x] Cancel search: childPage 82 of 306

80Ensuring you are correctly and safely seated
Group (weight category)
Group 0: up to 10 kgGroup 0: up to 10 kgGroup 1: 9 to 18 kgGroup 0+: up to 13 kg
Installation directionfacing backwards
(in the direction oppo- site to travel)facing backwards
(in the direction opposite to trav- el)facing backwards
(in the direction oppo- site to travel)facing forwards
(in the direction of travel)
SizeFGCDECDABB1installed on front passenger seatSeat does not have anchor points, it is not possible to secure with ISOFIX/LATCHInstalled on the rear seat benchIL-SUIL-SUIL-SUIUF/IL-SU
IL-SU: seat suitable for installing an ISOFIX child seat with certification
“semi-universal”, take note of the list of vehicles of the manufacturer of the
child seat.
IUF: seat suitable for the installation of an ISOFIX child seat with certifica-
tion “universal” and with Top Tether retaining strap.
Child seats with rigid mounting
For the installation of a child seat with rigid mounting auxiliary introduction
elements can be used. Using auxiliary introduction elements facilitates in-
stallation and protects upholstery. Auxiliary introduction elements form part
of the supply volume of the child seat or can be acquired at a SEAT dealer-
ship. If necessary, auxiliary introduction elements are inserted in both an-
chor points of the vehicle ⇒
.
● Observe the manufacturer's instructions when installing and removing
the child seat ⇒
.
● Press the child seat onto the retaining rings ⇒ Fig. 53 in the direction of
the arrow. The child seat must be safely engaged and click audibly into
place.
● Pull on both sides of the child seat to ensure that it is secure. Child seat with adjustable retaining straps
●
Observe the manufacturer's instructions when installing and removing
the child seat ⇒
.
● Place the child seat on the seat cushion and attach the retaining strap
hooks to the retaining rings ⇒ Fig. 53.
● Tighten the straps evenly using the corresponding adjustment device.
The child seat must sit flush against the vehicle seat.
● Pull on both sides of the child seat to ensure that it is secure.
WARNING
The lower anchor points for child seats do not include rings. Only secure
booster seats to lower anchor points.
CAUTION
● To avoid making permanent marks in the padding, remove the auxiliary
introduction elements from the anchor points when the child seat is not in-
stalled in the vehicle anchor points.
● To prevent damage being done to the upholstery, the padding or the
auxiliary introduction elements, always remove the auxiliary introduction el-
ements from the anchor points before folding the rear seat bench.
Page 83 of 306
81
Ensuring you are correctly and safely seated
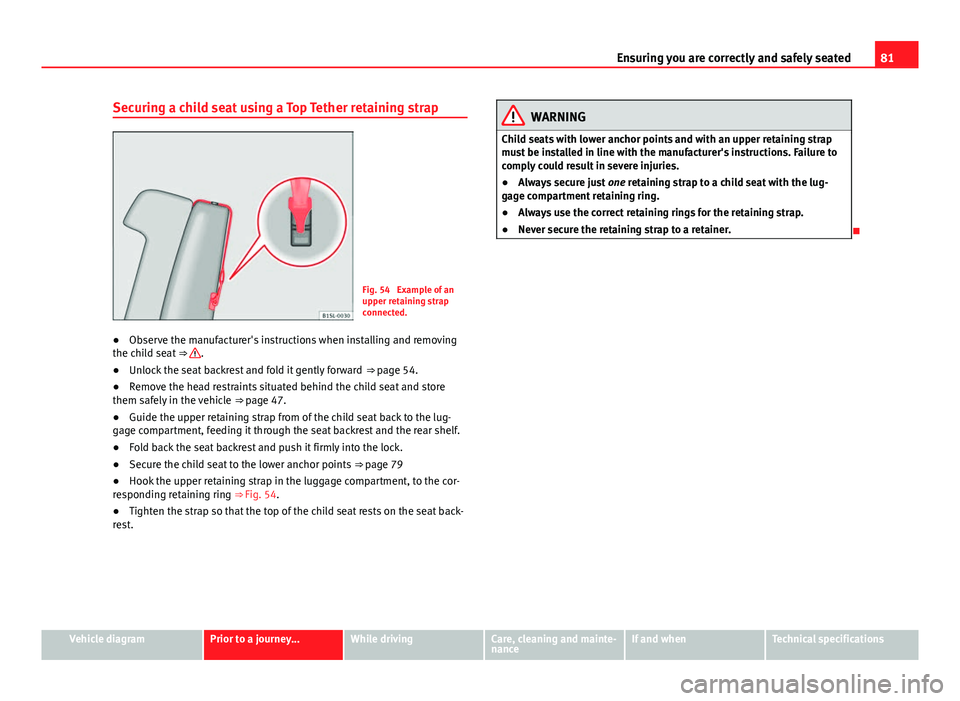
Securing a child seat using a Top Tether retaining strap
Fig. 54 Example of an
upper retaining strap
connected.
● Observe the manufacturer's instructions when installing and removing
the child seat ⇒
.
● Unlock the seat backrest and fold it gently forward
⇒ page 54.
● Remove the head restraints situated behind the child seat and store
them safely in the vehicle ⇒ page 47.
● Guide the upper retaining strap from of the child seat back to the lug-
gage compartment, feeding it through the seat backrest and the rear shelf.
● Fold back the seat backrest and push it firmly into the lock.
● Secure the child seat to the lower anchor points
⇒ page 79
● Hook the upper retaining strap in the luggage compartment, to the cor-
responding retaining ring ⇒ Fig. 54.
● Tighten the strap so that the top of the child seat rests on the seat back-
rest.
WARNING
Child seats with lower anchor points and with an upper retaining strap
must be installed in line with the manufacturer's instructions. Failure to
comply could result in severe injuries.
● Always secure just one retaining strap to a child seat with the lug-
gage compartment retaining ring.
● Always use the correct retaining rings for the retaining strap.
● Never secure the retaining strap to a retainer.
Vehicle diagramPrior to a journey...While drivingCare, cleaning and mainte-
nanceIf and whenTechnical specifications
Page 100 of 306

98Transporting
Loading luggage compartment
Introduction
Always transport heavy loads in the luggage compartment and place the
seat backs in a vertical position. Never overload the vehicle. Both the carry-
ing capacity as well as the distribution of the load in the vehicle have ef-
fects on the driving behaviour and braking ability ⇒
.
Additional information and warnings:
● Airbag system ⇒ page 65
● Light ⇒ page 82
● Transporting ⇒ page 95
● Wheels and tyres ⇒ page 210
WARNING
When the vehicle is not in use or being watched, always lock the doors
and the rear lid to reduce the risk of serious injury or death.
● Do not leave children unwatched, especially when the rear lid is open.
Children could climb into the luggage compartment, close the rear lid
from inside and be unable to escape themselves. This could lead to seri-
ous injury or death.
● Never allow children to play in or around the vehicle.
● Never transport people in the luggage compartment.
WARNING
Unsecured or incorrectly secured objects can cause serious injury in case
of a sudden manoeuvring or breaking or in case of an accident. This is es-
pecially true when objects are struck by a detonating airbag and fired
through the vehicle interior. To reduce the risks, please note the follow-
ing:
● Secure all objects in the vehicle. Always keep equipment and heavy
objects in the luggage compartment.
● Always secure objects with suitable rope or straps so that they can-
not enter the deployment areas around the frontal or side airbags in case
of sudden braking or an accident.
● While driving, always keep object compartments closed.
● Do not place hard, heavy or sharp objects inside the vehicle interior,
in open storage compartments, the rear shelf or on the dash panel.
● Remove hard, heavy and sharp objects from clothes and pockets in-
side the vehicle and store securely.
WARNING
The transport of heavy object changes vehicle handling and increases
braking distance. Heavy loads that have not been stored or secured cor-
rectly could cause loss of control and result in serious injury.
● The vehicle handling changes when transporting heavy objects due
to a change in the centre of gravity.
● Distribute the load as uniformly and as low down on the vehicle as
possible.
● Store heavy objects in the luggage compartment as far from the rear
axle as possible.
CAUTION
Hard objects on the rear shelf could chafe against the wires of the heating
element in the heated rear window and cause damage.
Page 101 of 306

99
Transporting
Note
The ventilating slits between the heated rear window and the rear shelf
must not be covered so that used air can escape from the vehicle.
Folding and lifting up the rear seat bench backrest
Fig. 67 Rear seat: unlock
button A; red marking
B
The rear seat backrest can be folded forward to extend the luggage com-
partment.
Folding the rear seat backrest forwards
● Push the head restraint down as far as it will go or remove it if necessary
⇒ page 47 and store it in a safe place.
● Pull the unlock switch
⇒ Fig. 67 A
forwards whilst simultaneously lift-
ing the rear seat backrest.
● The rear seat backrest is not engaged when the red marking of the but-
ton B
is visible.
● If the rear seat backrest is folded, people (including children) are not
permitted to travel in the rear folded seats. Folding up the rear seat backrest
●
Lift back the backrest of the rear seat and push it firmly into the lock un-
til it clicks securely into place ⇒
.
● The red marking on the unlock button B must not be seen.
● Make sure that the backrest of the rear seat is securely locked in posi-
tion so that the seat belts can provide proper protection in the rear seats.
● If necessary, install and adjust the head restraints again ⇒ page 47.
WARNING
Folding and lifting the backrests of the rear seats carelessly without pay-
ing attention could cause serious injury.
● Never fold or lift the seats while driving.
● Do no trap or damage seat belts when raising the seat backrest.
● Keep hands, fingers, feet and other limbs away from the range of the
rear seat backrests when folding and lifting them.
● All seat backrests must engage correctly for the seat belts on the rear
seats to work properly. When the backrest of an occupied seat is not cor-
rectly locked in place, the passenger can be thrust forward with the rear
seat backrest in case of sudden braking, sudden manoeuvres or an acci-
dent.
● A red signal on the button B
warns that the backrest is not engaged.
Always check that the red marking is not visible when the backrest of the
rear seat is in the upright position.
● No seat must be occupied if the backrest of the rear seat is folded or
not correctly engaged.
CAUTION
Before folding the seat backrest of the rear seat, adjust the front seats so
that the head restraint or seat backrest do not hit them when it is folded. If
necessary, remove the head restraints ⇒ page 47 and store them safely.
Vehicle diagramPrior to a journey...While drivingCare, cleaning and mainte-
nanceIf and whenTechnical specifications
Page 104 of 306

102Transporting
Extending the luggage compartment forwards
● Disassemble the luggage compartment tray ⇒ page 100.
● Disassemble the rear headrests ⇒ page 47.
● Fold the backrest of the rear seat forwards ⇒ page 99.
● If necessary, expand the luggage compartment downwards.
CAUTION
Do not let the luggage compartment floor fall when closing it. Always care-
fully guide it downwards in a controlled manner. Otherwise, the lining and
the floor of the luggage compartment could be damaged.
Fastening rings*
In the front part of the luggage compartment, there may be fastening rings
to secure the luggage.
In order to use the fastening rings, they must be lifted beforehand.
WARNING
If unsuitable or damaged belts or retaining straps are used, they could
break in the event of braking or an accident. Objects could then be
launched across the passenger compartment and cause serious or fatal
injuries.
● It is important to always use belts or retaining straps that are suita-
ble and in a good condition.
● Belts and retaining straps should be securely fastened to the fasten-
ing rings.
● Objects in the luggage compartment that are unsecured could move
suddenly and modify the handling of the vehicle.
WARNING (Continued)
● Small and light objects must also be secured.
● The maximum tensile load of the fastening ring for securing objects
should never be exceeded.
● A child seat should never be secured with the fastening rings.
Note
● The maximum tensile load that the fastening rings can support is 3.5
kN.
● Belts and securing systems for the appropriate load can be obtained
from specialised dealerships. SEAT recommends visiting a SEAT dealership
for this.
Retaining hooks
Fig. 71 In the luggage
compartment: retaining
hooks
There may be hooks in the upper left and right part of the luggage compart-
ment.
Page 118 of 306

116Practical equipment
WARNING
Undue use of the cigarette lighter may cause a fire or burns and other se-
rious injuries.
● The cigarette lighter must only be used to light cigarettes or similar.
● Never leave children unsupervised in the vehicle. The cigarette lighter
can be used when the ignition is switched on.
Note
The cigarette lighter can also be used with the 12 Volt socket.
Page 119 of 306

117
Practical equipment
Electrical power socket* Introduction
Electrical equipment can be connected to the socket in the vehicle.
All connected appliances should be in perfect working order without any
faults.
Additional information and warnings:
● Cigarette lighter ⇒ page 115
● Accessories, parts replacement, repairs and modifications ⇒ page 222
WARNING
Improper use of the socket or electrical devices could lead to a fire and
cause serious injuries.
● Never leave children unsupervised in the vehicle. The socket and
equipment connected to it can be used when the ignition is switched on.
● Should a connected electrical device overheat, switch it off and un-
plug it immediately.
CAUTION
● To avoid damage to the vehicle's electrical system, never connect equip-
ment that generates electrical current, such as solar panels or battery charg-
ers, to the 12 Volt power sockets in order to charge the vehicle's battery.
● Only use accessories with approved electromagnetic compatibility ac-
cording to current regulations. ●
To avoid damage due to voltage variations, switch off all appliances con-
nected to the 12 V socket before switching the ignition on or off and before
starting the engine.
● Never connect an appliance to the 12 Volt power socket that consumes
more than the power indicated in watts. Exceeding the maximum power ab-
sorption could damage the vehicle's electrical system.
For the sake of the environment
Do not leave the engine running when the vehicle is at a standstill.
Note
Using electrical appliances with the engine stopped and the ignition switch-
ed on will drain the battery.
Note
Unshielded equipment can cause interference on the radio equipment and
the vehicle's electrical system.
Note
If electrical equipment is used near an aerial, you may observe interference
in the reception of AM stations.
Vehicle diagramPrior to a journey...While drivingCare, cleaning and mainte-
nanceIf and whenTechnical specifications
Page 123 of 306

121
Starting, changing gears, parking
WARNING
Unsuitable or careless use of the vehicle key could result in serious in-
jury.
● Always take all the keys with you whenever you leave the vehicle. The
engine could accidentally be started and electrical equipment such as
the windows could accidentally be operated resulting in serious injury.
● Never leave children or disabled people alone in the car. They could
be trapped in the car in an emergency and will not be able to get them-
selves to safety. For example, depending on the time of the year, temper-
atures inside a locked and closed vehicle can be extremely high or ex-
tremely low resulting in serious injuries and illness or even death, partic-
ularly for young children.
● Never remove the key from the ignition if the vehicle is in motion. The
steering may lock and it will not be possible to turn the steering wheel.
Note
● If the key is left in the ignition lock with the engine off for long periods,
the vehicle battery will run flat.
● In vehicles with automatic gearbox the ignition key can only be with-
drawn with the selector lever in position P. In this case, press and release
the selector lever locking button.
Starting the engine
Complete operations only in the sequence given.
1.Press the brake pedal and keep pressed until step 5 has been completed.
1 a.In vehicles with a manual gearbox: Press the clutch pedal all
the way and keep pressed until the engine starts.
Complete operations only in the sequence given.
2.Put the gearbox lever in neutral or the selector lever in posi- tion P or N.
3.Turn the key in the ignition lock to position ⇒ Fig. 86 2; do
not press the accelerator.
4.When the engine has started, release the key in the ignition lock.
5.If the engine does not start, stop the process and try again af-ter one minute.
6.Release the handbrake when you want to begin driving⇒ page 134.
WARNING
Never leave the vehicle unattended if the engine is running. The vehicle
could move off suddenly, especially if it is in gear, resulting in an acci-
dent and serious injury.
WARNING
Cold start sprays could explode or cause a sudden increase in the engine
speed.
● Never use start boosters.
CAUTION
● An attempt to start the engine while driving or starting the engine imme-
diately after turning it off can cause damage to the engine or starter motor.
● When the engine is cold, avoid high revs and heavy acceleration and do
not make the engine work hard.
● Do not push or tow start the engine. Unburnt fuel could damage the cat-
alytic converter.
Vehicle diagramPrior to a journey...While drivingCare, cleaning and mainte-
nanceIf and whenTechnical specifications