Page 17 of 72

16Audio modeActivating a stationusing the stored sta-tion buttons
Press the stored station button corresponding tothe desired station.A stored station can be activated by pressing itsstored station button only if it can still be receivedin your current location.
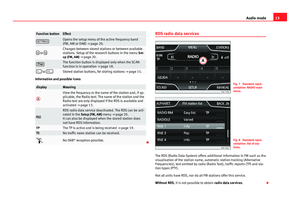
Change the group ofstored station but-tons by sliding yourfinger gently
Press lightly on the station area and slide your fin-ger horizontally to access the next/previous group⇒ Fig. 10
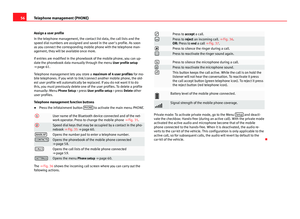
1
.The stored station buttons are shown in groups of5 function buttons.
Storing stations instored station but-tons
See: storing stations ⇒ page 17.Storing station logosin stored station but-tons
It is possible to assign the logo of the stations stor-ed. The logos will be shown in the stored stationbuttons ⇒ page 16.
Manually save station logos in the saved station buttons
The station logos can be imported from a compatible data medium (for ex-ample, memory card or memories with USB port).
●
Press the Setup function button, then Manage logos.
●
Press the station button where you wish to store the logo of a station.
●
Select the source where the logo is stored (for example, SD 1). We rec-ommend saving logos in the memory unit’s root directory.
●
Select the station logo.
●
Repeat the process to assign other logos; press the infotainment buttonRADIO to return to the RADIO main menu.
Automatically save station logos in the saved station
buttons (only in FM and DAB modes)
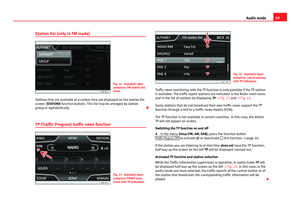
Fig. 11
Standard rep-resentation: logochoice menu.
A station is automatically assigned a logo when it is saved if it is availablefrom the radio’s database.
If 2 or more logos are available from the database, there is the option tomanually choose the desired one ⇒ Fig. 11.
Note
Not all stations are stored in the database and therefore it is not alwayspossible to assign logos automatically.
Page 18 of 72

17Audio modeSelecting, adjusting and storing a stationFig. 12
Standard repre-sentation: RADIO mainmenu.
Fig. 13
Standard repre-sentation: list of DAB ra-dio stations and blocks.
Selecting a stationSelecting a sta-tion with the re-search buttons
Press the function button or ⇒ Fig. 12.Depending on the setup of the research buttons, it willalternate between stored stations or stations that canbe tuned in. The search buttons are modified in the Set-up (FM, AM, DAB) ⇒ page 20 menu.
Tuning to a sta-tion from the sta-tion list in FM,AM mode
Press the function button Stations ⇒ Fig. 12 to open thelist of stations. Go through the list and select the de-sired station by pressing it. Press the function buttonBack ⇒ Fig. 13 to return to the main menu.
Tuning to a sta-tion from the sta-tion list in DABmode
Press the Stations function button to open the list ofstations.The station list is opened ⇒ Fig. 13 and, in the secondlevel, the stations. The station currently playing in theselected ensemble is highlighted.In the view for the open ensemble, press one of the dis-played stations to switch to it.Press the function key Back ⇒ Fig. 13 to return to themain menu.
Updating the sta-tion listThe station list found in the FM frequency band is upda-ted automatically.In AM and DAB frequency bands, the station list may beupdated manually by pressing the Update ⇒ Fig. 13function button.
Adjusting the frequency of the stations manually
Displaying thefrequency dialTurn the setup button.Or: press the function button Manual ⇒ Fig. 12.Adjusting the fre-quency in stagesPress the + or - buttons for the frequency band.OR: turn the setup button.
Page 19 of 72

18Audio modeBrowsing the fre-quency bandquickly
Place your finger on the slider in the frequency dial anddrag it along the dial.Hiding the fre-quency bandBriefly press the function button Manual.If you select a station with a stored station button, themanual selection of the frequency is also finalised. Ifyou do not do anything else, after a certain time the fre-quency band will close automatically.
Storing stations
Storing the sta-tion that you arelistening to inone of the storedstation buttons
Hold down the desired stored station button ⇒ Fig. 12until you hear the signal. The station that you are listen-ing to will be stored in this button.
Storing a stationfrom the list ofstations in one ofthe stored stationbuttons
Press the function button Stations ⇒ Fig. 12 to open thelist of stations.The stations already assigned to stored station buttonsare shown in the list of stations marked with the sym-bol ⇒ Fig. 13.Select the desired station holding it down on the dis-play until the screen for storing stations appears.Press the stored station button where you wish to savethe station. A signal will sound and the station will thenbe saved in this stored station button. The system auto-matically returns to the list.
Deleting a storedstationIn the menu Delete presets, available in the menu Radiosetup you can delete the stored stations one by one orall at once ⇒ page 20.
Scan function (SCAN)
When the scan function is running, all available stations on the current fre-quency band are played in sequence for around 5 seconds each.
Starting the scanfunctionBriefly press the setup button.OR: Press the function button Setup and then selectSCAN.
Stopping the scanfunctionPress the function button SCAN “crossed out” tostop the scan function on the station you are listen-ing to.OR: Briefly press the setup button.The scan function also ends when you manually se-lect a station using the stored station buttons, orwhen a traffic report comes in.
Autostore (automatic station storing)
Hold the RADIO button down for approximately 10 seconds to carry out theautostore function for the stations that can be tuned in at the time of run-ning the Autostore. The stations are saved in the stored station buttons.
Note
This function can take several minutes, during which time the radio will re-main muted. In addition, any stored stations assigned previously will be de-leted.
Page 20 of 72
Fig. 14
Standard repre-sentation: FM station listmenu
Stations that are available at a certain time are displayed on the station listscreen (STATIONS functio")
19Audio modeStation list (only in FM mode)Fig. 14
Standard repre-sentation: FM station listmenu
Stations that are available at a certain time are displayed on the station listscreen (STATIONS function button). This list may be arranged by stationgroup or alphabetically.
TP (Traffic Program) traffic news function
Fig. 15
Standard repre-sentation: RADIO mainmenu with TP indication.
Fig. 16
Standard repre-sentation: List of stationswith TP indication.
Traffic news monitoring with the TP function is only possible if the TP stationis available. The traffic report stations are indicated in the Radio main menuand in the list of stations by displaying TP ⇒ Fig. 15 and ⇒ Fig. 16.
Some stations that do not broadcast their own traffic news support the TPfunction through a link to a traffic news station (EON).
The TP function is not available in certain countries. In this case, the lettersTP will not appear on screen.
Switching the TP function on and off
●
In the menu Setup (FM, AM, DAB), press the function buttonTraffic Program (TP) to activate or deactivate this function ⇒ page 20.
If the station you are listening to at that time does not have the TP function,half-way up the screen on the left TP will be displayed crossed out.
Activated TP function and station selection
While the Traffic Information supervision is operative, in audio mode TP willbe displayed half-way up the screen on the left ⇒ Fig. 15. In this case, in theaudio mode you have selected, the traffic reports of the current station or ofthe station that broadcasts the corresponding traffic information will beplayed.
Page 21 of 72

20Audio modeIn FM mode, the station tuned in must have the TP function. If, after activat-ing the TP function, you manually select or use the stored station buttons toselect a station that does not have the TP function, it will not check if thereare traffic reports (display: TP crossed out).
When the traffic report station tuned in stops being received, TP crossed outwill also be displayed, and you must search for a station manually⇒ page 17.
During operation in AM or Media mode, a traffic report station is always setautomatically in the background, provided there is one that can be tuned in.Depending on your location, this process can take some time.
Reception of a traffic report
An incoming traffic report will interrupt the active audio mode.
During the broadcast of the traffic report a pop-up window will appear and,if necessary, the radio will change to the station of the traffic report (EON)for the duration of the broadcast.
Media mode is interrupted and the volume is adjusted according to the pre-set volume ⇒ page 64.
The traffic report volume may be modified with the volume control⇒ Fig. 1. The modified volume will be stored for future traffic reports.
●
Press the function button Cancel to end the current traffic report. The TPfunction remains switched on.
●
OR: Press the function button Deactivate to end the current traffic reportand deactivate the TP function. You can reactivate it in the menu SETUP⇒ page 20.
Setup (FM, AM, DAB)
FM setup
●
Select the frequency band FM by pressing the infotainment buttonRADIO.
●
Press the function button Setup to open the menu FM setup.
Function button: effectSound: sound setup ⇒ page 64.SCAN: scan function (SCAN). When the scan function is running, all availa-ble stations on the current frequency band are played in sequence foraround five seconds each ⇒ page 18.
Search mode: determines the setup of the buttons with arrows and .The setup will be saved for the current frequency band. Preset list: all stored stations on the selected frequency band can be se-lected with the arrow buttons. Stations: all available stations on the selected frequency band can beselected with the arrow buttons.Traffic Program (TP)*: TP function (traffic news monitoring) activated⇒ page 19.If the function button is deactivated (in grey), you must first activate thefunction button radio data system (RDS).
Delete presets: deletes the stored stations (all or separately). All: deletes all the stored stations (FM 1, FM 2, FM 3).To delete stations individually, select the desired preset: FM 1, FM 2 orFM 3. Then press the stored station button of the station to delete.
Managing logos: logos of stations that have been saved in the station but-tons may be assigned/deleted ⇒ page 16. Radio text: The Radio text is active. If the function button is deactivated(in grey), you must first activate it.Advanced setup*: setup of the radio data services RDS.
Page 22 of 72
: the automatic station tracking is active. Withthe check box deactivated , the automatic station tracking will remaindeactivated.")
21Audio modeFunction button: effect Alternative frequency (AF): the automatic station tracking is active. Withthe check box deactivated , the automatic station tracking will remaindeactivated. The Regional RDS function button will remain deactivated(in grey).
Radio data system (RDS): Radio Data System (RDS) active. With thecheckbox deactivated , the radio data system RDS functions will notbe available. The function buttons will therefore remain deactivated (ingrey).
Regional RDS: determines the setup for the regional automatic stationtracking via the RDS ⇒ page 13. Fixed: only the alternative frequencies of the station tuned in that areadjusted to the same regional programme will be adjusted.Automatic: it will always change to the frequency of the station setthat offers the best reception at that time, even if it means interrupt-ing a regional broadcast.
AM setup
●
Select the AM frequency band by pressing the RADIO infotainment but-ton.
●
Press the function button Setup to open the menu AM setup.
Function button: effectSound: sound setup ⇒ page 64.SCAN: scan function (SCAN). When the scan function is running, all availa-ble stations on the current frequency band are played in sequence foraround five seconds each ⇒ page 18.
Search mode: determines the setup of the buttons with arrows and .The setup will be saved for the current frequency band. Preset list: all stored stations on the selected frequency band can be se-lected with the arrow buttons. Stations: all available stations on the selected frequency band can beselected with the arrow buttons.Function button: effect Traffic programme (TP): TP function (traffic news monitoring) activated⇒ page 19.If the function button is deactivated (in grey), first you must activate thefunction button radio data system (RDS) in the menu FM setup.
Delete presets: deletes the stored stations (all or separately). All: deletes all the stored stations (AM 1, AM 2, AM 3).To delete the stations separately, select the desired station AM 1, AM 2or AM 3. Then press the stored station button of the station to delete.
Managing logos: a station logo can be assigned to the stations saved in thestored station buttons.
DAB setup
●
Select the DAB frequency band by pressing the RADIO infotainment but-ton.
●
Press the function button Setup to open the menu DAB setup.
Function button: effectSound: sound setup ⇒ page 64.SCAN: scan function (SCAN). When the scan function is running, all availa-ble stations on the current frequency band are played in sequence foraround five seconds each ⇒ page 18.
Search mode: determines the setup of the buttons with arrows and .The setup will be saved for the current frequency band. Preset list: all stored stations on the selected frequency band can be se-lected with the arrow buttons. Stations: all available stations on the selected frequency band can beselected with the arrow buttons.Traffic Program (TP): TP function (traffic news monitoring) activated⇒ page 19.If the function button is deactivated (in grey), you must first activate thefunction button radio data system (RDS).
Delete presets: deletes the stored stations (all or separately).
Page 23 of 72
.To delete stations separately, select the station desired DAB 1, DAB 2 orDAB 3. Then press the stored sta")
22Audio modeFunction button: effect All: deletes all the stored stations (DAB 1, DAB 2, DAB 3).To delete stations separately, select the station desired DAB 1, DAB 2 orDAB 3. Then press the stored station button of the station to delete.
Managing logos: logos of stations that have been saved in the station but-tons may be assigned/deleted. Radio text: The Radio text is active.Advanced setup: DAB services setup. DAB traffic announcements: traffic reports broadcast using the DAB sys-tem can be heard, like the TP traffic reports, in any operation mode. Other DAB alerts: the incoming DAB messages (news, sport, weather,warnings, etc.) are played with the DAB radio mode activated. DAB-DAB station tracking: automatic station tracking within the DAB fre-quency band has been activated. Automatic switch DAB-FM: this allows the frequency band to be changedto FM for automatic station tracking.If the function button is deactivated (in grey), you must first activate the Radio data system (RDS) function button in the FM setup menu⇒ page 20.
L Band: Have this frequency band available.
Page 24 of 72
 are audio sources containing audio files on various dif-ferent data media (for example CD, memory card, external MP3 player).These audio files")
23Audio modeMedia mode
Introduction
“Media sources”1) are audio sources containing audio files on various dif-ferent data media (for example CD, memory card, external MP3 player).These audio files can be played by the infotainment system from its corre-sponding drives or audio input sockets (memory card slot, AUX-IN multi-me-dia socket etc.).
The CD player and/or SD card reader, as well as the MEDIA-IN connection,are located inside the glove box.
Intellectual property rights
Audio and video files saved on data media are generally protected by intel-lectual property law depending on the national and international provisionsapplicable. Observe legal requirements!
Note
●The audio coding technology MPEG-4 HE-AAC and patents have aFraunhofer IIS licence.●
This product is protected by copyright and intellectual property rights ofMicrosoft Corporation. Using or distributing similar technology outside ofthis product without a licence from Microsoft or any of its authorised sub-sidiaries is prohibited.
●
The infotainment system allows you to view, play and manage compati-ble audio files only. Other files are ignored.
Data media and file requirements
Factory-fitted CD players conform to safety class 1 according toDIN IEC 76 (CO) 6/ VDE 0837.
The unit only accepts 12-cm standard CDs and memory cards with the di-mensions 32 mm x 24 mm x 2.1 mm or 1.4 mm.
The supported file formats listed are collectively referred to below as “audiofiles”. A CD containing audio files of these types is referred to as an “audiodata CD”.
Media sourcesRequirements for playing in the unitAudio files Audio CDs (up to 80 min). CD-ROM, CD-R-, CD-RW, audiodata CD up to a maximum of 700MB (megabytes) with file systemISO 9660, levels 1 and 2, Joliet orUDF 1.02, 1.5, 2.01, 2.5 SD and MMC memory cards inthe file system FAT12, FAT16,FAT32, xFAT or VFAT up to a maxi-mum of 2 GB (gigabytes), SDHCcards and SDXC cards.– AUX-IN: ⇒ page 28– MEDIA-IN or MDI: external datamedia compatible with the ME-DIA-IN multimedia interface⇒ page 29
– Digital specification of the audio .-Rates of 160 kbit/s (recommended)up to a maximum of 320 kbit/s and 48kHz of sampling frequency.– Audio files in MP3, WMA, OGGVorbisand ACC format.
– Playlists in PLS, B4S, ASX, M3U andWPL formats.
Requirements for handling external data media through the MEDIA-IN multi-media interface.
1)
Consult the compatibility list.