Page 4 of 340
.
Contents
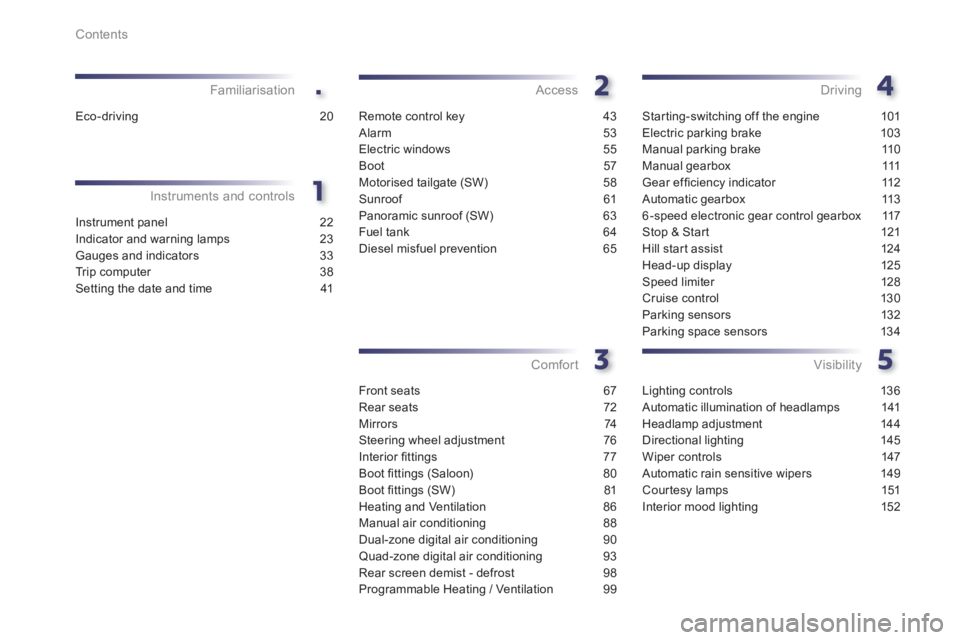
Instrument panel 22
Indicator and warning lamps 23
Gauges and indicators 33
Tr ip computer 38
Setting the date and time 41
Instruments and controlsFamiliarisation
Remote control key 43
Alarm 53
Electric windows 55
Boot 57
Motorised tailgate (SW) 58
Sunroof 61
Panoramic sunroof (SW) 63
Fuel tank 64
Diesel misfuel prevention 65
Access
Front seats 67
Rear seats 72
Mirrors 74
Steering wheel adjustment 76
Interior fi ttings 77
Boot fi ttings (Saloon) 80
Boot fi ttings (SW) 81
Heating and Ventilation 86
Manual air conditioning 88
Dual-zone digital air conditioning 90
Quad-zone digital air conditioning 93
Rear screen demist - defrost 98
Programmable Heating / Ventilation 99
Comfort
Starting-switching off the engine 101
Electric parking brake 103
Manual parking brake 110
Manual gearbox 111
Gear effi ciency indicator 112
Automatic gearbox 113
6-speed electronic gear control gearbox 117
Stop & Star t 121
Hill start assist 124
Head-up display 125
Speed limiter 128
Cruise control 130
Parking sensors 132
Parking space sensors 134
Driving
Lighting controls 136
Automatic illumination of headlamps 141
Headlamp adjustment 144
Directional lighting 145
Wiper controls 147
Automatic rain sensitive wipers 149
Cour tesy lamps 151
Interior mood lighting 152
Visibility
Eco-driving 20
Page 10 of 340
8
Familiarisation
Lighting of the indicator lamp indicates the state
of the corresponding function.
Switch panels
Opening the boot.
Opening the fuel filler flap. 57, 58
Massa
ge.
7
1
53
Alarm.
Pro
grammable heating warning lamp.
6
4
99
Electric parking brake.
10
3
Starting/stopping using the electronic key.
10
1
Deactivation of Stop & Start.
122
Head-up display
(on/off, settings).
12
5
Deactivation of parking sensors.
133
Parking space sensor.
134
Electric child lock.
164
Deactivation of the DSC/ASR system.
170
Adaptive lighting.
142
Page 12 of 340
10
Familiarisation
9.Fusebox.
10. Front door window demisting/defrostingvent.
11.Windscreen demisting/defrosting vent. 12 .Steering lock and star ting with the key.
13. Starting using the electronic key. 14 .
Audio equipment steering wheel controls.
15. Wiper / screenwash / trip computer stalk.
16.Central locking and hazard warningbuttons.
17. Multifunction screen.
Instruments and controls
1.
Cruise control / speed limiter controls. 2.
Headlamp height adjustment. 3.
Lighting and direction indicator stalk
4.
Instrument panel. 5.
Driver's airbag.Horn.
6.Gear lever.
7. 12 V accessory socket
USB por t / auxiliary socket. 8.Bonnet release lever.
18.Central adjustable air vents.19. Passenger's airbag.20.
Side adjustable air vents.
21.Glove box / Passenger's airbag deactivation. 22.
Electric parking brake. 23.
Central armrest with storage. 24.
Storage (according to version).25.Audio system. 26.Heating / air conditioning controls.
Page 17 of 340
.
15
Familiarisation
I would like...
Heating or manual air conditioning
AirdistributionAir flowAir recirculation / Exterior air intakeTemperatureManualA/C
HOT
COLD
DEMISTINGDEFROSTING
Vent ilat ion
Digital air conditioning:use of the fully automatic mode by pressing the "AUTO"
button is recommended.
Advice on interior settings
Page 27 of 340
1
25
Instruments and controls
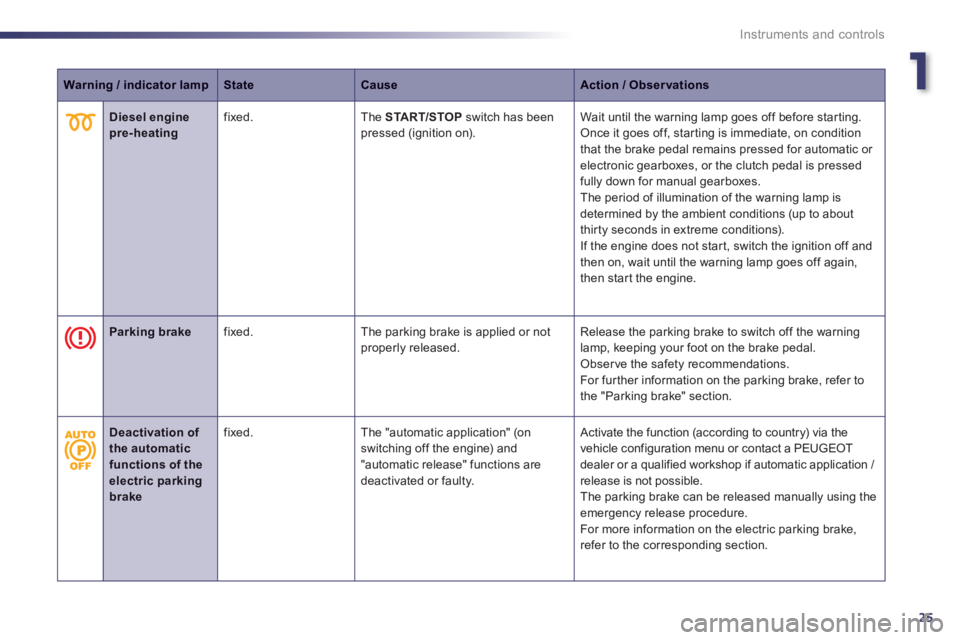
Warning / indicator lampStateCauseAction / Observations
Diesel engine pre-heating fixed. The START/STOP
switch has been pressed (ignition on). Wait until the warning lamp goes off before star ting.
Once it goes off, star ting is immediate, on condition
that the brake pedal remains pressed for automatic or electronic gearboxes, or the clutch pedal is pressed fully down for manual gearboxes.
The period of illumination of the warning lamp is
determined by the ambient conditions (up to about
thirty seconds in extreme conditions).
If the engine does not star t, switch the ignition off and
then on, wait until the warning lamp goes off again,
then start the engine.
Parking brake fixed. The parking brake is applied or notproperly released. Release the parking brake to switch off the warninglamp, keeping your foot on the brake pedal.
Obser ve the safety recommendations.
For further information on the parking brake, refer to
the "Parking brake" section.
Deactivation of the automatic functions of the electric parkingbrake
fixed. The "automatic application" (on switching off the engine) and
"automatic release" functions aredeactivated or faulty.
Activate the function (according to country) via the
vehicle configuration menu or contact a PEUGEOT
dealer or a qualified workshop if automatic application /
release is not possible.
The parkin
g brake can be released manually using the emergency release procedure.
For more information on the electric parking brake,
refer to the corresponding section.
Page 72 of 340
70
Comfort
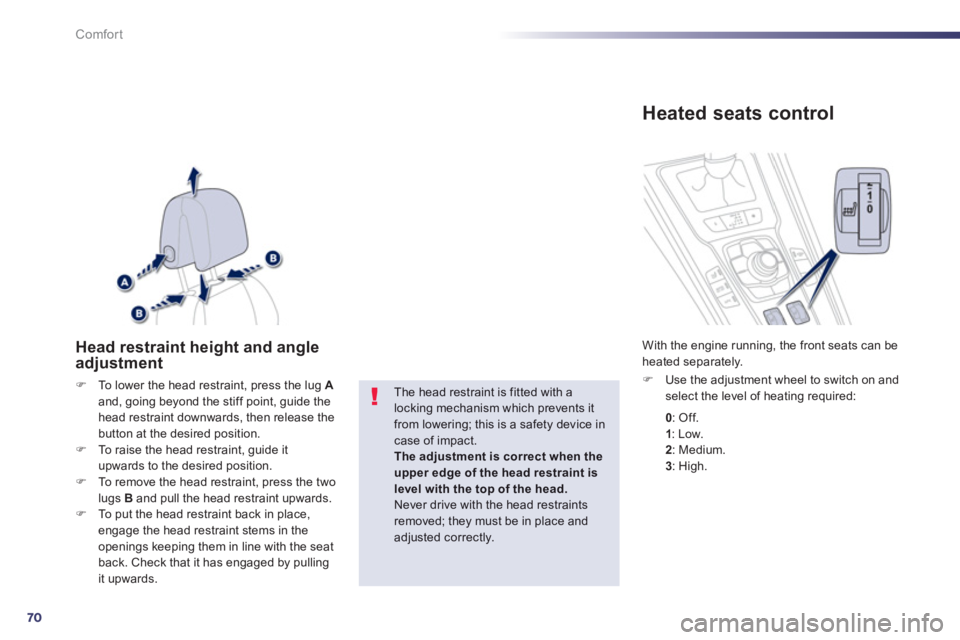
Head restraint height and angle adjustment
FTo lower the head restraint, press the lug Aand, going beyond the stiff point, guide the head restraint downwards, then release the
button at the desired position.
FTo raise the head restraint, guide it upwards to the desired position.FTo remove the head restraint, press the two lugs B and pull the head restraint upwards. FTo put the head restraint back in place,
engage the head restraint stems in the
openings keeping them in line with the seat
back. Check that it has engaged by pulling it upwards.
The head restraint is fitted with a locking mechanism which prevents itfrom lowering; this is a safety device incase of impact.The adjustment is correct when theupper edge of the head restraint is level with the top of the head.Never drive with the head restraintsremoved; they must be in place andadjusted correctly.
Heated seats control
F
Use the adjustment wheel to switch on and select the level of heating required:
With the en
gine running, the front seats can be heated separately.
0: Off.
1: Low. 2: Medium.3
: High.
Page 88 of 340
86
Comfort
Heating and Ventilation
The air circulating in the passenger compartment
is filtered and originates either from the outside via
the grille located at the base of the windscreen or
from the inside in air recirculation mode.
Controls
The incoming air follows various routes
depending on the controls selected by
the driver, the
front passenger and rear passengers, according to the level of equipment.
The temperature control enables you to obtain
the level of comfor t required by mixing the air of
the various circuits.The air distribution control enables you toselect the air vents used in the passenger compar tment by the combined use of theassociated buttons.
The air flow control enables you to increase or reduce the speed of the ventilation fan.
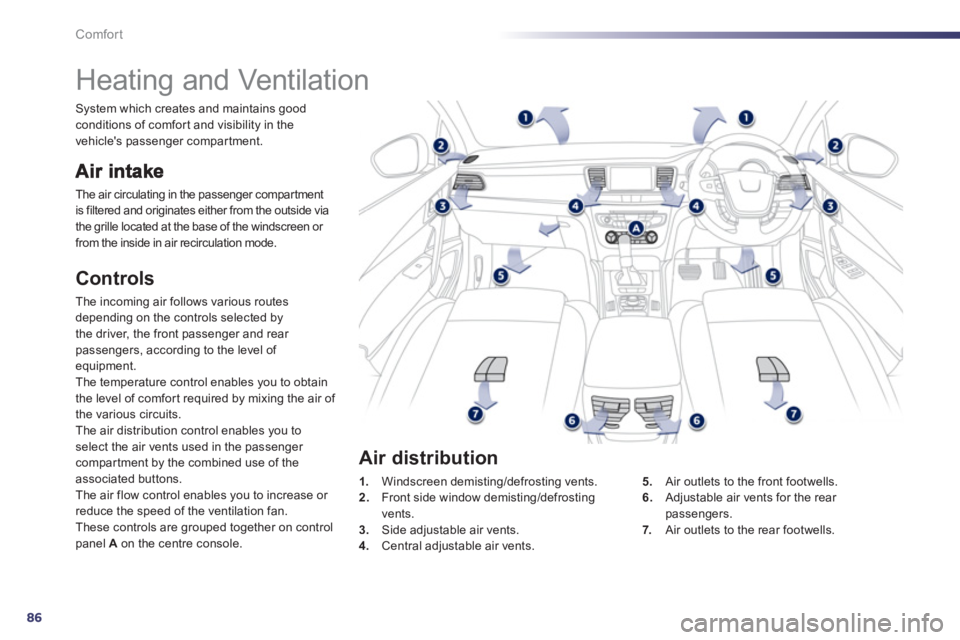
These controls are grouped together on controlpanel Aon the centre console.
1.Windscreen demisting/defrosting vents.2. Front side window demisting/defrosting
vents. 3. Side adjustable air vents. 4.Central adjustable air vents. 5
. Air outlets to the front footwells.
6.Adjustable air vents for the rear passengers.
7. Air outlets to the rear footwells.
Air distribution
System which creates and maintains goodconditions of comfor t and visibility in the
vehicle's passenger compartment.
Page 93 of 340
3
91
Comfort
On entering the vehicle, if the interior temperature is much colder or warmer than the comfort value, there is noneed to change the value displayed in order to obtain the comfort required.The system corrects the differencein temperature automatically and asquickly as possible.
4. Automatic visibility programme
For maximum cooling or heating of thepassenger compartment, it is possibleto exceed the minimum value 14 or themaximum value 28.F
Turn control 2or 3
to the left until "LO"is displayed or to the right
until "HI"
is displayed. See "Front demistin
g-defrosting".
F
Press this button to equalise thecomfort value on the passenger's
side with that on the driver's side (mono-zone). The indicator lamp in the button comes on.
I
f you wish, you can change one of settings
provided by the system. The other functions will still be controlled automatically.F Pressing the "AUTO"
button returns the system to completely automatic operation.
Manual operation
5. Mono-zone / Dual-zone
The air conditioning is designed to operate effectively in all seasons,
with the windows closed.
6. Air conditioning On / Off
It allows you:
- in summer, to lower the temperature,
- in winter, above 3°C, to improve demistin
gperformance.
7. Maximum air conditioning
If you want to temporarily refresh theair in the passenger compartment,
press this button and "LO"isdisplayed.
To return to the previous settings, press the
button again.
With Stop & Start, when demisting has been activated, the STOP mode is notavailable.Switchin
g on
FPress the "A/C"button, the associated green indicator lamp comes on.The air conditioning does not operate when
the air flow control is set to off.
Switching offFPress the "A/C"
button again, the
associated green indicator lamp goes off.Switching off the air conditioning may result in
some discomfort (humidity, misting).