2013 NISSAN SENTRA display
[x] Cancel search: displayPage 4 of 24
Drive MoDe
NORMAL
Normal drive mode is recommended for normal
everyday driving, and is the default mode of
your vehicle.
E
c O
EcO drive mode is recommended for maximum fuel economy . Performance may be reduced.
• Press the e
C
o button
01 on the instrument panel to activate.
• The
e
C
o
drive indicator light illuminates on the instrument panel.
SPORT
The SPORT drive mode is recommended for an enhanced performance feel. Fuel econ\
omy may be reduced.
• Press the SP
or
T button
02 on the instrument panel to activate.
• SP
or
T drive indicator light illuminates on the instrument panel.
For more information, refer to the “Starting and driving (section 5)” of your Owner’s Manual.
new system features
NaviG aT io N SYST eM (if so equipped)
Your Navigation System can calculate a route from the current location to\
a preferred destination.
T
he real-time map display and turn-by-turn voice guidance will lead you a\
long the route.
The Navigation System will continually update your vehicle’s position. If you have deviated
from the original route, it will recalculate the route from your current\
location.
For more information, refer to your Navigation System Owner’s Manual.
To view detailed instructional videos regarding these and other features, please go to www.nissanownersinfo.mobi.2
0102
Page 5 of 24
To view detailed instructional videos regarding these and other features, please go to www.nissanownersinfo.mobi.
looSe F uel Ca P
A looSe F uel Ca P warning message will display
in the trip computer 01 when the fuel-filler cap is not
tightened correctly
.
To tighten, turn the cap clockwise until a single click
is heard.
The warning message will disappear when the vehicle
detects the fuel-filler cap is properly tightened and the
button 02 on the steering wheel
is pressed.
If the cap is not properly tightened, the Malfunction
Indicator Light may also illuminate.
For more information, refer to the “instruments and controls (section 2)”
and the “Pre-driving checks and adjustments (section 3)” of your Owner’s Manual.
01
Tire PreS Su re Mo Ni Tor iN G SYST eM (TPM S) W i TH
ea
SY F ill T ire aler T (if so equipped)
A CHeCK… T ire … P reS… warning message
will appear in the trip computer
01 and the low tire
pressure warning light 02 will illuminate when one
or more tires are low on pressure and air is needed.
•
T
he tire pressures should be checked when the
tires are cold. The tires are considered cold after
the vehicle has been parked for 3 hours or more or
driven less than 1 mi (1.6 km) at moderate speeds.
After tire pressures are adjusted, drive the vehicle at
speeds above 1
6 MPH (25 km/h). The CH
eCK T
ire
Pre
S warning message and low tire pressure
warning light will dis
appear.
When adding air to an under-inflated tire, the TPMS with Easy Fill Tire Alert provides visual
and audible signals to help you inflate the tires to the recommended
c
O
LD tire pressure.
To use the Easy Fill Tire Alert system (if so equipped):
1. Move the shift lever to the
P (P
arK)
position and apply the parking brake.
2. Place the ignition switc
h in the o N position. Do not start the engine.
3.
Add air to the under-inflated tire and within a few seconds, the hazar\
d warning lights will
start flashing.
4.
W
hen the designated tire pressure is reached, the horn will beep once and the hazard
warning lights will stop flashing.
5. Repeat this procedure for any additional under-inflated tires.
essential information
02
01
CHeCK T ire P reS
02
3
Page 12 of 24
FM/aM/SiriusXM™* SaTelli T e ra Di o W i TH CD P laY er
(if so equipped)
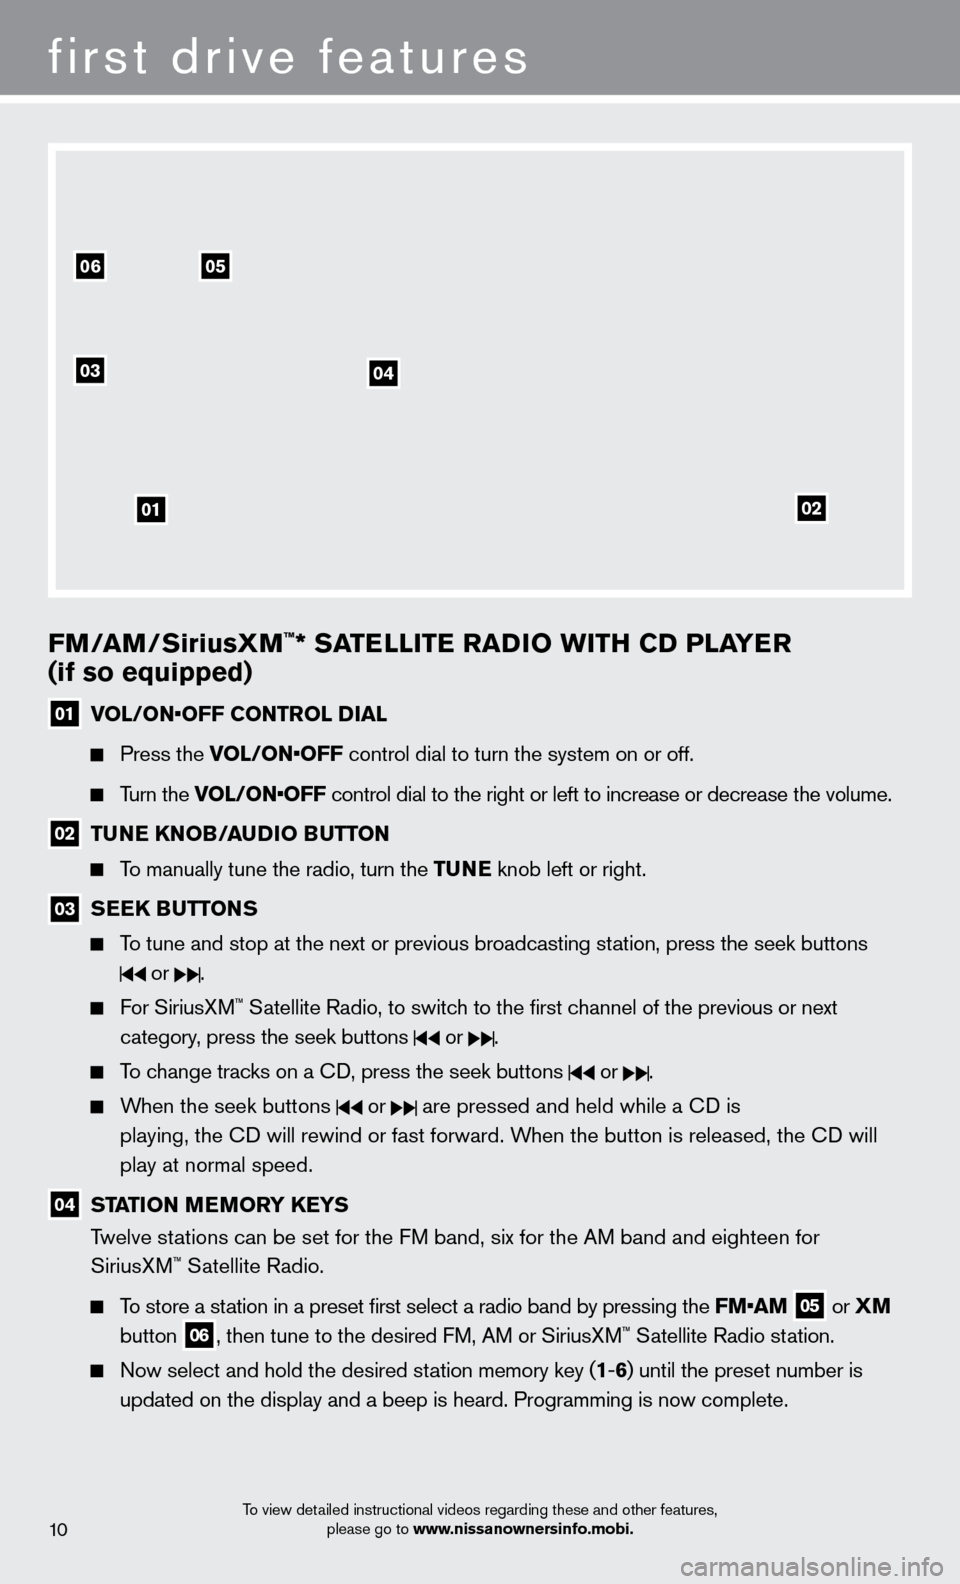
01 vol / o N• o FF C o NT rol Dial
Press the vol / o N• o FF control dial to turn the system on or off.
Turn the vol / o N• o FF control dial to the right or left to increase or decrease the volume.
02 TuNe KNo B/a uDi o Bu TTo N
To manually tune the radio, turn the T uNe knob left or right.
03 S ee K B uT ToNS
To tune and stop at the next or previous broadcasting station, press the seek buttons
or .
For SiriusXM™ Satellite Radio, to switch to the first channel of the previous or next
category
, press the seek buttons
or .
To change tracks on a cD, press the seek buttons or .
When the seek buttons or are pressed and held while a cD is
playing, the
c
D will rewind or fast forward. W
hen the button is released, the c
D will
play at normal speed.
04 STaT io N MeMorY Ke YS
T welve stations can be set for the FM band, six for the AM band and eighteen for
SiriusXM
™ Satellite Radio.
To store a station in a preset first select a radio band by pressing the FM•a M
05 or
XM
button 06, then tune to the desired FM, AM or SiriusXM™ Satellite Radio station.
Now select and hold the desired st ation memory key (1-6 ) until the preset number is
updated on the display and a beep is heard. Programming is now complete.\
To view detailed instructional videos regarding these and other features, please go to www.nissanownersinfo.mobi.
first drive features
0506
03
01
04
02
10
Page 15 of 24
system guide
11
BlueTooTH® HaNDS-Free PHo Ne SYST eM (if so equipped)
With an overhead microphone and sound
t
ransmitted through the audio system speakers,
the Bluetooth® Hands-free Phone System utilizes
Bluetooth® wireless technology and voice recognition
to provide hands-free cellular phone communication.
A cellular telephone should not be used while driving
so full attention may be given to vehicle operation.
*
SYSTEM OPERATING TIPS
close all windows. Surrounding noises may interfere
with system operation and performance.
Press the button on the steering wheel to activate
voice recognition.
Wait until after the tone sounds and the face
icon on the display changes before speaking
a command.
Begin speaking a command within 3.5 seconds of the tone.
*Some jurisdictions prohibit the use of cellular telephones while drivin\
g.
To view detailed instructional videos regarding these and other features, please go to www.nissanownersinfo.mobi.
13
TriP CoMP u T er
With the ignition switch in the o N position, trip
computer modes
can be selected by pressing the
button
02 on the steering wheel.
The following modes can be selected in the display 01:
•
Odometer – records the tot
al distance the vehicle
has been driven.
•
T
rip
a
– measures the distance of one specific trip.
•
T
rip B – measures the distance of a second
specific trip.
•
e
C
o
Pedal
i
ndicator – displays the
recommended accelerator pedal position
to optimize fuel consumption.
•
M
PG – displays the instant fuel consumption.
•
av
G
/mpg – displays the average fuel consumption since the last reset.
•
av
G
/mph – displays the average vehicle speed since the last reset.
•
dte –
displays the estimated dist
ance to empty (dte) the vehicle can be driven before refueling.
To reset Trip a , Trip B, a vG /mpg, or avG /mph, go to the desired mode on the trip computer
and hold the
button 02 for more than 3 seconds.
For more information, refer to the “instruments and controls (section 2)” of your Owner’s Manual.
01
02
Page 18 of 24
system guide
To view detailed instructional videos regarding these and other features, please go to www.nissanownersinfo.mobi.
BlueTooTH® SYSTeM W i TH Na viG aT io N (if so equipped)
Send and receive predefined or custom text mess ages* through you vehicle’s
Bluetooth® system.
Bluetooth® Streaming Audio allows you to use a compatible Bluetooth® phone to play
audio files on your device. Your compatible cellular phone can be connected to the vehicle’s
audio system allowing audio files to play through the vehicle’s speakers.
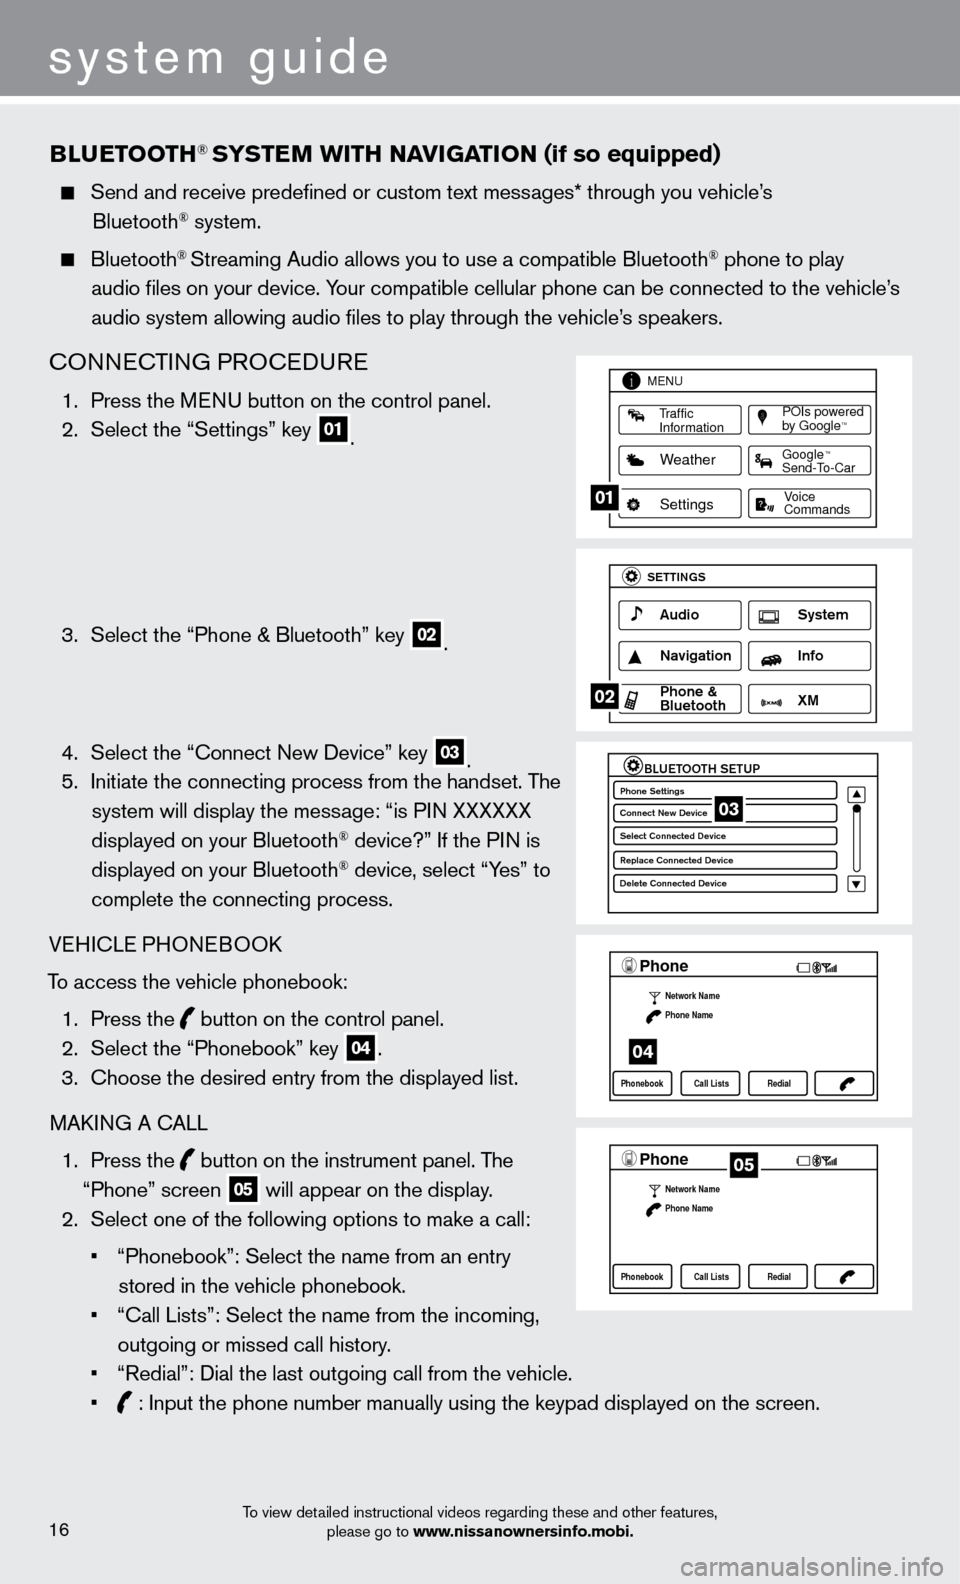
cONNEcTING PRO c EDURE
1. Press the M ENU button on the control panel.
2.
Select the “Settings” key 01.
3.
Select the “Phone & Bluetooth” key 02.
4.
Select the “
c
onnect New Device” key
03. 5.
Initiate the connecting process from the handset. T he
system will display the message: “is PIN XXXXXX
displayed on your Bluetooth
® device?” If the PIN is
displayed on your Bluetooth® device, select “Yes” to
complete the connecting process.
VEHI
c
LE PHONEBOO
k
T
o access the vehicle phonebook:
1.
Press the button on the control panel.
2.
Select the “Phonebook” key 04.
3.
c
hoose the desired entry from the displayed list.
MA
k
I
NG A
c
ALL
1.
Press the
button on the instrument panel. The
“Phone” screen 05 will appear on the display.
2.
Select one of the following options to make a call:
•
“Phonebook”: Select the name from an entry
stored in the vehicle phonebook.
•
“
c
all Lists”: Select the name from the incoming,
outgoing or missed call history.
•
“Redial”: Dial the last outgoing call from the vehicle.
•
: Input the phone number manually using the keypad displayed on the scre\
en.
LHA2253 1A
Traffic
Information
MENU
Weather
Settings
Commands Voice
POIs powered
by GoogleTM
TM
Send-To-Car Google
01
LHA2248 1A
Audio
SETTINGS
Navigation Info
XM S\fstem
\bhone &
Bluetooth
02
LHA2265 1A
BLUETOOTH SETUPPhone Settings
Conne\ft New De\bi\fe
Sele\ft Conne\fted De\bi\C\fe
Repla\fe Conne\fted De\C\bi\fe
Delete Conne\fted De\bi\C\fe03
LHA22971A
Phone
Network Name
Phone Name
Phonebook Call Lists Redial
04
LHA2297 1A
Phone
Network Name
Phone Name
Phonebook Call Lists Redial05
16
Page 20 of 24
To view detailed instructional videos regarding these and other features, please go to www.nissanownersinfo.mobi.18
04
03
06
07
05
0102
NaviGaT io N SY ST eM (if so equipped)
Your Navigation System can calculate a route from the current location to\
a preferred
destination. The real-time map display and turn-by-turn voice guidance will lead you a\
long
the route.
The navigation System will continually update your vehicle’s position. If you have deviated from the original route, it will recalculate the route from your current\
location.
Your Navigation System, along with POIs (Point Of Interest) powered by Google™* (if so
equipped), allows you to enter a destination using Google search results.
Using Google™ Send-to-car* (if so equipped) you can send a destination from Google Maps
to your vehicle’
s Navigation System.
Hands Free T ext Messaging – The system allows for the sending and receiving of text
messages through the vehicle interface.
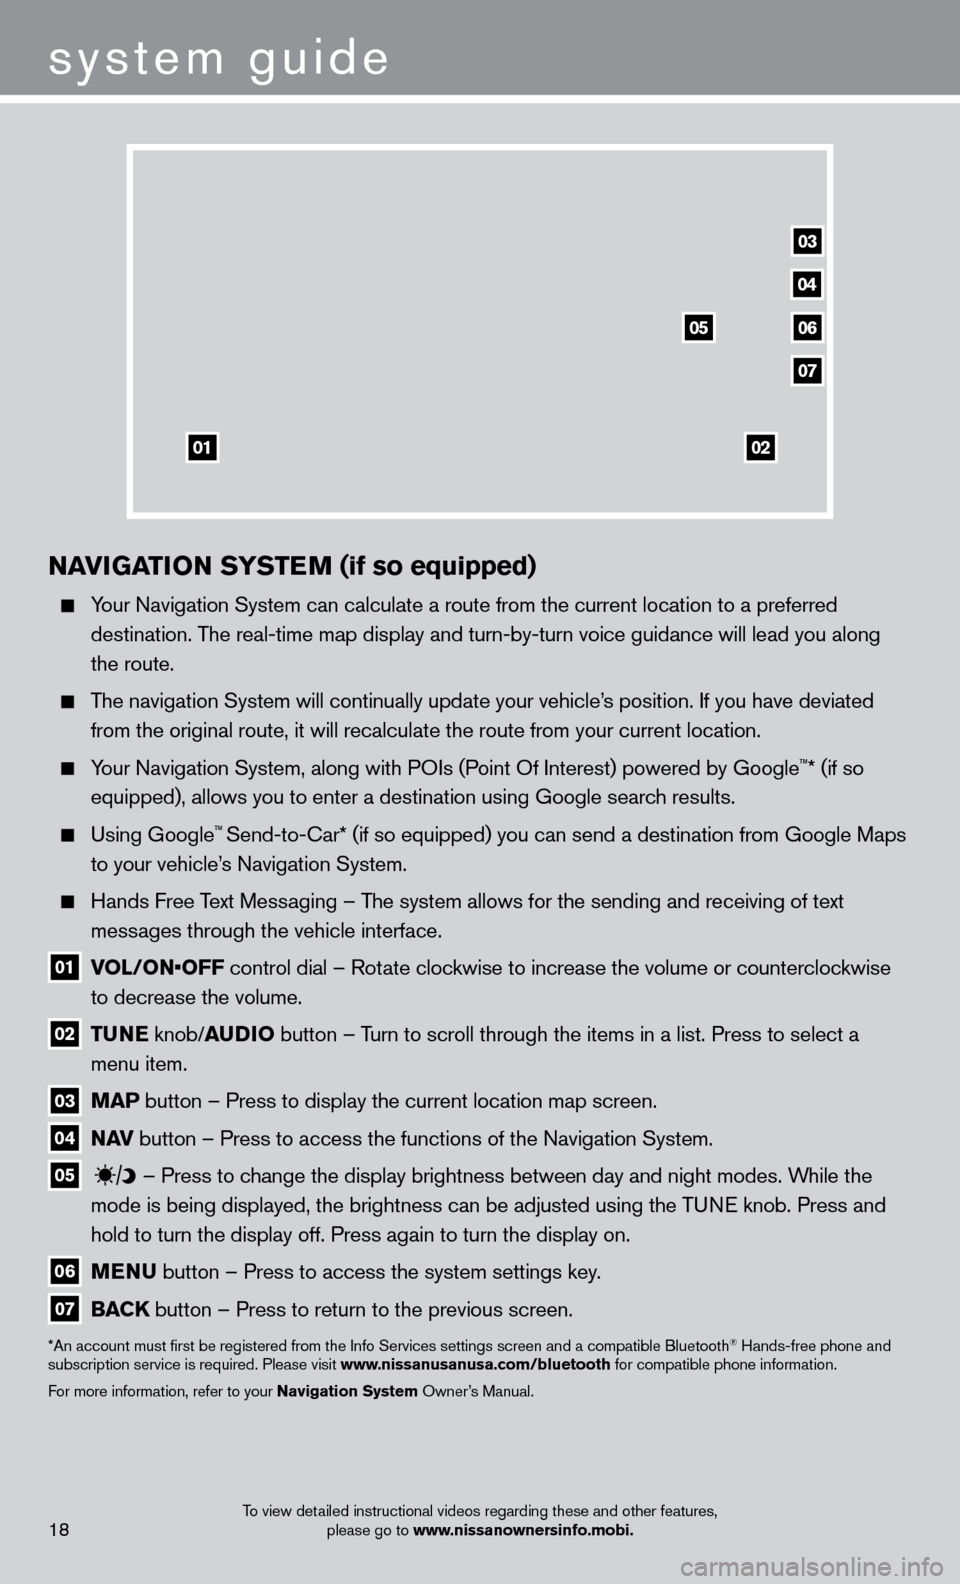
01 vol / o N• o FF control dial – Rotate clockwise to increase the volume or counterclockwise
to decrease the volume.
02 Tu N e knob/ au D io button – T urn to scroll through the items in a list. Press to select a
menu item.
03 M a P button – Press to display the current location map screen.
04 Nav button – Press to access the functions of the Navigation System.
05
– Press to change the display brightness between day and night modes. While the
mode is being displayed, the brightness can be adjusted using the TUNE knob. Press and
hold to turn the display off. Press again to turn the display on.
06 M e N u button – Press to access the system settings key .
07 Ba CK
button – Press to return to the previous screen.
*An account must first be registered from the Info Services settings s\
creen and a compatible Bluetooth® Hands-free phone and
subscription service is required. Please visit www.nissanusanusa.com/bluetooth for compatible phone information.
For more information, refer to your Navigation System Owner’s Manual.
system guide