2013 NISSAN QUEST reset
[x] Cancel search: resetPage 7 of 36
TIre Pre SSure MONITOr ING SYSTeM (TPMS)
wITH eaSY FILL TI re aLerT
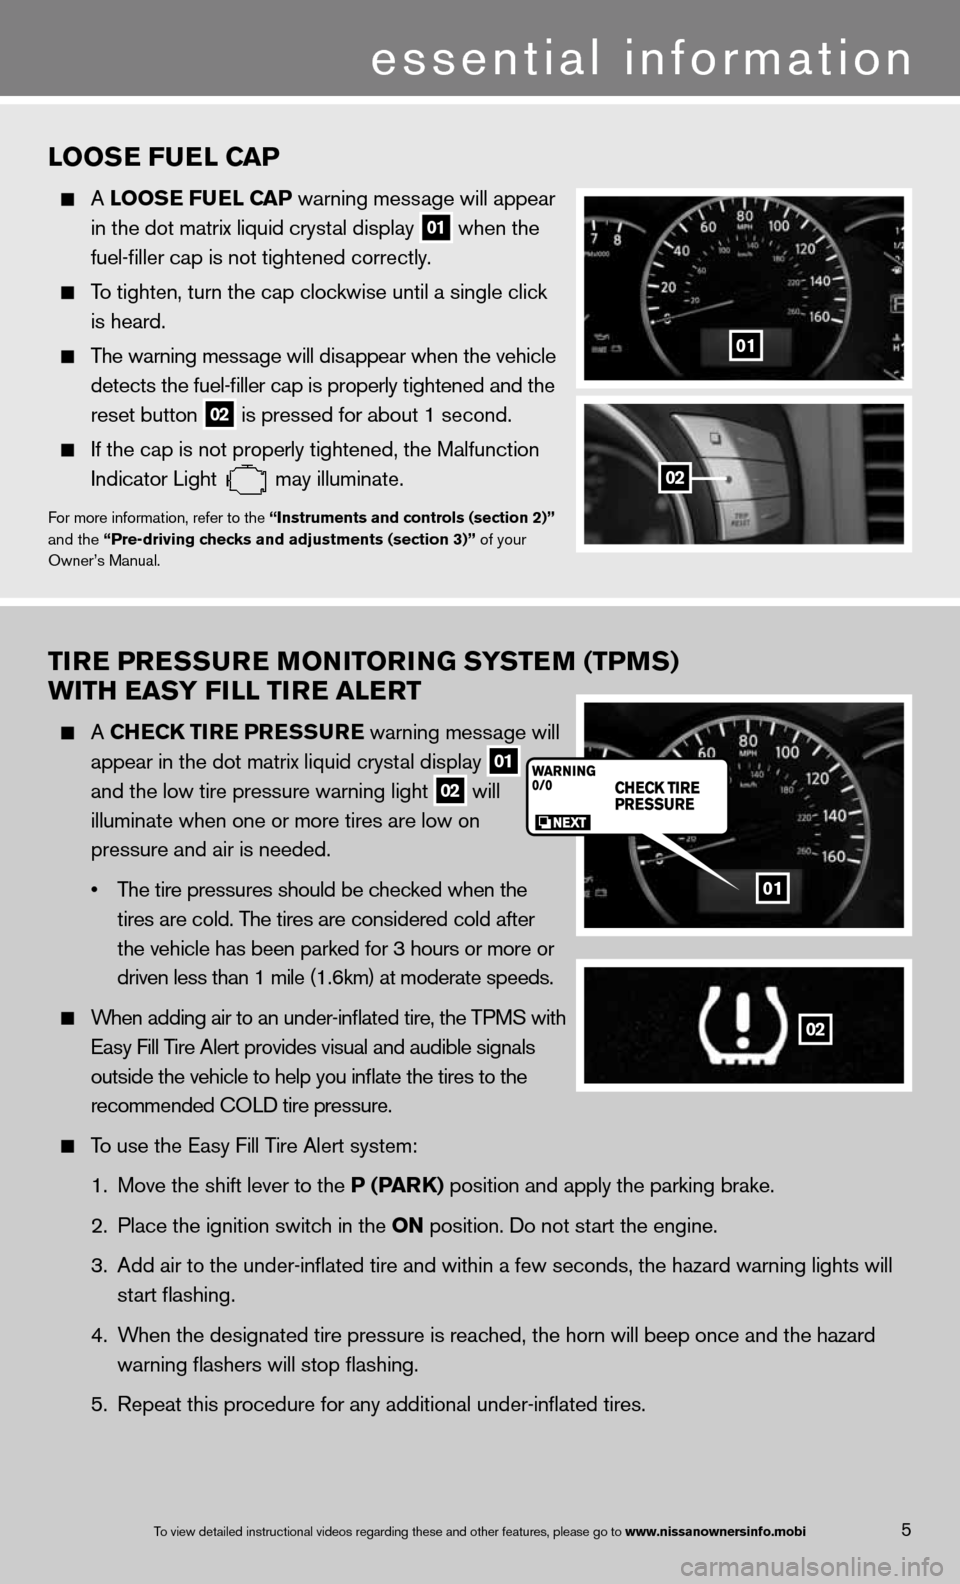
A CHe CK TIre P reSSure warning message will
appear in the dot matrix liquid crystal display
01
and the low tire pressure warning light
02 will
illuminate when one or more tires are low on
pressure and air is needed.
• The tire pressures should be checked when the
tires are cold. The tires are considered cold after
the vehicle has been parked for 3 hours or more or
driven less than 1 mile (1.6km) at moderate speeds.
When adding air to an under-inflated tire, the TPMS with
easy fill Tire Alert provides visual and audible signals
outside the vehicle to help you inflate the tires to the
recommended c OLd tire pressure.
To use the easy fill Tire Alert system:
1. Move the shift lever to the P (P arK) position and apply the parking brake.
2. Place the ignition switch in the ON position. do not start the engine.
3. Add air to the under-inflated tire and within a few seconds, the hazar\
d warning lights will
start flashing.
4. When the designated tire pressure is reached, the horn will beep once and the hazard
warning flashers will stop flashing.
5. Repeat this procedure for any additional under-inflated tires.
01
02
5To view detailed in\fstructional videos\f regarding these a\fnd other features\f \fplease go to www.nissanownersin\Ifo.mobi
LOOS e Fue L CaP
A LOOS e Fue L CaP warning message will appear
in the dot matrix liquid crystal display
01 when the
fuel-filler cap is not tightened correctly.
To tighten, turn the cap clockwise until a single click
is heard.
The warning message will disappear when the vehicle
detects the fuel-filler cap is properly tightened and the
reset button
02 is pressed for about 1 second.
if the cap is not properly tightened, the Malfunction
indicator Light
may illuminate.f
or more information, refer to the “Instruments and controls (section 2)”
and the “Pre-driving checks and adjustments (section 3)” of your
Owner’s Manual.
01
02
essential information
Page 16 of 36
AUDIO\fSYST\bM
Demonstrate\f \f \f\fYes\f
1. How to tune to the\f next \broadcast sta\ftion and skip
to the next catego\fry (if so equipped) \for CD track
2. How to store a rad\fio station in a pr\feset
3. How to scan the \bro\fadcast stations
BlU\bTOOTh®\fhANDS-fr\b\b\fPhON\b\fS YST\bM\f(if\fso\fequipped)
Ye s
1. Connect the custom\fer’s phone
2. Explain voice tagg\fing
3. Identify microphone\f location
4. Explain how to dia\fl a num\ber
5. Explain how to rec\feive and end a cal\fl
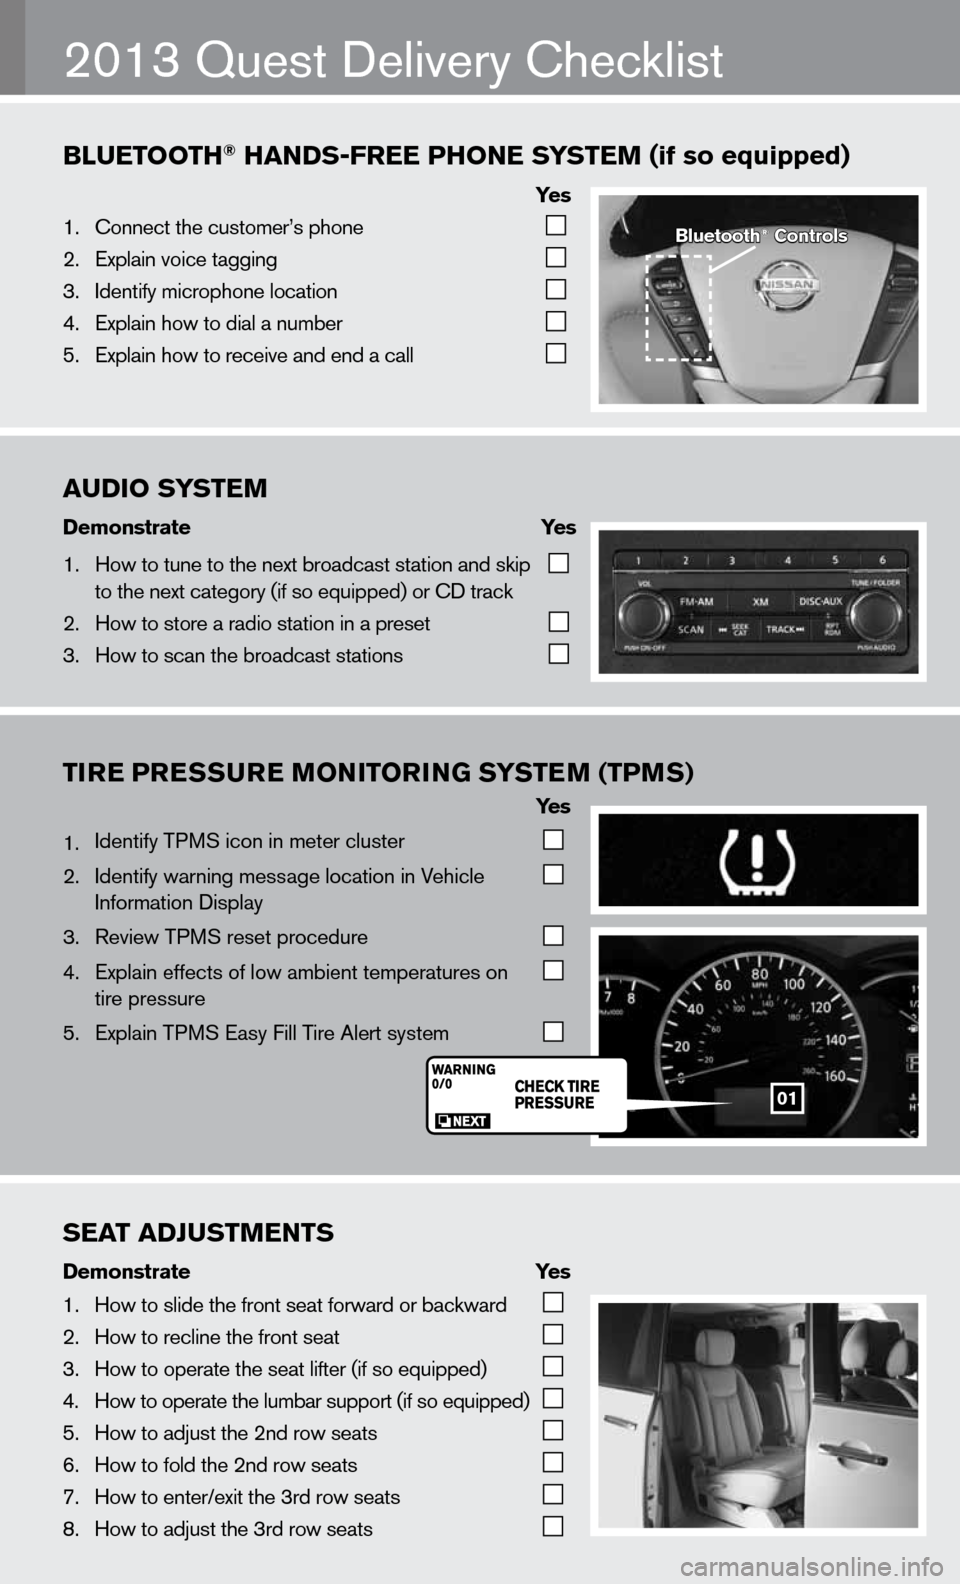
TIre Pre SSure MONITOr ING SYSTeM (TPMS)
Ye s
1. identify TPMS icon in meter cluster
2. identify warning message location in Vehicle
information display
3. Review TPMS reset procedure
4. explain effects of low ambient temperatures on
tire pressure
5. explain TPMS easy fill Tire Alert system
2013 Quest delivery checklist
Bluetooth®\fControls
01
S\bAT\fADjUSTM\bNTS
Demonstrate\f \f \f \fYes
1. How to slide the fr\font seat forward or\f \backward
2. How to recline the\f front seat
3. How to operate the\f seat lifter (if so \fequipped)
4. How to operate the\f lum\bar support (if \fso equipped)
5. How to adjust the \f2nd row seats
6. How to fold the 2nd\f row seats
7. How to enter/exit \fthe 3rd row seats
8. How to adjust the \f3rd row seats
Page 23 of 36
01
0605
03
02
FM/aM/SiriusXM™* Sa TeLLITe raDIO wITH CD/DVD PLa Yer
(if so equipped)
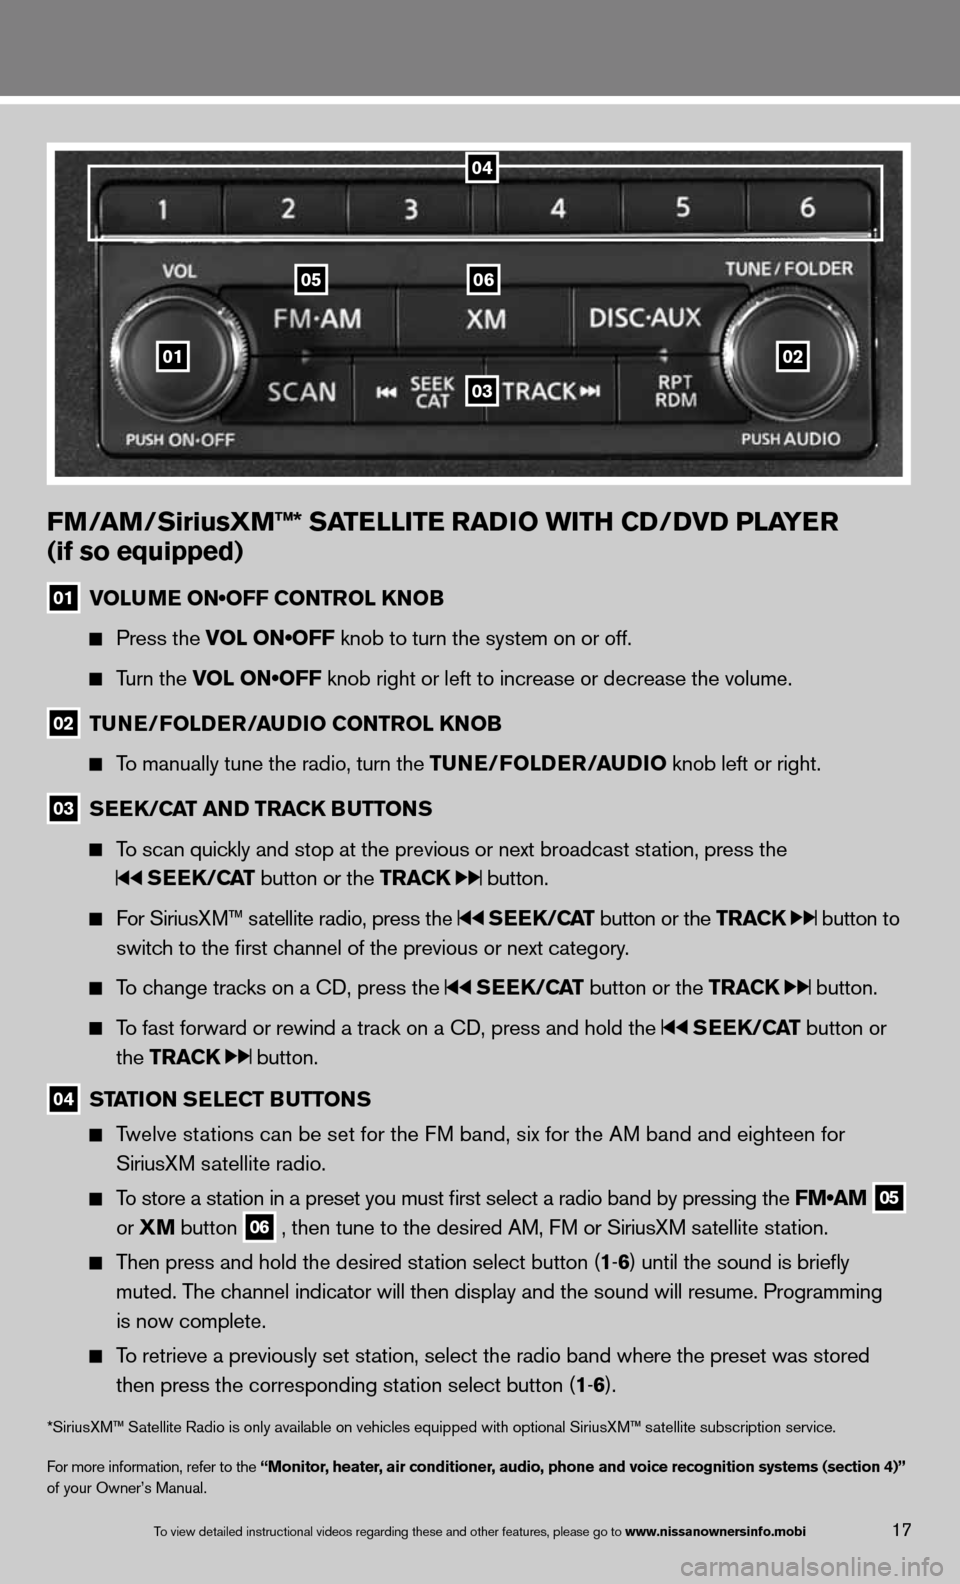
01 VOLUME ON•OFF CONTROL KNOB
Press the VOL ON•OFF knob to turn the system on or off.
Turn the VOL ON•OFF knob right or left to increase or decrease the volume.
02 Tu
Ne/FOLD er/au DIO CONTr OL KNOB
To manually tune the radio, turn the T uNe/FOLDer/auDIO knob left or right.
03 S
ee K/C aT aND Tra CK BuTTONS
To scan quickly and stop at the previous or next broadcast station, press the
SeeK/C aT button or the Tra CK button.
for SiriusXM™ satellite radio, press the SeeK/C aT button or the Tra CK button to
switch to the first channel of the previous or next category.
To change tracks on a cd, press the SeeK/C aT button or the Tra CK button.
To fast forward or rewind a track on a cd, press and hold the SeeK/C aT button or
the Tra CK
button.
04 ST
aTION S eLe CT B uTTONS
Twelve stations can be set for the f M band, six for the AM band and eighteen for
SiriusXM satellite radio.
To store a station in a preset you must first select a radio band by pressing the FM•AM 05
or
XM button 06 , then tune to the desired AM, f
M or SiriusXM satellite station.
Then press and hold the desired station select button (1 -6 ) until the sound is briefly
muted. The channel indicator will then display and the sound will resume. Programmin\
g
is now complete.
To retrieve a previously set station, select the radio band where the preset was stored
then press the corresponding station select button (1 -6 ).
*SiriusXM™ Satellite Radio is only available on vehicles equipped with optional Siri\
usXM™ satellite subscription service.
for more information, refer to the “Monitor, heater, air conditioner, audio, phone and voice recognition systems (section 4)”
of your Owner’s Manual.
04
17To view detailed in\fstructional videos\f regarding these a\fnd other features\f \fplease go to www.nissanownersin\Ifo.mobi
Page 24 of 36
CruISe CONTr OL
The cruise control system enables you to set a constant
cruising speed once the vehicle has reached 25 mph.
The system will automatically maintain the set speed
until you tap the brake pedal, accelerate, cancel or
turn the system off.
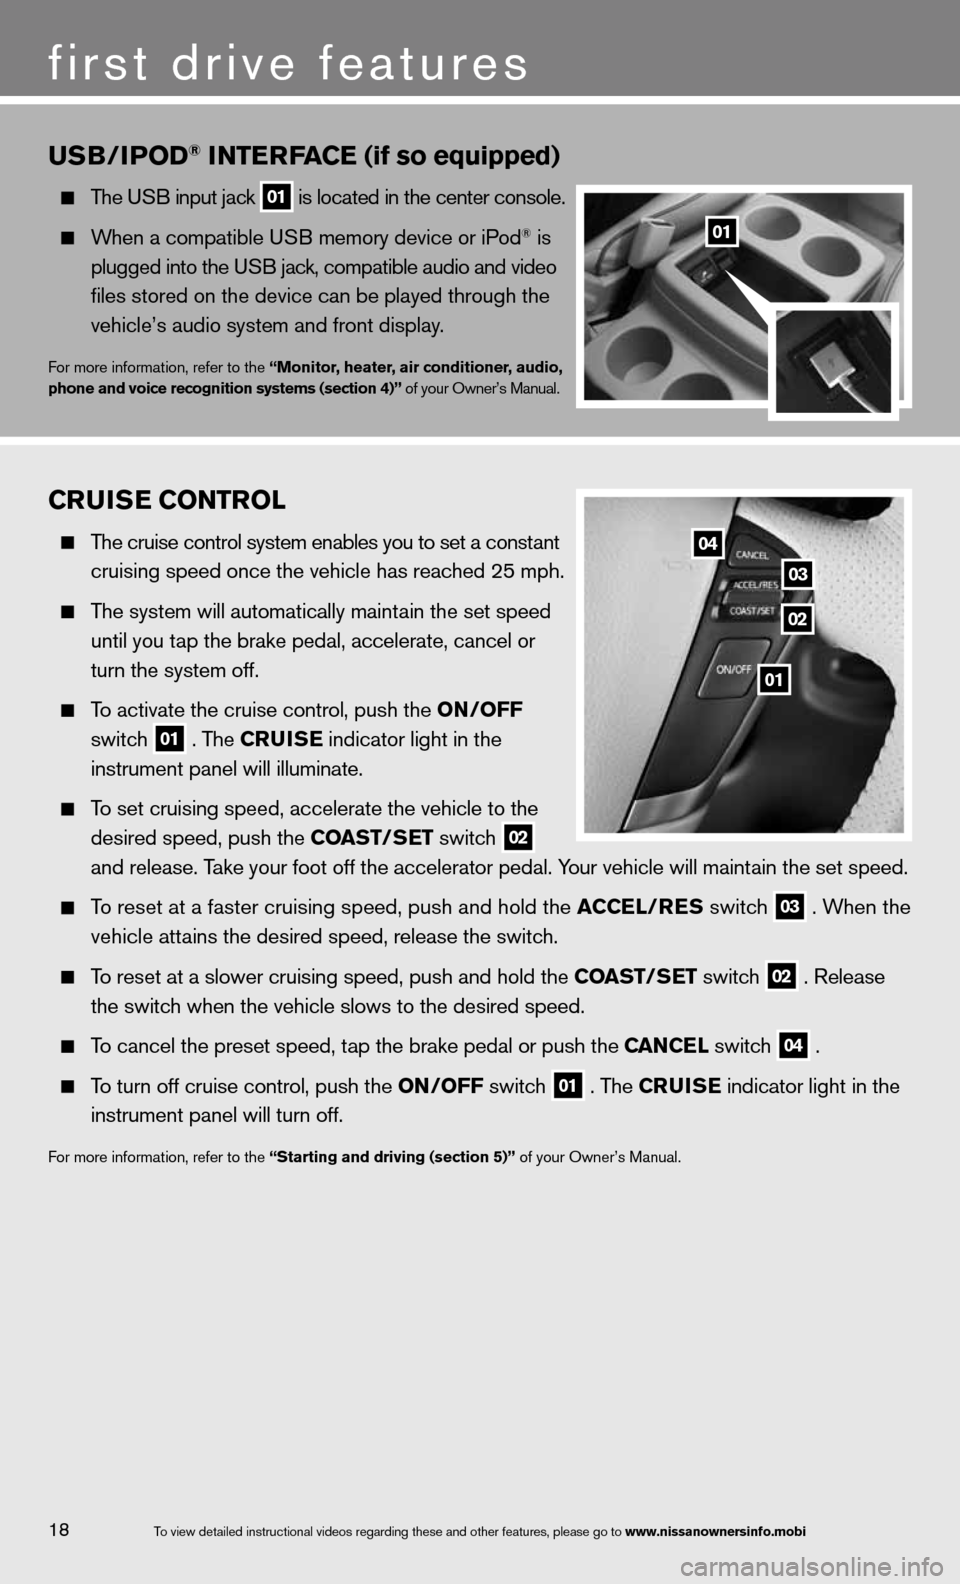
To activate the cruise control, push the ON/OFF
switch
01 . The C
ruISe indicator light in the
instrument panel will illuminate.
To set cruising speed, accelerate the vehicle to the
desired speed, push the CO aST/SeT switch
02
and release. Take your foot off the accelerator pedal. Your vehicle will maintain the set speed.
To reset at a faster cruising speed, push and hold the a CCeL/reS switch 03 . When the
vehicle attains the desired speed, release the switch.
To reset at a slower cruising speed, push and hold the CO aST/SeT switch 02 . Release
the switch when the vehicle slows to the desired speed.
To cancel the preset speed, tap the brake pedal or push the C aNCeL switch 04 .
To turn off cruise control, push the ON/OFF switch 01 . The C
ruISe indicator light
in the
instrument panel will turn off.
for more information, refer to the “Starting and driving (section 5)” of your Owner’s Manual.
u SB/IP OD® INTer Fa Ce (if so equipped)
The u SB input jack 01 is located in the center console.
When a compatible u SB memory device or iPod® is
plugged into the u SB jack, compatible audio and video
files stored on the device can be played through the
vehicle’s audio system and front display.
for more information, refer to the “Monitor, heater, air conditioner, audio,
phone and voice recognition systems (section 4)” of your Owner’s Manual.
01
02
03
04
18To view detailed in\fstructional videos\f regarding these a\fnd other features\f \fplease go to www.nissanownersin\Ifo.mobi
first drive features
01
Page 26 of 36
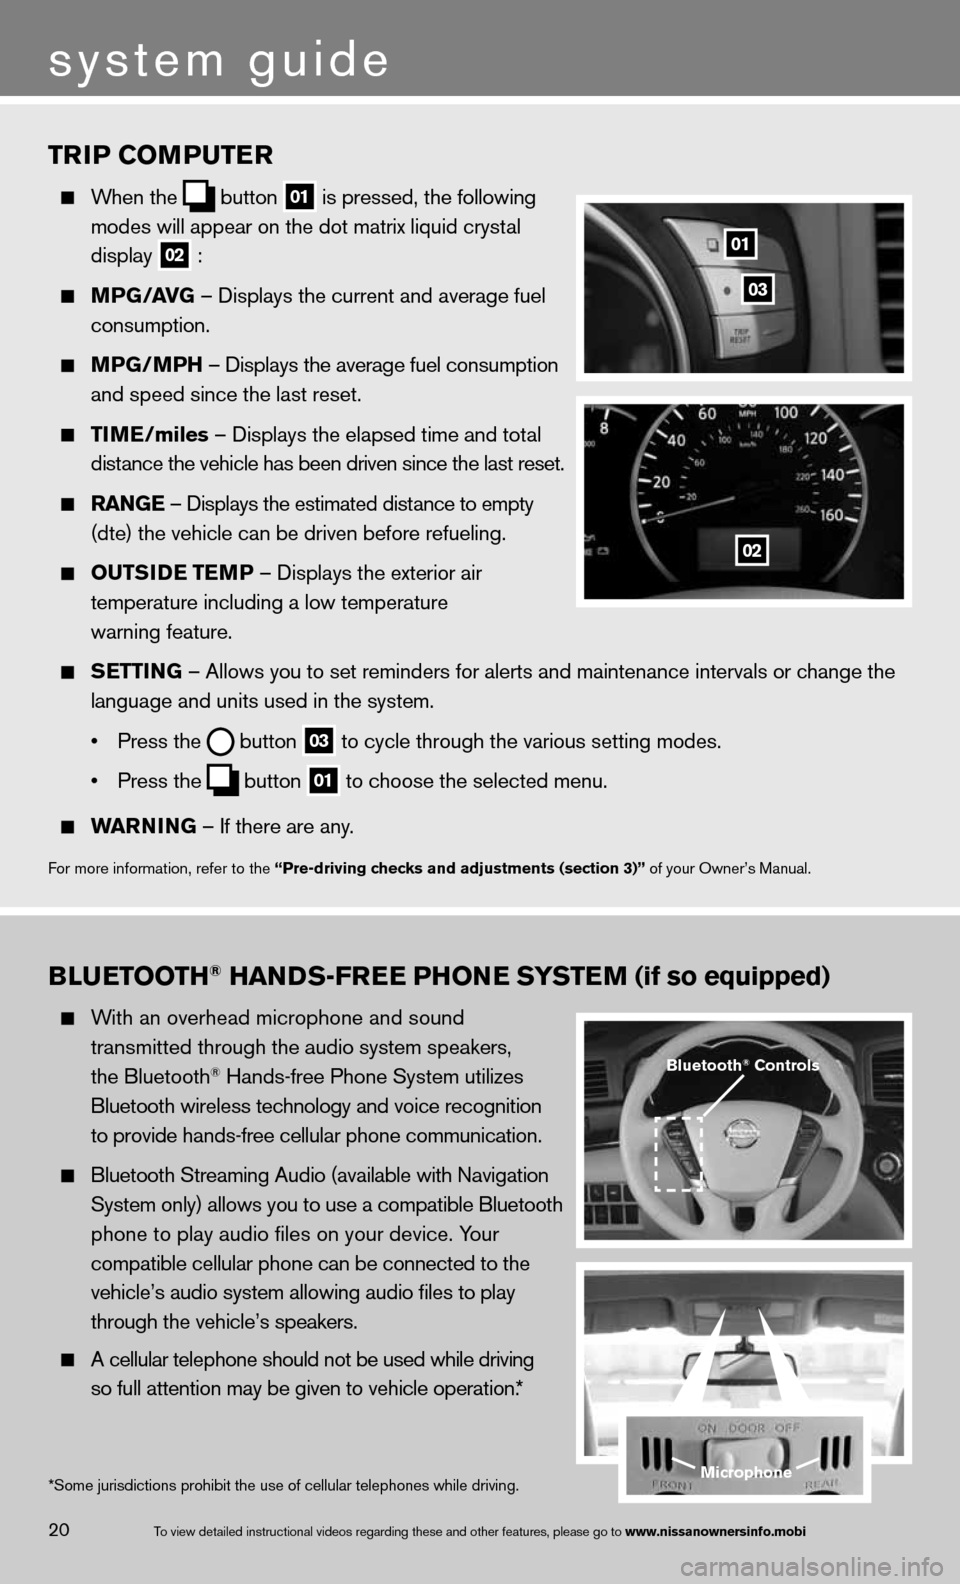
TrIP COMPuTer
When the
button
01 is pressed, the following
modes will appear on the dot matrix liquid crystal
display
02 :
MPG/ aVG – displays the current and average fuel
consumption.
MPG/MPH – displays the average fuel consumption
and speed since the last reset.
TIM e/miles – displays the elapsed time and total
distance the vehicle has been driven since the last reset.
raNG e – displays the estimated distance to empty
(dte) the vehicle can be driven before refueling.
OuTSID e TeMP – displays the exterior air
temperature including a low temperature
warning feature.
SeTTING – Allows you to set reminders for alerts and maintenance intervals o\
r change the
language and units used in the system.
• Press the
button
03 to cycle through the various setting modes.
• Press the
button
01 to choose the selected menu.
warNING – if there are any.
for more information, refer to the “Pre-driving checks and adjustments (section 3)” of your Owner’s Manual.
01
02
03
BLueTOOTH® HaNDS-Free PHON e SYSTeM (if so equipped)
With an overhead microphone and sound
transmitted through the audio system speakers,
the Bluetooth
® Hands-free Phone System utilizes
Bluetooth wireless technology and voice recognition
to provide hands-free cellular phone communication.
Bluetooth Streaming Audio (available with navigation
System only) allows you to use a compatible Bluetooth
phone to play audio files on your device. Your
compatible cellular phone can be connected to the
vehicle’s audio system allowing audio files to play
through the vehicle’s speakers.
A cellular telephone should not be used while driving
so full attention may be given to vehicle operation.*
Microphone
Bluetooth® Controls
*Some jurisdictions prohibit the use of cellular telephones while drivin\
g.
system guide
20To view detailed in\fstructional videos\f regarding these a\fnd other features\f \fplease go to www.nissanownersin\Ifo.mobi