2013 NISSAN MURANO fuel
[x] Cancel search: fuelPage 2 of 28
*See your Owner’s Manual for information.
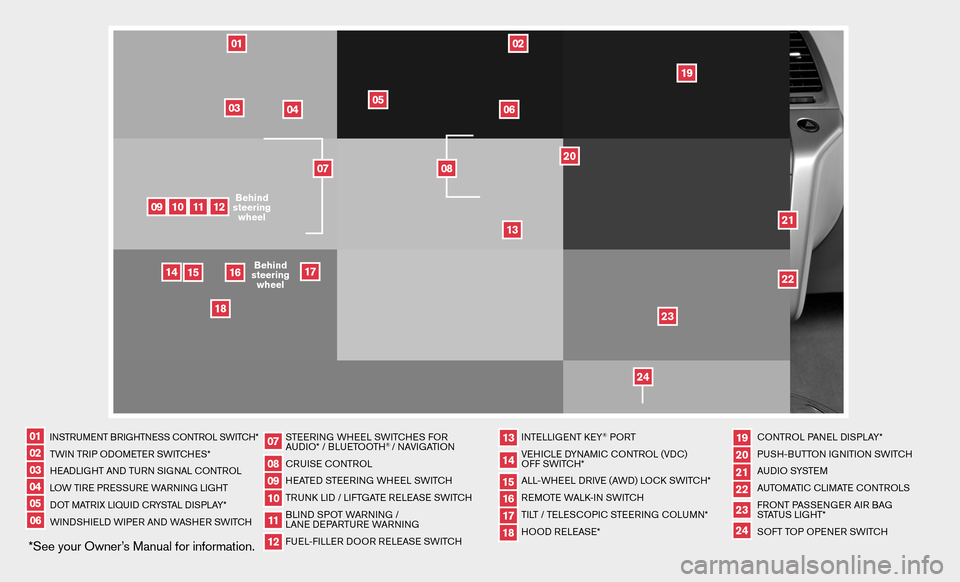
INSTRUMENT BRIGHTNESS CONTROL SWITCH*TWIN TRIP ODOMETER SWITCHES*
HEADLIGHT AND TURN SIGNAL CONTROL
LOW TIRE PRESSURE WARNING LIGHT
DOT MATRIX LIQUID CRYSTAL DISPLAY*
WINDSHIELD WIPER AND WASHER SWITCH STEERING
WHEEL SWITCHES FOR
AUDIO* / BLUETOOTH
® / NAVIGATION
CRUISE CONTROL
HEATED STEERING WHEEL SWITCH
TRUNK LID / LIFTGATE RELEASE SWITCH
BLIND SPOT WARNING /
LANE DEPARTURE WARNING
FUEL-FILLER DOOR RELEASE SWITCH INTELLIGENT KEY
® PORT
VEHICLE DYNAMIC CONTROL (VDC)
OFF SWITCH*
ALL-WHEEL DRIVE (AWD) LOCK SWITCH*
REMOTE WALK-IN SWITCH
TILT / TELESCOPIC STEERING COLUMN*
HOOD RELEASE* CONTROL
PANEL DISPLAY*
PUSH-BUTTON IGNITION SWITCH
AUDIO SYSTEM
AUTOMATIC CLIMATE CONTROLS
FRONT PASSENGER AIR BAG
STATUS LIGHT*
SOFT TOP OPENER SWITCH
010203040506
1011
17
0712
18
192021222324
08
1315
09
1416
2122
09
18
14
12
11
16
10
02
05
0613
20
08
0301
04
17
15
07
19
23
24
Behind
steering wheel
Behind
steering wheel
Page 3 of 28
TABLE OF CONTENTS
y
NEW SYSTEM FEATURES
Heated Steering Wheel (if so equipped). . . . . . . . . . . . . . . . . . . . . . . . . . . . 2
Opening the Soft Top (CrossCabriolet models) . . . . . . . . . . . . . . . . . . . . . . 2
Moving Object Detection (MOD) (if so equipped) . . . . . . . . . . . . . . . . . . . . 2
Blind Spot Warning (BSW) System (if so equipped) . . . . . . . . . . . . . . . . . 3
Lane Departure Warning (LDW) System (if so equipped). . . . . . . . . . . . . . 3
ESSENTIAL INFORMATION
Loose Fuel Cap . . . . . . . . . . . . . . . . . . . . . . . . . . . . . . . . . . . . \
. . . . . . . . . . . . 4
Tire Pressure Monitoring System (TPMS) . . . . . . . . . . . . . . . . . . . . . . . . . . . 4
Towing Your Vehicle . . . . . . . . . . . . . . . . . . . . . . . . . . . . . . . . . . . . \
. . . . . . . . . 5
Automatic Power Windows (CrossCabriolet models) . . . . . . . . . . . . . . . . . 5
Before Operating the Soft Top (CrossCabriolet models) . . . . . . . . . . . . . . 5
FIRST DRIVE FEATURES
NISSAN Intelligent Key
® System . . . . . . . . . . . . . . . . . . . . . . . . . . . . . . . . . . 6
Power Liftgate Release (Hardtop models - if so equipped). . . . . . . . . . . . . 7
Trunk Lid Release (CrossCabriolet models) . . . . . . . . . . . . . . . . . . . . . . . . . 7
Soft Top Operation (CrossCabriolet models) . . . . . . . . . . . . . . . . . . . . . . . . 8
Front Seat Adjustments. . . . . . . . . . . . . . . . . . . . . . . . . \
. . . . . . . . . . . . . . . . . 8
Rear Seat Adjustments (Hardtop models) . . . . . . . . . . . . . . . . . . . . . . . . . . 9
Rear Seat Entry/Exit (CrossCabriolet models) . . . . . . . . . . . . . . . . . . . . . . 10
Automatic Drive Positioner (if so equipped) . . . . . . . . . . . . . . . . . . . . . . . . 11
Outside Mirror Control Switch . . . . . . . . . . . . . . . . . . . . . . . . . . . . . . . . . . . 11
Starting/Stopping the Engine . . . . . . . . . . . . . . . . . . . . . . . . . . . . . . . . . . . . 12
Headlight Control Switch . . . . . . . . . . . . . . . . . . . . . . . . . . . . . . . . . . . \
. . . . 12
Windshield Wiper and Washer Switch . . . . . . . . . . . . . . . . . . . . . . . . . . . . 13
Automatic Climate Controls (if so equipped) . . . . . . . . . . . . . . . . . . . . . . . 14
FM/AM/SiriusXM Satellite Radio with CD/DVD Player (if so equipped) . . 16
Cruise Control . . . . . . . . . . . . . . . . . . . . . . . . . . . . . . . . . . . .\
. . . . . . . . . . . . 17
Front Armrest/Center Console Storage Box. . . . . . . . . . . . . . . . . . . . . . . . 17
Fuel-Filler Door . . . . . . . . . . . . . . . . . . . . . . . . . . . . . . . . . . . .\
. . . . . . . . . . . 17
SYSTEM GUIDE
Trip Computer . . . . . . . . . . . . . . . . . . . . . . . . . . . . . . . . . . . .\
. . . . . . . . . . . . 18
Bluetooth
® Hands-free Phone System (if so equipped) . . . . . . . . . . . . . . 19
System Operating Tips. . . . . . . . . . . . . . . . . . . . . . . . . . . . . . . . . . .\
. . . . . 19
Bluetooth
® System with Navigation (if so equipped) . . . . . . . . . . . . . . . 20
Bluetooth® System without Navigation (if so equipped) . . . . . . . . . . . . . 21
Bluetooth® Streaming Audio (with Navigation System - if so equipped) . . . . 22
Navigation System (if so equipped) . . . . . . . . . . . . . . . . . . . . . . . . . . . . . . . 23
HomeLink
® Universal Transceiver (if so equipped) . . . . . . . . . . . . . . . . . . . 24
• A cellular telephone should not be used for any purpose while
driving so full attention may be given to vehicle operation.
• Always wear your seat belt.
• Supplemental air bags do not replace proper seat belt usage.
• Children 12 and under should always ride in the rear seat
properly secured in child restraints or seat belts according to
their age and weight.
• Do not drink and drive.
For more information, refer to the “Safety –– Seats, seat belts and
supplemental restraint system (section 1)” , the “Monitor, heater, air
conditioner, audio, phone and voice recognition systems (section 4)”
and the “Starting and driving (section 5)” of your Owner’s Manual.
Additional information about your vehicle is also available in your Owner’s Manual, Navigation System Owner’s Manual and at www.nissanusa.com. To view detailed
instructional videos, go to
www.nissanownersinfo.mobi/2013/murano or snap this barcode with an appropriate barcode reader.
Page 6 of 28
TIRE PRESSURE MONITORING SYSTEM (TPMS)
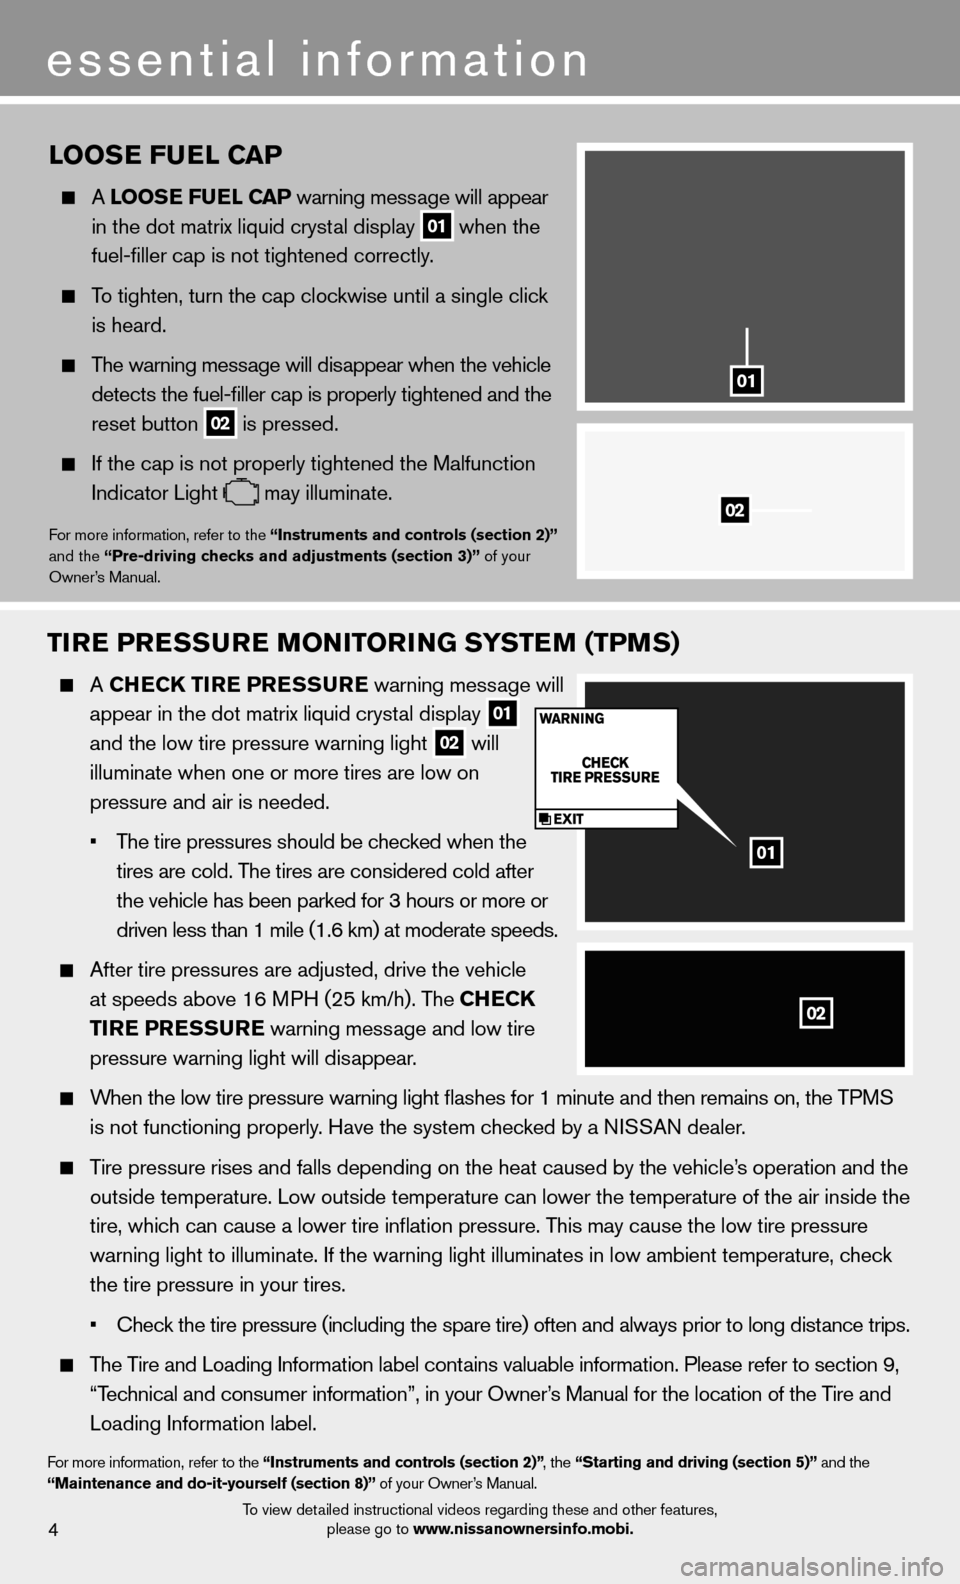
A CHECK TIRE PRESSURE warning message will
appear in the dot matrix liquid crystal display
01
and the low tire pressure warning light
02 will
illuminate when one or more tires are low on
pressure and air is needed.
• The tire pressures should be checked when the
tires are cold. The tires are considered cold after
the vehicle has been parked for 3 hours or more or
driven less than 1 mile (1.6 km) at moderate speeds.
After tire pressures are adjusted, drive the vehicle
at speeds above 16 MPH (25 km/h). The CHECK
TIRE PRESSURE warning message and low tire
pressure warning light will disappear.
When the low tire pressure warning light fl ashes for 1 minute and then remains on, the TPMS
is not functioning properly. Have the system checked by a NISSAN dealer.
Tire pressure rises and falls depending on the heat caused by the vehicle\
’s operation and the
outside temperature. Low outside temperature can lower the temperature o\
f the air inside the
tire, which can cause a lower tire infl ation pressure. This may cause the low tire pressure
warning light to illuminate. If the warning light illuminates in low amb\
ient temperature, check
the tire pressure in your tires.
• Check the tire pressure (including the spare tire) often and always prior \
to long distance trips.
The Tire and Loading Information label contains valuable information. Please refer to section 9,
“Technical and consumer information”, in your Owner’s Manual for the location of the Tire and
Loading Information label.
For more information, refer to the “Instruments and controls (section 2)” , the “Starting and driving (section 5)” and the
“Maintenance and do-it-yourself (section 8)” of your Owner’s Manual.
essential information
LOOSE FUEL CAP
A LOOSE FUEL CAP warning message will appear
in the dot matrix liquid crystal display
01 when the
fuel-fi ller cap is not tightened correctly.
To tighten, turn the cap clockwise until a single click
is heard.
The warning message will disappear when the vehicle
detects the fuel-fi ller cap is properly tightened and the
reset button
02 is pressed.
If the cap is not properly tightened the Malfunction
Indicator Light
may illuminate.
For more information, refer to the “Instruments and controls (section 2)”
and the “Pre-driving checks and adjustments (section 3)” of your
Owner’s Manual.02
01
01
02
4To view detailed instructional videos regarding these and other features,
please go to www.nissanownersinfo.mobi.
Page 19 of 28
17
FUEL-FILLER DOOR
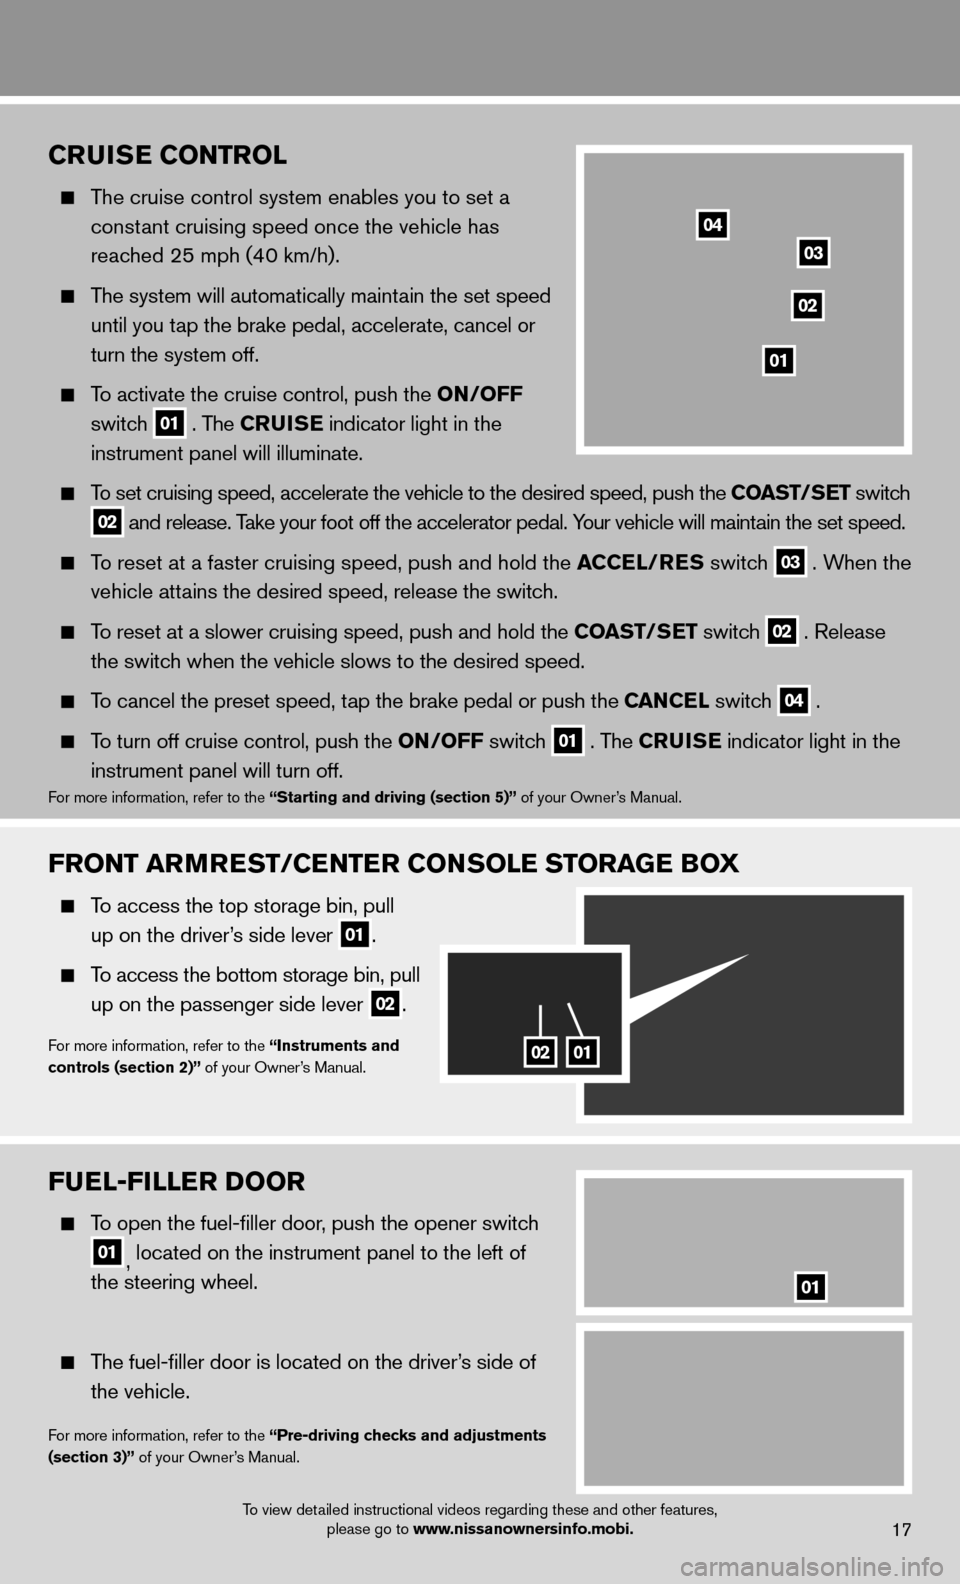
To open the fuel-fi ller door, push the opener switch
01, located on the instrument panel to the left of
the steering wheel.
The fuel-fi ller door is located on the driver’s side of
the vehicle.
For more information, refer to the “Pre-driving checks and adjustments
(section 3)” of your Owner’s Manual.
01
FRONT ARMREST/CENTER CONSOLE STORAGE BOX
To access the top storage bin, pull
up on the driver’s side lever
01.
To access the bottom storage bin, pull
up on the passenger side lever
02.
For more information, refer to the “Instruments and
controls (section 2)” of your Owner’s Manual.0201
CRUISE CONTROL
The cruise control system enables you to set a
constant cruising speed once the vehicle has
reached 25 mph (40 km/h).
The system will automatically maintain the set speed
until you tap the brake pedal, accelerate, cancel or
turn the system off.
To activate the cruise control, push the ON/OFF
switch
01 . The CRUISE
indicator light in the
instrument panel will illuminate.
To set cruising speed, accelerate the vehicle to the desired speed, push \
the COAST/SET switch
02 and release. Take your foot off the accelerator pedal. Your vehicle will maintain the set speed.
To reset at a faster cruising speed, push and hold the ACCEL/RES switch 03 . When the
vehicle attains the desired speed, release the switch.
To reset at a slower cruising speed, push and hold the COAST/SET switch 02 . Release
the switch when the vehicle slows to the desired speed.
To cancel the preset speed, tap the brake pedal or push the CAN CE L switch 04 .
To turn off cruise control, push the ON/OFF switch 01 . The CRUISE
indicator light
in the
instrument panel will turn off.
For more information, refer to the “Starting and driving (section 5)” of your Owner’s Manual.
01
02
03
04
To view detailed instructional videos regarding these and other features,
please go to www.nissanownersinfo.mobi.
Page 20 of 28
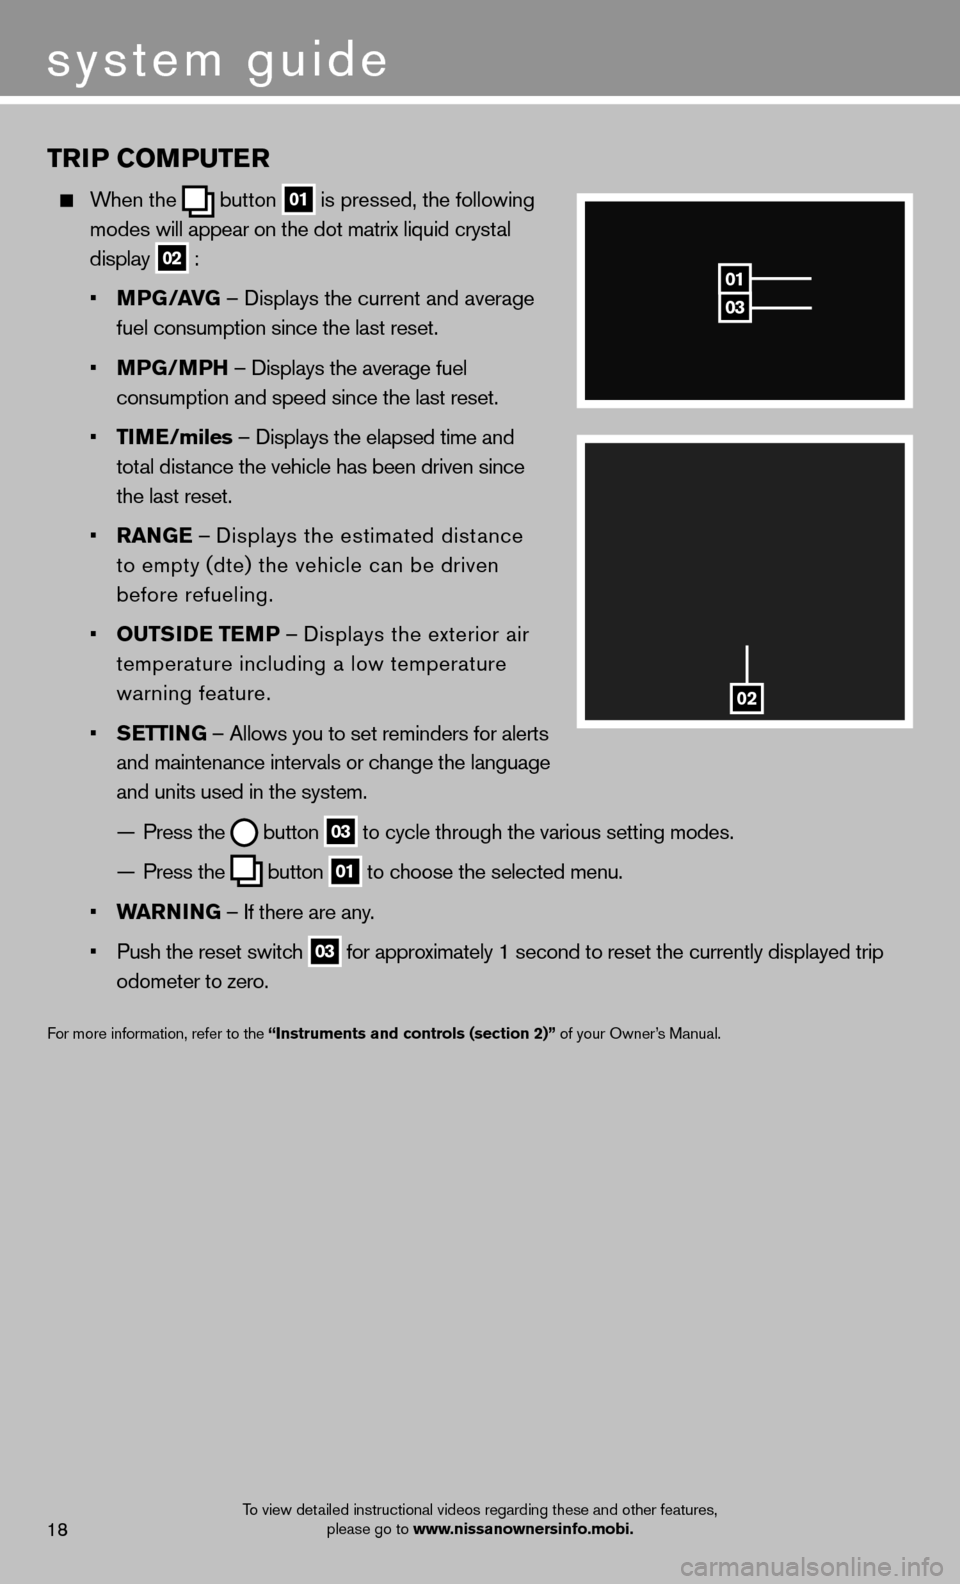
TRIP COMPUTER
When the button 01
is pressed, the following
modes will appear on the dot matrix liquid crystal
display
02 :
• MPG/AVG – Displays the current and average
fuel consumption since the last reset.
• MPG/MPH – Displays the average fuel
consumption and speed since the last reset.
• TIME/miles – Displays the elapsed time and
total distance the vehicle has been driven since
the last reset.
• RANGE – Displays the estimated distance
to empty (dte) the vehicle can be driven
before refueling.
• OUTSIDE TEMP – Displays the exterior air
temperature including a low temperature
warning feature.
• SETTING – Allows you to set reminders for alerts
and maintenance intervals or change the language
and units used in the system.
— Press the
button 03 to cycle through the various setting modes.
— Press the
button 01 to choose the selected menu.
• WARNING – If there are any.
• Push the reset switch
03 for approximately 1 second to reset the currently displayed trip
odometer to zero.
For more information, refer to the “Instruments and controls (section 2)” of your Owner’s Manual.
03
01
02
system guide
18To view detailed instructional videos regarding these and other features,
please go to www.nissanownersinfo.mobi.
Page 25 of 28
23
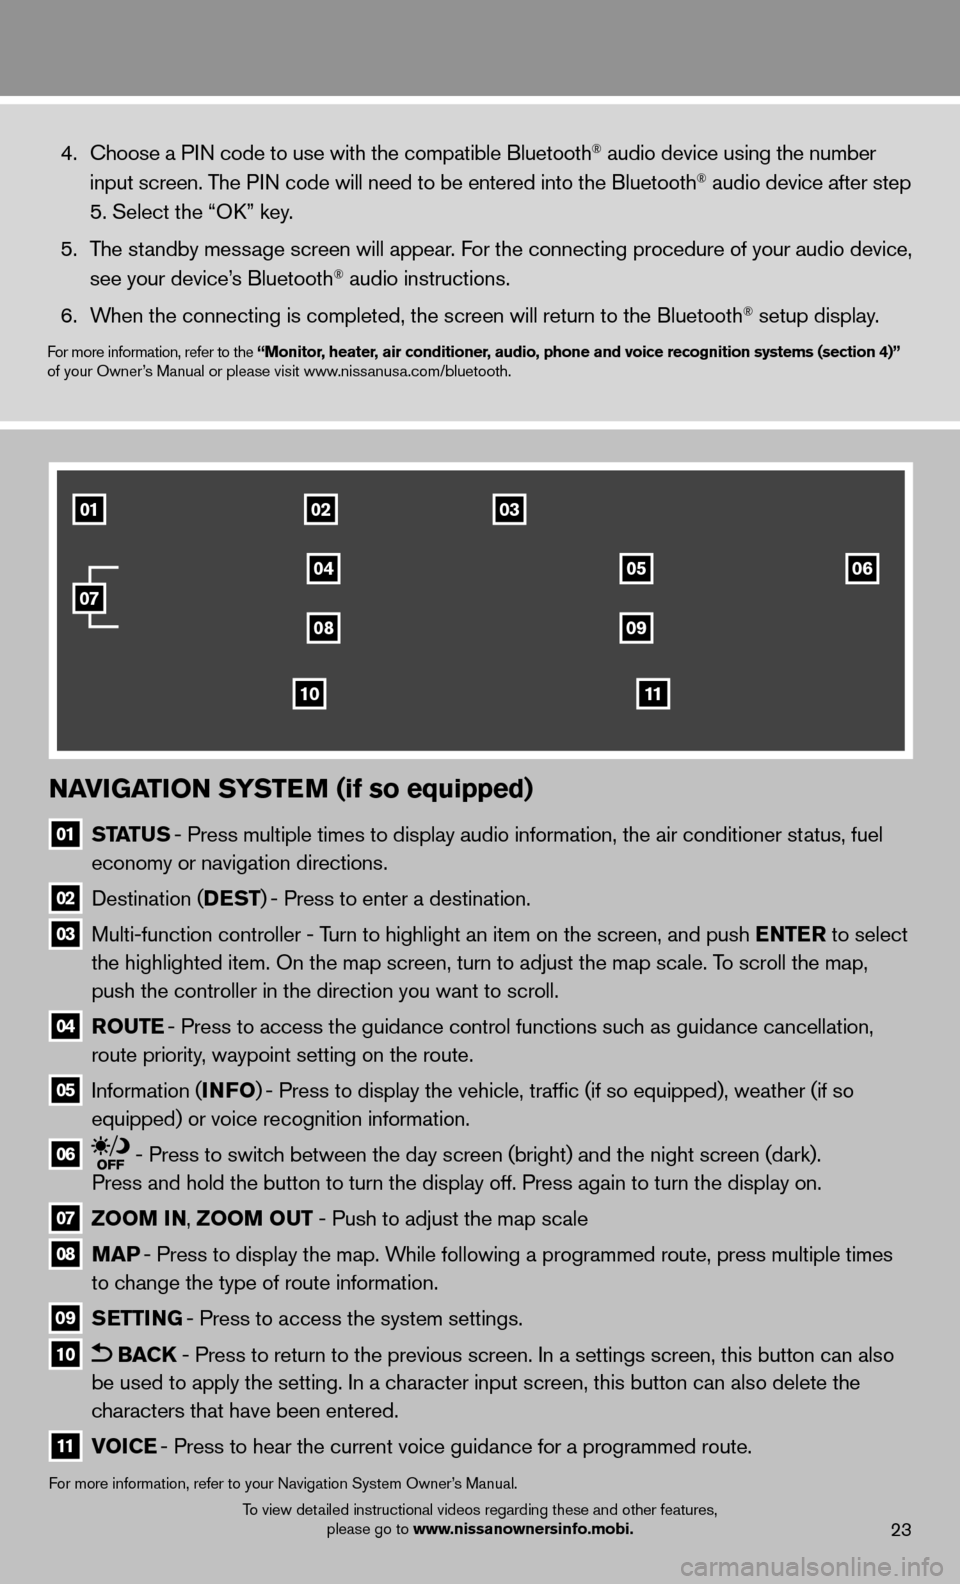
NAVIGATION SYSTEM (if so equipped)
01
STATUS - Press multiple times to display audio information, the air conditioner\
status, fuel
economy or navigation directions.
02 Destination (DEST ) - Press to enter a destination.
03 Multi-function controller - Turn to highlight an item on the screen, and push ENTER to select
the highlighted item. On the map screen, turn to adjust the map scale. T\
o scroll the map,
push the controller in the direction you want to scroll.
04 ROUTE - Press to access the guidance control functions such as guidance cancellation,
route priority, waypoint setting on the route.
05 Information (INFO ) - Press to display the vehicle, traffi c (if so equipped), weather (if so
equipped) or voice recognition information.
06 - Press to switch between the day screen (bright) and the night screen (dark).
Press and hold the button to turn the display off. Press again to turn t\
he display on.
07 ZOOM IN, ZOOM OUT - Push to adjust the map scale
08
MAP - Press to display the map. While following a programmed route, press multiple times
to change the type of route information.
09
SETTING - Press to access the system settings.
10 BACK - Press to return to the previous screen. In a settings screen, this bu\
tton can also
be used to apply the setting. In a character input screen, this button can also delete the
characters that have been entered.
11 VOICE - Press to hear the current voice guidance for a programmed route.
For more information, refer to your Navigation System Owner’s Manual.
4. Choose a PIN code to use with the compatible Bluetooth® audio device using the number
input screen. The PIN code will need to be entered into the Bluetooth® audio device after step
5. Select the “OK” key.
5. The standby message screen will appear. For the connecting procedure of your audio device,
see your device’s Bluetooth
® audio instructions.
6. When the connecting is completed, the screen will return to the Bluetooth\
® setup display.
For more information, refer to the “Monitor, heater, air conditioner, audio, phone and voice recognition systems (section 4)”
of your Owner’s Manual or please visit www.nissanusa.com/bluetooth.
010203
04
0809
1110
0506
07
To view detailed instructional videos regarding these and other features,
please go to www.nissanownersinfo.mobi.