Page 9 of 24

To view detailed instructional videos regarding these and other features, please go\
to www.nissanownersinfo.mobi7
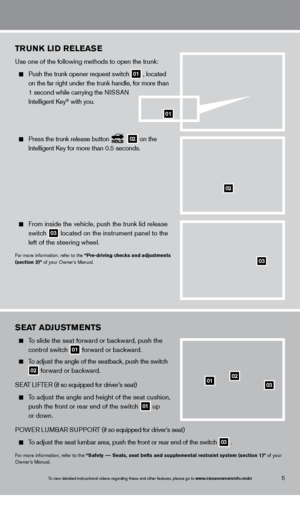
startinG/st o PP inG thE EnGi nE
Depress the brake pedal.
•
If the brake pedal is not depressed, pushing the
ignition switc
h once enters the a CC mode.
•
If the ignition is pushed a second time, the vehicle
will enter the
on mode.
Press the ignition switc h start /st o P button to
st
art the engine.
NOTE: It is important to make sure the NISSAN Intelligent
k ey
® is with you (that is, in your pocket
or purse).
TURNING THE ENGINE OFF
Move the shift lever to the P (Par k ) position and apply the parking brake.
Press the ignition switch start /st o P button to turn the engine off.
For more information, refer to the “starting and driving (section 5)” of your Owner’s Manual.
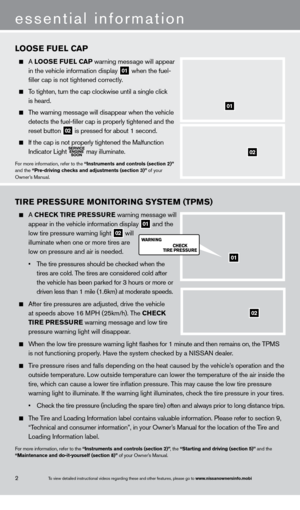
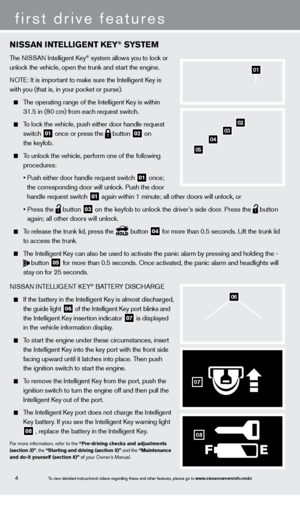
hEa DliGht C ontrol s W itC h
HEADLIGHT
c
O
NTROL
Turn the headlight control switch to the
position
01 to turn on the front parking, tail, license
plate and instrument panel lights. T urn the switch to
the position
02 to turn on the headlights.
AUTOLIGHT SYSTEM
The autolight system will automatically turn the headlights on when it is\
dark and off when it
is light. T
he system will keep the headlights on for a period of time after you tur\
n the ignition
off and all doors are closed.
To activate the autolight system, turn the headlight control switch to the auto position
03
then turn the ignition switc
h to
on
. To deactivate the autolight system, turn the headlight
control switc
h to the
off
,
01 or
position
02 .
HIGH BEAM SELE
cT
Push the headlight control switc h forward
04 to
select the high beam function. The blue indicator
light
illuminates in the instrument panel. Pull
the headlight control switch back to the original
position to select the low beam. T
he blue indicator
light goes off.
Pull and release the headlight control switc h
05 to flash the headlight high beams on and off.
01
03
02
04
05
1351487_13b_Maxima_QRG_010813b.indd 71/8/13 2:13 PM
Page 10 of 24

To view detailed instructional videos regarding these and other features, please go\
to www.nissanownersinfo.mobi
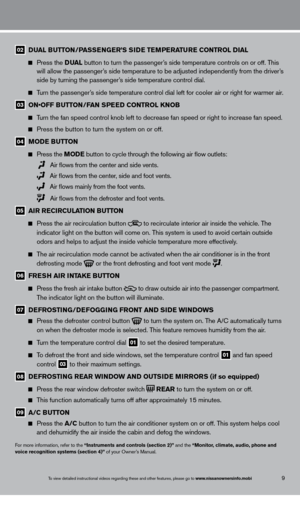
WinD shi E lD Wi PE r /Wa sh E r sWi tCh
Move the lever to the following positions to operate
the windshield wipers:
01 Mist ( mist ) - One sweep operation of
the wipers.
02 Intermittent ( int ) - Wipers operate
intermittently
. The intermittent speed can be
adjusted by twisting the time control ring 03 .
04 Low ( lo ) - Wipers operate at a continuous
low-speed.
05 High ( hi ) - Wipers operate at a continuous
high-speed.
06 Washer
- Pull the lever toward you to activate
the washer
. The wipers will operate several times.
For more information, refer to the “instruments and controls (section 2)”
of your Owner ’s Manual.
01
02
04
05
mist
off
int
lo
hi
06
03
010302
0708
0904
0506
8
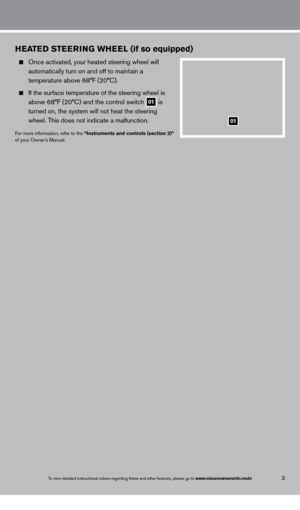
first drive features
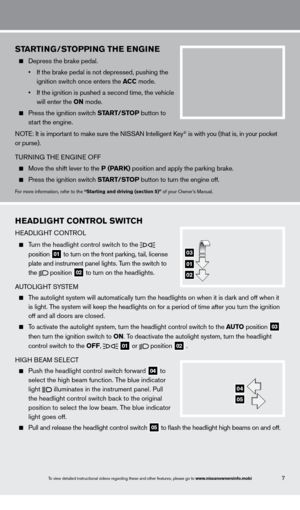
automatiC C limat E C ontrols (if so equipped)
01 auto Butt on/ Dr iv Er ’ s siD E t EmPEra turE C ontrol Dial
The auto mode may be used year-round. Press the
auto button to turn the system on
and the system will automatically control the inside temperature (autom\
atic cooling and/
or dehumidified heating), air flow distribution and fan speed.
Turn the driver’s side temperature control dial to the left for cooler air or right for \
warmer air.
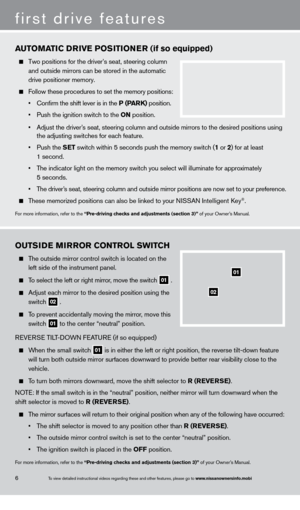
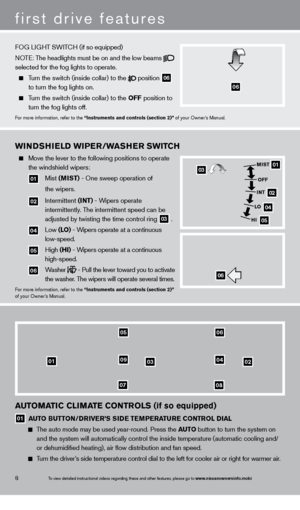
FOG LIGHT SWIT
cH (if so equipped)
N
OTE: The headlights must be on and the low beams
selected for the fog lights to operate.
Turn the switch (inside collar) to the
position
06
to turn the fog lights on.
Turn the switch (inside collar) to the
off position to
turn the fog lights off.
For more information, refer to the “instruments and controls (section 2)” of your Owner’s Manual.
06
1351487_13b_Maxima_QRG_010813b.indd 81/8/13 2:13 PM
Page 11 of 24

To view detailed instructional videos regarding these and other features, please go\
to www.nissanownersinfo.mobi9
02 Dual Butt on/ Pas sEnG Er ’ s siD E t EmPEra turE C ontrol Dial
Press the Dua l button to turn the passenger ’s side temperature controls on or off. This
will allow the passenger
’s side temperature to be adjusted independently from the driver’s
side by turning the passenger
’s side temperature control dial.
Turn the passenger’s side temperature control dial left for cooler air or right for warmer \
air.
03 ON•OFF BUTTON/FAN SPEED CONTROL KNOB
Turn the fan speed control knob left to decrease fan speed or right to in\
crease fan speed.
Press the button to turn the system on or off.
04 moDE Button
Press the mo DE button
to cycle through the following air flow outlets:
Air flows from the center and side vents.
Air flows from the center, side and foot vents.
Air flows mainly from the foot vents.
Air flows from the defroster and foot vents.
05 air rEC irC ulation Butt on
Press the air recirculation button
to recirculate interior air inside the vehicle. The
indicator light on the button will come on. T his system is used to avoid certain outside
odors and helps to adjust the inside vehicle temperature more effectivel\
y
.
The air recirculation mode cannot be activated when the air conditioner i\
s in the front
defrosting mode or the front defrosting and foot vent mode
.
06 frEsh air intakE Butt on
Press the fresh air intake button
to draw outside air into the passenger compartment.
T
he indicator light on the button will illuminate.
07 DEfrostinG /DEf o GGi nG front anD siD E W inDoW s
Press the defroster control button to turn the system on. The A/ c automatically turns
on when the defroster mode is selected. This feature removes humidity from the air.
Turn the temperature control dial 01 to set the desired temperature.
To defrost the front and side windows, set the temperature control 01 and fan speed
control 03 to their maximum settings.
08 DEfrostinG
rE ar W inDoW anD outsiD E mirrors (if so equipped)
Press the rear window defroster switch
rE ar
to turn the system on or off.
This function automatically turns off after approximately 15 minutes.
09 a /C Butt on
Press the a /C button to turn the air conditioner system on or off. This system helps cool
and dehumidify the air inside the cabin and defog the windows.
For more information, refer to the “instruments and controls (section 2)” and the “monitor, climate, audio, phone and
voice recognition systems (section 4)” of your Owner’s Manual.
1351487_13b_Maxima_QRG_010813b.indd 91/8/13 2:13 PM
Page 12 of 24

To view detailed instructional videos regarding these and other features, please go\
to www.nissanownersinfo.mobi10
first drive features
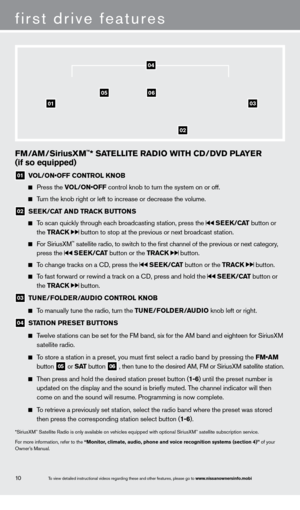
fm/am/siriusXm™* satEllit E ra Di o W ith CD/D v D P lay Er
(if so equipped)
01 V OL/ON•OFF CONTROL KNOB
Press the
VOL/ON•OFF control knob to turn the system on or off.
Turn the knob right or left to increase or decrease the volume.
02 sE Ek /Ca t anD traC k Butt ons
To scan quickly through each broadcasting station, press the s
EE k/Cat button or
the traC
k
button to stop at the previous or next broadcast station.
For SiriusXM™ satellite radio, to switch to the first channel of the previous or next category,
press the s EE k/Cat button or the traC k button.
To change tracks on a cD, press the sEE k/Cat button or the traC k button.
To fast forward or rewind a track on a cD, press and hold the sEE k/Cat button or
the traC
k
button.
03 tunE /f ol DEr/a uDi o C ontrol kno B
To manually tune the radio, turn the tun E/ folDE r /a u D io knob left or right.
04 station P rEsE t Butt ons
Twelve stations can be set for the FM band, six for the AM band and eighteen for SiriusXM
s
atellite radio.
To store a station in a preset, you must first select a radio band by pressing the \
FM•AM
button 05 or s at button
06 , then tune to the desired AM, FM or SiriusXM satellite station.
Then press and hold the desired station preset button (1-6) until the preset number is
updated on the display and the sound is briefly muted. T
he channel indicator will then
come on and the sound will resume. Programming is now complete.
To retrieve a previously set station, select the radio band where the preset was stored
then press the corresponding st
ation select button (1-6).
*SiriusXM™ Satellite Radio is only available on vehicles equipped with optional Siri\
usXM™ satellite subscription service.
For more information, refer to the “
m
onitor, climate, audio, phone and voice recognition systems (section 4)” of your
Owner’s Manual.
01
0506
02
03
04
1351487_13b_Maxima_QRG_010813b.indd 101/8/13 2:13 PM
Page 13 of 24

To view detailed instructional videos regarding these and other features, please go\
to www.nissanownersinfo.mobi
fuEl- fill Er Door
The fuel-filler door is located on the driver’s side of
the vehicle.
When the doors of the vehicle are locked or
unloc
ked, the fuel-filler door is automatically
loc
ked or unlocked at the same time.
To open the fuel-filler door, once unlocked, push the right side of the door.
For more information, refer to the “Pre-driving checks and adjustments (section 3)” of your Owner’s Manual.
11
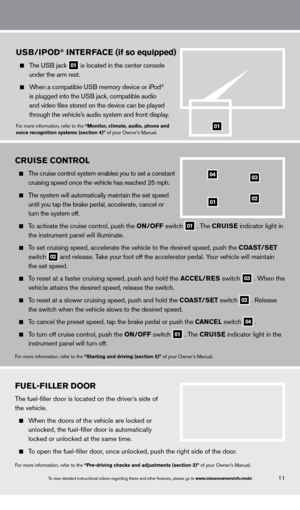
CruisE C ontrol
The cruise control system enables you to set a constant
cruising speed once the vehicle has reac
hed 25 mph.
The system will automatically maintain the set speed
until you t
ap the brake pedal, accelerate, cancel or
turn the system off.
To activate the cruise control, push the on/ off switch 01 . The Cruis E
indicator light in
the instrument panel will illuminate.
To set cruising speed, accelerate the vehicle to the desired speed, push \
the C oast /sE t
switc
h
02 and release. Take your foot off the accelerator pedal. Your vehicle will maintain
the set speed.
To reset at a faster cruising speed, push and hold the aC CE l/ r E s switc h 03 . When the
v
ehicle attains the desired speed, release the switch.
To reset at a slower cruising speed, push and hold the C oast /sE t switch 02 . Release
the switc
h when the vehicle slows to the desired speed.
To cancel the preset speed, tap the brake pedal or push the CanCEl switch 04 .
To turn off cruise control, push the
on/ off switch 01 . The Cruis E
indicator light
in the
instrument panel will turn off.
For more information, refer to the “starting and driving (section 5)” of your Owner’s Manual.
04
0102
03
usB/iPoD® int ErfaCE (if so equipped)
The USB jack 01 is located in the center console
under the arm rest.
When a compatible USB memory device or iPod®
is plugged into the U
SB jack, compatible audio
and video files stored on the device can be played
through the vehicle’
s audio system and front display.
For more information, refer to the “monitor, climate, audio, phone and
voice recognition systems (section 4)” of your Owner’s Manual.01
1351487_13b_Maxima_QRG_010813b.indd 111/8/13 2:13 PM
Page 14 of 24

To view detailed instructional videos regarding these and other features, please go\
to www.nissanownersinfo.mobi
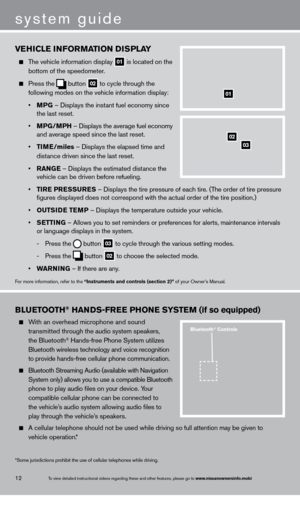
vEhiCl E information Di sP lay
The vehicle information display
01 is located on the
bottom of the speedometer
.
Press the
button
02 to cycle through the
following modes on the vehicle information display:
•
m
PG – Displays the inst
ant fuel economy since
the last reset.
•
m
PG/
m
P
h – Displays the average fuel economy
and average speed since the last reset.
•
tim
E
/miles – Displays the elapsed time and
dist
ance driven since the last reset.
•
ran
G
E – Displays the estimated distance the
vehicle can be driven before refueling.
•
tir
E P
r
E
ssur
E
s
– Displays the tire
pressure of each tire. (The order of tire pressure
figures displayed does not correspond with the actual order of the tir\
e position.)
•
outsi
D
E
t
E
mP
– Displays the temperature outside your vehicle.
•
s
E
ttin
G
– Allows you to set reminders or preferences for alerts, maintenance\
intervals
or language displays in the system.
-
Press the button
03 to cycle through the various setting modes.
-
Press the button
02 to choose the selected mode.
•
Wa
rnin
G – If there are any
.
For more information, refer to the “instruments and controls (section 2)” of your Owner’s Manual.
01
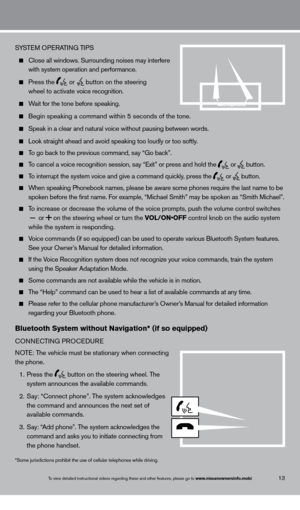
BluE tooth® hanDs - frE E P honE syst Em (if so equipped)
With an overhead microphone and sound
t
ransmitted through the audio system speakers,
the Bluetooth® Hands-free Phone System utilizes
Bluetooth wireless tec
hnology and voice recognition
to provide hands-free cellular phone communication.
Bluetooth Streaming Audio (available with Navigation
System only) allows you to use a compatible Bluetooth
phone to play audio files on your device. Y
our
compatible cellular phone can be connected to
the vehicle’
s audio system allowing audio files to
play through the vehicle’
s speakers.
A cellular telephone should not be used while driving so full attention may be given to
vehicle operation.*
system guide
12
*Some jurisdictions prohibit the use of cellular telephones while drivin\
g.
Bluetooth® Controls
02
03
1351487_13b_Maxima_QRG_010813b.indd 121/8/13 2:13 PM
Page 15 of 24

To view detailed instructional videos regarding these and other features, please go\
to www.nissanownersinfo.mobi
SYSTEM OPERATING TIPS
close all windows. Surrounding noises may interfere
with system operation and performance.
Press the
or
button on the steering
w
heel to activate voice recognition.
Wait for the tone before speaking.
Begin speaking a command within 5 seconds of the tone.
Speak in a clear and natural voice without pausing between words.
Look straight ahead and avoid speaking too loudly or too softly.
To go back to the previous command, say “Go back”.
To cancel a voice recognition session, say “Exit” or press and hold the
or
button.
To interrupt the system voice and give a command quickly, press the
or
button.
When speaking Phonebook names, please be aware some phones require the la\
st name to be
spoken before the first name. F
or example, “Michael Smith” may be spoken as “Smith Michael”.
To increase or decrease the volume of the voice prompts, push the volume \
control switches
or
on the steering wheel or turn the VOL/ON•OFF control knob on the audio system
while the system is responding.
Voice commands (if so equipped) can be used to operate various Bluetoot\
h System features.
See your Owner
’s Manual for detailed information.
If the Voice Recognition system does not recognize your voice commands, train th\
e system
using the Speaker Adapt
ation Mode.
Some commands are not available while the vehicle is in motion.
The “Help” command can be used to hear a list of available commands\
at any time.
Please refer to the cellular phone manufacturer ’s Owner’s Manual for detailed information
regarding your Bluetooth phone.
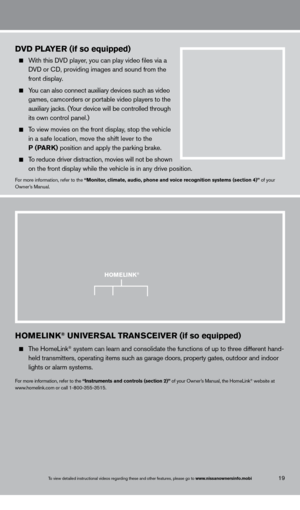
Bluetooth system without navigation* (if so equipped)
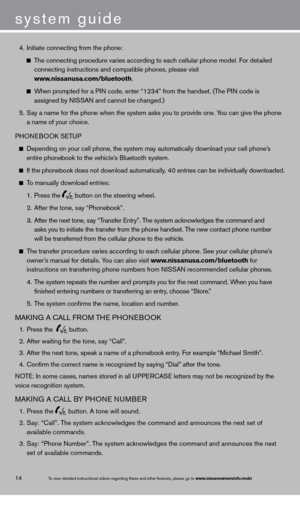
cONNEcTING PRO c EDURE
NOTE: The vehicle must be stationary when connecting
the phone.
1.
Press the button on the steering wheel. The
system announces the available commands.
2.
S
ay: “
c
onnect phone”. The system acknowledges
the command and announces the next set of
available commands.
3.
S
ay: “Add phone”. The system acknowledges the
command and asks you to initiate connecting
from
the phone handset.
13
*Some jurisdictions prohibit the use of cellular telephones while drivin\
g.
microphone
1351487_13b_Maxima_QRG_010813b.indd 131/8/13 2:13 PM
Page 16 of 24

system guide
To view detailed instructional videos regarding these and other features, please go\
to www.nissanownersinfo.mobi
4. Initiate connecting from the phone:
The connecting procedure varies according to each cellular phone model. For detailed
connecting instructions and compatible phones, please visit
www
.nissanusa.com/bluetooth.
When prompted for a PIN code, enter “1234” from the handset. (The PIN code is
assigned by N
ISSAN and cannot be changed.)
5.
S
ay a name for the phone when the system asks you to provide one. You can give the phone
a name of your c
hoice.
PHONEBOO
k
SE
TUP
Depending on your cell phone, the system may automatically download your\
cell phone’ s
entire phonebook to the vehicle’
s Bluetooth system.
If the phonebook does not download automatically , 40 entries can be individually downloaded.
To manually download entries:
1.
Press the button on the steering wheel.
2.
After the tone, s
ay “Phonebook”.
3.
After the next tone, s
ay “Transfer Entry”. The system acknowledges the command and
asks you to initiate the transfer from the phone handset. T
he new contact phone number
will be transferred from the cellular phone to the vehicle.
The transfer procedure varies according to each cellular phone. See your cellular phone’s
owner
’s manual for details. You can also visit www.nissanusa.com/bluetooth for
instructions on transferring phone numbers from N
ISSAN recommended cellular phones.
4.
T
he system repeats the number and prompts you for the next command. When you have
finished entering numbers or transferring an entry
, choose “Store.”
5.
T
he system confirms the name, location and number.
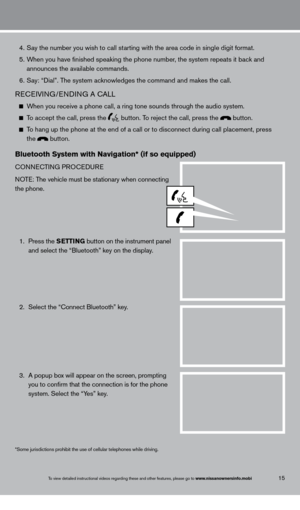
MAkING A cALL F ROM THE PHONEBOOk
1. Press the
button.
2.
After waiting for the tone, s
ay “ c all”.
3.
After the next tone, speak a name of a phonebook entry
. For example “Michael Smith”.
4.
c
onfirm the correct name is recognized by saying “Dial” after the tone.
NOTE: In some cases, names stored in all UPPER
cA
SE letters may not be recognized by the
voice recognition system.
MAkING A cALL B Y PHONE NUMBER
1. Press the
button. A tone will sound.
2.
S
ay: “Call”. The system acknowledges the command and announces the next set of
available commands.
3.
S
ay: “Phone Number”. The system acknowledges the command and announces the next
set of available commands.
14
1351487_13b_Maxima_QRG_010813b.indd 141/8/13 2:13 PM