Page 213 of 444
●The Bluetooth® audio may be stopped un-
der the following conditions:
● Receiving a call on the Hands-Free
Phone System.
● Checking the connection to the hands-
free phone.
● Do not place the Bluetooth® audio device in
an area surrounded by metal or far away from
the in-vehicle Bluetooth® module to prevent
tone quality degradation and wireless con-
nection disruption.
● While an audio device is connected through
the Bluetooth® wireless connection, the
battery power of the device may discharge
quicker than usual.
● This system supports the Bluetooth® Audio
Distribution Profile (A2DP, AVRCP) .
BLUETOOTH® is a
trademark owned by
Bluetooth SIG, Inc.
and licensed to
Clarion Co., Ltd.
CD or USB with Compressed Audio
Files (models without Navigation
System)
The file types supported by this system are MP3
and WMA.
Explanation of terms:
● MP3 — MP3 is short for Moving Pictures
Experts Group Audio Layer 3. MP3 is the
most well-known compressed digital audio
file format. This format allows for near “CD
quality” sound, but at a fraction of the size of
normal audio files. MP3 conversion of an
audio track from CD-ROM can reduce the
file size by approximately a 10:1 ratio with
virtually no perceptible loss in quality. MP3
compression removes the redundant and
irrelevant parts of a sound signal that the
human ear doesn’t hear.
● WMA — Windows Media Audio (WMA)* is a
compressed audio format created by Micro-
soft as an alternative to MP3. The WMA
codec offers greater file compression than
the MP3 codec, enabling storage of more
digital audio tracks in the same amount of
space when compared to MP3s at the same
level of quality. ●
Bit rate — Bit rate denotes the number of
bits per second used by a digital music file.
The size and quality of a compressed digital
audio file is determined by the bit rate used
when encoding the file.
● Sampling frequency — Sampling frequency
is the rate at which the samples of a signal
are converted from analog to digital (A/D
conversion) per second.
● Multisession — Multisession is one of the
methods for writing data to media. Writing
data once to the media is called a single
session, and writing more than once is called
a multisession.
● ID3/WMA Tag — The ID3/WMA tag is the
part of the encoded MP3 or WMA file that
contains information about the digital music
file such as song title, artist, encoding bit
rate, track time duration, etc. ID3 tag infor-
mation is displayed on the Artist/song title
line on the display.
* Windows®, Windows Media® and Windows
Vista® are registered trademarks and trade-
marks in the United States of America and other
countries of Microsoft Corporation of the USA.
4-54Monitor, climate, audio, phone and voice recognition systems
Page 242 of 444
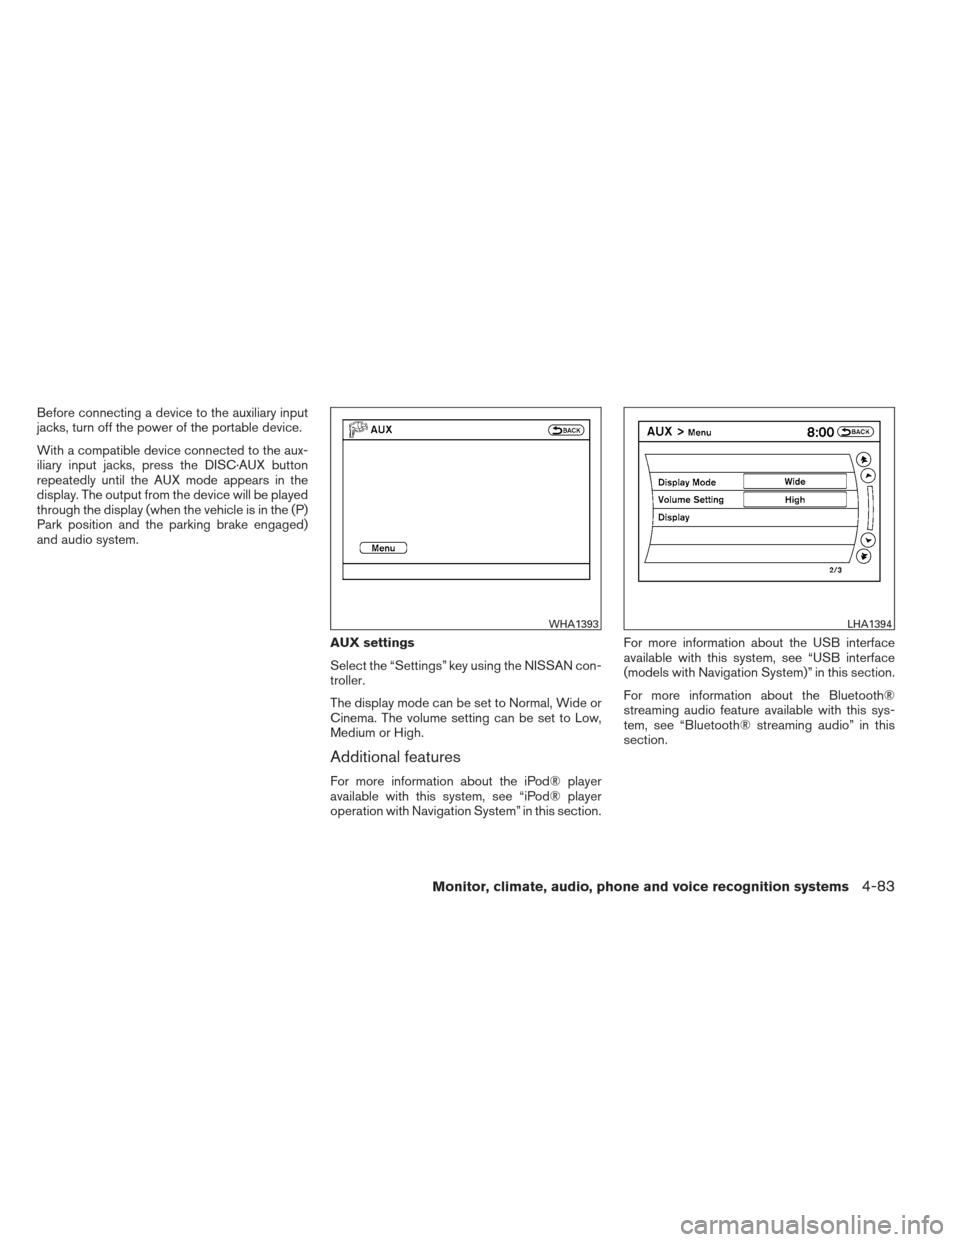
Before connecting a device to the auxiliary input
jacks, turn off the power of the portable device.
With a compatible device connected to the aux-
iliary input jacks, press the DISC·AUX button
repeatedly until the AUX mode appears in the
display. The output from the device will be played
through the display (when the vehicle is in the (P)
Park position and the parking brake engaged)
and audio system.AUX settings
Select the “Settings” key using the NISSAN con-
troller.
The display mode can be set to Normal, Wide or
Cinema. The volume setting can be set to Low,
Medium or High.
Additional features
For more information about the iPod® player
available with this system, see “iPod® player
operation with Navigation System” in this section.For more information about the USB interface
available with this system, see “USB interface
(models with Navigation System)” in this section.
For more information about the Bluetooth®
streaming audio feature available with this sys-
tem, see “Bluetooth® streaming audio” in this
section.
WHA1393LHA1394
Monitor, climate, audio, phone and voice recognition systems4-83
Page 257 of 444
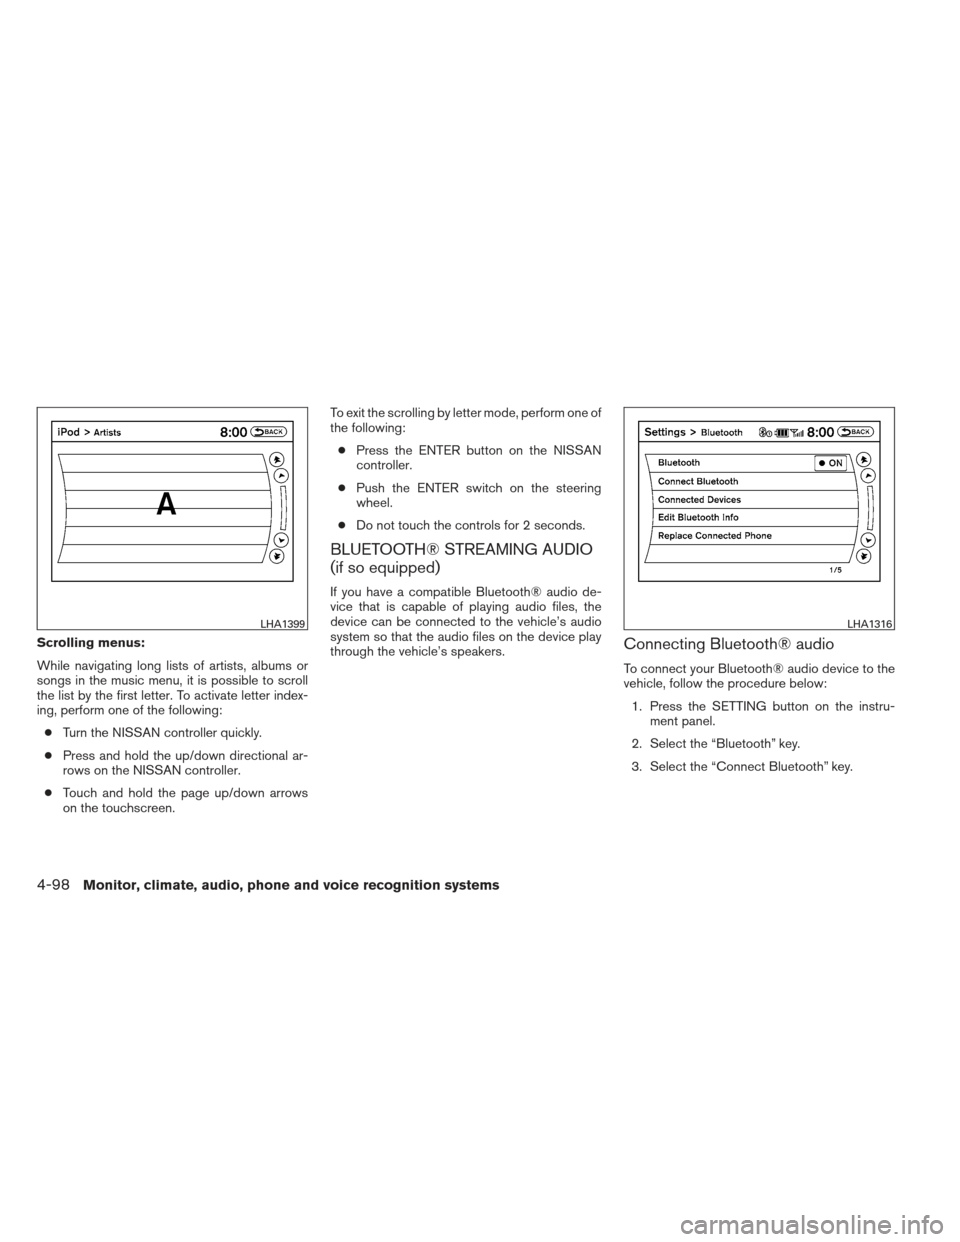
Scrolling menus:
While navigating long lists of artists, albums or
songs in the music menu, it is possible to scroll
the list by the first letter. To activate letter index-
ing, perform one of the following:● Turn the NISSAN controller quickly.
● Press and hold the up/down directional ar-
rows on the NISSAN controller.
● Touch and hold the page up/down arrows
on the touchscreen. To exit the scrolling by letter mode, perform one of
the following:
● Press the ENTER button on the NISSAN
controller.
● Push the ENTER switch on the steering
wheel.
● Do not touch the controls for 2 seconds.
BLUETOOTH® STREAMING AUDIO
(if so equipped)
If you have a compatible Bluetooth® audio de-
vice that is capable of playing audio files, the
device can be connected to the vehicle’s audio
system so that the audio files on the device play
through the vehicle’s speakers.
Connecting Bluetooth® audio
To connect your Bluetooth® audio device to the
vehicle, follow the procedure below:
1. Press the SETTING button on the instru- ment panel.
2. Select the “Bluetooth” key.
3. Select the “Connect Bluetooth” key.
LHA1399LHA1316
4-98Monitor, climate, audio, phone and voice recognition systems
Page 258 of 444
4. A screen will appear asking if you are con-necting the device to use with the hands-
free phone system. Select the “No” key. 5. Enter a PIN of your choice. It will be needed
by your Bluetooth® audio device to com-
plete the connection process. See the
Bluetooth® audio device’s owner’s manual
for more information.Audio main operation
To switch to the Bluetooth® audio mode, press
the DISC button repeatedly until the
Bluetooth® audio mode is displayed on the
screen.
The controls for the Bluetooth® audio are dis-
played on the screen.
LHA1317LHA1351SAA2510
Monitor, climate, audio, phone and voice recognition systems4-99
Page 259 of 444
Bluetooth® audio settings
To adjust the Bluetooth® audio settings, follow
the procedure below:1. Press the SETTING button on the instru- ment panel.
2. Select the “Bluetooth” key.
3. Select the “Connected Devices” key. 4. Select the “Audio Player” key.
5. A list of the connected Bluetooth® audio
players is displayed. Select the name of the
device you wish to edit.
LHA1316LHA1296LHA1297
4-100Monitor, climate, audio, phone and voice recognition systems
Page 260 of 444
6. The Device Name and Device Address aredisplayed on the screen. Select the “Select”
key to make this device the active
Bluetooth® audio player. Select the “Edit”
key to edit the details of the player, such as
Device Name. Select the “Delete” key to
delete the device.CD CARE AND CLEANING
●Handle a CD by its edges. Do not bend the
disc. Never touch the surface of the disc.
● Always place the discs in the storage case
when they are not being used.
● To clean a disc, wipe the surface from the
center to the outer edge using a clean, soft
cloth. Do not wipe the disc using a circular
motion.
● Do not use a conventional record cleaner or
alcohol intended for industrial use. ●
A new disc may be rough on the inner and
outer edges. Remove the rough edges by
rubbing the inner and outer edges with the
side of a pen or pencil as illustrated.
LHA1298LHA0049
Monitor, climate, audio, phone and voice recognition systems4-101
Page 261 of 444
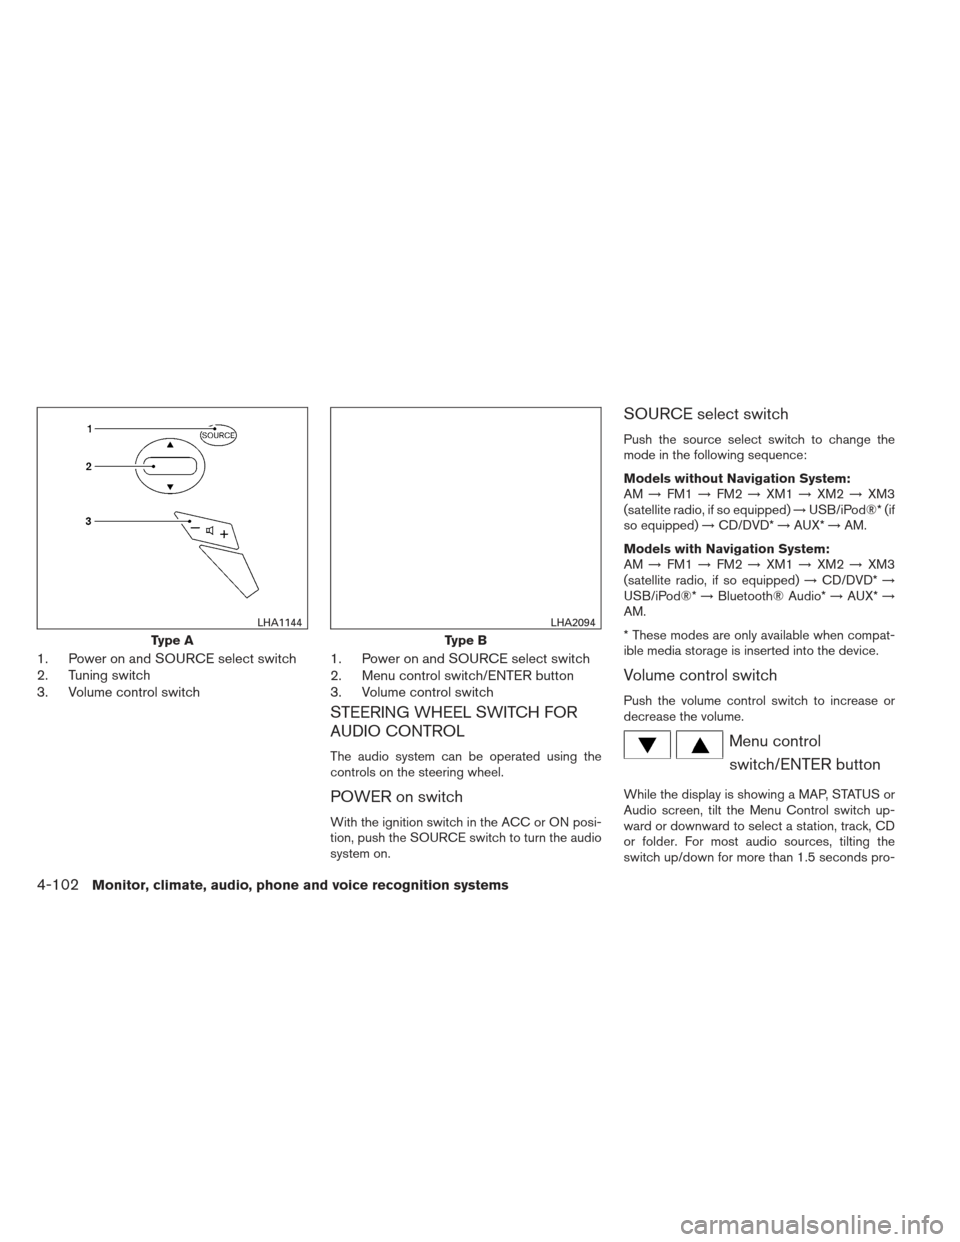
1. Power on and SOURCE select switch
2. Tuning switch
3. Volume control switch1. Power on and SOURCE select switch
2. Menu control switch/ENTER button
3. Volume control switch
STEERING WHEEL SWITCH FOR
AUDIO CONTROL
The audio system can be operated using the
controls on the steering wheel.
POWER on switch
With the ignition switch in the ACC or ON posi-
tion, push the SOURCE switch to turn the audio
system on.
SOURCE select switch
Push the source select switch to change the
mode in the following sequence:
Models without Navigation System:
AM
→FM1 →FM2 →XM1 →XM2 →XM3
(satellite radio, if so equipped) →USB/iPod®* (if
so equipped) →CD/DVD* →AUX* →AM.
Models with Navigation System:
AM →FM1 →FM2 →XM1 →XM2 →XM3
(satellite radio, if so equipped) →CD/DVD* →
USB/iPod®* →Bluetooth® Audio* →AUX* →
AM.
* These modes are only available when compat-
ible media storage is inserted into the device.
Volume control switch
Push the volume control switch to increase or
decrease the volume.
Menu control
switch/ENTER button
While the display is showing a MAP, STATUS or
Audio screen, tilt the Menu Control switch up-
ward or downward to select a station, track, CD
or folder. For most audio sources, tilting the
switch up/down for more than 1.5 seconds pro-
Type A
LHA1144
Type B
LHA2094
4-102Monitor, climate, audio, phone and voice recognition systems
Page 262 of 444
vides a different function than a tilting up/down
for less than 1.5 seconds.
AM and FM:● Tilt up/down for less than 1.5 seconds to
increase or decrease the preset station.
● Tilt up/down for more than 1.5 seconds to
seek up or down to the next station.
● Press the ENTER button to show the list of
preset stations.
XM (if so equipped): ● Tilt up/down for less than 1.5 seconds to
increase or decrease the preset station.
● Tilt up/down for more than 1.5 seconds to
go to the next or previous category.
● Press the ENTER button to show the XM
Menu.
iPod® (if so equipped): ● Tilt up/down for less than 1.5 seconds to
increase or decrease the track number.
● Press the ENTER button to show the iPod
Menu.
CD: ● Tilt up/down for less than 1.5 seconds to
increase or decrease the track number. ●
Tilt up/down for more than 1.5 seconds to
increase or decrease the folder number (if
playing compressed audio files) .
● Press the ENTER button to show the CD
Menu.
DVD (if so equipped): ● Tilt up/down for less than 1.5 seconds to
increase or decrease the track number.
● Tilt up/down for more than 1.5 seconds to
increase or decrease the title number.
● Press the ENTER button to select an item
from the DVD display.
● When the transparent operation menu ap-
pears, the switch will control the menu.
USB (if so equipped): ● Tilt up/down for less than 1.5 seconds to
increase or decrease the track number.
● Tilt up/down for more than 1.5 seconds to
increase or decrease the folder number.
● Press the ENTER button to show the USB
Menu.
Bluetooth® Audio (if so equipped): ● Tilt up/down for less than 1.5 seconds to
increase or decrease the track number. AUX:
● Press the ENTER button to show the AUX
Menu.
ANTENNA
Window antenna
The antenna pattern is printed inside the rear
window.
CAUTION
● Do not place metalized film near the
rear window glass or attach any metal
parts to it. This may cause poor recep-
tion or noise.
● When cleaning the inside of the rear
window, be careful not to scratch or
damage the rear window antenna.
Lightly wipe along the antenna with a
dampened soft cloth.
Monitor, climate, audio, phone and voice recognition systems4-103