2013 NISSAN ARMADA light
[x] Cancel search: lightPage 14 of 26

10
first drive features
To view detailed in\fstructional videos\f regarding these a\fnd other features\f \fplease go to www.nissanownersin\Sfo.mobi
04 station Pr
Es Et B uttons
Twelve stations can be set for the FM band, six for the AM band and eighteen for SiriusXM
satellite radio.
To store a station in a preset, you must first select a radio band by pressing the \
am /fm
button
05 or
Xm button
06 , then tune to the desired AM, f
M or SiriusXM satellite station.
Then press and hold the desired station preset button (1-6) until the preset number is
updated on the display and the sound is briefly muted. The channel indicator will then
come on and the sound will resume. Programming is now complete.
To retrieve a previously set station, select the radio band where the preset was stored
then press the corresponding station select button (1-6).
for more information, refer to the “monitor, climate, audio, phone and voice recognition systems (section 4)” of your
Owner’s Manual.
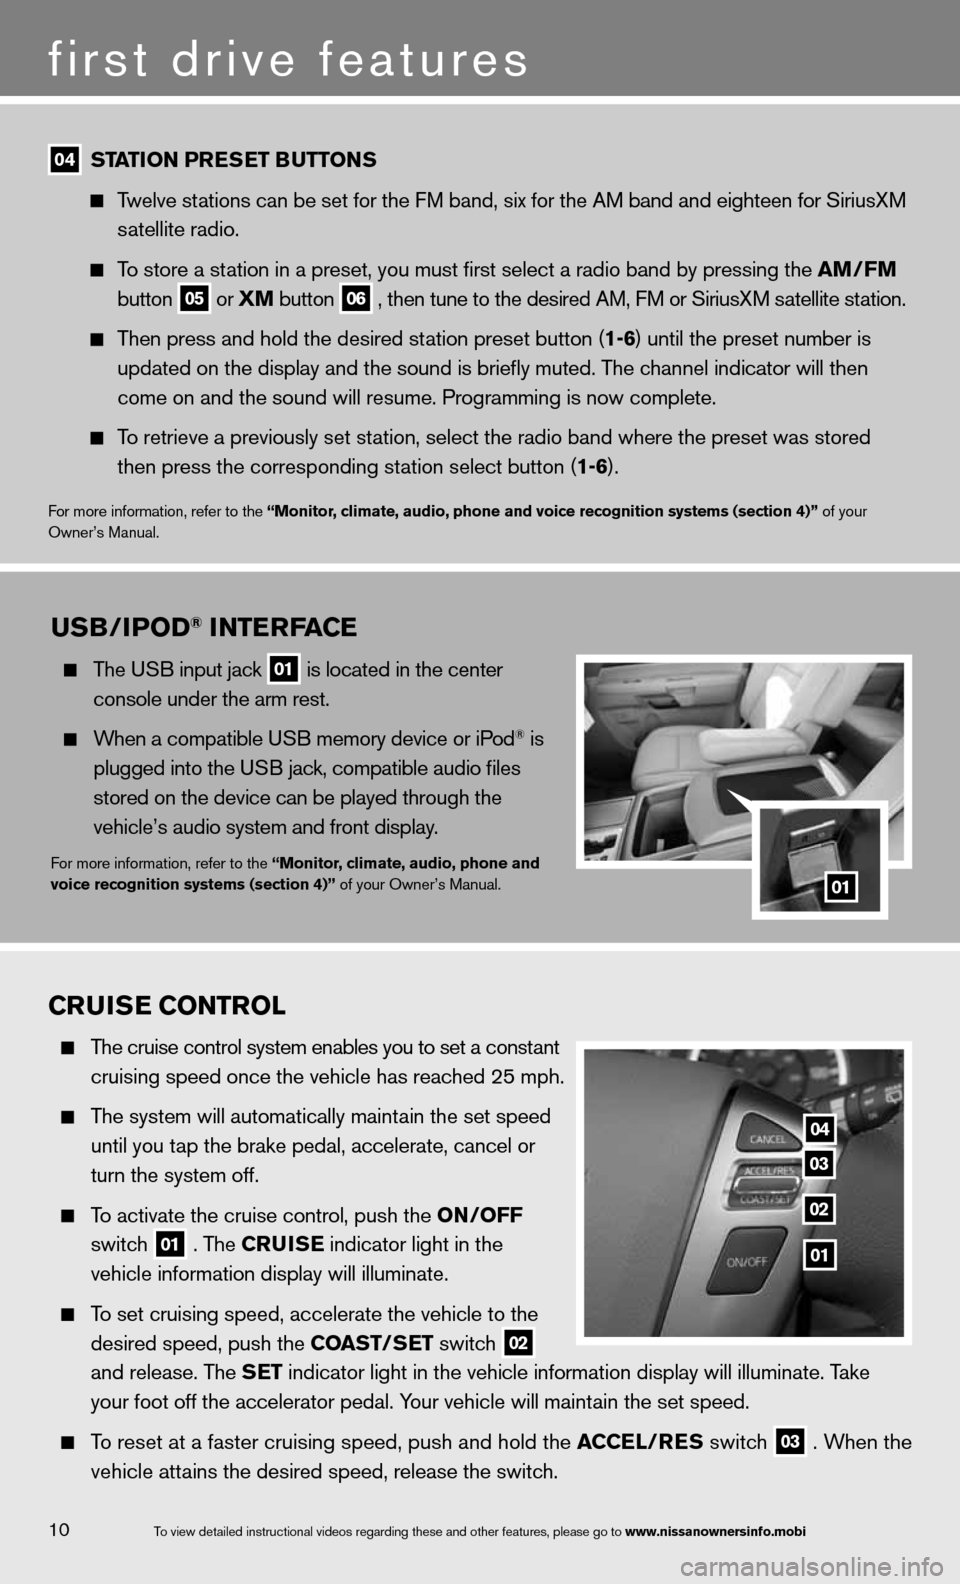
Cruis E Control
The cruise control system enables you to set a constant
cruising speed once the vehicle has reached 25 mph.
The system will automatically maintain the set speed
until you tap the brake pedal, accelerate, cancel or
turn the system off.
To activate the cruise control, push the on /off
switch
01 . The C
ruisE indicator light in the
vehicle information display will illuminate.
To set cruising speed, accelerate the vehicle to the
desired speed, push the Coast/ sEt switch
02
and release. The s
Et indicator light in the vehicle information display will illuminate. Take
your foot off the accelerator pedal. Your vehicle will maintain the set speed.
To reset at a faster cruising speed, push and hold the a CCEl/rEs switch
03 . When the
vehicle attains the desired speed, release the switch.
04
03
02
01
usB/iPo D® intE rfa CE
The u SB input jack
01 is located in the center
console under the arm rest.
When a compatible u SB memory device or iPod® is
plugged into the u SB jack, compatible audio files
stored on the device can be played through the
vehicle’s audio system and front display.
for more information, refer to the “monitor, climate, audio, phone and
voice recognition systems (section 4)” of your Owner’s Manual.01
Page 15 of 26

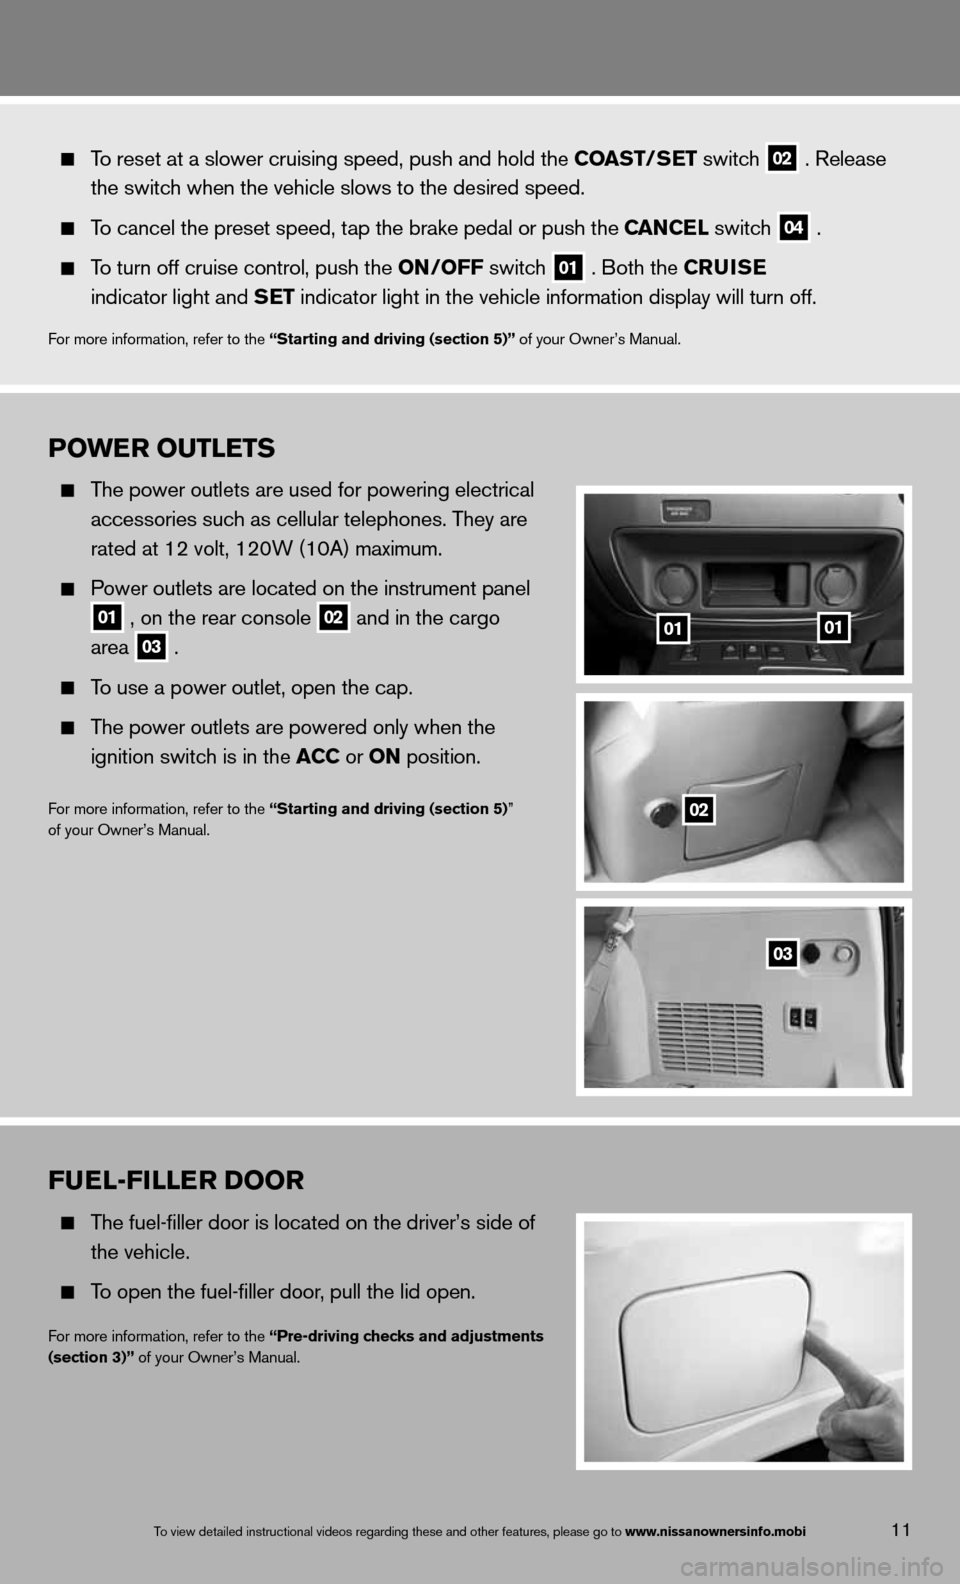
Po WE r outlEts
The power outlets are used for powering electrical
accessories such as cellular telephones. They are
rated at 12 volt, 120W (10A) maximum.
Power outlets are located on the instrument panel
01 , on the rear console
02 and in the cargo
area
03 .
To use a power outlet, open the cap.
The power outlets are powered only when the
ignition switch is in the aCC or on position.
f or more information, refer to the “starting and driving (section 5)”
of your Owner’s Manual.
11
fuEl-fillE r Door
The fuel-filler door is located on the driver’s side of
the vehicle.
To open the fuel-filler door, pull the lid open.
for more information, refer to the “Pre-driving checks and adjustments
(section 3)” of your Owner’s Manual.
To view detailed in\fstructional videos\f regarding these a\fnd other features\f \fplease go to www.nissanownersin\Sfo.mobi
To reset at a slower cruising speed, push and hold the Coast/ sEt switch
02 . Release
the switch when the vehicle slows to the desired speed.
To cancel the preset speed, tap the brake pedal or push the C anCEl switch
04 .
To turn off cruise control, push the on /off switch
01 . Both the C
ruisE
indicator light and s Et indicator light in the vehicle information display will turn off.
for more information, refer to the “starting and driving (section 5)” of your Owner’s Manual.
0101
02
03
Page 16 of 26

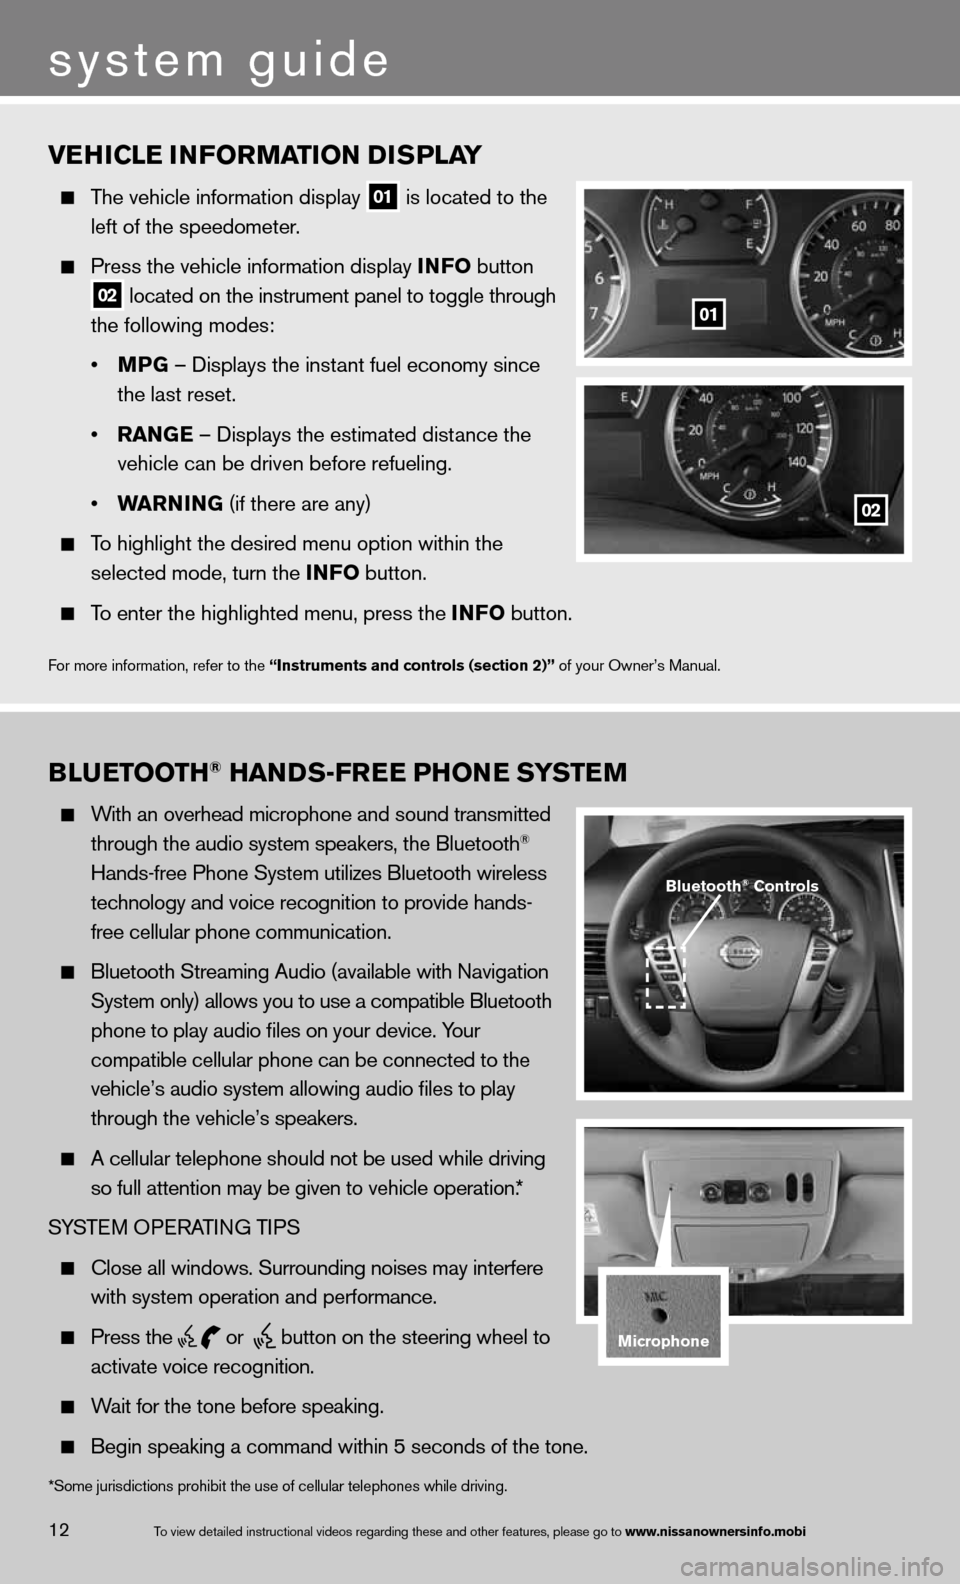
vEhiClE information D isPlay
The vehicle information display
01 is located to the
left of the speedometer.
Press the vehicle information display info button
02 located on the instrument panel to toggle through
the following modes:
• mPG – displays the instant fuel economy since
the last reset.
• ran GE – displays the estimated distance the
vehicle can be driven before refueling.
• Warnin G (if there are any)
To highlight the desired menu option within the
selected mode, turn the info button.
To enter the highlighted menu, press the info button.
f or more information, refer to the “instruments and controls (section 2)” of your Owner’s Manual.
01
02
B lu Etooth® han Ds-fr EE Phon E systEm
With an overhead microphone and sound transmitted
through the audio system speakers, the Bluetooth®
Hands-free Phone System utilizes Bluetooth wireless
technology and voice recognition to provide hands-
free cellular phone communication.
Bluetooth Streaming Audio (available with navigation
System only) allows you to use a compatible Bluetooth
phone to play audio files on your device. Your
compatible cellular phone can be connected to the
vehicle’s audio system allowing audio files to play
through the vehicle’s speakers.
A cellular telephone should not be used while driving
so full attention may be given to vehicle operation.*
SYSTe M OPeRATin G TiPS
close all windows. Surrounding noises may interfere
with system operation and performance.
Press the
or
button on the steering wheel to
activate voice recognition.
Wait for the tone before speaking.
Begin speaking a command within 5 seconds of the tone.
Bluetooth® Controls
microphone
system guide
12To view detailed in\fstructional videos\f regarding these a\fnd other features\f \fplease go to www.nissanownersin\Sfo.mobi
*Some jurisdictions prohibit the use of cellular telephones while drivin\
g.
Page 22 of 26

04 off – Press to switch between the day screen (bright) and the night screen (dark).
Press and hold the button to turn the display off. Press again to turn t\
he display on.
05 maP – Press to display the map. While following a programmed route, press multiple
times to change the type of route information.
06 Multi-function controller
a. EntE r – Press to select the highlighted item on the screen. if this button is pressed
while a map is displayed, the map menu screen is displayed.
b. Main directional buttons – Press to move across the map, highlight an\
item on the
screen or adjust a setting.
c. Additional directional buttons – Press to move across the map or high\
light an item on
the character input screen.
d. center dial
– Turn the dial to highlight an item on the screen, adjust a setting or
adjust the map scale.
07 information (info
) – Press to display the vehicle, traffic (if so equipped), weat\
her
(if so equipped) or voice recognition information.
08 DisP
lay– Press to access the display settings.
09 status – Press multiple times to display audio information with either the \
air conditioner
status, fuel economy or navigation directions.
10 s
Ettin G – Press to access the system settings.
11 BaC
k – Press to return to the previous screen. in a settings screen, this button can also
be used to apply the setting. in a character input screen, this button can also delete the
characters that have been entered.
12 voi
CE – Press to hear the current voice guidance for a programmed route.
for more information, refer to your navigation System Owner’s Manual.
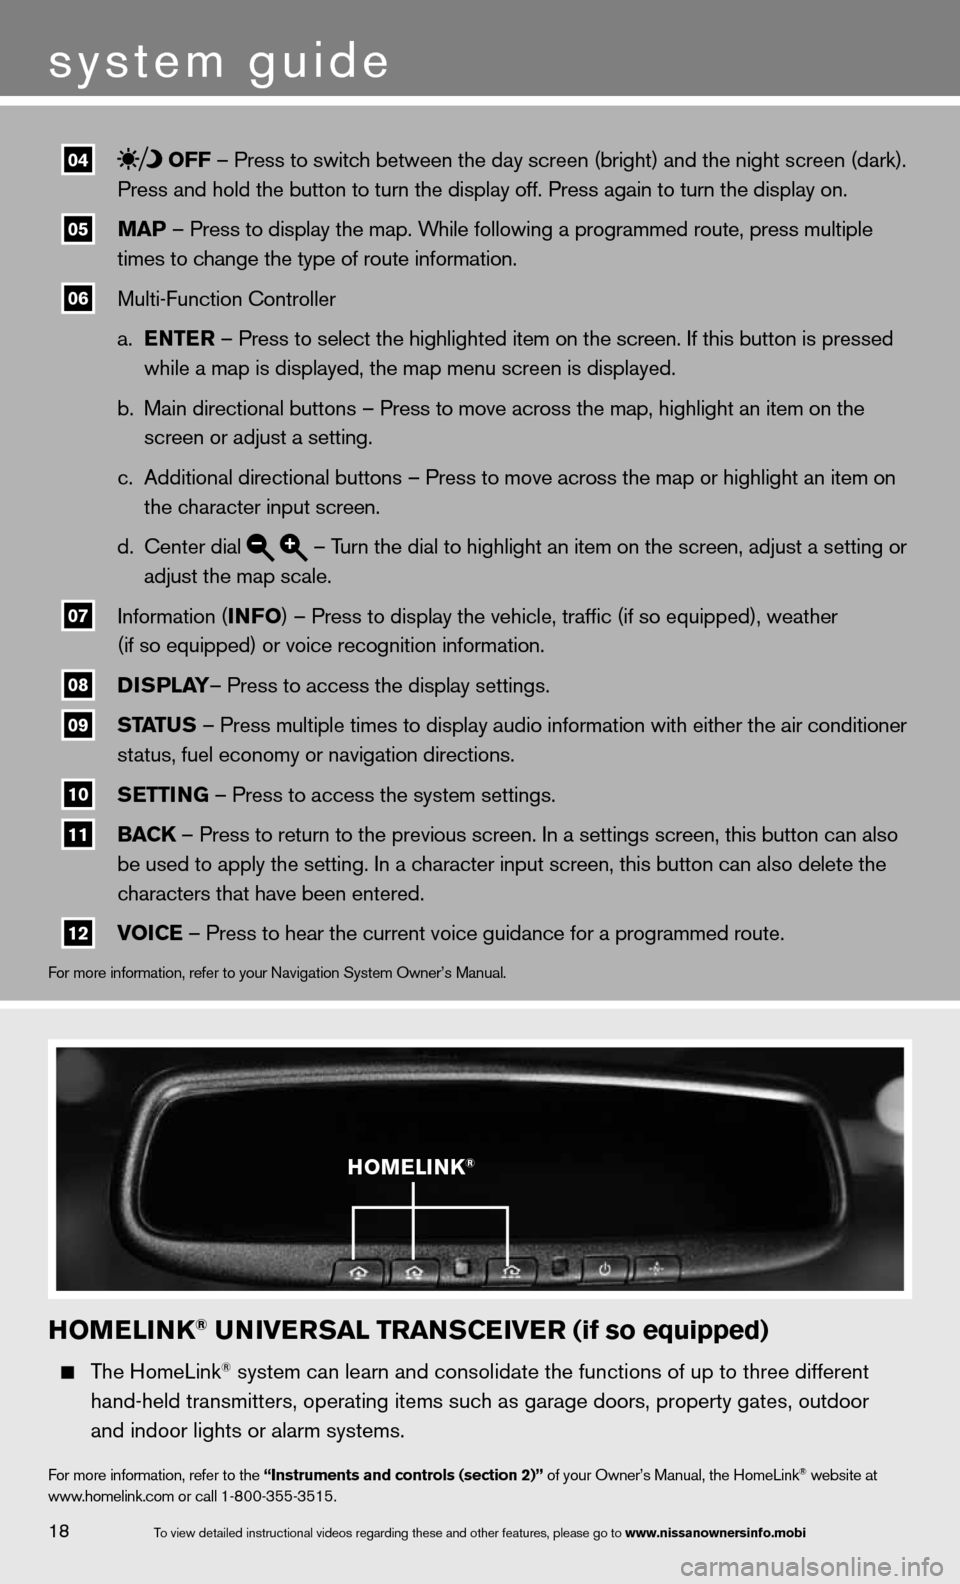
homElink® univE rsal trans CEivE r (if so equipped)
The HomeLink® system can learn and consolidate the functions of up to three different\
hand-held transmitters, operating items such as garage doors, property gates, outdoor
and indoor lights or alarm systems.
for more information, refer to the “instruments and controls (section 2)” of your Owner’s Manual, the HomeLink® website at
www.homelink.com or call 1-800-355-3515.
homElink®
18
system guide
To view detailed in\fstructional videos\f regarding these a\fnd other features\f \fplease go to www.nissanownersin\Sfo.mobi