2013 MITSUBISHI iMiEV traction control
[x] Cancel search: traction controlPage 139 of 258

Stability control function
E00619100088
The
stability control function is designed to help
the driver maintain control of the vehicle on slip-
pery roads or during rapid steering manoeuvres. It
works by controlling the electric motor unit output
and the brake on each wheel.
NOTE
l The stability control function operates at
speeds of about 15 km/h (9 mph) or higher.
“ASC OFF” switch E00619200496
The ASC is automatically activated when the elec-
tric
motor switch is turned to the “ON” position.
You can deactivate the system by pressing down
the “ASC OFF” switch for 3 seconds or longer. When the ASC is deactivated, the indication
lamp
will turn on. To reactivate the ASC, momen-
tarily press the “ASC OFF” switch; the indica-
tion lamp is turned off. CAUTION
l
For
safety reasons, the “ASC OFF”
switch should be operated when your ve-
hicle is stopped.
l Be sure to keep the ASC on while driving
in normal circumstances. NOTE
l When
moving out of mud, sand or fresh
snow, pressing the accelerator pedal may not
allow the electric motor speed to increase. In
such situations, temporarily turning off the
ASC with the “ASC OFF” switch will make
it easier to move out your vehicle.
l Using the “ASC OFF” switch turns off both
the stability control function and the traction
control function.
l If you continue to press the “ASC OFF”
switch after the ASC is turned off, the “mis-
taken operation protection function” will ac-
tivate and the ASC will turn back on.
ASC indication lamp or ASC OFF in-
dication lamp E00619300556 -
ASC indication lamp
The indication lamp will blink
when the ASC is operating. -
ASC OFF indication lamp
This indication lamp will turn on
when the ASC is turned off with the
“ASC OFF” switch. CAUTION
l
When
the indication lamp blinks, ASC
is
operating, which means that the road is
slippery or that your vehicle’s wheels are
beginning to slip. If this happens, drive
slower with less accelerator input. Starting and driving
5-19 5
OHAE13E1
Page 186 of 258

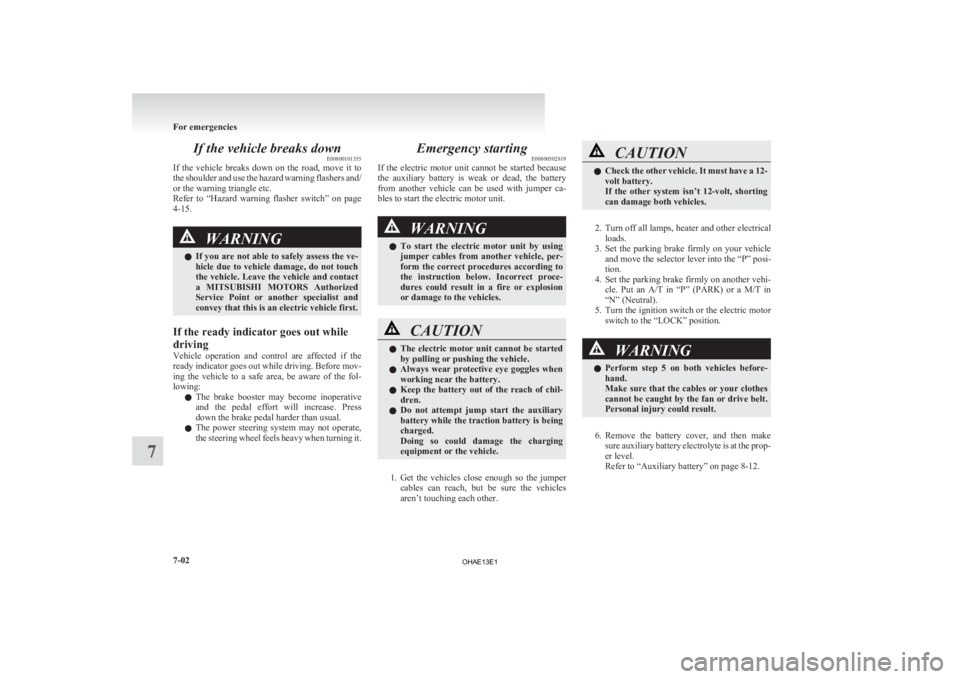
If the vehicle breaks down
E00800101355
If
the vehicle breaks down on the road, move it to
the shoulder and use the hazard warning flashers and/
or the warning triangle etc.
Refer to “Hazard warning flasher switch” on page
4-15. WARNING
l If
you are not able to safely assess the ve-
hicle due to vehicle damage, do not touch
the vehicle. Leave the vehicle and contact
a MITSUBISHI MOTORS Authorized
Service Point or another specialist and
convey that this is an electric vehicle first.
If the ready indicator goes out while
driving
Vehicle
operation and control are affected if the
ready indicator goes out while driving. Before mov-
ing the vehicle to a safe area, be aware of the fol-
lowing:
l The brake booster may become inoperative
and the pedal effort will increase. Press
down the brake pedal harder than usual.
l The power steering system may not operate,
the steering wheel feels heavy when turning it. Emergency starting
E00800502819
If
the electric motor unit cannot be started because
the auxiliary battery is weak or dead, the battery
from another vehicle can be used with jumper ca-
bles to start the electric motor unit. WARNING
l To
start the electric motor unit by using
jumper cables from another vehicle, per-
form the correct procedures according to
the instruction below. Incorrect proce-
dures could result in a fire or explosion
or damage to the vehicles. CAUTION
l
The
electric motor unit cannot be started
by pulling or pushing the vehicle.
l Always wear protective eye goggles when
working near the battery.
l Keep the battery out of the reach of chil-
dren.
l Do not attempt jump start the auxiliary
battery while the traction battery is being
charged.
Doing so could damage the charging
equipment or the vehicle.
1. Get
the vehicles close enough so the jumper cables can reach, but be sure the vehicles
aren’t touching each other. CAUTION
l
Check
the other vehicle. It must have a 12-
volt battery.
If the other system isn’t 12-volt, shorting
can damage both vehicles.
2. Turn
off all lamps, heater and other electrical loads.
3. Set the parking brake firmly on your vehicle and move the selector lever into the “P” posi-
tion.
4. Set the parking brake firmly on another vehi- cle. Put an A/T in “P” (PARK) or a M/T in
“N” (Neutral).
5. Turn the ignition switch or the electric motor switch to the “LOCK” position. WARNING
l Perform
step 5 on both vehicles before-
hand.
Make sure that the cables or your clothes
cannot be caught by the fan or drive belt.
Personal injury could result.
6. Remove
the battery cover, and then make sure auxiliary battery electrolyte is at the prop-
er level.
Refer to “Auxiliary battery” on page 8-12. For emergencies
7-02
7
OHAE13E1
Page 195 of 258

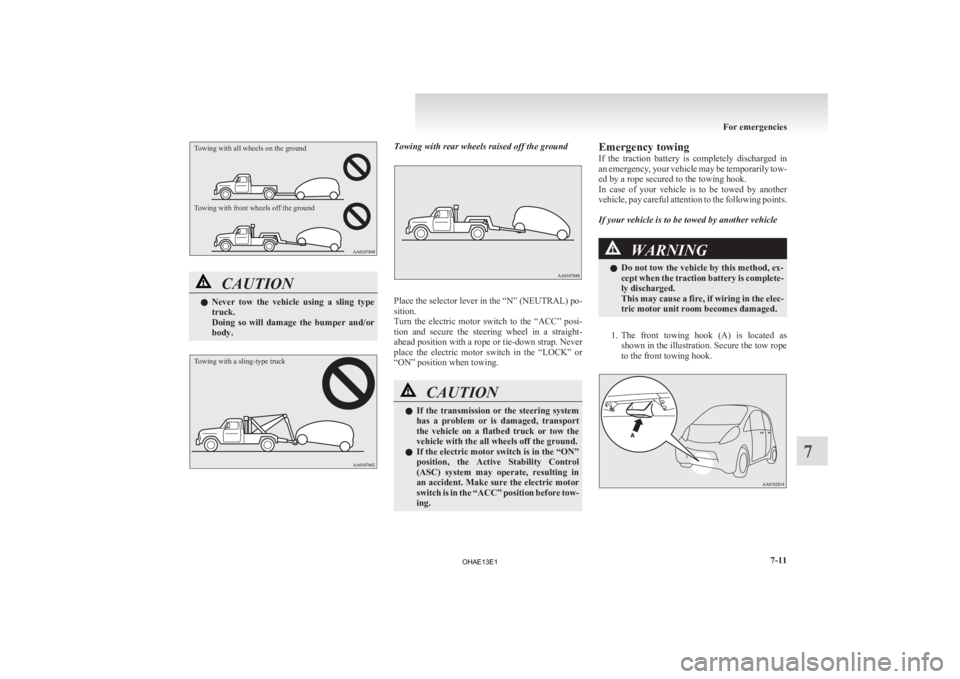
Towing with all wheels on the ground
Towing with front wheels off the groundCAUTION
l
Never
tow the vehicle using a sling type
truck.
Doing so will damage the bumper and/or
body.
Towing with a sling-type truck Towing with rear wheels raised off the ground
Place the selector lever in the “N” (NEUTRAL) po-
sition.
Turn
the electric motor switch to the “ACC” posi-
tion and secure the steering wheel in a straight-
ahead position with a rope or tie-down strap. Never
place the electric motor switch in the “LOCK” or
“ON” position when towing. CAUTION
l
If
the transmission or the steering system
has a problem or is damaged, transport
the vehicle on a flatbed truck or tow the
vehicle with the all wheels off the ground.
l If the electric motor switch is in the “ON”
position, the Active Stability Control
(ASC) system may operate, resulting in
an accident. Make sure the electric motor
switch is in the “ACC” position before tow-
ing. Emergency towing
If
the traction battery is completely discharged in
an emergency, your vehicle may be temporarily tow-
ed by a rope secured to the towing hook.
In case of your vehicle is to be towed by another
vehicle, pay careful attention to the following points.
If your vehicle is to be towed by another vehicle WARNING
l Do not tow the vehicle by this method, ex-
cept
when the traction battery is complete-
ly discharged.
This may cause a fire, if wiring in the elec-
tric motor unit room becomes damaged.
1. The
front towing hook (A) is located as shown in the illustration. Secure the tow rope
to the front towing hook. For emergencies
7-11 7
OHAE13E1
Page 245 of 258

A
Accessory (Installation) 04
Accessory socket 6-36
Active stability control (ASC)
5-18
Additional equipment 8-20
Air conditioning Important operation tips for the air condition-
ing 6-09
Air purifier 6-09
Airbag 3-20
Antenna 6-30
Anti-lock brake system (ABS) 5-15 Warning lamp 5-16
Assist grips 6-41
Audio Error codes 6-26
Handling of compact discs 6-29
LW/MW/FM electronic tuning radio with CD
player 6-10
Auxiliary battery 8-12 Specification 9-05
Auxiliary battery charge warning lamp 4-10
BBasic knowledge for charging 1-04
Battery
Auxiliary battery
8-12
Auxiliary battery charge warning lamp 4-10
Discharged battery (Emergency starting) 7-02
Disposal information for used batteries 05
Traction battery 02
Bonnet 8-07
Brake assist system 5-15
Brake Anti-lock brake 5-15
Braking 5-14 Fluid 8-11,9-08
Parking brake 5-03
Warning lamp 4-09
Bulb capacity
8-23C Capacities 9-08
Card holder 6-36,6-39
Cargo loads 5-20
Central door locks 2-06
Charging indicator
4-09
Charging Quick charging 1-12
Regular charging 1-08
Child restraint 3-11
Child-protection rear doors 2-07
Cleaning Exterior of your vehicle 8-03
Interior of your vehicle 8-02
Plastic, vinyl leather, etc. 8-02
Clock 6-31
Cold Cautions and actions to deal with intense
cold 08
Combination headlamps and dipper switch 4-11
Coolant 8-09,9-08
Cruising range 03,9-07
Cruising range indicator 4-03,4-06
Cup holder 6-40
D Daytime running lamps 4-13
Bulb capacity
8-24
Replacement 8-31
Demister (rear window) 4-18
Digital clock 6-31
Dimensions 9-03 Dipper (High/Low beam change) 4-13
Door ajar warning lamp 4-10
Doors
Central door locks 2-06
Child-protection
2-07
Lock and unlock 2-05
Driving the vehicle 5-11
Driving, alcohol and drugs 5-02
E Economical driving 5-02
Electric motor switch
5-07
Electric motor unit Warning lamp 4-10
Electric motor Number 9-02
Specifications 9-05
Electric power steering system (EPS) 5-17
Electric window control 2-09 Driver’s switches 2-09
Lock switch 2-09
Passenger’s switches 2-09
Timer function 2-10
Electronic immobilizer (Anti-theft starting sys-
tem) 2-02
Emergency starting 7-02
Energy level gauge 4-06
Energy usage indicator 4-03
Error codes 6-26
EV charging cable 1-05
Exterior and interior lamp operation 8-19
F Fluid capacities and lubricants 9-08
Fluid
Brake fluid 8-11,9-08
Coolant 8-09 Alphabetical index
1
OHAE13E1
Page 246 of 258

Hot water heater fluid 8-09,9-08
Washer fluid 8-11,9-08
For cold and snowy weather 8-20
Front fog lamps Bulb capacity
8-24
Indication lamp 4-09
Replacement 8-31
Switch 4-15
Front room lamp Bulb capacity 8-24
Front seat 3-03
Front turn-signal lamps Bulb capacity 8-24
Replacement 8-30
Fuel Modification/alterations to the electrical sys-
tems 05
Fuses 8-20
Fusible links 8-20
GGauges 4-02,4-08
General maintenance
8-19
General vehicle data 9-03
Genuine parts 05
Glove box 6-39
HHandling of compact discs 6-29
Hazard warning flasher switch 4-15
Hazard warning indication lamps
4-09
Head restraints 3-07
Headlamp levelling switch 4-13
Headlamps Bulb capacity 8-24
Headlamp flasher 4-13
Replacement 8-24,8-28,8-29 Switch 4-11
Heat Cautions and actions to deal with intense
heat 06
Heated mirror 5-07
Heated seats 3-04
High-beam indication lamp
4-09
High-mounted stop lamp Bulb capacity 8-24
Replacement 8-34
Hinges and latches lubrication 8-19
Horn switch 4-19
Hot water heater fluid 8-09,9-08
I i-MiEV 02
Cruising range 03
Main features 02
Traction battery
02
If the vehicle breaks down 7-02
Indication and warning lamps 4-08
Indication lamps 4-09
Inside rear-view mirror 5-05
Inspection and maintenance following rough road
operation 5-12
Instruments 4-02
Intense cold Cautions and actions 08
Intense heat Cautions and actions 06
Interior lamps 6-37
J Jump starting (Emergency starting) 7-02 K Keyless entry system 2-03
Keys 2-02
L Labeling 9-02
Lamp monitor buzzer
4-12
Lamps (headlamps, fog lamp, etc.) auto-cutout func-
tion 4-12
Licence plate lamps Bulb capacity 8-24
Replacement 8-34
Link System 6-33
Low voltage electrical system 9-05
Lubricants 9-08
LW/MW/FM electronic tuning radio with CD play-
er 6-10
M Map lamps 6-37,6-38
Bulb capacity
8-24
Meter illumination control 4-03,4-06
Mirror Inside rear-view mirror 5-05
Outside rear-view mirrors 5-05
Modification/alterations to the electrical sys-
tems 05
O Odometer 4-03,4-04
Oil
Transmission oil 9-08
Operation under adverse driving conditions
7-12
Outside rear-view mirrors 5-05 Alphabetical index
2
OHAE13E1